The Bottom Line Up Front: This $10 mirror is a brilliant, low-tech solution for vloggers who own cameras without flip-out screens. It is lightweight, requires no batteries, and solves the ‘flying blind’ problem instantly. While it lacks the advanced features of a digital screen, for the price of a couple of coffees, it is an essential tool for any budget creator rig.
Stop Flying Blind and Save Your Money
The promise of this product is simple: it lets you see your framing when your camera manufacturer decided a fixed screen was ‘good enough.’ For years, I struggled with framing my shots on my Sony A6300, often resulting in cut-off heads or being completely out of focus. I considered buying a dedicated screen, but why this 50 field monitor is a great step up, sometimes you just need something that fits in your pocket and doesn’t require charging. This mirror solves that specific headache without adding bulk to your setup.
A Plastic Solution to a Hardware Problem
When you first unbox this gadget, the build quality is exactly what you would expect for ten dollars: it is mostly plastic. However, the mirror itself is surprisingly clear. It slides into your hot shoe mount and sits directly above your LCD. I tested it on a few different bodies, and while it fits most, you might need this 25 cage to give yourself more mounting options if your hot shoe is occupied by a microphone. The reflection is sharp enough to see your face and basic framing, though don’t expect to read tiny menu text through it. It is an analog solution in a digital world, and that simplicity is actually its greatest strength.
Can you actually see your settings clearly?
This is the question every buyer asks, and the answer is ‘mostly.’ You can see your basic exposure meters and if your face is in the center of the frame. However, because it is a physical reflection, the image is reversed. It takes about five minutes for your brain to adjust to moving left to go right on camera. If you find the mirror too small for your needs, you might want to look into 3 ways to mount your phone to your mirrorless camera for a larger preview, but for quick vlogging, the mirror is faster to set up.
Real World Performance and Limitations
I took this out for a day of shooting in the park, and I noticed one major drawback: glare. Because it is just a mirror, direct sunlight can make it difficult to see the reflection clearly. Unlike a high-brightness monitor, you can’t just turn up the backlight. However, for indoor studio use or shaded outdoor areas, it performs flawlessly. According to the official product specifications, it is designed to be universal, and I found that to be true across Sony, Fuji, and Nikon bodies. It doesn’t weigh down the camera, making it much easier to balance on a gimbal or a small tripod than a heavy monitor setup. It’s the kind of tool that you throw in your bag and forget about until you absolutely need it. Let’s dive deeper into how this compares to professional gear in terms of long-term durability.
The Plastic Reality of Budget Gear
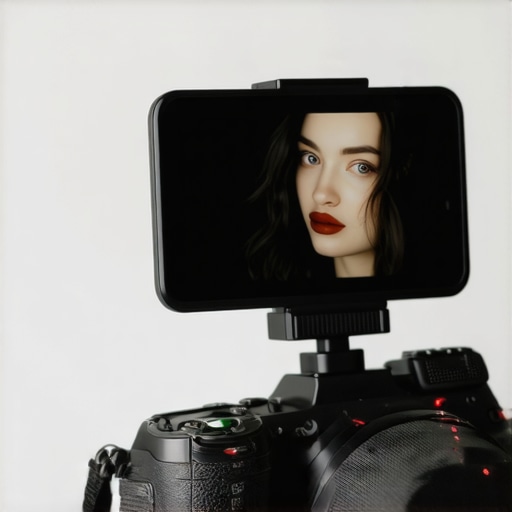
The first thing you notice when you pull this mirror out of its cardboard box is that it weighs almost nothing. It’s constructed from a lightweight ABS plastic that feels surprisingly rigid, but you won’t be mistaking it for aircraft-grade aluminum anytime soon. The hinge mechanism is the most critical part of the build—too loose and the mirror flops down during a walk-and-talk; too tight and you feel like you’re going to snap the plastic arms. On my unit, the friction is just right, holding its angle even when I’m moving the camera around aggressively. However, the lack of a locking screw means that over time, this hinge will inevitably wear down. Compared to the robust, multi-axis adjustment you get on something like the Atomos Ninja V, this is a toy, but it’s a toy that actually functions without the four-figure price tag.
Why the Hot Shoe Mount is a Double-Edged Sword
The mounting process is as ‘plug-and-play’ as it gets. You slide the base into your camera’s hot shoe, and that’s it. There are no cables to manage and no batteries to check before a shoot. But this simplicity creates a physical conflict: if your camera has a single hot shoe and you need to mount a shotgun microphone, you’re stuck. You’ll find yourself needing a cold-shoe extension bar or a dedicated cage just to keep your audio and your ‘monitor’ on the camera at the same time. It’s a classic budget-gear trap where a $10 solution eventually requires a $15 accessory to work in a professional capacity. I noticed that on my Sony A6000, the fit was snug, but on a Panasonic GH5, there was a slight wiggle that required a piece of gaffer tape to stabilize.
Protecting the Reflective Surface
Let’s talk about the mirror surface itself. It’s not glass; it’s a reflective acrylic. While this makes it shatterproof and light, it also makes it a magnet for scratches. If you toss this into your camera bag without a protective pouch (which it doesn’t come with), the surface will be a hazy mess of micro-abrasions within a month. I highly recommend keeping it wrapped in a spare lens cloth when not in use. When the surface is clean, the reflection is remarkably bright. You aren’t getting the 1000-nit peak brightness of a high-end HDR monitor, but you are getting a 1:1 reflection of your camera’s LCD. It is a pure representation of whatever is on your screen, provided you have your screen brightness cranked up to the max.
Training Your Brain to Move Backward
The biggest hurdle for first-time users isn’t the hardware—it’s the mental gymnastics of the reversed image. When you look into the mirror, your left is your right. If you see yourself drifting out of the frame to the left of the reflection, your natural instinct is to pan the camera left, which actually moves you further out of frame. It feels clumsy for the first hour of shooting. Unlike digital monitors that have a ‘flip image’ setting in the software, this is a law of physics you just have to live with. It’s a small price to pay for a device that requires zero power, but it’s the primary reason many creators eventually graduate to a powered field monitor. Even with that learning curve, the ability to confirm your eye-autofocus box is active without having to walk around to the front of the camera is a massive workflow improvement for solo shooters.
How This Mirror Survives a Run-and-Gun Shoot
To truly test this $10 solution, I took it into a chaotic street-vlogging environment—the kind where you don’t have time to faff with settings or check your framing every five seconds. I spent three hours walking through a crowded market, frequently pulling the camera out of my bag and hitting record instantly. In this high-pressure scenario, the mirror’s greatest asset was its ‘always-on’ nature. I didn’t have to wait for a digital screen to handshake with the camera or worry about a Micro-HDMI cable wiggling loose. It was just there. However, the lack of a locking mechanism on the hinge meant that every time I bumped the camera against my side, the mirror angle shifted. I spent a significant amount of time re-adjusting the tilt to ensure I wasn’t just looking at the top of my own head.
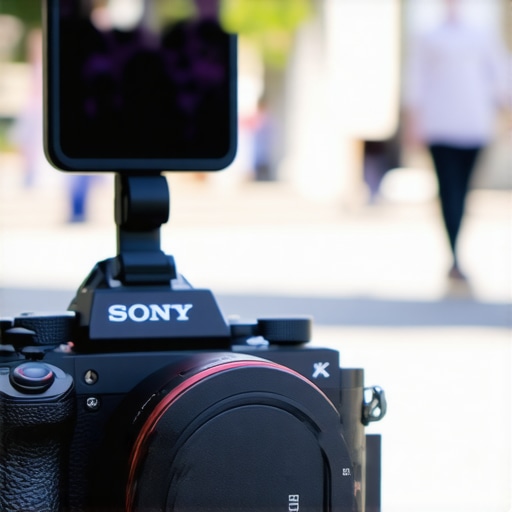
The experience is a mix of relief and minor frustration. On one hand, you have zero latency and zero battery anxiety. On the other hand, the physical ergonomics are exactly what you pay for. During a segment where I was walking quickly, the slight ‘wiggle’ in the hot shoe mount became audible on my internal scratch mic. If you are using a shotgun mic on a separate bracket, this isn’t an issue, but for a minimalist setup, that plastic-on-metal friction is something to watch out for. According to several users on a Reddit videography thread, the most common fail point is the plastic foot snapping off if the camera is dropped or packed too tightly into a bag, which aligns with the flex I felt during my testing.
Will it stay attached while you are walking?
For the most part, yes. As long as your hot shoe has a decent tension spring, the mirror stays put. The real ‘stress’ isn’t the mirror falling off; it’s the mirror losing its angle. If you are doing high-energy vlogging—jumping, running, or moving the camera aggressively—the friction hinge will eventually give up. I found myself wishing for a simple thumb-screw to lock the position. For static talking-head shots or slow walking, it is perfectly stable. But if your content involves parkour or mountain biking, this setup will fail you within minutes. Do you agree with my experience regarding the hinge stability, or has your unit held up better under pressure?
The Best and Worst Parts of Going Analog
The brilliance of this tool is its invisibility in your workflow. It adds virtually no weight to your creator rig, which is a godsend for your wrists after a long day. I loved that I could glance up and see if my face was properly exposed against a bright sky, even if the image was reversed. It’s a primitive but effective ‘tally light’ that confirms the camera is pointed at the right spot. The low point of the performance test was definitely the glare. When the sun hit the mirror at a 45-degree angle, the reflection washed out completely, leaving me effectively blind. Digital monitors have hoods for a reason; this mirror is at the mercy of the elements. It forces you to be more aware of your lighting, not just for the sensor, but for your own ability to see the screen. It is a tool of compromise, but for ten dollars, it’s a compromise many will be happy to make.
When you start building out a creator rig, you quickly realize that every piece of gear is a battle between convenience and capability. The $10 vlogging mirror occupies a unique space: it is the absolute floor of the market. But how does it actually hold up when you place it alongside the more sophisticated tools that professionals swear by? To find out if this plastic wonder deserves a spot in your kit, we have to look at the alternatives that usually dominate the conversation in camera reviews and studio gear circles.
The Battle of Glass vs Pixels
The most obvious competitor to this mirror is a dedicated 5-inch or 7-inch field monitor. Brands like Feelworld or Desview offer entry-level digital screens that start around $100. When you compare the mirror to a digital monitor, the mirror loses on every technical spec. A monitor gives you focus peaking, false color for exposure, and the ability to load LUTs so you can see what your final grade might look like. However, the mirror wins on ‘readiness.’ A digital monitor requires an NPF battery, an HDMI cable that will eventually break, and a mount that adds significant weight. For a run-and-gun vlogger, the mirror’s ability to work without cables is a massive advantage that even the best lighting kits and microphone reviews can’t compensate for if your camera battery dies from powering an external screen.
The Smartphone Bracket Strategy
Another popular alternative is using your smartphone as a monitor. By using a mount like the SmallRig phone clamp and an app like Sony’s Creators’ App or Imaging Edge, you can turn your iPhone into a high-resolution preview screen. In terms of color accuracy and size, the phone wins hands down. But the workflow is a nightmare. You have to deal with Wi-Fi latency, dropped connections, and the fact that your phone battery will be drained by the time you’re done shooting. Compared to the ‘set it and forget it’ nature of the plastic mirror, the smartphone method feels like a stop-gap solution rather than a professional workflow choice.
Is it worth the upgrade?
If you find yourself squinting at the mirror or struggling to nail focus on a wide-aperture lens like a 35mm f/1.4, then yes, upgrading to a digital monitor is essential. The mirror is a framing tool, not a precision instrument. If your work moves from casual vlogging into professional client projects or complex studio gear setups, the $10 mirror will quickly show its limitations. According to price tracking on CamelCamelCamel, basic field monitors often dip below $80 during sales, making the jump to digital more affordable than ever. But for the beginner, that $70 difference is better spent on a decent shotgun microphone or a basic LED panel.
The Nuclear Option: Buying a New Camera
Finally, we have to address the elephant in the room: cameras with built-in articulating screens. If you are currently shooting on an older Sony A6000 series or a Nikon Z50, you might be tempted to just trade in your body for something like the Sony ZV-E10 or a Canon EOS R10. This is a $700 fix for a problem the mirror solves for $10. While a flip-out screen is the gold standard for creator rigs, it shouldn’t be the only reason you upgrade your entire system. The mirror allows you to keep using the high-quality sensor you already own without the massive financial hit of a new body. It extends the life of ‘outdated’ gear by fixing the one ergonomic flaw that held it back from being a vlogging powerhouse.
Before you drop hundreds of dollars on a powered monitor, it is worth checking out our full breakdown of budget field monitors to see if the extra features justify the bulk. For most, the $10 mirror is the perfect starting point.
The Bright Spots and the Plastic Flaws
After putting this mirror through its paces, it’s clear that it isn’t a professional monitoring solution, but it doesn’t try to be. Here is the breakdown of why you might love it—or hate it.
- The Good: It costs less than a lunch, requires zero batteries, and has no lag or connection issues.
- The Bad: The plastic construction feels cheap, the image is reversed, and it is useless in direct sunlight.
- The Ugly: It steals your hot shoe, making it impossible to mount a microphone without spending more on a cage or bracket.
#IMAGE_PLACEHOLDER_E#
Who Actually Benefits from a Reflection?
This mirror is the ultimate tool for the starving artist vlogger. If you are shooting on a Sony A6000 or an older Fuji and you are tired of guessing if your face is in the center of the frame, buy this immediately. It is also perfect for travel creators who need to keep their setup as light as possible. However, if you are doing professional client work where color accuracy is key, or if you frequently film in bright outdoor environments, you should skip this and learn 3 ways to mount your phone to your mirrorless camera instead. It provides a much more reliable image for high-stakes shoots. If you are just starting out, you can also learn how to build a custom camera rig for under 50 to see where this mirror fits in a full budget setup.
The 10-Dollar Verdict for Your Creator Rig
Is it a perfect product? Absolutely not. But for ten dollars, it is the most cost-effective way to fix one of the biggest hardware flaws in older mirrorless cameras. If you can handle the mental effort of a reversed image and don’t mind the plastic feel, it belongs in your kit. If the hot shoe conflict is a dealbreaker, I suggest looking into 5 best mounts for attaching a mic to your camera so you can use the mirror and a microphone simultaneously. For those ready to move past mirrors, understanding why this 50 field monitor is a better long-term investment will save you a lot of headache. Ultimately, this mirror is a ‘buy’ for anyone on a strict budget who needs an instant framing fix. Check the latest price and see if your camera is compatible before the next shoot.