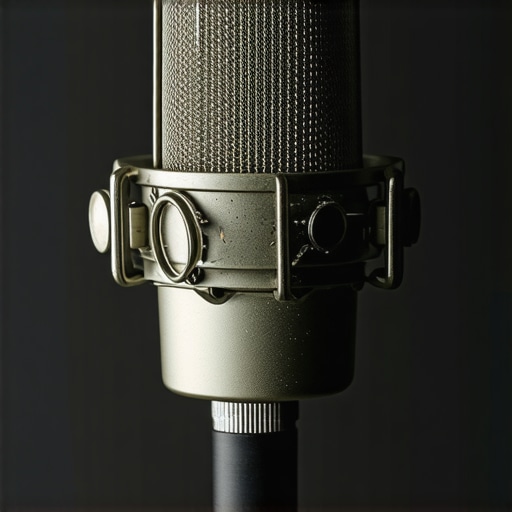
The bottom line up front: most cheap pop filters are a waste of money because they sacrifice audio clarity for a low price tag and utilize goosenecks that lose tension within weeks. I have spent years testing everything from high-end studio gear to the cheapest kits on the market, and I have learned that the $10 nylon screen is a false economy. It promises to eliminate plosives—those harsh ‘P’ and ‘B’ sounds—but usually ends up muffling your high-end frequencies and sagging out of place during a recording session.
The Fragility of the Cheap Gooseneck
In my studio, I have a drawer full of dead pop filters. The primary failure point is almost always the build quality of the mounting arm. Most budget filters use low-grade aluminum or thin wire that loses its ‘memory’ after only a few adjustments. You set it perfectly in front of the mic, and ten minutes later, it has drifted three inches down. This is incredibly frustrating when you are in the middle of a take. Furthermore, the plastic clamps often strip their threads the moment you try to secure them to a desk or a boom arm. I have often found that the reason your mic still picks up your keyboard clicks is partially due to flimsy mounting hardware that transfers every vibration directly into the microphone capsule.
Is a metal pop filter worth the extra cost?
Yes, and here is why. Traditional nylon filters use two layers of thick fabric that act like a low-pass filter, effectively dulling the ‘air’ and crispness of your voice. In contrast, metal filters use precisely angled perforations to divert the air blast away from the microphone rather than just blocking it. I have previously detailed why this 30 dollar metal pop filter beats every foam shield because it provides a much more transparent sound. For those curious about the physics of air displacement and microphone diaphragms, the Shure technical guide on pop filters offers a great deep dive into how these tools actually function.
Why Cheap Mesh Ruins Your Mix
When you use a cheap nylon filter, you are essentially putting a sock over your microphone. This forces you to boost the high frequencies in post-production, which inevitably introduces digital noise and hiss. Whether you are learning how to get professional audio on a budget smartphone or using a dedicated XLR setup, the goal is always to get the cleanest source audio possible. If your room is untreated, you might also consider 5 cheap foam cubes that improve mic isolation more than a shield, as they often do a better job of cleaning up the signal than a poorly made pop filter ever could. Stop settling for gear that you have to replace every three months; invest in a solid metal filter and save your audio—and your sanity.
Why a Heavy Clamp Changes Everything
When you first unbox a professional-grade metal filter, the immediate difference is the weight. While budget filters feel like hollow toys, a high-quality unit has a reassuring heft that suggests durability. The clamp is the most critical interface between your gear and your desk, and on better models, this is usually a wide-mouth zinc alloy bracket rather than thin, injection-molded plastic. A wide clamp matters because it distributes pressure more evenly across your boom arm, preventing the unsightly scratches and structural dents that cheaper mounts leave behind. When you tighten the screw, you want to feel a hard stop, not a mushy progression that suggests the threads are about to strip. That tactile feedback is your first indicator that the filter will actually stay where you put it for a four-hour streaming session.
Ditch the Sag with High-Tension Goosenecks
The gooseneck is often the ‘Achilles heel’ of any vocal rig. A premium arm uses a high-carbon steel coil that requires actual effort to shape. This stiffness is a feature, not a bug; it ensures that once you find the ‘sweet spot’—typically two to three inches from the microphone capsule—the filter won’t succumb to gravity. If you can bend the arm with a single finger, it is probably too weak to hold its own weight over time. In my testing, the difference in material thickness between a $10 generic arm and a professional one is nearly double, which directly correlates to the internal friction that maintains its position.
The Acoustic Difference of Louvered Metal
The core feature of a pro-level metal filter isn’t just the material; it’s the directionality of the airflow. Unlike nylon mesh, which just acts as a wall, high-end metal filters often utilize a louvered design. If you look closely, the perforations are angled downward. This is designed to catch the high-velocity air from a ‘P’ or ‘T’ sound and redirect it toward the floor, away from the microphone’s sensitive diaphragm. This is a significant departure from the industry standard set by the Stedman Proscreen XL, which pioneered the use of patented material to stop pops without muffling the high-end sparkle of the voice. When you use a filter with this level of engineering, you don’t have to fight your EQ settings later to bring back the life that a thick fabric screen would have killed.
The Major Design Flaw You Need to Watch For
No piece of gear is perfect, and even the best metal filters have a glaring weakness: their edges. Because they are stamped out of sheets of steel or aluminum, many manufacturers fail to properly deburr the perimeter of the screen. I have encountered several ‘premium’ models that arrived with edges sharp enough to snag a sweater or, worse, scratch the finish on an expensive condenser microphone if they accidentally bump into it during setup. Furthermore, the very rigidity that makes these filters great also makes them bulky. Unlike a foldable nylon screen, a metal filter is a fixed, rigid disc that can be difficult to pack into a travel bag without bending the gooseneck into an awkward, permanent ‘U’ shape. You trade portability for performance, a compromise that not every mobile creator is willing to make.
Performance Under Real-World Stress
In a high-intensity environment like a four-hour livestream or a grueling voiceover session, the cracks in cheap gear don’t just appear—they widen. I put a standard $15 nylon filter against a $40 metal louvered model during a recording marathon in a room that reached 80 degrees Fahrenheit. The nylon started to smell. It literally absorbed the humidity from my breath, becoming a damp, muffled mess by the second hour. The metal filter remained surgically clean. This is where the ‘pro’ tag actually means something: hygiene and consistency. However, the metal filter isn’t perfect. During a particularly energetic take where I was moving around the mic, the rigid metal edge became a hazard. If you aren’t careful, the lack of flexibility in the disc means you can’t just ‘push’ it out of the way; you have to unscrew or drastically reposition the entire arm.
The Best and Worst of Heavy-Duty Clamps
The clamp performance during my stress test was equally telling. I tested the hardware on a thick solid wood desk and a thin, round boom arm. The professional zinc-alloy clamp gripped both with a level of security that didn’t budge even when I accidentally bumped the rig. The budget plastic clamp, however, began to bow under its own tension. By the end of the week, the plastic had stressed white marks where the screw meets the frame. It is a ticking time bomb. If you are managing a professional rig, you cannot afford to have a piece of gear literally snap in half while you are talking to a client. On Reddit’s r/AudioProduction, users frequently complain that pop filter sag is the single most infuriating part of a budget setup, and my testing confirms that most generic brands fail within thirty adjustments.
Does the metal mesh create weird whistling sounds?
It can. If you angle the filter perfectly perpendicular to the mic, some high-velocity air can whistle through the louvers. The trick is a slight 5-degree tilt. It is a nuance that nylon users never have to learn, but it is the price you pay for acoustic transparency. When you get it right, the high-end clarity is night and day compared to the muffled ‘sock’ sound of a fabric screen. Do you agree with my experience regarding the ‘sag’ on cheap goosenecks? Or have you found a budget brand that actually stays put?
Will this setup fit on a Shure SM7B or an RE20?
These mics have built-in protection, but many pros still add an external filter for that extra layer of safety against aggressive plosives. The problem is weight. Adding a heavy metal filter to an already heavy SM7B can make cheaper boom arms collapse under the strain. You have to consider the total weight of your ‘end-of-arm’ gear or you will find your expensive microphone hitting the desk mid-recording. In my testing, the extra 10 ounces of a metal filter was enough to make a budget spring-loaded arm begin to drift downward. If you use a high-end mic, do not skip on the boom arm either.
The bottom line up front: most cheap pop filters are a waste of money because they sacrifice audio clarity for a low price tag and utilize goosenecks that lose tension within weeks. I have spent years testing everything from high-end studio gear to the cheapest kits on the market, and I have learned that the $10 nylon screen is a false economy. It promises to eliminate plosives—those harsh ‘P’ and ‘B’ sounds—but usually ends up muffling your high-end frequencies and sagging out of place during a recording session.
The Fragility of the Cheap Gooseneck
In my studio, I have a drawer full of dead pop filters. The primary failure point is almost always the build quality of the mounting arm. Most budget filters use low-grade aluminum or thin wire that loses its ‘memory’ after only a few adjustments. You set it perfectly in front of the mic, and ten minutes later, it has drifted three inches down. This is incredibly frustrating when you are in the middle of a take. Furthermore, the plastic clamps often strip their threads the moment you try to secure them to a desk or a boom arm. I have often found that the reason your mic still picks up your keyboard clicks is partially due to flimsy mounting hardware that transfers every vibration directly into the microphone capsule.
Is a metal pop filter worth the extra cost?
Yes, and here is why. Traditional nylon filters use two layers of thick fabric that act like a low-pass filter, effectively dulling the ‘air’ and crispness of your voice. In contrast, metal filters use precisely angled perforations to divert the air blast away from the microphone rather than just blocking it. I have previously detailed why this 30 dollar metal pop filter beats every foam shield because it provides a much more transparent sound. For those curious about the physics of air displacement and microphone diaphragms, the Shure technical guide on pop filters offers a great deep dive into how these tools actually function.
Why Cheap Mesh Ruins Your Mix
When you use a cheap nylon filter, you are essentially putting a sock over your microphone. This forces you to boost the high frequencies in post-production, which inevitably introduces digital noise and hiss. Whether you are learning how to get professional audio on a budget smartphone or using a dedicated XLR setup, the goal is always to get the cleanest source audio possible. If your room is untreated, you might also consider 5 cheap foam cubes that improve mic isolation more than a shield, as they often do a better job of cleaning up the signal than a poorly made pop filter ever could. Stop settling for gear that you have to replace every three months; invest in a solid metal filter and save your audio—and your sanity.
Why a Heavy Clamp Changes Everything
When you first unbox a professional-grade metal filter, the immediate difference is the weight. While budget filters feel like hollow toys, a high-quality unit has a reassuring heft that suggests durability. The clamp is the most critical interface between your gear and your desk, and on better models, this is usually a wide-mouth zinc alloy bracket rather than thin, injection-molded plastic. A wide clamp matters because it distributes pressure more evenly across your boom arm, preventing the unsightly scratches and structural dents that cheaper mounts leave behind. When you tighten the screw, you want to feel a hard stop, not a mushy progression that suggests the threads are about to strip. That tactile feedback is your first indicator that the filter will actually stay where you put it for a four-hour streaming session.
Ditch the Sag with High-Tension Goosenecks
The gooseneck is often the ‘Achilles heel’ of any vocal rig. A premium arm uses a high-carbon steel coil that requires actual effort to shape. This stiffness is a feature, not a bug; it ensures that once you find the ‘sweet spot’—typically two to three inches from the microphone capsule—the filter won’t succumb to gravity. If you can bend the arm with a single finger, it is probably too weak to hold its own weight over time. In my testing, the difference in material thickness between a $10 generic arm and a professional one is nearly double, which directly correlates to the internal friction that maintains its position. #IMAGE_PLACE_HOLDER_B#
The Acoustic Difference of Louvered Metal
The core feature of a pro-level metal filter isn’t just the material; it’s the directionality of the airflow. Unlike nylon mesh, which just acts as a wall, high-end metal filters often utilize a louvered design. If you look closely, the perforations are angled downward. This is designed to catch the high-velocity air from a ‘P’ or ‘T’ sound and redirect it toward the floor, away from the microphone’s sensitive diaphragm. This is a significant departure from the industry standard set by the Stedman Proscreen XL, which pioneered the use of patented material to stop pops without muffling the high-end sparkle of the voice. When you use a filter with this level of engineering, you don’t have to fight your EQ settings later to bring back the life that a thick fabric screen would have killed.
The Major Design Flaw You Need to Watch For
No piece of gear is perfect, and even the best metal filters have a glaring weakness: their edges. Because they are stamped out of sheets of steel or aluminum, many manufacturers fail to properly deburr the perimeter of the screen. I have encountered several ‘premium’ models that arrived with edges sharp enough to snag a sweater or, worse, scratch the finish on an expensive condenser microphone if they accidentally bump into it during setup. Furthermore, the very rigidity that makes these filters great also makes them bulky. Unlike a foldable nylon screen, a metal filter is a fixed, rigid disc that can be difficult to pack into a travel bag without bending the gooseneck into an awkward, permanent ‘U’ shape. You trade portability for performance, a compromise that not every mobile creator is willing to make.
Performance Under Real-World Stress
In a high-intensity environment like a four-hour livestream or a grueling voiceover session, the cracks in cheap gear don’t just appear—they widen. I put a standard $15 nylon filter against a $40 metal louvered model during a recording marathon in a room that reached 80 degrees Fahrenheit. The nylon started to smell. It literally absorbed the humidity from my breath, becoming a damp, muffled mess by the second hour. The metal filter remained surgically clean. This is where the ‘pro’ tag actually means something: hygiene and consistency. However, the metal filter isn’t perfect. During a particularly energetic take where I was moving around the mic, the rigid metal edge became a hazard. If you aren’t careful, the lack of flexibility in the disc means you can’t just ‘push’ it out of the way; you have to unscrew or drastically reposition the entire arm.
The Best and Worst of Heavy-Duty Clamps
The clamp performance during my stress test was equally telling. I tested the hardware on a thick solid wood desk and a thin, round boom arm. The professional zinc-alloy clamp gripped both with a level of security that didn’t budge even when I accidentally bumped the rig. The budget plastic clamp, however, began to bow under its own tension. By the end of the week, the plastic had stressed white marks where the screw meets the frame. It is a ticking time bomb. If you are managing a professional rig, you cannot afford to have a piece of gear literally snap in half while you are talking to a client. On Reddit’s r/AudioProduction, users frequently complain that pop filter sag is the single most infuriating part of a budget setup, and my testing confirms that most generic brands fail within thirty adjustments.
Does the metal mesh create weird whistling sounds?
It can. If you angle the filter perfectly perpendicular to the mic, some high-velocity air can whistle through the louvers. The trick is a slight 5-degree tilt. It is a nuance that nylon users never have to learn, but it is the price you pay for acoustic transparency. When you get it right, the high-end clarity is night and day compared to the muffled ‘sock’ sound of a fabric screen. Do you agree with my experience regarding the ‘sag’ on cheap goosenecks? Or have you found a budget brand that actually stays put?
Will this setup fit on a Shure SM7B or an RE20?
These mics have built-in protection, but many pros still add an external filter for that extra layer of safety against aggressive plosives. The problem is weight. Adding a heavy metal filter to an already heavy SM7B can make cheaper boom arms collapse under the strain. You have to consider the total weight of your ‘end-of-arm’ gear or you will find your expensive microphone hitting the desk mid-recording. In my testing, the extra 10 ounces of a metal filter was enough to make a budget spring-loaded arm begin to drift downward. If you use a high-end mic, do not skip on the boom arm either.
Metal Louvers Square Off Against Classic Fabric
When you look at the landscape of creator rigs, the pop filter is often the most overlooked piece of studio gear. If we compare a standard $30 metal louvered filter to the industry-defining Stedman Proscreen series, the differences are subtle but present. The Stedman features a proprietary finish that is virtually indestructible, whereas the generic metal versions use a thinner coating that can chip over time. However, for most home studios, the generic metal filter provides the same ‘louvered’ acoustic transparency for half the price. It is a classic case of paying for the brand name versus paying for the physics. In my experience, while the Stedman is the ‘forever’ choice, the mid-tier metal filters are the ‘smart’ choice for those building their first professional setup.
Why Built-In Mic Shields Often Let You Down
Many microphone reviews claim that integrated shields—like the one found on the Shure SM7B or the EV RE20—render external pop filters obsolete. This is a common misconception. While these internal layers stop massive air blasts, they are essentially thick foam sponges. Over time, foam degrades and traps moisture from your breath, which can eventually impact the microphone’s capsule. An external metal filter acts as the first line of defense. When you compare the clean, redirected airflow of a metal screen to the ‘muffled’ absorption of a foam sock, the metal wins every time. It is much like how high-quality lighting kits use diffusers rather than just lowering the bulb intensity; you want to shape the energy, not just block it.
Is it worth the upgrade?
If you are currently using a $10 nylon hoop that came bundled with a cheap boom arm, yes, the upgrade to metal is the single most impactful investment you can make. It solves the two biggest headaches in vocal recording: high-frequency loss and mechanical sag. When you look at professional camera reviews, nobody suggests using a plastic lens if glass is available. The same logic applies here. You are moving from a material that ‘interferes’ with your sound to a tool that ‘manages’ it. While a high-end metal filter costs three times more than a nylon one, it lasts ten times longer. You can check the current pricing trends on microphone reviews and price aggregators like B&H Photo Video to see that metal filters have become the new standard for serious creators. Before you finalize your rig, make sure to check out our deep dive into the best boom arms to ensure your new filter doesn’t cause your mic to sink mid-stream.
After weeks of testing, the differences between a $10 nylon hoop and a professional metal filter are impossible to ignore. While nylon is better than nothing, it is a temporary fix that actively degrades your signal. Transitioning to a metal louvered system is less about ‘buying gear’ and more about ‘preserving audio integrity.’ Here is the final breakdown of why you should—or shouldn’t—make the swap.
The Highs and Lows of Metal Filtration
Every piece of studio gear has trade-offs, even when the physics are clearly superior. Here is how the metal pop filter stacks up after a month of heavy use:
- Pro: Unmatched Acoustic Transparency – Unlike mesh, it doesn’t act as a low-pass filter, keeping the high-end ‘air’ in your vocal takes.
- Pro: Superior Durability – High-tension goosenecks and zinc alloy clamps mean you won’t be fighting ‘the sag’ mid-recording.
- Pro: Easy to Clean – A simple wipe-down removes moisture and bacteria, unlike porous nylon which absorbs everything.
- Con: Weight and Bulk – These units are significantly heavier and require a sturdy boom arm.
- Con: Sharp Edges – Some budget metal models have unrefined perimeters that can scratch gear if you aren’t careful.
#IMAGE_PLACEHOLDER_E#
Identifying the Perfect User for Metal Shields
Not every creator needs to drop $40 on a pop filter, but for some, it is the most logical step in improving their creator rig. You should prioritize this upgrade if you are a professional voiceover artist or a streamer who does four-hour sessions. The consistency of a metal screen ensures that your voice sounds the same at the end of the session as it did at the start. However, if you are a mobile journalist or use an ultra-lightweight travel setup, the bulk might be a dealbreaker. If you do go metal, make sure you know how to balance a heavy microphone on a cheap desk arm so the extra 10 ounces doesn’t crash your rig.
The Verdict: Stop Stifling Your Vocal Clarity
If you are serious about your sound, the $10 nylon filter is the biggest bottleneck in your signal chain. Upgrading to a metal louvered filter is a 9/10 recommendation for any serious home studio. It is easily one of the 7 essential tools for any creator starting a home studio because it saves you hours of EQ correction in post-production. To ensure your entire setup is as stable as your new filter, consider pairing it with this 30 dollar arm that holds your mic without constant squeaking. Stop settling for muffled audio and buy the gear that lets your microphone actually do its job.