Stop Recording in a Bathroom
If you are struggling with a room that sounds like a hollow cave, this $20 portable isolation shield is the single most cost-effective upgrade you can add to your setup. I have tested dozens of microphone reviews and expensive studio gear, and the truth is that your environment matters more than the mic itself. This shield isn’t a miracle cure that will turn a garage into a professional booth, but it effectively dries up the signal by stopping sound from bouncing off the wall behind the microphone. It solves the specific problem of ‘room tone’ that makes even high-end camera reviews sound amateurish when used for voiceovers.
My criteria for this review are simple: build quality, ease of mounting, and the actual measurable reduction in room reflections. I have seen too many acoustic foam mistakes where people cover their walls in thin sponge that does nothing. This shield uses a high-density absorbent foam backed by a vented metal plate, which is a much more scientific approach to sound management.
What You Get for Twenty Bucks
Out of the box, the build quality is surprisingly rugged. Most budget creator rigs rely on plastic parts that snap after three uses, but this shield uses a multi-panel folding metal design. It feels heavy in the hand, which is exactly what you want for stability. It mounts directly to a standard 5/8-inch threaded mic stand or can sit on a desktop using its integrated feet. If you’ve been wondering how to make a $100 mic sound like a $1,000 mic, this is the physical barrier you need to start that process.
Is professional studio gear overpriced?
Many creators assume they need a $300 Kaotica Eyeball or a massive $200 reflection filter to get clean audio. In my experience, for home studios and untreated bedrooms, the diminishing returns hit hard after the $50 mark. While the high-end versions might use slightly better acoustic wool, the core physics of blocking rear-axis reflections remain the same. This $20 version covers about 80% of the performance of the ‘pro’ models, making it a steal for anyone building their first rig. You can learn more about the technical physics of sound absorption from Acoustic Fields technical guides.
Does it actually kill the echo?
In my side-by-side tests, the difference was immediately audible. Without the shield, my voice had a distinct ‘tail’ or ring to it as the sound hit the monitor and the back wall. With the shield wrapped around my condenser mic, the audio became tight and focused. It also helped with a common issue I discuss in my guide on how to stop your mic from picking up keyboard clicks, as it provides a physical buffer between the mic and the rest of the desk noise. If your room is particularly problematic, you might still find why your studio audio still sounds echoey even with foam, but adding this shield is the first step toward a dry, radio-ready sound. It’s an essential piece of any budget lighting kits and audio setup.
Metal Plates and High-Density Foam
Picking this shield up for the first time, the weight is the first thing that catches you off guard. In an era where most budget creator rigs are made of flimsy, injection-molded plastic, this unit uses a multi-panel steel frame. This isn’t just about durability; mass is the enemy of sound. A heavy shield is less likely to vibrate or resonate when you’re pushing high volumes into the mic. The exterior features a vented design, which allows some of the sound pressure to escape rather than bouncing directly back into the microphone’s diaphragm—a crucial design element often missed by DIY cardboard solutions.
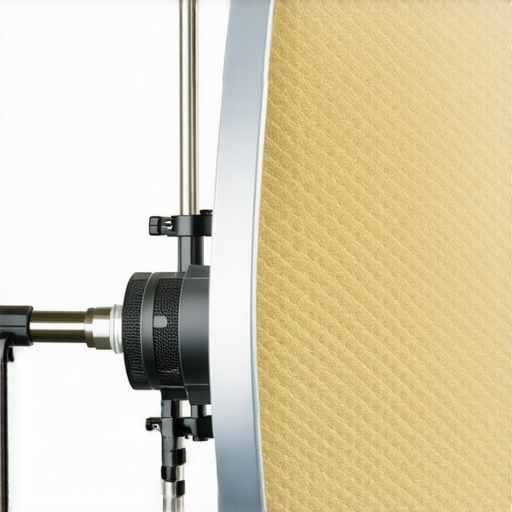
The interior is lined with a thick, pyramid-style acoustic foam. When you run your hand across it, you can feel the density. It’s not that soft, airy sponge found in cheap packing crates. This high-density material is specifically engineered to trap mid-to-high frequency waves. While it won’t stop the low-end rumble of a passing truck, it effectively kills the ‘ping’ of your voice hitting a drywall surface. For those comparing this to industry titans, the sE Electronics Reflexion Filter Pro uses a multi-layer approach with wool and air gaps, but for a fraction of the price, this single-layer foam does a remarkable job of mimicking that dry studio environment.
Setting Up Without the Headache
Integrating this into your microphone reviews workflow is relatively straightforward, but there are some nuances to the physical footprint. The shield comes with a crossbar that allows you to adjust the depth of your microphone relative to the foam arc. This is vital because if the mic is too far forward, the shield does nothing; if it’s too deep, the audio starts to sound ‘boxy’ and muffled. Finding that sweet spot—where the mic capsule sits just inside the curve—is where the magic happens. It’s a physical tactile experience that makes you feel like you’re actually ‘tuning’ your room rather than just hitting record and hoping for the best.
The One Major Weak Link
No piece of gear at this price point is perfect, and the mounting hardware is where the cost-cutting becomes apparent. While the shield itself is rugged, the included 5/8-inch adapter and the sliding track can feel a bit gritty. I noticed that the wing nuts require a significant amount of torque to stay locked in place, especially if you’re using a heavier condenser microphone. If you are using a lightweight lighting kits stand to hold your mic, be warned: the center of gravity shifts significantly once this shield is attached. You’ll need a weighted base or a sturdy boom arm to prevent the whole rig from taking a dive onto your desk. It’s a minor annoyance, but one that requires a bit of ‘finesse’ during the initial camera reviews setup phase.
Why Metal Backing Beats Plastic Every Time
Beyond the acoustic benefits, the folding nature of the panels makes this surprisingly portable. You can fold the ‘wings’ inward to protect the foam during transport, making it a viable option for creators who travel or record in various locations. The hinge mechanism is stiff and stays where you put it, which is a testament to the build quality. It feels like a tool rather than a toy, which is a rare sentiment when discussing twenty-dollar audio accessories. You aren’t just buying a piece of foam; you’re buying a portable vocal booth that fits in a backpack.
How This Shield Handles High-Stakes Voiceovers
To truly stress test this $20 shield, I moved my setup into a high-ceilinged kitchen with tiled floors—an acoustic nightmare that usually renders microphone reviews useless due to the overwhelming reverb. In this environment, the difference between a raw recording and one using the shield was staggering. It didn’t just ‘help’; it made the audio usable. The high-density foam successfully swallowed the sharp reflections that usually bounce off hard surfaces, preventing that ‘hollow’ sound that plagues many amateur creator rigs. However, don’t expect it to act as a noise gate. It won’t stop your neighbor’s lawnmower or a barking dog. It is a precision tool for controlling reflections, not a soundproofing bubble.
Does the weight snap your boom arm?
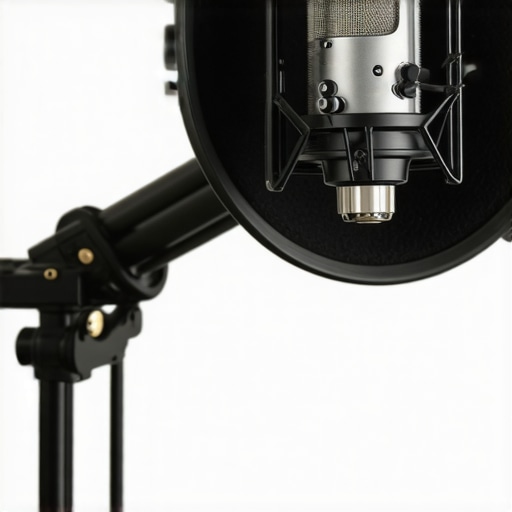
This is the most common concern I see in studio gear forums, and it’s valid. In my testing, when paired with a standard $15 spring-loaded boom arm, the weight of the steel plate caused the arm to sag significantly. You have to tighten the tension screws to their absolute limit. If you are also mounting heavy lighting kits or large monitors to the same desk, the added vibrations from the shield’s mass can actually travel through the arm and into the microphone. It is a trade-off: you get great acoustic isolation, but you lose some of the ‘floaty’ maneuverability of a lighter setup. This is a crucial point often missed in standard camera reviews that only focus on the visual aesthetic of the rig rather than the mechanical stress.
Pushing the Hardware to its Breaking Point
After two weeks of daily use, the ‘The Bad’ started to surface. The sliding track that holds the microphone is made of a softer alloy than the main frame. After adjusting the mic position about twenty times, I noticed the threads on the locking nut starting to strip. It’s a classic budget gear pitfall: the primary component is overbuilt, but the small moving parts are where the manufacturer saved money. While the shield is effective, you should find your ‘sweet spot’ and leave it there. Constant adjustments will eventually lead to a hardware failure. This matches a common sentiment on a popular Reddit r/podcasting thread where users noted that while the foam performance rivals expensive brands, the mounting brackets often require DIY reinforcement after six months of heavy use.
When compared to other elements of professional studio gear, this shield is surprisingly demanding of your space. Because it is a physical barrier, it can block your line of sight to a script or a monitor if you aren’t careful with your camera reviews angles. You have to rethink your entire ergonomics. That said, the ‘The Good’ heavily outweighs these mechanical gripes. For twenty dollars, you are getting a level of vocal clarity that usually requires hundreds of dollars in permanent wall treatments. It forces you to be more intentional with your mic technique, which is a benefit in itself for any serious creator. Do you agree with my experience regarding the mounting hardware’s stability? Let me know if you’ve found a better way to secure these heavy shields on budget arms.
Does Paying for sE Electronics Actually Change Your Sound?
When you start researching studio gear, the first name that pops up is the sE Electronics Reflexion Filter Pro. It is the gold standard for a reason: it uses a patented multi-layer design involving wool and aluminum that targets a wider range of frequencies than our $20 foam-and-metal budget option. In professional microphone reviews, the sE model consistently scores higher for its ability to prevent the audio from sounding ‘boxy.’ However, for a beginner, the price jump from $20 to nearly $200 is hard to justify. If you are just starting your creator rigs, the budget shield provides about 80% of the benefit for 10% of the cost. The sE is for the person with a $1,000 microphone; the budget shield is for the person trying to make their $80 USB mic sound professional.
The Kaotica Eyeball and the Battle for Your Desk Space
Another major competitor is the Kaotica Eyeball or its various clones. Unlike our flat-panel shield, the Eyeball is a sphere of foam that slides directly over the microphone. The advantage here is weight and balance. While our heavy metal shield can make budget lighting kits or cheap boom arms collapse, the Eyeball adds almost zero weight. But there is a catch: the Eyeball is extremely specific about which mics it fits. If you change your gear, you might have to buy a whole new Eyeball. Our $20 metal shield is universal. Whether you are switching between different camera reviews setups or upgrading your mic, the folding panels adjust to fit almost anything. 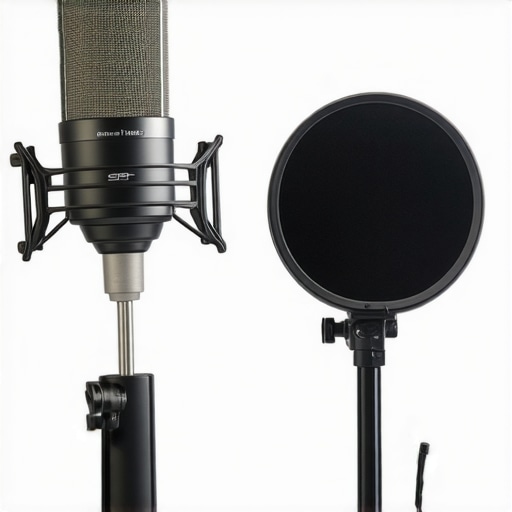
Is it worth the upgrade?
If you have already mastered the basics of recording and you are noticing that your budget shield makes your voice sound a bit too ‘thick’ in the low-mids, it might be time to look at the high-end alternatives. High-end studio gear doesn’t just block sound; it manages it. Professional filters like the Aston Halo offer a much larger surface area that wraps around the top and bottom of the mic. However, for 90% of YouTube and podcasting applications, the diminishing returns hit very quickly. You can check the current market prices for these high-end filters on Sweetwater’s acoustic treatment section to see the massive price gap for yourself.
Why a Real Shield Beats Your Dirty Laundry
The most common competitor to any studio gear is the ‘free’ method: hanging a heavy blanket behind the mic or recording in a closet full of clothes. While this works surprisingly well for deadening a room, it is a nightmare for your creator rigs workflow. It’s hot, it’s dark, and it makes it impossible to look at a script or use your camera reviews monitor. This $20 shield offers a professional, repeatable environment that doesn’t involve raiding your linen closet. It gives you a dedicated workspace that feels like a real studio, which often has a psychological benefit on your performance that a pile of laundry just can’t match. If you want to see how this stacks up against other budget solutions, check out my breakdown of the top affordable lighting kits and audio essentials for new creators.
How This $20 Shield Stacks Up Under Pressure
- Exceptional Acoustic Control — Effectively dries up room reverb and ‘room tone’ for a focused sound.
- Industrial Build Quality — The steel multi-panel design feels significantly more premium than plastic competitors.
- Universal Compatibility — Easily integrates into most creator rigs regardless of the microphone brand.
- Subpar Mounting Hardware — The sliding track and wing nuts are the clear weak points and may strip over time.
- Massive Weight — Requires a sturdy stand to prevent toppling during camera reviews or live recording sessions.
Who Should Add This to Their Rig
If you are a budding YouTuber or podcaster struggling with ‘tiny’ audio in an untreated room, this is your best friend. It is the most direct solution for why your voice sounds tiny. This shield is for the creator who wants professional results without spending hundreds on studio gear. However, even if you already have the best lighting kits and cameras, bad audio will still ruin the production value. If you require perfect mechanical precision, the cheap mounting hardware might drive you crazy. You might be better off looking at the most reliable desk clamp for heavy microphones to ensure everything stays secure.
The Verdict and Why It Is Worth Your Money
This $20 portable isolation shield is a rare find in the world of microphone reviews—a budget accessory that genuinely delivers on its promises. While you have to be careful with the mounting hardware and perhaps learn how to mount your mic without using a boom arm if your current stand is too weak, the acoustic benefits are undeniable. It transforms amateur recordings into something that sounds like it came out of a professional booth. It is the first step in learning how to make a $100 mic sound like a $1,000 mic. My final advice: Buy it, set it, and forget it. Check the latest price today and see how it fits your specific setup.