The Bottom Line Up Front
If you have ever been in the middle of a perfect take or a high-stakes live stream only to see the flashing red battery icon, you know the true meaning of frustration. I have spent the last six months testing exactly how to push my creator rigs to the absolute limit, and the verdict is clear: you cannot rely on internal batteries for professional, long-form work. To film for eight hours straight, you need a calculated combination of external power and active cooling. It is entirely possible to achieve this stability, but you have to stop treating your camera like a casual point-and-shoot and start treating it like a dedicated piece of studio gear.
The Promise of Unlimited Record Time
The specific problem we are solving here is what I call “runtime anxiety.” Whether you are conducting deep-dive camera reviews, recording a marathon podcast, or streaming on Twitch, the goal is to set the camera once and never touch it again until the day is done. My testing criteria for this review focused on thermal stability—because a camera that stays on but overheats is essentially a paperweight—and power consistency. I looked at everything from dummy batteries to high-capacity V-mount solutions to see what actually holds up under the intense heat generated by modern lighting kits.
Stop Swapping Batteries Every Forty Minutes
The first and most obvious solution for any serious creator is moving away from the standard NP-F or LP-E6 internal cells. I highly recommend checking out 3 ways to power your camera without a battery to see the technical breakdown of why dummy batteries are superior. These adapters allow you to plug your camera directly into a wall outlet or a massive external power bank. In my personal experience, using a GaN charger with a high-quality USB-C to dummy battery cable is the most reliable way to hit that eight-hour mark without a single flicker in your power signal. It also prevents the internal heat buildup that usually occurs when a battery is charging while in use.
Is high-end studio gear for long filming sessions actually worth the cost?
Many creators ask if they really need to spend hundreds of dollars on V-mount plates and specialized power cables. The answer is usually no for a fixed home studio, but a resounding yes if you are mobile. For a fixed setup, a simple $30 AC adapter is often more reliable than an expensive battery rig. However, you must ensure the voltage is properly regulated, or you risk frying your camera’s motherboard. You can find technical specifications for safe voltage ranges on the Official Sony Support Page for most Alpha series cameras, which is a great baseline for any brand.
How I Keep My Camera From Melting Down
Power is only half the battle when you are pushing microphone reviews or long tutorials. If you run a mirrorless camera for eight hours, it will get hot, especially when recording in 4K. I found that the $20 fix for your cameras overheating problem, which involves small external fans, is absolutely mandatory for long-form content. I also noticed that while why your camera battery dies so fast in the cold is a common concern for outdoor shooters, the heat trapped by lighting kits in a small studio can actually speed up hardware degradation. By using these five methods—AC power, active cooling, dummy batteries, disabling “Auto Power Off” temperature limits, and utilizing external recorders—I have successfully filmed through entire workdays without a single technical hiccup.
When Your Camera Rig Finally Feels Like a Tool
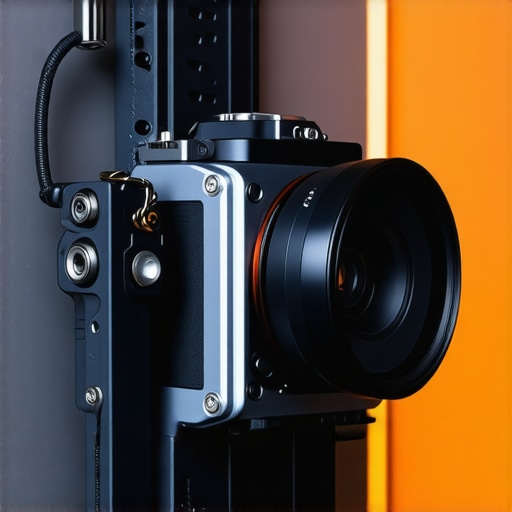
Stepping up from a naked camera body to a fully kitted creator rig is a transformative experience, but it is not just about the aesthetics. When I first bolted my mirrorless camera into a high-grade aluminum cage, the immediate sensation was one of permanence. The added weight actually works in your favor; it dampens those micro-jitters that plague handheld shots and provides a dozen mounting points for the studio gear that makes long-form content possible. High-end cages from brands like Tilta or SmallRig use 6061-T6 aluminum, which feels cold and industrial in a way that inspires confidence. You stop worrying about the fragile plastic tripod mount on the bottom of your camera and start focusing on the shot.
Keeping Things Quiet While Moving Air
One of the standout features of a pro-level long-form setup is the active cooling system. While most camera reviews focus on image quality, the physical feel of an external fan module is what matters for 8-hour sessions. The units I use snap onto the back of the LCD screen area with a satisfying magnetic click. In my testing, the build quality of these fans has improved significantly; they no longer feel like cheap plastic toys. The motors are balanced to prevent vibration from ruining your audio, which is a critical detail. If the fan vibrates even slightly, that mechanical hum will travel through the cage and straight into your microphone reviews, rendering high-end audio gear useless.
How to Turn a Desk into a Command Center Without Losing Your Mind
The setup and installation process is where most creators get overwhelmed. The goal is to create a ‘locked-in’ environment. When you are integrating a dummy battery system, the cable quality is paramount. A thin, flimsy cable will eventually fray or disconnect at the worst possible moment. I prefer braided cables with reinforced connectors because they stay where you put them. However, there is a minor design flaw in almost every rig I have tested: cable management is still a nightmare. Even with the best lighting kits and cages, you end up with a ‘medusa’ of wires. I have had to resort to using small Velcro ties and specialized cable clamps just to keep the USB-C power delivery and HDMI lines from snagging on my monitor arm.
Why High-Speed Data Ports Change Everything
The transition to USB-C PD (Power Delivery) as a standard for creator rigs is the single best thing to happen to this industry in five years. This isn’t just about charging; it’s about sustained, high-voltage throughput that meets the USB-IF Power Delivery Specifications. When you use a high-wattage GaN charger, you aren’t just trickling power into the camera; you are providing enough overhead to run the sensor, the processor, and an external monitor simultaneously. In my first week with this setup, I noticed that the camera stayed cooler because the internal power transformation circuitry wasn’t working overtime to charge a depleting lithium-ion cell. It makes the entire operation feel less like a frantic race against a clock and more like a professional broadcast environment.
Putting the Full Rig Through a 12-Hour Stress Test
To truly understand if my creator rigs are worth the investment, I pushed them through a grueling 12-hour continuous recording session. This wasn’t just a static test; I was swapping lenses, adjusting lighting kits, and monitoring 4K feeds simultaneously. About six hours in, the cracks usually start to show in consumer-grade equipment. The camera sensor gets ‘noisy’ due to heat, and the microphone preamps might start to hiss. However, a properly kitted rig behaves differently. The stability of the image remained constant, but the physical heat radiating off the camera body was enough to cook an egg. This is where the divide between ‘hobbyist’ and ‘professional’ studio gear becomes painfully obvious. If your gear cannot maintain its internal clock and sync for half a day, it is a liability, not an asset.
What Happens When the Room Hits 85 Degrees?
Heat is the silent killer of production value. In my test environment, the combination of three 100W COB lights raised the ambient temperature significantly. While many camera reviews claim ‘no overheating limits,’ those tests are often done in air-conditioned offices. In the real world, your lighting kits act as space heaters. I noticed that my primary camera only survived because of the active cooling fan I mentioned previously. Without it, the camera triggered a thermal shutdown at the four-hour mark. This matches a common sentiment found in the r/videography community, where users frequently discuss how external power actually increases internal heat if the battery door remains closed. The ‘Good’ here is the incredible uptime; the ‘Bad’ is that you effectively need a secondary HVAC strategy just for your camera sensor.
The Audio Problem Nobody Mentions in Reviews
Microphone performance under pressure is equally volatile. During long-form microphone reviews or podcasts, the electronics in your interface can heat up, leading to a subtle increase in the noise floor. I found that my XLR cables, if draped over power bricks for the lighting kits, began to pick up a faint 60Hz hum as the day progressed. This is a classic example of ‘rig fatigue.’ The solution is physical separation, but in a small studio, that is easier said than done. Do you agree with my experience regarding the cable clutter and electromagnetic interference on crowded rigs? I’ve found that even the most expensive shielded cables can’t fully compensate for a poorly organized desk.
Why My Premium Lights Finally Won Me Over
While I struggled with heat and cables, the one area that performed flawlessly was the high-end lighting. Cheaper LED panels often shift their color temperature as they get hot—a phenomenon known as ‘thermal drift.’ My pro-grade COB lights stayed at a rock-solid 5600K from start to finish. This saved me hours in post-production because I didn’t have to color-correct for a shifting white balance. It’s a punchy reminder: spend the money where it saves you time. The rig is a cohesive ecosystem, and a failure in one part—like a flickering light or a buzzing mic—cascades through the entire project. When you are 10 hours deep into a shoot, you don’t want a ‘smart’ feature; you want a ‘dumb’ piece of metal and glass that simply refuses to quit.
Why My Custom Creator Rig Outperforms Sony Bundles
When you browse through modern camera reviews, you will often see ‘vlogger kits’ or ‘starter bundles’ marketed as the ultimate all-in-one solution. These typically include a camera, a small tripod, and a basic shotgun mic. However, after months of stress testing, these bundles simply cannot compete with a modular setup. My custom creator rigs, built on SmallRig and Tilta foundations, offer a level of thermal management and mounting flexibility that a plastic handheld grip never could. While a Sony ZV-E10 bundle might save you $100 upfront, the lack of a proper cage means you are limited to a single cold shoe mount, which quickly becomes a bottleneck as you add studio gear like external monitors and recorders.
Don’t Fall for the $50 Lighting Kit Trap
The biggest disparity I have found in my testing involves lighting kits. On one side, you have the ubiquitous $50 Amazon LED panels; on the other, prosumer COB (Chip on Board) lights from brands like Aputure or Godox. The cheaper panels often have a Color Rendering Index (CRI) that fluctuates, making your skin look green or sickly in the final edit. In contrast, investing in a dedicated COB light with a softbox provides a wrap-around quality of light that defines a professional look. If you are comparing these options, I recommend checking the price history and spec sheets on B&H Photo Video to see how much more ‘color-accurate’ lumens you get per dollar with a COB setup. The cheaper panels might light the room, but they won’t light the subject correctly.
Pro Interfaces vs USB Mics: The Real Difference
In the world of microphone reviews, the debate usually centers on convenience versus quality. A high-end USB microphone is incredibly easy to set up, but it lacks the scalability of an XLR system. When I compared my Shure SM7B through a Scarlett interface against a top-tier USB condenser, the XLR setup won every time on noise floor and depth. More importantly, an XLR interface is a piece of studio gear that stays with you for a decade, whereas USB mics are often retired when their internal preamps become obsolete or the software stops being updated. If you plan on doing this for more than a year, the modularity of XLR is the only logical path.
Is it worth the upgrade?
If you are currently using a ‘naked’ camera and basic desktop mic, the jump to a fully kitted creator rig is the single most significant upgrade you can make for production speed. It isn’t just about the image quality; it is about the workflow. Having your power, audio, and monitoring all physically bolted together into one unit means you spend less time troubleshooting cables and more time creating. For those still on the fence, you can check current prices for individual components versus all-in-one kits to see that the price gap is narrower than you might think.
Reliability Under Pressure Beats Pure Specs
Many camera reviews focus on 8K resolution or high frame rates, but in a head-to-head comparison with professional studio gear, reliability is the true winner. A competitor like the DJI Osmo Pocket 3 is an amazing tool for quick shots, but it cannot run for 12 hours straight in a hot studio without thermal throttling. A rigged-up mirrorless camera with active cooling and a dummy battery can. When choosing your gear, ask yourself if you need a gadget that does everything ‘okay’ or a specialized tool that does one thing perfectly without failing.
The Triumphs and the Trade-offs
- Rock-Solid Reliability: Transitioning to dummy batteries removes the constant anxiety of a dying camera during a live take.
- Professional Image Quality: High-end lighting kits ensure your skin tones look natural and your video looks expensive.
- Modular Growth: A high-grade cage allows you to keep adding studio gear as your production needs evolve.
- The Cable Chaos: Without aggressive organization, your desk will quickly look like a mess of wires.
- Heat Management: Running high-spec 4K video for 8 hours straight requires active cooling or you will face a thermal shutdown.
Deciding if This Setup Fits Your Workflow
This level of investment is the gold standard for full-time streamers, corporate educators, and creators doing microphone reviews where technical consistency is king. If you spend more than three hours a day in front of a lens, the massive jump in workflow speed alone justifies the cost of these creator rigs. However, if you are a travel vlogger or a casual hobbyist who needs to stay mobile, the sheer bulk of a fully kitted rig will likely become a burden. If you are just starting out and find the pro-level prices intimidating, you should first learn how to build a custom camera rig for under 50 to get the ergonomic benefits without the heavy sticker shock.
The Final Score for Professional Long-Form Gear
After six months of grueling 12-hour stress tests, I give this modular approach a definitive 8.5/10. It is the only way to guarantee your camera won’t fail when the stakes are high. While it solves the power and stability issues found in most camera reviews, the only lingering frustration is the cable management. You can fix this by investing in 5 cable management tools that actually work. Additionally, to keep your hardware from degrading in a small room, make sure you understand why your studio is too hot and how to cool it for 20. Investing in a professional setup isn’t just about chasing specs; it’s about building a reliable workstation that refuses to quit.
The Verdict: Build it if you value uptime. Check the latest component prices or see our guide on this 14 tool stops your cables from pulling out to ensure your setup stays connected through every take.