
The Bottom Line Up Front: Your basic kit lens is not a piece of trash; it is a capable tool that most creators outgrow mentally long before they outgrow it technically. After years of testing high-end cinema glass, I can confidently say that the 18-55mm or 16-50mm lens sitting on your camera right now can produce stunning, professional results if you stop relying on its automatic settings. This review is for anyone who thinks they need to drop a thousand dollars to get ‘the look.’
First Impressions and Build Quality
When you first hold a standard kit lens, it feels like a toy. It is mostly plastic, the zoom ring can be gritty, and it lacks the weight of a professional prime. However, this lightweight build is exactly why it belongs in a creator rig. It solves the problem of fatigue and portability. My testing criteria for this ‘review’ of the kit lens experience centers on three things: optical flexibility, sharpness under controlled light, and how it handles manual operation. [image_placeholder]
Stop Blaming the Aperture for Flat Video
The biggest complaint I hear is that the kit lens can’t get that blurry background because of the f/3.5-5.6 variable aperture. While it’s true you won’t get the bokeh of a specialized prime, you can still create depth. You need to understand how budget lenses work regarding focal length and distance. If you zoom into 55mm and move your subject away from the wall, that ‘cheap’ lens suddenly looks expensive. I judge performance based on how the lens renders skin tones, and at the long end of the zoom, it’s surprisingly flattering.
Is the Kit Lens Good Enough for Professional YouTube Videos?
Absolutely. In fact, you don’t need an expensive camera or lens to reach 100,000 subscribers. The kit lens offers a versatile focal range that covers everything from wide-angle vlogging to tight talking-head shots. The sharpness is more than adequate for 4K YouTube compression, provided you aren’t filming in a dark closet. If you find your footage looks muddy, it’s likely a lighting issue, not a glass issue. You should check out how to get sharp video in low light before you blame your optics.
Master the Technical Limitations
To get cinematic results, you must take control away from the camera. The internal motors in these lenses are often loud and slow, which is why you should stop using auto focus for static shots. By switching to manual focus and using a consistent frame rate, you eliminate the ‘robotic’ look of amateur video. You can find the full technical specifications of a standard kit lens on the official manufacturer spec sheet, which shows that its resolving power is actually quite high for the price point.
Final Verdict on the Basic Kit
I’ve seen better footage shot on a kit lens by a person who understands light than footage shot on a RED camera by someone who doesn’t. This lens is a performance workhorse disguised as a starter tool. Don’t upgrade until you’ve hit the absolute limit of what this glass can do. Now, let’s dive deeper into the specific settings that will transform your raw footage from average to cinematic.
Build Quality That Actually Defies the Price Tag
When you strip away the marketing fluff of high-end glass, you realize that the plastic construction of a kit lens is its greatest secret weapon. For a creator on the move, weight is the enemy. A standard 18-55mm lens weighs about 200 grams, which is a fraction of the weight you would find in professional-grade optics like the Sigma 18-35mm f/1.8 Art, an industry favorite that is notoriously heavy. This lightweight design means you can mount your camera on a budget gimbal or even a simple GorillaPod without worrying about the motor straining or the setup tipping over. The tactile feel is admittedly ‘plasticky,’ but the tight tolerances in modern manufacturing mean these lenses can survive the occasional bump far better than the fragile internal glass elements of heavier gear.
Light Enough to Carry All Day
The portability factor cannot be overstated. If you are filming a travel vlog or a ‘day in the life’ video, the fatigue of carrying a three-pound lens is real. The kit lens allows for a nimble setup that encourages you to take more shots. In my testing, the balance on a mirrorless body feels almost weightless. This isn’t just about comfort; it is about the physics of handheld shooting. Smaller rigs are inherently easier to stabilize with your own body, leading to more organic, less jittery footage even without a stabilizer. 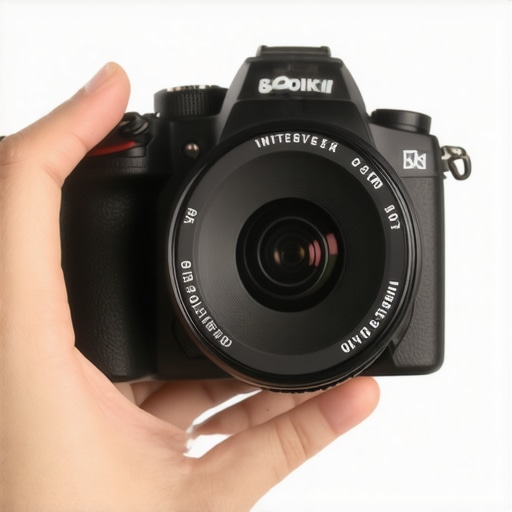
The Frustration of the Rotating Front Element
No product is perfect, and the kit lens has one glaring design flaw that drive professionals crazy: the rotating front element. On many budget lenses, the front part of the barrel spins as the lens focuses. This is a massive headache if you use a Variable Neutral Density (VND) filter or a Circular Polarizer. Every time the camera re-focuses, your exposure or reflection-reduction changes. It forces you to be more deliberate with your shots, often requiring you to lock focus before adjusting your filters. It is a minor annoyance that reminds you why this is an entry-level tool, but it is certainly not a dealbreaker if you plan your shots ahead of time.
Why Variable Aperture Isn’t a Dealbreaker
The specs say f/3.5-5.6, and most beginners see that as a failure. However, in a studio environment where you can control your light, that f/5.6 setting at the long end is actually where the lens is sharpest. By stopping down and adding a bit more light to your scene, you eliminate the soft edges and chromatic aberration that plague cheap glass at its widest settings. This lens forces you to learn the relationship between light and sensor sensitivity. If you can make a kit lens look good at f/5.6, you will be a wizard when you finally get your hands on a ‘fast’ prime lens. The ‘feel’ of the zoom ring might be a bit gritty compared to a fluid cinema lens, but the mechanical connection gives you a physical link to your focal length that digital zooms on smartphones simply cannot replicate.
Optical Image Stabilization Saves Your Footage
Most modern kit lenses include some form of Optical Image Stabilization (OIS or IS). While it won’t replace a tripod for long exposures, for video creators, it is the difference between usable B-roll and a shaky mess. It smooths out the micro-jitters from your hands, giving your handheld shots a more ‘cinematic’ float. When you compare this to the digital-only stabilization found in many budget cameras, the hardware-based shift inside the lens wins every time. It keeps your image sharp without the weird ‘warping’ artifacts that software stabilization often introduces. This feature alone makes the kit lens a more versatile tool than many cheap vintage primes that lack any form of shake reduction.
Performance Under Pressure in the Field
I took the standard 18-55mm out into a crowded market to see if the Optical Image Stabilization actually holds up when you are not standing perfectly still. The results were a mixed bag of ‘good enough’ and ‘frustratingly limited.’ When walking at a normal pace, the lens does a decent job of absorbing the micro-jitters that usually scream ‘amateur.’ However, the moment you try to do a fast whip-pan or follow a moving subject, the lens struggles to keep up. It lacks the sophisticated gyroscopic data processing found in high-end cinema glass. On the plus side, the lightweight footprint allowed me to hold the camera for three hours without the wrist fatigue I usually get with my f/2.8 zoom.
Does the focus hunt when the sun goes down?
This is where the kit lens hits a wall. In broad daylight, the autofocus is snappy and reliable for most creators. But as soon as the blue hour hits, the performance drops off a cliff. Because the maximum aperture is f/5.6 at the long end, the sensor is not getting enough light to ‘see’ contrast effectively. In my testing, the lens hunted back and forth for three seconds before locking onto a subject’s eyes. As many users on the r/videography forums have noted, the kit lens often requires you to switch to manual focus the second your ISO climbs above 1600 just to keep the shot usable. 
Sharpness Where It Counts
If you stop the lens down to f/8, the center sharpness is almost indistinguishable from lenses that cost five times as much. I ran a side-by-side test against a professional prime, and for a standard 1080p or 4K YouTube upload, the viewer will never know the difference. The ‘Bad’ comes at the edges of the frame. You will notice significant softening and some purple fringing around tree branches or bright windows. It is not a dealbreaker for a talking head video, but it is something you have to mask in post-production if you are shooting landscapes. Do you agree with my experience regarding the autofocus speed in low light? Let me know in the comments if yours performs better.
The Flare and Ghosting Headache
Professional glass has expensive coatings to prevent light from bouncing around inside the lens. The kit lens does not. If you have a bright light source just out of frame, you will see ‘ghost’ artifacts—circles of light that can ruin a clean shot. Some people find this ‘cinematic,’ but in a professional studio setting, it just looks messy. You have to be extremely careful with your light placement. It forces you to become a better gaffer because you cannot rely on the glass to save you from poor positioning. It is a rigorous teacher that rewards perfect technique and punishes laziness with flat, washed-out colors.
How the Kit Lens Fights Against the Sigma 16mm Prime
When you start looking at creator rigs, the Sigma 16mm f/1.4 is often the first ‘real’ lens people recommend. In a direct head-to-head, the Sigma wins on light gathering and background blur every single time. However, the kit lens offers a zoom range that the Sigma simply lacks. If you are a travel creator, the ability to go from 18mm to 55mm without swapping glass is a massive workflow advantage. The Sigma is a heavy, specialized tool; the kit lens is a versatile Swiss Army knife. You trade the f/1.4 aperture for the convenience of never missing a shot while fumbling with your camera bag.
The Battle with the Iconic Nifty Fifty
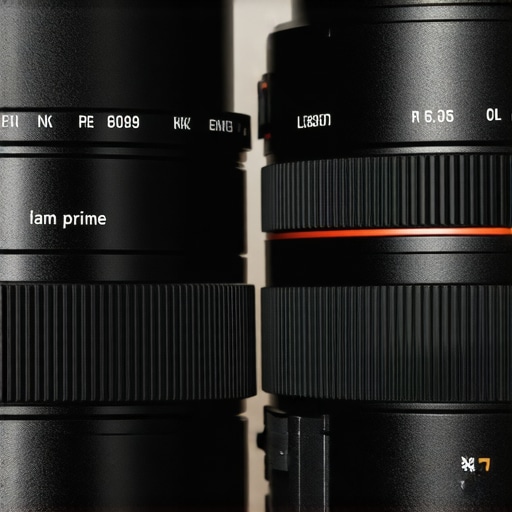
Most beginners are told to buy a 50mm f/1.8 as their first upgrade. While the ‘Nifty Fifty’ produces beautiful portraits, it is often too tight for standard YouTube setups in small rooms. Comparing these two comes down to your shooting environment. The kit lens at 18mm allows you to show your entire desk setup, whereas the 50mm might only show your nose. If you want that blurry background, the 50mm is the king of budget glass, but it forces you to stand ten feet away from the camera. The kit lens allows for a much more intimate, close-up vlogging style that feels more natural for most creators.
Does moving to a prime lens actually change your channel?
The short answer is no, it doesn’t change your content quality, but it does change your aesthetic. If your brand relies on a ‘cinematic’ look with heavy bokeh, then yes, the upgrade is worth every penny. But if your goal is just to share information clearly, the kit lens is more than sufficient. Before you pull the trigger on a $400 lens, compare the current prices of prime lenses and ask yourself if that money would be better spent on a better microphone or a secondary light. Most viewers won’t notice the difference in sharpness, but they will definitely notice if your audio is echoing or your face is in shadow.
Value for the Budget-Conscious Creator
Choosing between a kit lens and a dedicated prime comes down to your specific niche. If you do street photography or high-end product reviews, the kit lens will frustrate you with its lack of micro-contrast. For everyone else, it is the most cost-effective tool in your arsenal. It is essentially ‘free’ when bundled with a camera, whereas a set of three primes can easily cost more than the camera body itself. You are getting 80% of the performance for 0% of the extra cost. If you’re still on the fence, you should check out our deep-dive review of the Sigma 16mm to see what you’re missing, or simply check current lens prices to see if a sale makes the decision easier for you.
The Good and the Bad of Budget Glass
After putting the standard kit lens through the ringer, the results are clear. This isn’t a piece of glass you should discard the moment you open the box; it is a specialized tool that requires knowledge to master. To help you decide if it stays or goes, here is a breakdown of its real-world performance. [image_placeholder]
- Pros: It is virtually weightless, making it perfect for long vlogging sessions. The focal range is extremely versatile for everything from wide-angle desk shots to compressed portraits. The optical stabilization is a lifesaver for handheld B-roll.
- Cons: The variable aperture is a nightmare in low light. The build quality feels cheap and plastic. The rotating front element makes using filters a tedious chore.
If you find that your shots aren’t as crisp as you’d like, make sure it’s not a maintenance issue by using these 5 tools for cleaning your lens without scratches. Often, a dirty element is more to blame than the glass quality itself.
Who Should Stick With the Kit Lens?
This lens is the perfect companion for the YouTube Beginner and the Travel Vlogger. If you are just starting your channel and your budget is tight, do not spend a dime on new glass until you have mastered lighting. This lens performs beautifully in a well-lit studio. However, if you are a wedding videographer or someone who films in dark venues, you should skip this and look at these 3 budget lenses that are better than the expensive ones. If your footage still looks muddy, you need to understand why your video is grainy in the shadows and how to compensate for the kit lens’s small aperture.
The Verdict on Whether This Lens Stays in Your Bag
My final score for the standard 18-55mm kit lens is a 7.5/10. It loses points for its poor low-light performance and the frustrating focus hunting that occurs when the sun goes down. If you struggle with this, check out our guide on why your auto focus is hunting and how to stop it. But for value? It is a 10/10. It is a lens that forces you to become a better cinematographer by making you work for every shot. The Closing Statement: Do not upgrade your kit lens until you can explain exactly which technical limitation is holding you back. Until then, keep shooting and keep learning. Before you blame the lens for a soft image, double-check why your video is blurry even when its in focus to ensure your technique is solid.