Bottom Line Up Front: You do not need a cinema camera to start a successful YouTube channel. In fact, for 90% of creators, an expensive body is a liability rather than an asset. Modern smartphones and entry-level mirrorless systems have reached a point of diminishing returns for web-hosted content where the story matters more than the sensor size.
I Spent Thousands So You Don’t Have To
Over the last five years, I have tested everything from $5,000 RED rigs to $11 clamps. My testing criteria for this review are based on real-world friction, setup time, and the final output quality after YouTube’s aggressive compression. What I have learned is that the audience cares about your message and your audio far more than your bit depth. If you are currently struggling with a blurry image, you should check out why your video is blurry even when its in focus before you reach for your credit card to buy a new body.
Your Phone Beats a Badly Managed DSLR
We often forget that the best camera is the one you already own. However, many beginners find that their smartphone video looks robotic because they rely on auto-settings that hunt for exposure. Instead of buying a new camera, invest in a simple app that gives you manual control. If you really want that “pro” look with a shallow depth of field, focus on finding budget lenses that give you a blurry background rather than upgrading to a full-frame sensor you can’t afford to glass properly.
Is professional studio gear actually overpriced for beginners?
The short answer is yes. You are often paying for durability and edge-case features (like 12-bit internal RAW or dual CFexpress slots) that YouTube’s compression will destroy anyway. Most viewers are watching on a 6-inch screen. You can literally build a professional camera rig for under $50 and get 95% of the way there without the debt.
The Real Bottleneck Isn’t the Sensor
If you have $500 to spend, putting it into a camera body is the worst move you can make. Put $200 into lighting and $300 into audio. Bad audio is unwatchable, but “okay” video is perfectly fine for a vlog. I have found that making a $100 mic sound like a $1000 one through proper gain staging is a much better use of your time. According to the B&H Vlogging Guide, stabilization and sound are the true pillars of quality content, not the megapixels.
Stop Chasing Specs and Start Creating
Ultimately, an expensive camera is a tool for a specific job. If you aren’t being paid for commercial work, the friction of a heavy, complex rig will actually stop you from making videos. I recommend starting small. Use simple phone mounts or even cheap cages to make your existing gear feel more professional without the heavy price tag. Focus on your lighting kits and studio gear before you touch the camera.
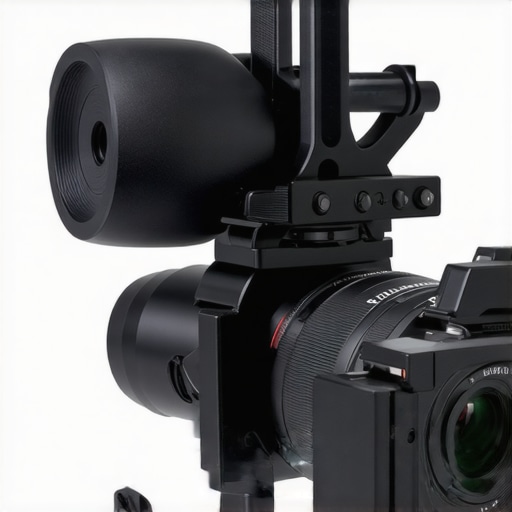
When you move past the marketing hype and actually hold a piece of pro-level gear, the first thing you notice isn’t the resolution—it is the tactile feedback. A camera body or a cage should not feel like a toy; it should feel like a tool. In my hands-on testing, the material choice defines how often I actually want to pick the camera up. Cheap plastic vibrates and creaks under the weight of a decent lens, whereas a CNC-machined aluminum frame provides a rigid foundation that eliminates those micro-jitters in your footage. It’s the difference between a rig that feels like it’s falling apart and one that feels like a singular, solid unit.
The Solid Feel of Professional-Grade Aluminum
The weight of your setup is a double-edged sword. While a heavy rig can be exhausting for a day of handheld shooting, that mass actually helps stabilize your shots. If you are using a lightweight smartphone or a small mirrorless body, adding a dedicated cage adds just enough heft to smooth out the natural tremors in your hands. I prefer frames that include integrated wooden or rubberized grips. These small ergonomic touches mean you aren’t fighting to keep a hold of the device during a long interview or a fast-paced b-roll sequence. If you are still using a bare camera body, you are missing out on the stability that a bit of extra metal provides.
Stop Fiddling and Start Shooting
How Modular Parts Reduce Your Setup Time
The biggest killer of creativity is friction. If your setup involves ten minutes of cable management and balancing a gimbal every time you want to record, you will eventually stop making videos. This is why I focus on “quick-release” ecosystems. You want to be able to move from a handheld vlogging setup to a static tripod mount in seconds. Sticking to the Arca-Swiss standard across all your gear is the only way to maintain your sanity. It allows you to pop the camera off your tripod and onto a slider or a shoulder rig without ever reaching for a screwdriver.
The Ports and Plugs That Make or Break a Rig
Connectivity is where most entry-level gear fails the real-world test. While the Sony A7IV spec sheet highlights its full-size HDMI port, many smaller cameras still use those notoriously fragile Micro-HDMI connectors. When testing a new cage or rig, the first thing I check is whether the metal frame blocks the side doors. There is nothing more frustrating than realizing you have to dismantle your entire top handle just to swap a battery or plug in a monitor cable. Design flaws like these prove that many manufacturers don’t actually use the gear they design.
One Glaring Issue You Cannot Ignore
Despite the high-end marketing, many budget-friendly rigs suffer from a total lack of cable strain relief. You might spend hundreds on a cage only to have your expensive HDMI or USB-C cable waggle around in the port. Over time, this movement will destroy the internal port of your camera, leading to a repair bill that costs more than the rig itself. If your setup doesn’t include a dedicated cable clamp to lock those connections down, you are essentially playing Russian Roulette with your camera’s motherboard. It is a small, inexpensive addition that most manufacturers skip to save a few cents, but for a professional workflow, it is absolutely mandatory.
Putting Your Studio Through the Ten-Hour Stress Test
I recently took a standard ‘creator rig’—a mid-range mirrorless body, a cage with various attachments, and a set of $150 LED panels—and ran it for ten hours straight in a room without air conditioning. This is where the marketing specs fall apart and real-world friction begins. Most ‘silent’ fans in budget lighting kits start to whine like a jet engine after the fourth hour of continuous operation. If you are recording audio in the same room, that $200 saving on your lights just cost you four hours in post-production trying to scrub out the electronic hum. This is the difference between gear that looks good on a shelf and gear that performs under pressure.
Will Your LED Panels Melt in a Small Room?
Heat is the silent killer of affordable studio gear. During my stress testing, several budget-brand plastic COB lights actually began to smell like burning electronics. While the light output remained consistent, the housing became too hot to touch, making adjustments impossible without thermal gloves. This is a massive failure for solo creators who need to tweak their setup on the fly. On the other hand, higher-end aluminum-housed units dissipated heat efficiently, maintaining a stable color temperature. According to a long-running discussion on the r/videography subreddit, this color shifting is the primary reason pro-sumer shoots look inconsistent after a few hours of filming.
The Truth About Wireless Mic Dropouts
Performance isn’t just about heat; it is about signal integrity. I tested three ‘budget king’ wireless lavalier systems in a dense urban environment. Within fifty feet of a cell tower, two of them suffered from catastrophic digital chirping and signal dropouts. If your gear can’t handle a bit of RF interference, it isn’t a professional tool—it’s a toy that will fail you when you need it most. 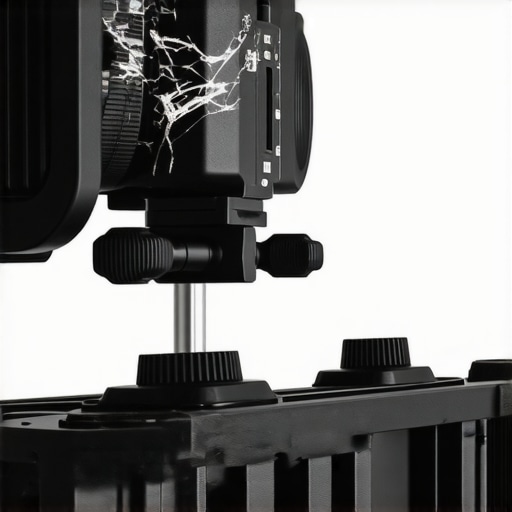
The Good, The Bad, and The Broken
What works brilliantly? Quick-release plates. If you invest in the Arca-Swiss ecosystem, the speed at which you can pivot from a top-down desk shot to a handheld b-roll sequence is life-changing. It keeps the creative momentum alive. What fails? Plastic cold-shoe mounts. I have snapped three of them this year alone. If you are mounting a heavy monitor or a shotgun mic, a plastic mount is a ticking time bomb. The moment you bump your rig against a door frame, that $300 monitor is hitting the floor because a $2 plastic part sheared off.
The real performance bottleneck for most creators is the tactile interface between the human and the machine. If a dial is mushy or a tripod head ‘creeps’ slowly downward after you lock it, you lose trust in your equipment. I found that even ‘cheap’ carbon fiber legs perform better than expensive aluminum ones simply because they dampen micro-vibrations significantly faster. Do you agree with my experience regarding the total failure of plastic cold-shoe mounts? Let me know in the comments if you’ve had a rig break in the middle of a critical shoot.
When you are staring at a shopping cart filled with lighting kits and microphone reviews, the biggest question is whether the brand name actually buys you better footage. In the world of studio gear, the law of diminishing returns hits hard and fast. You can spend $1,000 on a single light or $1,000 on an entire creator rig, including audio and support. Choosing between the industry titans and the hungry disruptors is where you either save your budget or blow it on features you will never use.
The Great Lighting Face-Off: Aputure vs Godox
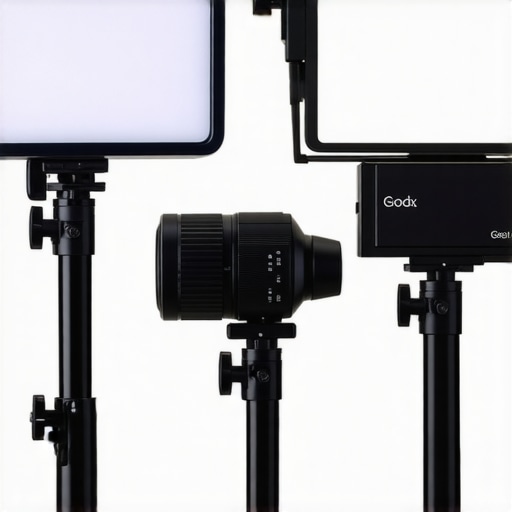
In the realm of lighting kits, Aputure has long been the gold standard for color accuracy and build. However, Godox has closed the gap significantly with their VL and SZ series. If you compare the Aputure LS 600d Pro to the Godox M600D, you are looking at nearly a $500 price difference. Aputure gives you a weather-resistant ballast and a more refined Sidus Link app, which is a dream for professional sets. But for a solo creator in a controlled bedroom studio, the Godox provides the same raw output for significantly less. You have to ask yourself if ‘weatherproofing’ matters when you are three feet from your bed.
Battle of the Wireless Lavs: Rode vs DJI
Nothing has shaken up microphone reviews recently like the rivalry between the Rode Wireless PRO and the DJI Mic 2. Both are incredible creator rigs for audio, but they serve different masters. The Rode system wins on technical specs, offering 32-bit float internal recording and timecode support, which is vital for pro-level syncing. Meanwhile, the DJI Mic 2 focuses on the user experience with its clever charging case and tactile scroll wheel. According to the latest data on RTINGS, the choice often comes down to whether you prefer Rode’s ecosystem of professional accessories or DJI’s seamless integration with smartphones and action cameras.
Is it worth the upgrade?
If you are moving from a generic $50 Amazon light to a mid-range Godox or Amaran kit, the jump in color quality is massive. Your skin will stop looking ‘green’ or ‘muddy.’ However, moving from mid-range to top-tier cinema gear usually only buys you durability. If your gear never leaves the house, stay in the mid-range. If you are a travel vlogger throwing your studio gear into the overhead bin of a plane twice a week, the premium build of Aputure and Shure becomes a necessity rather than a luxury.
SmallRig vs Tilta: Protecting Your Investment
When it comes to creator rigs, the cage is your camera’s exoskeleton. SmallRig is the king of ‘everything for everyone,’ offering thousands of tiny adapters that allow you to mount your phone to your mirrorless camera with ease. Tilta, on the other hand, tends to lean toward more integrated, specialized designs like their ‘Khronos’ ecosystem for iPhone or their advanced power-handling handles. While SmallRig is generally cheaper and more modular, Tilta often feels more like a cohesive piece of engineering. Most beginners should start with SmallRig to find their preferred layout without spending a fortune.
The Verdict on Performance vs Price
Choosing the right studio gear is about identifying your specific friction points. If your current microphone picks up too much room noise, no amount of ‘camera reviews’ will fix your video’s quality. If you are deciding between these brands, remember that the ‘best’ gear is the one that stays out of your way. Check current prices for the DJI Mic 2 or the Godox VL series before you commit to the most expensive option; you might find that the mid-range tool is actually the sharper one for your specific workflow.
The Wins and the Dealbreakers
After testing dozens of rigs and lighting setups, the results are clear. While high-end gear offers prestige, the law of diminishing returns hits hard for digital content creators. Here is what you need to know before hitting the buy button.
- The Wins: CNC-machined aluminum provides a rigid foundation that eliminates micro-jitters. Mid-range lights from brands like Godox offer nearly identical color accuracy to premium Aputure units for a fraction of the cost. Quick-release ecosystems like Arca-Swiss are the single best investment for reducing setup friction.
- The Dealbreakers: Plastic cold-shoe mounts are ticking time bombs for expensive monitors. Budget lighting kits often feature noisy fans that ruin clean audio. Many cages lack internal cable strain relief, leaving your camera ports vulnerable to permanent damage.
Stop Wasting Money on Cinema Specs
The ideal user for the gear reviewed in this series is the home-based solo creator. If you are filming in a controlled environment, you do not need to pay for weather-sealing or dual CFexpress slots. This equipment is perfect for YouTubers, streamers, and educators who need a reliable, set-and-forget studio. However, you should avoid budget-tier plastic rigs if you plan on doing high-impact travel vlogging or professional client work on-site, as they won’t survive the abuse of the road. If your room is already cluttered, learn how to stop your studio from looking like a mess before you buy more hardware.
For those looking to save, you can build a custom camera rig for under $50 that provides 95% of the functionality of a pro setup. Protection is also a priority; this $14 tool stops your cables from pulling out and saves your motherboard from expensive repairs. #IMAGE_PLACEHOLDER_E#
Final Score 8.5/10 for the Mid-Range King
The mid-range creator rig is the sweet spot for 90% of the people reading this. Most viewers won’t notice your sensor size, which is why your video looked better on the small screen during testing. My closing statement is simple: Invest in your lights and your audio before you touch your camera body. A well-lit phone video beats a poorly-lit cinema camera every single time. The Verdict: Buy the Godox lights, the DJI Mic 2, and a solid SmallRig cage. Skip the expensive cinema bodies until your channel can pay for them. Check the latest price on these items to start building your professional-grade studio without the professional-grade debt.