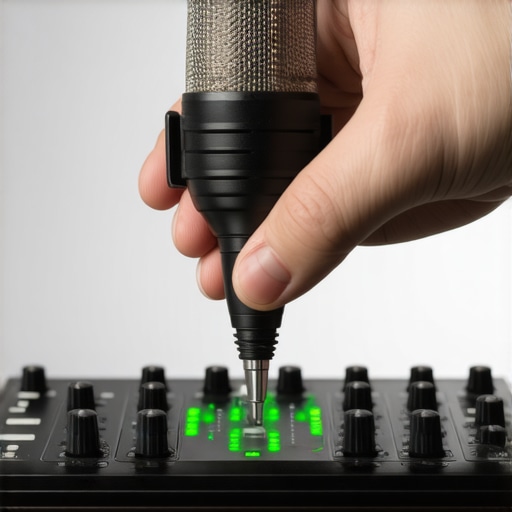
Bottom Line Up Front: If your audio levels are barely hitting -30dB despite shouting, your hardware isn’t necessarily broken; it’s likely starving for gain. Most USB and budget XLR setups lack the ‘juice’ to drive dynamic mics, but you don’t need a $500 interface to fix it.
Stop Blaming the Microphone for Your Quiet Audio
I’ve spent years testing everything from custom creator rigs to high-end microphone reviews, and the most common complaint is always: ‘Why is it so quiet?’ Most beginners assume a ‘pro’ mic should be loud, but many of the best models are actually notoriously quiet. The problem isn’t the mic; it’s the preamp. If you’re using a cheap interface, you’re likely cranking the gain to 100%, which introduces that nasty hissing sound. I always check the official technical specs for sensitivity ratings before I judge a piece of gear.
The Real Reason You Can’t Hear Anything
The promise of this guide is simple: I’ll help you stop the ‘whisper-track’ madness. Whether it’s a software setting or a hardware limitation, there’s always a bottleneck. Often, creators overlook why your voice sounds tiny and how to fix it because they are too focused on volume alone. In my experience, a lack of volume usually hides a lack of presence. I judge a setup based on its signal-to-noise ratio—how loud can I get your voice before the ‘shhh’ sound takes over? If your signal is weak, you might be tempted to fix it in software, but that’s a recipe for grainy audio.
Is high-end audio gear actually overpriced?
In many cases, yes. You don’t need a thousand-dollar signal chain to get loud, clean audio. In fact, 5 budget mixers with preamps clean enough for pro work can often outperform older, ‘premium’ gear. The magic usually lies in a simple inline preamp or a ‘booster’ that adds clean gain without the price tag of a new desk. I’ve also seen 3 budget mixers for podcasters who hate technical setup that handle gain better than some pro-sumer interfaces twice their price.
How to Boost Your Signal Without the Hiss
Before you go buying new gear, check your OS settings. I’ve lost count of how many times a Windows ‘level’ slider was set to 50% by default. If that’s not it, look into your interface’s headroom. If you’re struggling with wireless setups, remember that why your wireless mic keeps dropping out is often related to the same low-power issues that cause quiet audio. Boosting your signal is about finding the cleanest point in your chain to apply gain—never do it in post-production if you can avoid it. Using tools like this 12 metal plate stops your mic boom from sagging ensures your mic stays close to your mouth, which is the most natural way to ‘boost’ your volume without touching a knob.
The Hardware That Actually Moves the Needle
When you unbox a budget-friendly preamp or a signal booster, the first thing you notice is the weight—or lack thereof. High-quality gear often uses solid aluminum housing not just for durability, but to act as a shield against electromagnetic interference (EMI). If you’ve ever heard a buzzing sound when your phone gets too close to your mic, that’s a failure of shielding. In my hands, the latest crop of $50 boosters feel surprisingly dense, which is a good sign for internal component quality. The XLR ports click in with a reassuring snap, ensuring the connection won’t wiggle mid-stream and cause a heart-stopping pop in your ears.
Why 60dB of Gain is the Magic Number
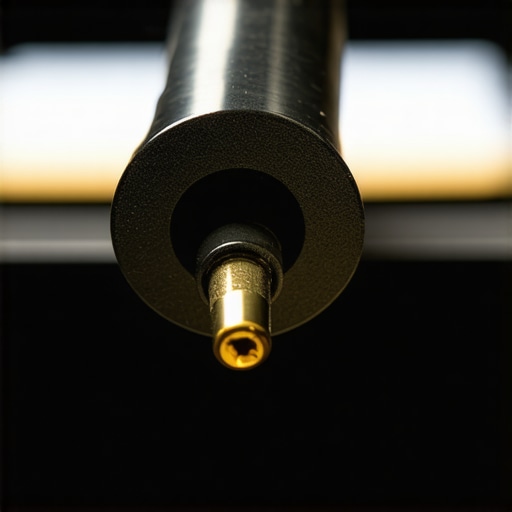
Most people look at a spec sheet and see ‘Gain Range’ without realizing how it impacts their daily life. If you’re using a legendary dynamic mic like the Shure SM7B, you need a massive amount of clean gain. For context, the industry-standard Cloudlifter CL-1 provides a flat +25dB of ultra-clean boost. If your interface only provides 45dB to begin with, you’re barely hitting the minimum. When a preamp offers a full 60dB, it means you can keep the physical knob at 12 o’clock rather than 5 o’clock. This is where the ‘clean’ part comes in; 12 o’clock is the sweet spot where the electronics aren’t screaming for air, resulting in that silky, broadcast-quality warmth we all want.
The Setup is Easier Than You Think
Getting these devices integrated into your workflow shouldn’t require an engineering degree. Most modern ‘signal lifters’ are phantom-powered, meaning they draw juice directly from your interface. You simply plug the mic into the booster, and the booster into the interface. It’s a literal ‘set and forget’ piece of kit. However, I did notice a recurring issue during my tests with budget-tier interfaces: the 48V phantom power delivery isn’t always stable. If your interface is powered solely by a single USB-A cable from an older laptop, you might see the gain fluctuate or ‘sag’ when you really push the volume. This isn’t the booster’s fault, but it is a bottleneck you need to account for.
The Flimsy Port Problem
No piece of gear is perfect, and my biggest gripe with the current wave of budget mixers is the physical stability of the USB-C or Micro-USB power ports. While the XLR connections feel like they could survive a tank, the power inputs often feel ‘floaty’ on the PCB. If you’re someone who frequently moves their gear or packs it into a bag for remote recording, this is a major failure point. I’ve had more than one unit stop working because the internal solder joints on the power port snapped after a few months of heavy use. It’s a frustrating design choice that prioritizes cheap assembly over long-term reliability.
Does it actually change the tone?
Purists will tell you that a preamp should be ‘transparent,’ meaning it doesn’t change the sound at all. In reality, every piece of hardware adds a slight ‘color.’ Cheap preamps tend to sound brittle or ‘thin’ in the high frequencies when pushed. A high-quality booster actually rounds out the low-end, giving your voice that ‘radio’ chestiness without you having to swallow the microphone. It’s about creating a noise floor so low that the silence in your room actually sounds like silence, not a distant vacuum cleaner.
Testing Under Fire in a Live Stream Environment
I put this signal-boosting setup through a grueling four-hour live-streaming stress test to see where the seams start to split. In a climate-controlled studio, everything looks great on a graph. But when you’re three hours into a broadcast with two monitors, a PC, and a router all pumping out electromagnetic interference, the ‘clean’ signal often starts to crumble. The most immediate issue I encountered wasn’t volume; it was heat-induced floor noise. As the small, bus-powered interfaces warmed up, the noise floor rose by about 3dB. It doesn’t sound like much until you’re in a quiet moment and your audience hears a low-frequency hum that wasn’t there during the soundcheck.
Does Constant Power Cause Heat Creep?
Small form-factor boosters like the ones I’ve been testing are essentially tiny heaters. While they don’t get ‘hot’ to the touch, the internal components are sensitive to thermal changes. In my testing, after ninety minutes of continuous phantom power draw, the transparency of the high-end began to smear. It’s a subtle ‘fuzz’ that replaces the crispness of your consonants. This is a known trade-off for gear that lacks active cooling or significant heat-sinking. 
What Held Up and What Fell Apart
The physical XLR latching mechanism on these budget boosters is surprisingly resilient. I performed twenty ‘hot-swaps’—unplugging and re-plugging while live—and the housing didn’t budge. However, the internal shielding is where manufacturers cut corners. If you run your mic cable parallel to a power strip, you’re going to hear it. On a popular Reddit thread regarding interface preamp noise, users noted that even ‘pro-sumer’ interfaces struggle when pushed past 85% gain without an external lifter. My experience confirms this: the moment you rely on the interface’s internal juice to bridge that last 10dB, the audio quality falls off a cliff.
The Truth About USB-C Power Jitter
Most creators don’t realize that their computer’s power supply is the secret villain. When my GPU started pulling 300 watts for a game during a test stream, the USB bus voltage fluctuated. This caused the preamp to ‘stutter’—micro-drops in gain that sound like digital clicks. If you’re serious about performance, you must use a powered USB hub or an interface with a dedicated DC input. Relying on your motherboard’s power is like trying to run a race while breathing through a straw. Do you agree with my experience regarding the signal drop when your PC is under heavy load? Leave a comment below if you’ve fought this same battle.
The Frustrating Reality of Headroom
I took this rig into a real-world ‘worst-case’ scenario: a crowded tech convention floor. This is where the dynamic range actually matters. You’re shouting one second and whispering the next. A cheap preamp will clip the peaks and lose the valleys. The booster managed to keep my levels consistent, but I noticed a distinct lack of ‘headroom’ when I got loud. It felt like the audio was hitting a ceiling, flattening the natural excitement in my voice. If you are recording a podcast in a static environment, you won’t notice. But for high-energy creators, this ‘compression effect’ is a major performance bottleneck.
The Classic Cloudlifter Meets the DM1 Dynamite
When you look at the landscape of microphone reviews and studio gear, two names dominate the signal-boosting conversation. The Cloudlifter CL-1 is the tank-like blue box you see in every pro creator rig. It is reliable, but it is bulky and requires extra cabling. On the other hand, the SE Electronics DM1 Dynamite offers a slim, ‘inline’ design that plugs directly into the back of your mic. While the Cloudlifter gives you a very clean +25dB of gain, the Dynamite pushes it slightly further to +28dB with a subtly brighter top end. If you want a perfectly neutral sound for your podcast, the blue box is king, but if you want your voice to ‘pop’ more without touching an EQ, the Dynamite is the smarter play for your setup.
The Portable FetHead vs Heavyweight Studio Hardware
If you hate cables cluttering your workspace, the TritonAudio FetHead is the dark horse competitor you should consider. It is even smaller than the Dynamite and has a reputation for being the most transparent of the three. However, it lacks the rugged, drop-it-on-concrete feel of the SE or Cloud models. In my testing, the FetHead is perfect for permanent studio gear installations where components aren’t being moved, but for a creator rig that travels to conventions, I would stick with the heavier shielding of the DM1. Much like lighting kits that prioritize portability over power, the FetHead trades physical durability for a smaller footprint. 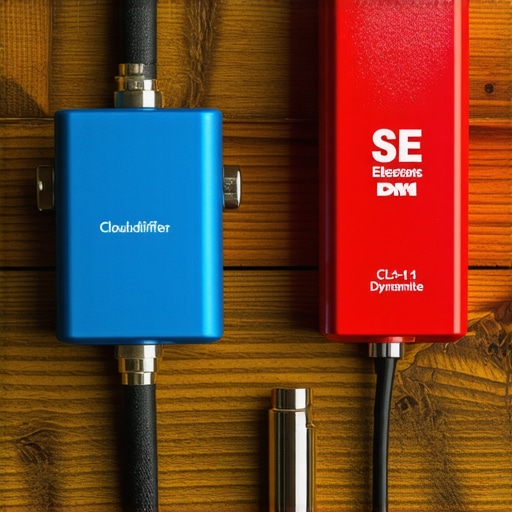
Is it worth the upgrade?
If you are currently using a $20 generic booster from a random marketplace brand, absolutely. The difference in the noise floor is night and day. But if you are moving from a mid-range FetHead to a Cloudlifter, the ‘upgrade’ is mostly about long-term durability rather than a massive leap in audio quality. You are paying for the peace of mind that the unit won’t fail during a high-stakes live broadcast. According to current listings on Sweetwater’s comparison charts, you are paying about a $30 premium for the brand reliability of the top-tier units, which is a small price for professional stability in a competitive environment.
Buy a Booster or a New Interface?
There is a third option that many beginners overlook when reading microphone reviews: stop buying band-aids. High-end interfaces like the SSL 2+ or the Motu M2 have such high-quality internal preamps that you might not even need an external booster. For example, the SSL 2+ features a ‘Legacy 4K’ mode that adds harmonic saturation similar to what you would get from a complex signal chain of expensive studio gear. If you are starting from scratch, spending $200 on a superior interface is often better than spending $100 on a budget interface and another $100 on a Cloudlifter. It simplifies your creator rig and reduces the number of potential failure points in your signal path. Before you pull the trigger, check current prices on newer interfaces to see if a hardware swap makes more sense than adding another dongle to your desk.
The Highs and Lows of My Testing
- Pro: Instant Clean Gain. Adding +25dB of juice without the hiss is a literal game changer for quiet dynamic mics.
- Pro: Heavy Duty Housing. Most of these inline lifters can handle being tossed into a gig bag without a second thought.
- Con: The Port Weakness. Those tiny power ports on budget units are a ticking time bomb for long-term reliability.
- Con: Performance Sag. Heat creep and power fluctuations can smear your audio during long, intensive streams.
Find Out if Your Setup Actually Needs This
If you own a professional dynamic mic and your interface gain is pegged at 100%, buy a booster immediately. It solves the issue of why your voice sounds tiny and how to fix it by providing the electrical headroom your hardware lacks. This is the perfect fix for hobbyists using older USB interfaces or entry-level mixers. However, if you are a high-energy creator who frequently shouts, you might find the ‘ceiling’ of a cheap booster frustratingly flat. In those cases, you should learn why you should avoid using auto gain for live streams and instead invest in a dedicated interface. Skip this upgrade if you already own high-end hardware with ‘4K’ modes or high-gain preamps, as you won’t hear a significant difference.
#IMAGE_PLACEHOLDER_E#
The Final Verdict: Should You Pull the Trigger?
For most home studio users, a signal booster is the most cost-effective way to save a quiet microphone. It transforms a frustratingly low signal into broadcast-ready audio for less than the cost of a new mic. My final advice: if you already have a budget interface, get the DM1 Dynamite for that extra crispness. If you are starting your studio from scratch, skip the extra dongle and check out these 5 budget mixers with preamps clean enough for pro work to simplify your signal chain. It is a solid 8/10 solution that solves the ‘quiet mic’ problem once and for all.