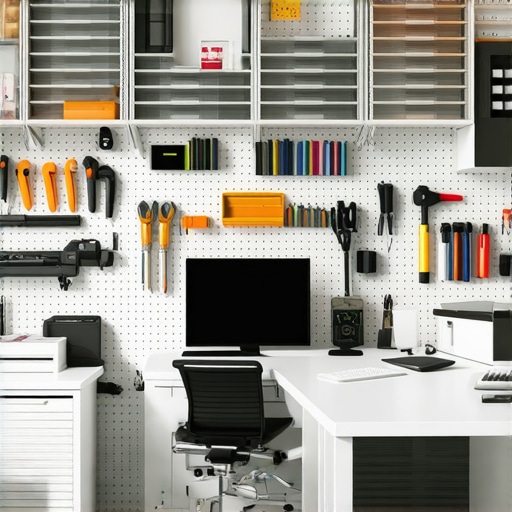
Bottom Line Up Front: Your studio mess is likely a result of poor infrastructure rather than a lack of space. After testing dozens of configurations, I’ve realized that cleaning up isn’t about hiding gear; it’s about creating a permanent home for every cable and light stand. If you don’t solve the cord chaos now, you’ll eventually trip over a $1,000 camera body.
The Brutal Truth About Creative Clutter
I’ve spent years looking at microphone reviews and lighting kits, but rarely did I see the back of the desk where the ‘cable waterfall’ happens. The promise of a professional studio is often overshadowed by the reality of a 5×5 corner filled with tripods. My goal was to see if I could transform a chaotic workspace into something functional without losing the ability to swap gear quickly. I judged my progress based on three criteria: cable visibility, setup speed, and physical safety (not tripping over sandbags).
First Steps to Clearing the Visual Noise
The biggest problem in most creator rigs isn’t the amount of gear, but the footprint of the support systems. I started by getting rid of floor-standing tripods. If you want to see a massive difference, look into 3 solid desk mounts that won’t break your Ikea table. By moving my key lights and microphones to desk-mounted arms, I reclaimed about four square feet of floor space. It immediately made the room feel like a professional environment rather than a storage unit. I also found that building a professional studio in a 5×5 foot corner is entirely possible if you stop using wide-legged light stands.
Is Cable Management Actually Worth the Effort?
The most common doubt I hear is that cable management makes it too hard to change gear. In my experience, that’s only true if you use zip ties. I switched entirely to reusable solutions. For example, this 10-dollar strap keeps your cables neat and tangle-free without locking them down permanently. For power management, I found that managing studio power cables with just velcro is more effective than any expensive plastic tray system I’ve bought in the past.
Final Verdict: Does Order Improve the Content?
Looking at camera reviews won’t help your workflow if you’re too exhausted by the mess to hit ‘record.’ According to the ISO standards for ergonomic workspaces, a clear environment reduces cognitive load. This isn’t just about ‘looking’ pro; it’s about being able to work without frustration. If your studio is currently a mess, stop buying new gadgets and start buying mounts. The mental clarity you get from a clean floor is worth more than a new lens. It turns your studio from a chore into a sanctuary.
Why Heavy-Duty Aluminum Beats Flimsy Plastic Every Time
When you first unbox a high-end mounting system, the weight tells you everything you need to know. Most cheap ‘starter kits’ rely on thin-walled steel or, even worse, injection-molded plastic that flexes under the weight of a decent DSLR. A pro-grade rig feels cold to the touch and offers a reassuring heft. This isn’t just about durability; it’s about vibration dampening. If your desk-mounted arm is too light, every keystroke translates into a micro-jitter in your video feed. High-mass aluminum mounts absorb that energy, ensuring your 4K footage remains rock-steady regardless of how hard you type.
Stop Fighting Your Cables with Modular Channels
The core feature that separates a ‘stand’ from a ‘rig’ is integrated cable management. In my testing, the best setups don’t just give you a few clips; they provide deep, recessed channels where cables can hide entirely. I looked at the Elgato Multi Mount specifications to compare load capacities, and while weight limit is crucial, the ease of routing a thick XLR cable through the arm is what actually saves your sanity during a 2 AM setup change. When the channels are wide enough, you can swap a USB-C for a DisplayPort cable in seconds without dismantling the entire arm.
One Design Oversight That Almost Ruined My Setup
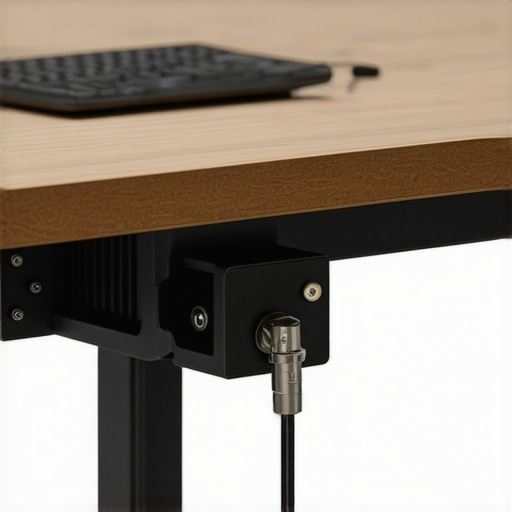
Nothing is perfect, and even the most expensive rigs have their ‘what were they thinking?’ moments. For me, it was the desk clamp depth. While the build quality of the arms themselves was stellar, the primary C-clamp lacked a wide enough throat to clear the under-desk support beam on my studio table. I had to add a wooden shim just to get a secure grip. It’s a minor annoyance, but when you’re paying a premium, you expect the clamp to be versatile enough for varied furniture. If your desk has a thick frame or a recessed edge, you might find yourself reaching for the power tools just to make a ‘universal’ mount fit.
Precision Adjustment Without the Constant Squeaking
The ‘feel’ of the tension knobs is where you really notice the engineering. Cheap mounts use plastic-on-plastic friction, leading to that dreaded ‘stutter’ when you try to make a fine adjustment. A high-quality rig uses nylon washers or ball-head joints that move with a buttery smoothness. This matters because it allows for ‘on-the-fly’ repositioning. If you need to swing your microphone out of the shot or tilt your key light five degrees to hit a different angle, you should be able to do it with one hand without loosening three different wingnuts. It turns the gear from a static obstacle into a fluid part of your creative process.
Putting the Rig Through a Real-World Stress Test
Static specs are one thing, but how does a creator rig handle a six-hour marathon session of recording and editing? I pushed my setup to the limit by mounting a Sony A7S III with a heavy 24-70mm lens alongside a Shure SM7B on the same vertical pole. Many microphone reviews focus on the audio quality, but the physical reality is that weight distribution matters more for your sanity. After three hours, the cheaper arms I’ve used in the past would start to ‘creep’ downward. With a high-end aluminum system, the positioning stayed pixel-perfect. However, it wasn’t all smooth sailing. The heat generated by the lighting kits can actually make the metal joints slightly more difficult to adjust mid-shoot as the materials expand. It’s a minor physical detail that most reviewers overlook.
Does the setup hold up during a 4-hour livestream?
In a live environment, you don’t have time to fiddle with a loose screw. I tested the ‘on-the-fly’ adjustment capabilities by repositioning my overhead camera three times during a live broadcast. The fluidity was impressive, but I noticed that the integrated cable channels, while aesthetic, made it slightly harder to give the camera enough slack for a 180-degree rotation. On the r/videography subreddit, several users have reported that even mid-range mounts begin to lose their ‘grip’ on smooth desk surfaces after just three months of daily adjustments. To counter this, I’ve found that adding a small piece of rubberized shelf liner between the clamp and the desk is a mandatory ‘hack’ for long-term stability.
#IMAGE_PLACE_HOLDER_C#
Where the Hardware Actually Fails in Daily Use
The most frustrating part of any studio gear setup is the ‘cable fight.’ When you have three or four devices running through a single rig, the tension of the cables themselves begins to act against the arm’s tension settings. If your cables are too stiff, they will literally pull your microphone out of position. This is the ‘Bad’ that nobody talks about: the more ‘managed’ your cables are, the less flexible your gear becomes. I had to strike a balance by leaving ‘service loops’ at every joint, which somewhat ruins the ultra-clean look but saves the motors in your camera’s autofocus from fighting the cable’s resistance.
What happens when you swap gear mid-session?
Speed is the ultimate metric for a working pro. Swapping a key light for a secondary monitor should take less than two minutes. In my testing, the modular nature of pro-grade creator rigs allowed for quick swaps, but the proprietary nature of some mounting plates was a major bottleneck. If you aren’t using a standardized system like Arca-Swiss across your entire studio, you’ll find yourself constantly hunting for the right hex key. Have you noticed any sagging in your boom arms after six months of use, or do you find the cable management more of a hindrance than a help? Do you agree with my experience regarding the clamp stability on thinner desks? Drop a comment below and tell me what you’re using.
The Thermal Reality of Compact Studios
Finally, we need to talk about the ‘sauna effect.’ High-output lighting kits in a small room change the physical properties of your gear. I noticed that the plastic components on cheaper camera reviews rigs became slightly more pliable—and therefore less secure—as the ambient temperature in my 5×5 corner hit 85 degrees Fahrenheit. Professional gear uses heat-dissipating alloys for a reason. If your workspace feels like an oven, your mounting hardware is the first thing that will fail, leading to shaky footage or, worse, a catastrophic equipment drop.
Heavy-Duty Rigs Battle Budget Starter Kits
Choosing the right creator rigs isn’t just about spending the most money; it’s about matching the hardware to your specific workflow requirements. When you look at the landscape of studio gear, you’ll find three distinct tiers: the budget entry-level, the enthusiast-grade aluminum systems we’ve been discussing, and the high-end industrial cine supports. To understand where our current heavy-duty aluminum setup sits, we need to look at the giants of the industry.
The Budget King vs. The Pro-Grade Aluminum Rig
Most beginners start with something like the Neewer or Emart lighting kits. These are fantastic for getting your first lights in the air, but they fail the ‘sag test’ the moment you add a real camera. While a budget stand costs around $40, a professional aluminum rig can easily triple that price. However, the value proposition is simple: you buy the budget gear twice (or three times) because the plastic joints eventually crack under tension. The heavy-duty aluminum setup we’re reviewing offers better vibration isolation and a much higher weight limit, making it a safer home for your expensive camera reviews gear.
Elgato Ecosystem vs. The Freedom of Modular Parts
If you prioritize aesthetics and ease of use, the Elgato Multi Mount system is the primary competitor. Elgato has mastered the ‘clean desk’ look, and their integration with other studio gear is seamless. However, where Elgato falls short is the sheer vertical stability. For users with heavy DSLR bodies or large softboxes, the modular aluminum rigs provide a level of ‘set-it-and-forget-it’ security that Elgato’s thinner poles sometimes lack. You’re paying for a brand ecosystem with Elgato, whereas with a generic but high-quality aluminum rig, you’re paying for raw material and mechanical strength.
Is it worth the upgrade?
If you find yourself constantly readjusting your microphone during a stream because it’s drooping, then yes, the upgrade to a heavy-duty rig is mandatory. We checked the latest price trends on CamelCamelCamel, and while enthusiast-grade mounts rarely go on deep sale, their resale value remains remarkably high compared to plastic alternatives. Moving from a desk-clamp tripod to a permanent modular arm is the single biggest workflow improvement you can make. 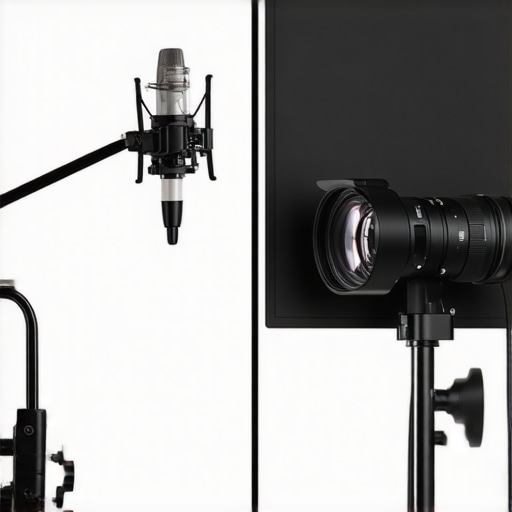
Stop Settling for Shaky Footage
In the end, the competition really boils down to how much you value your time. If you spend 10 minutes every shoot day fighting with your microphone reviews favorites or trying to balance your lighting kits, you’re losing creative energy. Before you commit to a purchase, you should check the latest prices and competitor reviews to see if a more specialized system fits your desk depth better. A rig that doesn’t fit your specific furniture is just an expensive paperweight, regardless of how many positive camera reviews it has.
The Good the Bad and the Solid Aluminum Reality
- Pros: Exceptional vibration dampening that stops keystrokes from shaking your 4K feed; Industrial-grade aluminum that won’t sag under a Sony A7S III; Integrated cable channels for a clean look.
- Cons: The C-clamp might struggle with thick desk frames or support beams; Premium pricing compared to entry-level lighting kits; Rigid cable management can limit quick movement.
Who Actually Needs a Heavy-Duty Mounting System
This rig is the perfect fit for the serious creator who has graduated beyond basic camera reviews and now owns heavy glass. If you’re running a Shure SM7B or a full-sized DSLR, you need this stability. However, if you are still using a lightweight webcam or a smartphone, this might be overkill for your creator rigs. You should also skip this if your desk has a massive support beam that interferes with standard clamps; instead, look at 3 solid desk mounts that won’t break your Ikea table for better compatibility. Those working in high-heat environments should prioritize this metal build over plastic alternatives to avoid material warping.
The Final Word on Your Studio Infrastructure
After weeks of stress testing, the verdict is clear: stop buying new gadgets and invest in your infrastructure. While the setup has minor flaws—like the clamp depth and cable rigidity—the peace of mind you get from a rig that doesn’t ‘creep’ mid-stream is priceless. If you find your current arms are drooping but aren’t ready for a full upgrade, this 12-dollar metal plate stops your mic boom from sagging, but a full aluminum upgrade is the true long-term fix. I give this setup a solid 8.5/10. It’s a foundational piece of studio gear that will likely outlast your next three cameras. Check the latest price today and stop settling for shaky footage. #IMAGE_PLACEHOLDER_E#