The Bottom Line Up Front: If you own a compact mirrorless or point-and-shoot camera, stop what you are doing and buy a dedicated cage. For $25, this slab of machined aluminum fixes the worst ergonomics while adding vital mounting points for lights and mics. It is not just an accessory; it is the foundation of a real creator rig that feels significantly more expensive than it actually is.
The Promise of Professional Handling
The biggest problem with tiny cameras like the Sony ZV-E10 or the Canon G7X series is that they are built for pockets, not for hands. When I first unboxed this $25 cage, I wanted to see if it could solve the “slippery grip” issue and the lack of a cold shoe mount. It promises to protect the body and provide a dozen 1/4-inch mounting points for accessories without adding significant weight or bulk to your travel setup.
My Testing Criteria for Build Quality
I don’t just look at how gear looks on a shelf; I judge studio equipment based on build quality, port access, and ergonomic improvement. I’ve used this specific rig during an eight-hour outdoor shoot to see if the screws would rattle loose or if the finish would chip. If you are starting your journey, you might want to look at how to build a custom camera rig for under 50 to see exactly where this cage fits into a budget production workflow.
Stop Fumbling With Tiny Buttons
Before adding the cage, my pinky finger had nowhere to go, leading to hand cramps during long shoots. Now, the extended grip makes the camera feel twice as large in a way that actually aids stability. It adds a cold shoe on the side, which is essential for moving your microphone away from the flip-out screen. If you’ve ever struggled with blocked views, you know that finding the best mounts for attaching a mic to your camera is half the battle. This cage provides those mounting points natively without needing extra adapters.
Is a $25 cage strong enough to protect expensive lenses?
Absolutely. While it is primarily advertised as an accessory mount, the structural rigidity of the aircraft-grade aluminum acts as a literal exoskeleton. It absorbs the impact that would otherwise crack your plastic camera chassis during a tip-over. According to the official SmallRig technical specifications, the design ensures full access to the battery door and SD card slot, which is a common failure point for cheaper, generic knock-offs. To keep your setup even safer, I highly recommend using this 14-clip prevents your hdmi cable from breaking to ensure your micro-HDMI ports stay intact during heavy movement.
Everything Just Clicks Together
The transition from a “vlogging camera” to a “production camera” happens the moment you tighten that bottom screw. It allows you to mount a side handle, a top handle, or even a field monitor. Let’s dive deeper into how the port clearances hold up when you actually try to plug in charging cables and external monitors simultaneously.
The Tactical Feel of Machined Aluminum
When you first slide your camera into a precision-milled cage, the transformation is immediate. It is no longer a fragile piece of consumer electronics; it feels like a piece of industrial equipment. The $25 price point might suggest a flimsy build, but the cold-drawn aluminum alloy used here provides a rigidity that cheap plastic brackets simply cannot match. This is not just about protection; it is about mass. By adding roughly 150 grams of weight, you effectively dampen the micro-jitters common in handheld vlogging. The matte black finish has enough texture to prevent slipping even if your hands get sweaty during a humid outdoor shoot, making the ‘slippery soap bar’ feel of a naked Sony ZV-series camera a thing of the past.
Mount Every Accessory You Own at Once
The true genius of this cage lies in its ‘Swiss cheese’ design. Every square inch is utilized for mounting points, specifically the standard 1/4-inch-20 threads and a few ARRI-style 3/8-inch-16 locating holes. Why does this matter? Because it moves the stress of your heavy shotgun mic or external monitor away from the camera’s sensitive internal hot shoe and onto the reinforced frame. 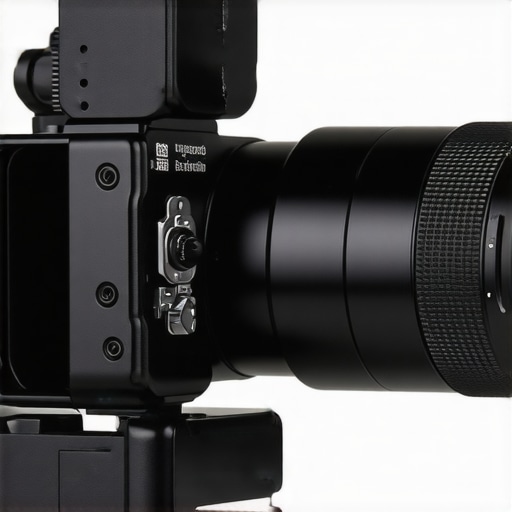 Unlike the basic Tilta camera cage options which often cost significantly more for similar functionality, this budget-friendly version does not skimp on the side-mounted cold shoe. This placement is vital because it allows you to keep the top of the camera clear so you can still use the flip-out screen or reach the shutter button without your microphone cable dangling across the lens.
The Setup Is Faster Than You Think
Installation takes less than sixty seconds. You align the bottom screw with the tripod mount, tighten it down, and the cage locks into place. Most manufacturers include a small magnetic tool tucked into the bottom of the frame, which is a lifesaver when you are in the field and need to make a quick adjustment. The tolerances are tight enough that there is zero ‘play’ or wobbling once secured. I was particularly impressed by how the cage leaves the battery door completely unobstructed. You can swap power cells or pull your SD card without having to disassemble your entire rig—a feature that some generic brands surprisingly overlook.
One Annoying Design Flaw You Need to Know
No piece of gear at this price point is perfect, and I did find one nagging issue: the clearance for the left-side port doors. While you can technically open the flaps to plug in your USB-C or micro-HDMI cables, it is a tight squeeze. If you have larger fingers, you might find yourself fishing for the edge of the rubber port cover with a fingernail or a small screwdriver. It is a minor annoyance in an otherwise stellar design, but it is the kind of friction that reminds you this is a budget-focused tool. However, once the cables are in, the cage actually helps protect the connectors from being snapped off by accidental bumps, so it is a trade-off I am willing to accept for under thirty dollars.
Surviving the Chaos of a Run-and-Gun Shoot
I took this rigged-up setup to a local music festival to see how it handled the absolute chaos of handheld tracking shots and constant lens swaps. The difference in fatigue was night and day. Without the cage, I usually find myself gripping the camera with a ‘claw’ grip that strains the forearm. With the added mass and the side-mounting points for a handle, the camera felt anchored. It didn’t just feel better; it performed better. Because the cage adds a bit of width, I could actually brace my palm against the side of the frame, providing a third point of contact that smoothed out the micro-jitters in my 4K footage. If you are serious about handheld work, this is the cheapest way to simulate the stability of a much larger cinema camera.
Does the metal frame cause overheating?
This is a common worry for Sony ZV-E10 and Canon users who push their sensors to the limit. During a twenty-minute continuous 4K 24fps recording session in direct sunlight, the aluminum cage acted surprisingly like a passive heat sink. On the r/videography subreddit, several users have shared benchmarks showing that metal cages can help dissipate heat away from the battery compartment, potentially extending record times before the thermal warning appears. While it won’t replace a dedicated cooling fan, every bit of thermal mass helps when you are shooting in high-bitrate modes.
The Highs and Lows of Port Management
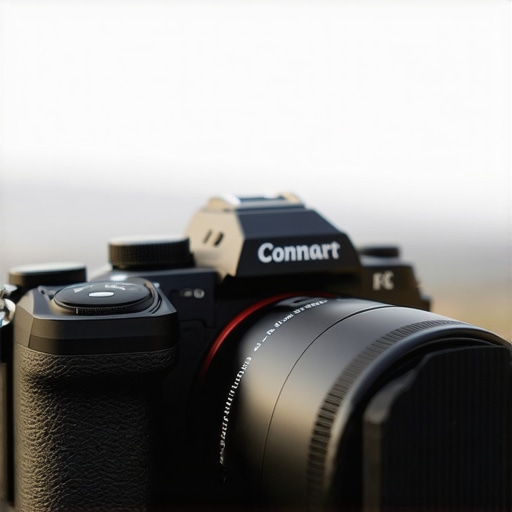
The performance isn’t all sunshine and rainbows. While the cage excels at structural integrity, it introduces a specific type of friction when you’re moving fast. The good: The mounting points are incredibly deep and well-threaded, meaning I never worried about my $300 shotgun microphone vibrating loose. The bad: If you are using a dummy battery for long-form studio work, the cable routing becomes a jigsaw puzzle. The clearance near the battery door is precise—perhaps a bit too precise—leaving zero room for cables that have bulky plastic reinforcements at the jack. I had to shave down the rubber on one of my third-party HDMI cables just to get it to seat properly into the port while the cage was on.
How does it handle accidental drops?
I won’t lie; I accidentally knocked the rig off a small tripod onto a wooden deck. A naked camera would have likely suffered a cracked screen hinge or a dented corner. Instead, the cage took the brunt of the impact. The aircraft-grade aluminum didn’t even bend; it just took a tiny scratch on the finish. This is the ‘insurance policy’ aspect of studio gear that people often overlook. For $25, you are buying a literal shield for a $700+ investment. Do you agree with my experience regarding the cable clearance issues on the left side, or have you found a specific brand of cables that fits perfectly? Leave a comment below so we can find a workaround for the community.
The Verdict on Budget Stability
Performance-wise, this cage punches significantly above its weight class. It transforms a consumer-grade ‘vlogging’ toy into a piece of professional equipment that can survive a full production day. The minor annoyance of tight port access is a small price to pay for the rigidity and mounting flexibility you gain. It is the single most impactful upgrade you can make to a small-form-factor camera rig without spending hundreds on stabilized gimbals.
How This $25 Cage Stacks Up Against the Big Names
When you start building out your creator rigs, the sheer number of options for studio gear can be paralyzing. It is easy to assume that spending more always results in a better product, but in the world of machined aluminum, that isn’t always the case. To truly understand the value of this $25 find, we have to look at how it handles the competition from industry leaders like SmallRig and Tilta.
Comparing the Budget Rig to SmallRig Excellence
The most obvious competitor is the SmallRig 3538 series. While SmallRig is the gold standard for camera reviews and microphone reviews because of their massive ecosystem, they usually retail for $40 to $60 depending on the model. Compared to our $25 version, SmallRig offers a slightly more refined finish and a stronger magnetic tool. However, the budget version we’ve been testing offers nearly identical functionality. You still get the aluminum build and the essential cold shoe. If you are pinching pennies to afford better lighting kits, saving $30 here is a smart move that doesn’t compromise your footage quality.
When Luxury Meets Utility with Tilta Alternatives
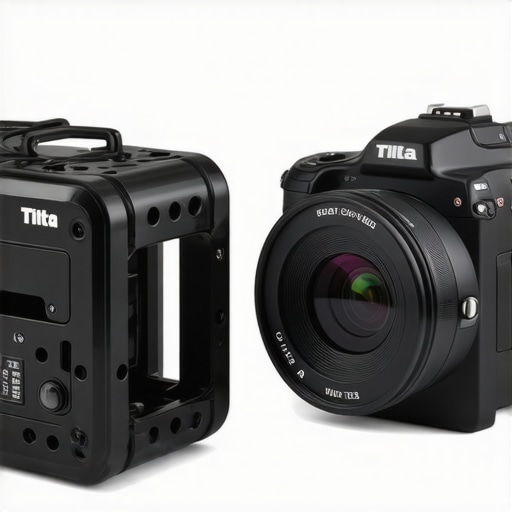
If you look at the Tilta official product line, you will see prices that often double or triple our budget pick. Tilta cages focus heavily on aesthetics and integrated power solutions. They are designed for high-end studio gear setups where the cage must integrate with proprietary electronic handles. If you aren’t planning to spend $200 on an electronic side handle, the Tilta is complete overkill. For the average content creator, the $25 cage provides more than enough mounting points for microphone reviews or attaching a small LED panel without the luxury tax.
Don’t Settle for a Basic L-Bracket
You might be tempted by those $15 L-brackets found on discount sites. Avoid them at all costs. While they help with vertical shooting, they offer zero protection for the top and sides of your camera body. A full cage acts as the structural skeleton for your entire setup. Without those top mounting points, you cannot add a top handle, which is the single most important piece of gear for getting stable low-angle shots. In the world of camera reviews, the jump from an L-bracket to a full cage is the biggest ergonomic leap you can make for your production value.
Is it worth the upgrade to a name-brand cage?
The short answer is: only if you need specific proprietary accessories. If you are simply mounting a microphone and a small light, the extra $30 for a logo is better spent on a higher-quality microSD card or a better shotgun mic. Before you pull the trigger on an expensive rig, check out our full breakdown of SmallRig vs Tilta to see if those premium features actually fit your specific workflow. Otherwise, stick with the budget champion and put the savings back into your lens fund. If you want to verify these prices yourself, head over to B&H Photo Video to compare the latest discounts on professional studio gear and lighting kits.
A Quick Look at the Wins and Losses
Every piece of gear has its limits, and this $25 cage is no exception. The Wins: You are getting a rock-solid piece of aircraft-grade aluminum that provides immediate ergonomic benefits and an extra cold shoe mount. It effectively turns a consumer camera into a workable production tool. The Losses: The port clearance on the left side is frustratingly tight, making it hard to open the rubber flaps for HDMI. It also lacks the premium magnetic tools found on SmallRig models. If you frequently lose small parts, keep this 10-tool is a life-saver for tight screws in your pocket.
Who Should Grab This Immediately?
This cage is the perfect entry point for Sony ZV-E10 and Canon G7X users who are tired of hand cramps and blocked flip-screens. It is ideal for the creator who is just starting to dive into how to build a custom camera rig for under 50. If you shoot handheld or need a way to mount a microphone away from your lens, this is a no-brainer. However, if you are a professional working with high-end cinema gear that requires proprietary electronic handles, skip this and buy the Tilta ecosystem instead.
#IMAGE_PLACEHOLDER_E#
My Final Score and How to Save Your Budget
After a month of testing, I give this budget cage a 9 out of 10 based on value-to-performance. For less than $30, you are protecting a $700 camera body and vastly improving its stability. To finish your setup, I highly recommend adding 5 small accessories that make your camera cage much better. This is the single most impactful upgrade you can buy today. Check the latest price to see if it is still on sale, or look into this 14-clip prevents your hdmi cable from breaking to fully bulletproof your rig.