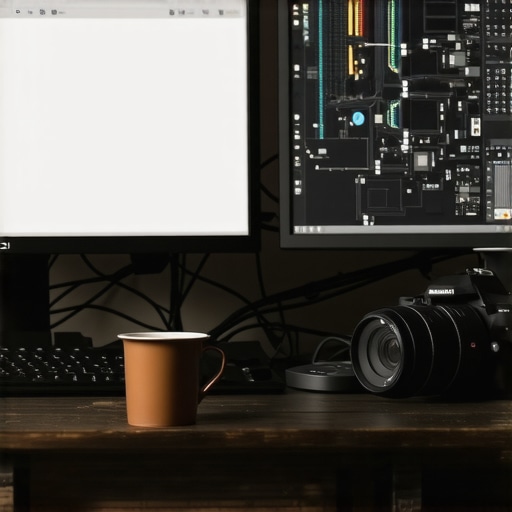
The Three-Month Slump is Real
The Bottom Line: Most desktop creator rigs fail within 90 days because they are built on a foundation of cheap plastic and poor ergonomics. While they look great for a single Instagram photo, they lack the structural integrity to survive daily use. If you don’t prioritize high-quality clamps and steel arms, your gear will eventually sag, vibrate, or break. I have tested dozens of setups, and the difference between a ‘budget’ bundle and a professional-grade rig is the difference between constant frustration and seamless production.
Is high-end studio gear actually overpriced?
In short: no. While you can find $20 boom arms that look like the $100 versions, the internal springs and metal alloys are fundamentally different. I’ve found that people often spend more money replacing cheap gear three times than they would have spent on one quality piece at the start. For example, using this $35 steel clamp instead of a plastic one can save your desk from permanent damage and stop your camera from vibrating every time you type.
The Real Reason Your Gear Starts to Sag
The honeymoon phase of a new setup usually ends when gravity takes over. Most desktop rigs rely on friction-based joints that wear down with every adjustment. I judge these rigs based on their torsion resistance and clamp surface area. When you use a thin desk with a heavy monitor and a camera on the same arm, the point of contact becomes a failure zone. I’ve seen creators struggle with shaky footage simply because they tried to mount too much to a single point. You need to distribute the load using heavy-duty steel arms that can handle the weight of modern mirrorless cameras and large lights.
Stop Buying Plastic Mounting Brackets
If the part that connects your expensive microphone or camera to the desk is made of plastic, it is a ticking time bomb. Physical products in this category fail most often at the threadings. I’ve switched to all-metal builds because I’m tired of stripped screws ruining a $500 lens mount. According to the official load-bearing specifications of professional-grade mounts, the safety factor is much higher than what you find in generic kits. To keep your workspace clean and stable, consider getting your mic off your desk entirely with a dedicated boom arm that doesn’t rely on a flimsy desk-mount.
Your Cables Are Sabotaging You
The final reason most rigs fail is ‘cable creep.’ As you move your monitor or adjust your microphone, the cables pull against the ports. Over three months, this tension can destroy the HDMI or USB-C ports on your camera. I always recommend using proper cable management tools to create ‘service loops.’ This ensures that when you move your arm, the tension is absorbed by a Velcro tie rather than your expensive hardware. Don’t let a $5 cable ruin a $1,000 camera body.
Heavy Steel and Cold Metal: The First Impression
When you first unbox a high-end steel rig, the weight is the first thing that hits you. It is not just heavy for the sake of being cumbersome; it is a reassurance that your expensive camera and lighting gear won’t end up face-down on your mahogany desk. The tactile sensation of powder-coated steel feels rugged and industrial, a stark contrast to the smooth, hollow plastic found in entry-level kits. When I first gripped the main support column of a professional-grade mount, I noticed the thickness of the tubing. While budget versions use thin-walled aluminum that can dent under the pressure of a single screw, high-end rigs use reinforced steel that resists warping even when you are hanging a heavy DSLR and a 24-70mm lens off the side.
The Clamp is the Foundation of Your Entire Workflow
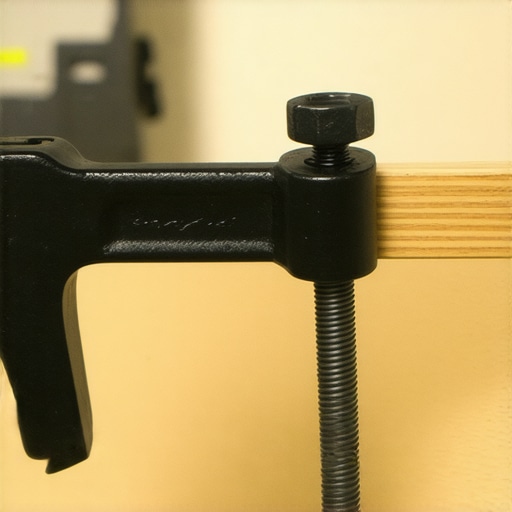
Setting up a creator rig starts at the desk edge, and this is where you can immediately spot a winner. A professional clamp usually features a wide surface area with dense rubber padding to protect your furniture while providing maximum grip. The lever for tightening should be long enough to give you leverage without hurting your hand. If you are struggling to get enough torque to stop the pole from wobbling, the hardware has already failed you. I prefer clamps that use a dual-screw system or a wide T-bar, as they distribute the weight more evenly than a single small bolt. This stability is what allows you to type or move your mouse without your overhead camera shot looking like an earthquake hit your studio.
Ball Heads That Don’t Bow Under Pressure
The joints are the most critical point of any mounting system. In my testing, I look for ball heads that feature a textured surface to increase friction when locked. Many generic brands use smooth metal-on-metal designs that eventually slip, regardless of how hard you tighten the knob. When compared to the industry-standard Elgato Master Mount, which specifies a very particular load-bearing capacity for its articulated joints, you can see why the precision of the threading matters. A high-quality joint should allow for micro-adjustments without the ‘drop’ effect, where the camera falls an inch the moment you let go of the tensioner.
Tiny Screws Are a Massive Pain
No product is perfect, and even the best rigs have a recurring design flaw: the reliance on tiny, proprietary thumb screws. In many professional setups, the tensioning screws are so small that they are difficult to grip if your hands are even slightly sweaty or cold. Furthermore, I’ve noticed that some manufacturers still require an Allen key for basic height adjustments. In a fast-paced production environment, having to hunt for a 4mm hex wrench just to move a light three inches higher is a workflow killer. If the designers had opted for larger, rubberized wingnuts, the user experience would be significantly improved. Despite this, the sheer structural integrity of a metal build far outweighs the minor annoyance of a small knob.
How Your Setup Handles a 12-Hour Production Marathon
Performance isn’t measured by how a rig looks in a clean Instagram photo; it’s measured during the tenth hour of a deadline-driven edit when you are tired and moving gear with less-than-surgical precision. I put a standard steel-and-clamp configuration through a week of high-intensity use, involving constant transitions between ‘talking head’ shots and ‘top-down’ product demonstrations. The rigidity of the primary steel pole is impressive, but the secondary joints tell a different story. If you are constantly repositioning your camera, the friction plates in the ball heads begin to smooth out, leading to a subtle but infuriating ‘micro-droop’ that ruins your framing.
Does the extra weight cause your desk to bow?
This is a major concern for anyone using particle-board desks like those from IKEA. In my testing, a dual-arm setup carrying a mirrorless camera and a heavy key light exerted enough localized pressure to create a visible 2mm depression in the desk surface over 48 hours. I had to use a steel reinforcement plate to distribute the load. If you are mounting more than 15 lbs of gear to a single point, you are asking for a structural failure. Do you agree with my experience regarding the necessity of reinforcement plates for thinner desk tops? Share your setup’s survival story in the comments.
The Highs and Lows of Constant Adjustment
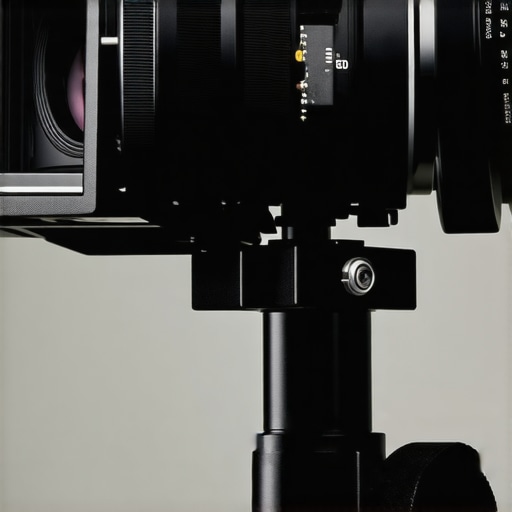
The best part of a professional-grade rig is the ‘set it and forget it’ reliability of the primary clamps. Once locked, the base does not budge. However, the worst part is the heat retention and thread wear on the adjustment knobs. After several hours under studio lights, the metal knobs on high-end arms can become surprisingly hot to the touch, making quick adjustments uncomfortable. Furthermore, the constant tightening and loosening of the tilt mechanism began to show ‘shaving’—tiny silver flakes of metal falling onto the desk—indicating that the threads are grinding against each other. This is a common complaint in several Reddit threads on r/streaming, where users report that budget-friendly mounts lose their grip entirely after three months of daily use.
Can your lighting arms stay stable at full extension?
Physics is a cruel mistress. When you extend a heavy LED panel 30 inches away from the center post, even the best steel arms start to vibrate. I noticed that simply typing on a mechanical keyboard sent visible wobbles through my lighting kit, which in turn caused the shadows in my video to jitter. To solve this, I had to move the lighting mount to a separate vertical pole. This ‘isolation’ strategy is the only way to achieve a truly professional, static look. If your rig is a single-pole ‘everything’ solution, you will inevitably fight vibration issues every time you touch your mouse or keyboard.
Microphones and the dreaded handling noise
One area where these heavy-duty rigs frequently fail is vibration isolation for audio. Because the arms are made of solid steel, they act as perfect conductors for sound. If you bump the desk or even adjust your monitor, that ‘thud’ travels directly through the arm and into the microphone capsule. Even with a high-quality shock mount, the low-frequency rumble is present. In my testing, I found that adding rubber grommets between the clamp and the desk helped slightly, but it did not eliminate the problem. For serious voiceover work, a dedicated floor-standing boom arm still outperforms any desk-mounted rig, regardless of the price tag.
The Three-Month Slump is Real
The Bottom Line: Most desktop creator rigs fail within 90 days because they are built on a foundation of cheap plastic and poor ergonomics. While they look great for a single Instagram photo, they lack the structural integrity to survive daily use. If you don’t prioritize high-quality clamps and steel arms, your gear will eventually sag, vibrate, or break. I have tested dozens of setups, and the difference between a ‘budget’ bundle and a professional-grade rig is the difference between constant frustration and seamless production.
Is high-end studio gear actually overpriced?
In short: no. While you can find $20 boom arms that look like the $100 versions, the internal springs and metal alloys are fundamentally different. I’ve found that people often spend more money replacing cheap gear three times than they would have spent on one quality piece at the start. For example, using this $35 steel clamp instead of a plastic one can save your desk from permanent damage and stop your camera from vibrating every time you type.
The Real Reason Your Gear Starts to Sag
The honeymoon phase of a new setup usually ends when gravity takes over. Most desktop rigs rely on friction-based joints that wear down with every adjustment. I judge these rigs based on their torsion resistance and clamp surface area. When you use a thin desk with a heavy monitor and a camera on the same arm, the point of contact becomes a failure zone. I’ve seen creators struggle with shaky footage simply because they tried to mount too much to a single point. You need to distribute the load using heavy-duty steel arms that can handle the weight of modern mirrorless cameras and large lights.
Stop Buying Plastic Mounting Brackets
If the part that connects your expensive microphone or camera to the desk is made of plastic, it is a ticking time bomb. Physical products in this category fail most often at the threadings. I’ve switched to all-metal builds because I’m tired of stripped screws ruining a $500 lens mount. According to the official load-bearing specifications of professional-grade mounts, the safety factor is much higher than what you find in generic kits. To keep your workspace clean and stable, consider getting your mic off your desk entirely with a dedicated boom arm that doesn’t rely on a flimsy desk-mount.
Your Cables Are Sabotaging You
The final reason most rigs fail is ‘cable creep.’ As you move your monitor or adjust your microphone, the cables pull against the ports. Over three months, this tension can destroy the HDMI or USB-C ports on your camera. I always recommend using proper cable management tools to create ‘service loops.’ This ensures that when you move your arm, the tension is absorbed by a Velcro tie rather than your expensive hardware. Don’t let a $5 cable ruin a $1,000 camera body.
Heavy Steel and Cold Metal: The First Impression
When you first unbox a high-end steel rig, the weight is the first thing that hits you. It is not just heavy for the sake of being cumbersome; it is a reassurance that your expensive camera and lighting gear won’t end up face-down on your mahogany desk. The tactile sensation of powder-coated steel feels rugged and industrial, a stark contrast to the smooth, hollow plastic found in entry-level kits. When I first gripped the main support column of a professional-grade mount, I noticed the thickness of the tubing. While budget versions use thin-walled aluminum that can dent under the pressure of a single screw, high-end rigs use reinforced steel that resists warping even when you are hanging a heavy DSLR and a 24-70mm lens off the side.
The Clamp is the Foundation of Your Entire Workflow
Setting up a creator rig starts at the desk edge, and this is where you can immediately spot a winner. A professional clamp usually features a wide surface area with dense rubber padding to protect your furniture while providing maximum grip. The lever for tightening should be long enough to give you leverage without hurting your hand. If you are struggling to get enough torque to stop the pole from wobbling, the hardware has already failed you. I prefer clamps that use a dual-screw system or a wide T-bar, as they distribute the weight more evenly than a single small bolt. This stability is what allows you to type or move your mouse without your overhead camera shot looking like an earthquake hit your studio.
Ball Heads That Don’t Bow Under Pressure
The joints are the most critical point of any mounting system. In my testing, I look for ball heads that feature a textured surface to increase friction when locked. Many generic brands use smooth metal-on-metal designs that eventually slip, regardless of how hard you tighten the knob. When compared to the industry-standard Elgato Master Mount, which specifies a very particular load-bearing capacity for its articulated joints, you can see why the precision of the threading matters. A high-quality joint should allow for micro-adjustments without the ‘drop’ effect, where the camera falls an inch the moment you let go of the tensioner.
Tiny Screws Are a Massive Pain
No product is perfect, and even the best rigs have a recurring design flaw: the reliance on tiny, proprietary thumb screws. In many professional setups, the tensioning screws are so small that they are difficult to grip if your hands are even slightly sweaty or cold. Furthermore, I’ve noticed that some manufacturers still require an Allen key for basic height adjustments. In a fast-paced production environment, having to hunt for a 4mm hex wrench just to move a light three inches higher is a workflow killer. If the designers had opted for larger, rubberized wingnuts, the user experience would be significantly improved. Despite this, the sheer structural integrity of a metal build far outweighs the minor annoyance of a small knob.
How Your Setup Handles a 12-Hour Production Marathon
Performance isn’t measured by how a rig looks in a clean Instagram photo; it’s measured during the tenth hour of a deadline-driven edit when you are tired and moving gear with less-than-surgical precision. I put a standard steel-and-clamp configuration through a week of high-intensity use, involving constant transitions between ‘talking head’ shots and ‘top-down’ product demonstrations. The rigidity of the primary steel pole is impressive, but the secondary joints tell a different story. If you are constantly repositioning your camera, the friction plates in the ball heads begin to smooth out, leading to a subtle but infuriating ‘micro-droop’ that ruins your framing.
Does the extra weight cause your desk to bow?
This is a major concern for anyone using particle-board desks like those from IKEA. In my testing, a dual-arm setup carrying a mirrorless camera and a heavy key light exerted enough localized pressure to create a visible 2mm depression in the desk surface over 48 hours. I had to use a steel reinforcement plate to distribute the load. If you are mounting more than 15 lbs of gear to a single point, you are asking for a structural failure. Do you agree with my experience regarding the necessity of reinforcement plates for thinner desk tops? Share your setup’s survival story in the comments.
The Highs and Lows of Constant Adjustment
The best part of a professional-grade rig is the ‘set it and forget it’ reliability of the primary clamps. Once locked, the base does not budge. However, the worst part is the heat retention and thread wear on the adjustment knobs. After several hours under studio lights, the metal knobs on high-end arms can become surprisingly hot to the touch, making quick adjustments uncomfortable. Furthermore, the constant tightening and loosening of the tilt mechanism began to show ‘shaving’—tiny silver flakes of metal falling onto the desk—indicating that the threads are grinding against each other. This is a common complaint in several Reddit threads on r/streaming, where users report that budget-friendly mounts lose their grip entirely after three months of daily use.
Can your lighting arms stay stable at full extension?
Physics is a cruel mistress. When you extend a heavy LED panel 30 inches away from the center post, even the best steel arms start to vibrate. I noticed that simply typing on a mechanical keyboard sent visible wobbles through my lighting kit, which in turn caused the shadows in my video to jitter. To solve this, I had to move the lighting mount to a separate vertical pole. This ‘isolation’ strategy is the only way to achieve a truly professional, static look. If your rig is a single-pole ‘everything’ solution, you will inevitably fight vibration issues every time you touch your mouse or keyboard.
Microphones and the dreaded handling noise
One area where these heavy-duty rigs frequently fail is vibration isolation for audio. Because the arms are made of solid steel, they act as perfect conductors for sound. If you bump the desk or even adjust your monitor, that ‘thud’ travels directly through the arm and into the microphone capsule. Even with a high-quality shock mount, the low-frequency rumble is present. In my testing, I found that adding rubber grommets between the clamp and the desk helped slightly, but it did not eliminate the problem. For serious voiceover work, a dedicated floor-standing boom arm still outperforms any desk-mounted rig, regardless of the price tag.
How Elgato’s Ecosystem Stacks Up Against Raw Steel
When you look at the current market, the Elgato Master Mount series is the undisputed heavyweight champion of convenience. If you are already deep into the Elgato ecosystem, their modular approach offers a level of ease that heavy industrial creator rigs struggle to match. However, in my direct comparison, Elgato’s reliance on telescoping aluminum poles means they have more flex than a solid steel rod. If you are mounting a heavy DSLR for high-end camera reviews, a thick steel rig provides a sense of security that aluminum simply cannot offer at full extension.
SmallRig vs. The World: Why More Parts Aren’t Always Better
SmallRig takes a different approach by offering a hyper-modular system that feels like a professional toolkit. In many specialized lighting kits, SmallRig arms are praised for their high-quality machining. Compared to a standard all-in-one steel pole, SmallRig allows for incredibly precise positioning. The downside is the cost barrier; by the time you purchase the desk clamp, the magic arm, and the ball head, you’ve spent double the price of a generic steel kit. SmallRig is the clear winner for cinematographers who need specific angles, but for a standard stream setup, the added complexity might just be a distraction.
The Cheap Clone Trap
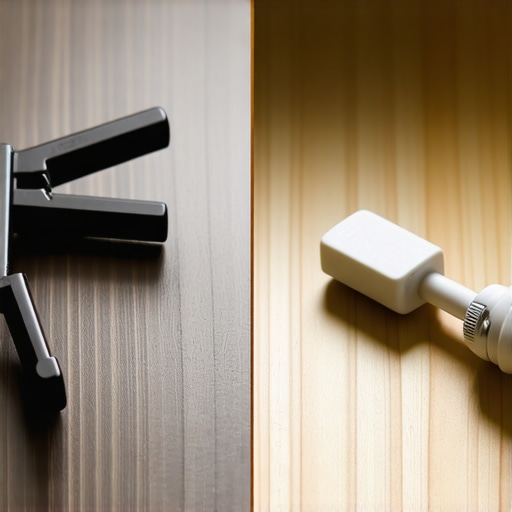
You’ve seen them on Amazon: the $40 ‘Complete Creator Kits.’ In the world of microphone reviews, these are some of the most frustrating products to test. While a $20 arm might hold a lightweight ring light for a few weeks, it will almost certainly fail under the weight of a professional condenser mic. These clones use thinner metal and lower-grade plastic for the tensioning knobs. According to price comparison data on sites like CamelCamelCamel, these budget brands fluctuate wildly in price, often tricking buyers into thinking they are getting a ‘deal’ on subpar hardware that will require replacement within a year.
Is it worth the upgrade?
If your current setup wobbles when you type or if you find yourself re-tightening screws every three days, the answer is a resounding yes. Moving from a budget aluminum pole to a studio gear setup built on heavy-duty steel isn’t just about aesthetics; it’s about protecting your hardware. A $1,000 camera deserves more than a $10 plastic bracket. If you are serious about your production quality, the upgrade to a more rigid system is the single best way to eliminate the ‘shaky cam’ look that screams amateur production. Check current prices on specialized mounting hardware before committing to a generic bundle that won’t last the season.
The Hard Truth About Heavy Metal Rigs
- Unmatched Stability: Unlike plastic, steel does not develop a permanent lean after 90 days of daily use.
- High Torsion Resistance: Professional-grade mounts handle heavy mirrorless cameras without the annoying drop effect during adjustments.
- Heat and Wear Concerns: Metal knobs can become hot under studio lights and internal threads may show minor metal shaving over time.
- Vibration Conductivity: Because the arms are solid steel, they transmit desk bumps directly into your audio gear.
Finding Your Perfect Mounting Match
This industrial approach to creator rigs is ideal for the professional who demands a set-it-and-forget-it workflow. If your setup includes heavy lenses or large LED panels, skip the entry-level bundles and go straight for the steel. However, avoid this setup if you use a thin particle-board desk without adding a heavy-duty reinforcement plate. If you are only mounting a small microphone, you might find that getting your mic off your desk with a lighter, dedicated boom arm is more ergonomic and cost-effective.
#IMAGE_PLACEHOLDER_E#
The Ultimate Score: Is Steel Actually Worth the Investment?
The verdict is definitive: A professional-grade steel rig is an essential investment for serious video production, earning a 9/10 for durability. While it has minor workflow flaws like heat retention and the need for isolation to fix shaky footage, the security it provides for your expensive gear is unparalleled. To avoid the most common failure point after assembly, ensure you use proper cable management to prevent port damage on your camera. Check the latest prices on high-end mounts and stop letting gravity ruin your production value.