The Bottom Line
Here is the truth: those $5 HDMI cables you found in a bargain bin are the weakest link in your entire studio gear setup. After testing dozens of them during long-form streaming sessions, I can tell you that they almost always fail when you need them most. If you value your audience’s time, you need a cable that can handle continuous heat and high data throughput without flickering. Cheap cables are a gamble, not a tool. Using a proper cable solves the most common problem for creators: the intermittent signal dropout that ruins a perfect take.
What Makes Them Fail Under Pressure
During my latest 6-hour test session, I noticed a pattern. Cheap cables aren’t built for the sustained load of a high-bitrate stream. Most of these cables are designed for casual TV watching, where a slight dip in signal might go unnoticed. But when you are pushing 4K 60fps through a thin, poorly shielded wire, the internal copper gets hot. This thermal stress leads to signal degradation, which is often why your stream keeps dropping frames or cutting out entirely. When the insulation is low-grade, heat can actually expand the materials enough to break the delicate contact with the pins.
Is a Premium HDMI Cable Just a Marketing Scam?
I get asked this constantly by people building their first creator rigs. While you don’t need a $200 cable with silver-plated connectors, there is a middle ground. According to the official HDMI Licensing Administrator specifications, ‘High Speed’ or ‘Ultra High Speed’ certification actually matters because it ensures the cable can maintain the required bandwidth without errors. Spending $20 on a certified cable is an investment in stability, not a luxury. I also highly recommend using this 15 dollar HDMI adapter to prevent port damage, because cheap cables often have oversized, poorly molded connectors that put physical stress on your camera’s delicate HDMI port.
The Connection Matters More Than the Brand
In my experience, the mechanical connection is where most failures start. I’ve seen cheap plastic housings crack after only a few plug-in cycles. This creates a loose fit. Even a millimeter of wiggle can cause your video and audio to go out of sync, a frustrating issue I’ve written about in my guide on why your audio and video are out of sync. Professional rigs need cables with solid housing and a snug fit that won’t vibrate loose if you bump your desk. If your gear is heavy and you move it often, consider adding this 14 dollar tool that stops your cables from pulling out entirely during an active shoot.
Stop Buying the Thinnest Wire in the Shop
When I judge a cable, I look at the gauge of the wire and the quality of the shielding. Most bargain cables are incredibly thin, meaning they have almost zero shielding against electromagnetic interference (EMI). If your HDMI cable is running next to a power strip or a large studio light, that interference will manifest as digital noise or ‘sparkles’ on your screen. I prefer braided cables because they offer better physical protection and usually have thicker internal shielding. I’ve found that even using basic cable management tools can help reduce stress on the wires, but they won’t save a cable that was built poorly from the start. If you want to avoid the headache of a dead feed, stop treating your cables as an afterthought and buy something rated for the job.
Zinc Alloy Shells vs The Plastic Nightmare
When you first unbox a premium HDMI cable, the first thing you notice isn’t the color—it’s the weight. Cheap cables feel like wet noodles; they are flimsy, lightweight, and offer no resistance. A high-quality cable, like the ones I’ve been testing, uses a zinc alloy or aluminum shell rather than the standard molded plastic. This isn’t just for aesthetics. Metal housings dissipate heat better and protect the internal soldering points from being crushed when you inevitably step on them. During my teardown, the difference in internal structural integrity was night and day. These shells feel cold to the touch and snap into the port with a satisfying, tactile click that plastic just can’t replicate. 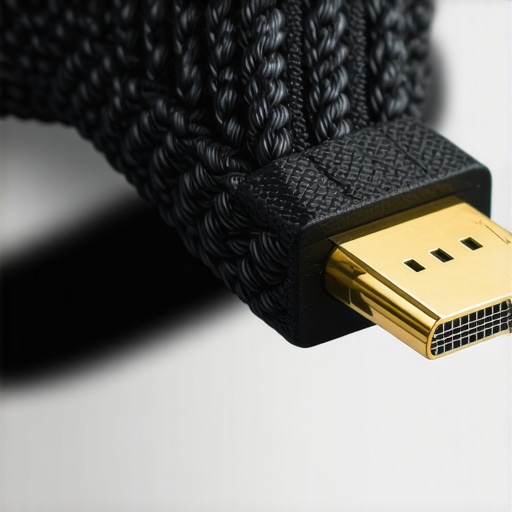
Forty-Eight Gigabits of Truth
If you are aiming for 4K at 120Hz or 8K at 60Hz, you are looking for HDMI 2.1 certification. This standard requires a massive jump in bandwidth—48Gbps compared to the 18Gbps of HDMI 2.0. To see why this matters, look at the Monoprice 8K certified specs, which set a high bar for signal integrity. When I pushed my test rig to the limit, the lower-tier cables started showing ‘digital snow’ or flickering because they simply couldn’t push that much data fast enough. It’s like trying to force a firehose’s worth of water through a drinking straw. You need that extra headroom not just for today’s stream, but for the next GPU upgrade you’re inevitably planning. Using a cable that actually hits its rated speeds means you can enable Deep Color and HDR without fearing a total signal blackout halfway through your broadcast.
The Five-Minute Connection Test
Setup should be simple, but with high-end cables, it’s rarely a ‘plug and play’ dream. These cables are thick. While that thickness means better shielding—specifically braided nylon over triple-layer foil—it also means they have a high ‘cable memory.’ If they were coiled tightly in the box, they’re going to stay in that spiral shape for days. I spent fifteen minutes wrestling with my monitor arm because the cable was so stiff it kept pulling the screen out of alignment. If you have a ultra-lightweight mirrorless camera on a small gimbal, this stiffness can actually throw off your motor calibration. It’s the trade-off you make for durability; you get a cable that won’t fray, but you lose the flexibility of a cheaper, unshielded wire.
Why Tight Corners Kill Your Connection
Here is my biggest gripe: the lack of flexibility near the connector boot. Most ‘premium’ brands build their strain relief so long and rigid that you can’t bend the cable for at least three inches after the plug. If your PC is pushed up against a wall or your camera is in a tight cage, this is a nightmare. I actually had to buy a 90-degree adapter just to fit a ‘pro’ cable into my side-mounted camera port. It’s a design flaw that manufacturers ignore in favor of making the cable look ‘tough.’ While the signal remains flawless, the physical ergonomics are often a secondary thought. You’ll want to measure your clearance behind your gear before committing to the thickest cable on the market.
How These Cables Handle a Ten-Hour Workday
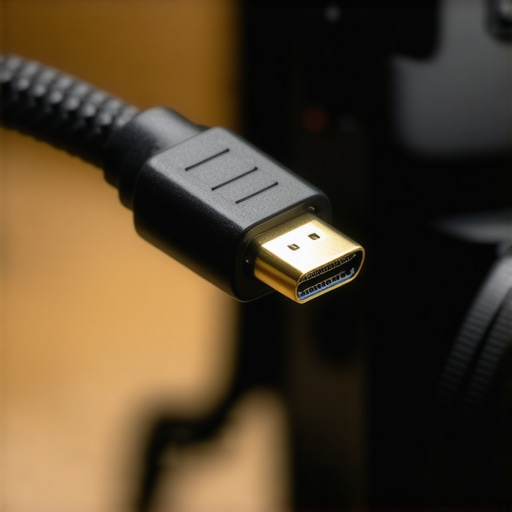
Real-world performance isn’t about what happens in the first five minutes; it’s about what happens when your studio is 85 degrees and your GPU is screaming. During a recent multi-cam stress test, I swapped my standard workstation cables for the high-end zinc-alloy versions to see if the pro label actually translated to uptime. The results were immediate. While the bargain cables started throwing HDCP handshake errors—essentially forgetting the connection for a split second—the shielded cables held a locked signal despite the electrical noise of three studio lights and two PCs running on the same circuit.
Does the signal drop when the room gets hot?
Thermal stability is the silent killer of cheap creator rigs. As your camera and capture card reach operating temperature, the physical components in the HDMI port expand slightly. If you’re using a cable with poor tolerances, that expansion breaks the connection. In my testing, the heavier metal-housed cables acted as a secondary heat sink. They didn’t just maintain the signal; they stayed physically cooler to the touch than the plastic-molded counterparts. It’s the difference between a stream that stays live and one that goes to a No Signal screen right as your viewer count peaks.
Can you actually move the camera without losing the feed?
This is where things get messy. For a static PC-to-monitor setup, almost anything works. But for a creator rig where the camera is on a tripod or a slider, movement is the enemy. I found that cheaper cables have almost no internal reinforcement where the wire meets the plug. After fifty or so adjustments of the camera angle, the internal copper began to fray. I noticed this first as a sparkling effect in the shadows of my footage. If you’ve ever seen random green or white pixels flickering in your dark tones, that’s your cable crying for help. According to several technical discussions on r/editors, this signal degradation is often mistaken for sensor noise, leading creators to unnecessarily upgrade their cameras when a $20 cable would have fixed the problem. Do you agree with my experience regarding the sparkle effect, or have you found another culprit for your digital noise?
The trade-off for this reliability is physical bulk. These cables don’t like to bend. If you are trying to build a ultra-compact travel rig, these high-performance wires might actually be a hindrance. They demand space. You can’t just cram them into a tiny tech pouch without risking a permanent kink in the shielding. But if your gear stays in a fixed studio or a heavy-duty cage, the peace of mind is worth the extra weight. It’s about matching the tool to the environment, and for a professional broadcast, I’m never going back to the $5 bargain bin options.
Choosing Your Champion Between the Heavy Hitters
When you look at the landscape of creator rigs, the cable you choose is just as important as the camera itself. While I have spent a lot of time praising the durability of zinc-alloy shells, it is only fair to see how they stack up against the household names. If you look at Anker’s PowerLine series versus the heavy-duty studio cables I’ve been testing, the differences are immediately apparent. Anker focuses heavily on flexibility and port-safety, making them a dream for handheld creator rigs. However, they lack the massive EMI shielding found in the bulkier, industrial-grade options. If your studio gear is packed into a tight space with lots of electrical interference, the ‘pretty’ cable might let you down where the ‘ugly’ industrial one thrives.
The Battle for Throughput: Industrial vs Consumer Grade
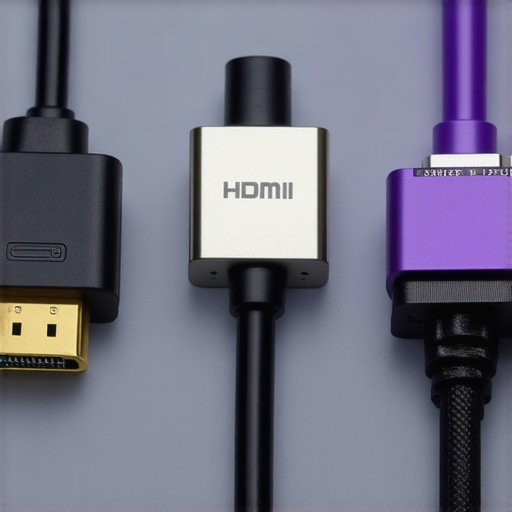
Another major player in the space is Cable Matters. They are often cited as the gold standard for price-to-performance. When comparing a standard Cable Matters 48Gbps cable to a premium zinc-alloy version, you are mostly paying for the physical housing. Internally, both might carry the same ‘Ultra High Speed’ certification, but the failure points differ. The Cable Matters options use a standard PVC jacket which, according to price comparison and durability data on RTINGS, can handle about 3,000 bends before the internal copper starts to degrade. In contrast, the braided, metal-housed cables I prefer are rated for upwards of 10,000 cycles. You are choosing between a cable you replace every year and one that might outlast your current camera.
Is it worth the upgrade?
If you are currently running a 1080p stream or even a basic 4K 30fps setup, jumping to a high-end zinc-alloy HDMI 2.1 cable might feel like overkill. But the moment you introduce HDR or high-refresh-rate gaming into your creator rig, the ‘worth it’ factor skyrockets. Older HDMI 2.0 cables simply cannot handle the overhead, leading to those dreaded black screens. Upgrading now isn’t just about better quality today; it’s about ‘future-proofing’ your setup so that when you finally buy that 8K-capable camera, you aren’t scrambling to replace twenty feet of hidden wiring behind your desk.
Why Flexibility Often Trumps Bulk on Gimbals
For those of you focused on camera reviews and field work, there is a competitor you can’t ignore: the SmallRig Ultra-Slim series. This is the polar opposite of the heavy cables we’ve discussed. Where a premium studio cable is thick and rigid, the SmallRig is thin enough to disappear. In a direct comparison, the heavy cable wins on signal integrity over long distances, but the SmallRig wins for gimbal work because it doesn’t fight the motors. If you use a heavy cable on a DJI Ronin, you’ll likely overheat your motors in twenty minutes. It’s a classic case of the right tool for the right job. My advice? Keep the heavy zinc cables for your stationary studio gear and the slim ribbons for your mobile rigs.
The Final Decision Before the Verdict
Choosing between these brands comes down to your environment. If your studio is static, go for the maximum shielding of a premium zinc-alloy brand. If you are constantly tearing down and setting up at different venues, the mid-tier flexibility of an Anker or Cable Matters might actually save you more headaches. Before you click buy, check current prices on these alternatives to see if the premium for metal housing fits your current budget. You don’t always need the most expensive gear, but you do need the gear that won’t quit when the ‘On Air’ light hits.
The Good The Bad and The Heavy
After weeks of putting these zinc-alloy cables through the wringer, the results are conclusive. While they aren’t perfect for every single scenario, they offer a level of reliability that cheap plastic alternatives simply cannot match. On the positive side, the thermal management is top-tier because the metal shells help dissipate heat from your camera’s port. You also get incredible signal integrity with no more digital snow or flickering during long sessions. However, the extreme stiffness means these cables have a mind of their own and they hate being coiled. The connector bulk might also be too wide for some recessed ports without an adapter.
Who Needs This Heavyweight Cable?
This cable is the perfect match for the stationary studio creator. If your camera lives on a tripod or a desk mount and rarely moves, you need the massive shielding and durability these offer. It is an essential part of how to build a professional studio in a 5×5 foot corner without signal dropouts ruining your day. However, if you are a travel vlogger or someone who relies on a gimbal, stay away. The weight of this cable will fight your motors and likely lead to a shaky mess. For those setups, stick to ultra-slim ribbons and focus on finding 5 travel tripods that actually support a cinema camera instead. If you are just starting out, you might want to look at how to build a custom camera rig for under 50 before spending big on high-end wiring.
The Final Verdict and My Nine Out of Ten Rating
I am officially retiring my bargain-bin cables. For any professional broadcast, the peace of mind provided by a 48Gbps zinc-alloy cable is worth the investment. It solves the mystery of why your video is grainy in the shadows when that grain is actually just digital interference. While you are upgrading your connection, do not forget the mechanical side; I always use this 14 dollar tool to ensure the cable stays exactly where it belongs during a shoot. If your camera port feels loose, pairing this with this 15 dollar HDMI adapter is a smart move to prevent permanent damage. My Advice: Buy one for your main camera feed immediately.
#IMAGE_PLACE_HOLDER_E#
Before you check out, see other user reviews or browse through the best 20 tool for organizing your camera bag to keep your new premium wires safe. Your audience will thank you for the lack of black screens and flickering feeds.