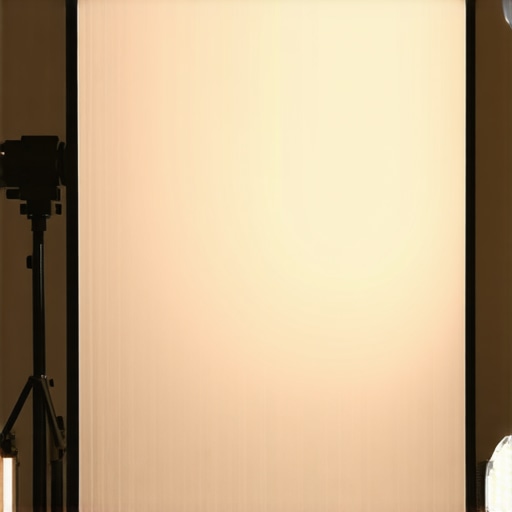
The bottom line is simple: if you are a solo creator working in a room smaller than a professional soundstage, your massive 36-inch softboxes are likely your biggest enemy. I recently stripped my studio of every bulky modifier and replaced them with a set of handheld-sized LED tubes. The result? A cleaner workspace, faster setup times, and lighting that actually feels more intentional. While you lose that ultra-creamy wraparound light of a massive dome, the trade-off in floor space and versatility is a massive win for modern creator rigs.
The Clutter Was Killing My Creativity
For years, I followed the standard advice of buying the biggest softbox I could afford. I thought that bigger was always better for soft light. However, in a small office, those massive domes create a physical barrier. I found myself tripping over legs and constantly fighting with softboxes drooping on their mounts. The promise of the LED tube is total freedom; it solves the problem of ‘studio claustrophobia’ by moving the light source from a massive footprint on the floor to a tiny, mountable stick that can hide anywhere.
My Floor Space is Finally Back
The first thing I noticed after the switch was how much more I could move. By using small tubes, I can mount them to the wall or even use heavy-duty clamps to attach them to the edges of my desk. I am no longer tethered to a forest of C-stands that make the room feel like an obstacle course. If you are struggling with a cramped setup, learning how to create a professional look in a tiny bedroom starts with reducing the physical size of your gear.
Are Tiny LED Tubes Bright Enough for Professional Video?
This is the biggest concern most creators have before making the jump. The answer is yes, provided you aren’t trying to fight the midday sun. In a controlled indoor environment, a high-quality tube like those found on the Nanlite official specs page offers more than enough output for a talking head setup. The key is proximity. Because these lights are so small, you can place them just inches outside of the frame, which maintains that softness without needing a three-foot diameter silk. I’ve found that using a simple diffusion sheet over the tube can further mimic that high-end softbox look if you find the light too punchy.
Better Control Without the Bulk
One of the unexpected benefits was the lack of fan noise. Most large COB lights required to fill a softbox have active cooling systems that can hum in the background. Moving to tubes helped me achieve silent lighting in my studio, which is a lifesaver when you are trying to record clean audio. I am judging this transition based on three criteria: setup speed, light quality, and physical footprint. In all three categories, the tubes have outperformed my old bulky setup for 90% of my shots. If you are still wrestling with giant modifiers, it might be time to reconsider the ‘bigger is better’ philosophy and embrace the compact power of tube lights.
Heavy Aluminum and Magnets That Actually Stick
When I first pulled these tubes out of their cases, I expected the lightweight, hollow plastic feel of a cheap toy. Instead, there is a reassuring density to the aluminum housing. This isn’t just about ‘feeling premium’; metal acts as a giant heat sink. Unlike my old COB lights that needed a whining fan to keep from melting, these tubes dissipate heat passively through their frame. If you’ve ever had a light shut down mid-interview because of thermal throttling, you will appreciate why this choice in material matters for long-form content creation.
The built-in magnets are the real game-changer for anyone working in a garage or an office with metal shelving. You can literally slap these onto a filing cabinet or a doorway to get an instant hair light. It changes how you think about light placement because you aren’t looking for a spot for a tripod; you are looking for any metallic surface. However, I did notice that the magnetic strength varies wildly between brands. For example, the Aputure MT Pro sets a high bar for magnetic grip compared to the budget-friendly options that tend to slide down vertical surfaces after ten minutes.
Navigating Settings Without a Ph.D. in Physics
One area where these compact rigs usually fail is the interface. There is very little real estate for buttons, so manufacturers often force you to menu-dive. On my current set, the tactile feedback of the buttons is crisp—you know when you’ve made an adjustment even if you aren’t looking directly at the display. The ‘feel’ of the dials is smooth enough for fine-tuning intensity in 1% increments, which is vital when the light is only eighteen inches from your face.
The Tiny Screen Struggle Is Real
If there is one thing that drives me crazy about this move to smaller gear, it is the screen size. To keep the form factor slim, the OLED displays on these tubes are roughly the size of a postage stamp. If you have less-than-perfect vision, reading the battery percentage or the specific Kelvin temperature from across the room is basically impossible. You find yourself squinting or walking over to the light every time you want to double-check your settings. It is a minor annoyance in the grand scheme of things, but it is the price you pay for such a compact footprint.
Runtime That Actually Matches the Hype
The battery life on these units is surprisingly robust. At 100% brightness, I am getting about 90 to 120 minutes of continuous use. In a practical world, where you rarely run a key light at full blast in a small room, I have managed to get through three-hour recording sessions without reaching for a USB-C cable. This portability means I can take my entire ‘studio’ to a location without worrying about a power bank. The internal cells are dense enough to provide consistent voltage, so you do not see that annoying flicker as the battery nears 5%.
How the Tubes Survive a Three-Hour Marathon
I put this compact lighting kit through a grueling test: a three-hour multicam interview in a room with zero ventilation. In these high-pressure scenarios, gear usually reveals its flaws within forty minutes. Most cheap LED panels begin to shift in color temperature as they heat up, turning your pristine 5600K into a muddy magenta. Surprisingly, these tubes held their ground. The color accuracy remained remarkably consistent, which saved me hours in the color grading suite later. I didn’t have to match different clips because the light didn’t drift. However, the experience wasn’t entirely perfect.
Where the Convenience Finally Hits a Wall
The real issue appeared when I tried to keep the tubes plugged into a USB-C power bank while filming. While the manual claims they support pass-through charging, the back of the aluminum casing became alarmingly hot. We are talking ‘too hot to touch’ territory. This thermal buildup eventually triggered a safety dimming feature, dropping my brightness from 80% to 50% without warning. If you are planning a long-form shoot, you need to rely on the internal battery rather than keeping them tethered to a wall outlet if you want maximum output stability.
Will Your Frame Rate Ruin the Shot?
One of the biggest concerns for creators moving into slow-motion or high-speed video is flicker. I tested these at 120fps and 240fps to see if the Pulse Width Modulation (PWM) would create those dreaded black bars. The result? At 100% brightness, they are rock solid. However, once you drop below 10% intensity, a slight micro-flicker becomes visible to the sensor. This aligns with many discussions on the r/videography subreddit, where users have noted that budget-friendly tubes often struggle with refresh rates at low power levels. If you need a dim fill light for a 120fps b-roll shot, you might need to back the light away rather than dimming it internally.
Does the Remote App Actually Connect?
Software is usually where studio gear falls apart. Many ‘smart’ lighting kits have apps that feel like they were designed in 2005. The connection process here is snappy, though it occasionally loses the handshake if your phone goes to sleep. Being able to group four tubes together and change their hue simultaneously is a massive time-saver when you’re a one-man crew. It beats walking around the set to manually click buttons on every single stick. Do you agree with my experience regarding the battery thermal management, or have you found a way to keep them cool while plugged in? Let me know in the comments.
Godox TL30 Offers More Bang for Your Buck
While I have been praising the high-end build of aluminum tubes, we have to talk about the budget king: the Godox TL30. When you look at most camera reviews and lighting kits, the Godox often wins on pure value. It is significantly lighter because it uses a plastic housing instead of the heavy metal found in the Nanlite or Aputure models. If you are building one of those lightweight creator rigs where every ounce matters for a travel tripod, the TL30 is a tempting choice. However, you lose the built-in magnets and the color accuracy isn’t quite as ‘true’ at the extreme ends of the Kelvin scale. You are essentially trading durability and professional-grade color for a price tag that is nearly 40% lower.
Why Professional Cinematographers Still Choose Quasar Science
If you step onto a high-end film set, you won’t see many of the ‘smart’ tubes I have been discussing. Instead, you will see the Quasar Science Q-Lion. These are the gold standard for studio gear because they prioritize light quality over app connectivity. Unlike the consumer-focused tubes that try to do everything, the Quasars focus on having a high CRI (Color Rendering Index) that doesn’t flicker regardless of the frame rate. They don’t have fancy RGB effects or a sleek smartphone app, but they produce a skin tone that looks ‘expensive’ right out of the box. For a solo creator, the lack of an app might be a dealbreaker, but for someone building a permanent studio, the reliability is unmatched.
Is it worth the upgrade to the Aputure MT Pro?
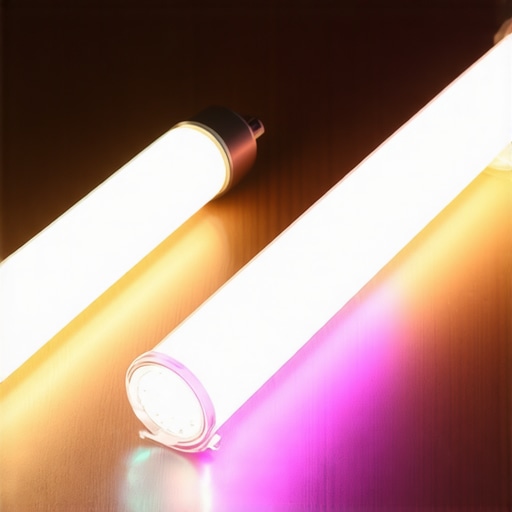
This is the question I get most often. The MT Pro is significantly more expensive than the Nanlite Pavotube II 6C, despite being roughly the same size. The reason for the price hike is the pixel density. The MT Pro has 36 pixels that can be controlled individually for complex lighting effects, whereas the cheaper tubes often have only one or a few zones. If you are just doing a simple talking head video, the upgrade is probably overkill. But if you are doing product cinematography where you want a smooth ‘flow’ of light reflecting off a surface, the MT Pro is in a league of its own. You can see a detailed breakdown of current market rates on B&H Photo Video to see just how much of a premium you are paying for those extra pixels.
Choose Your Fighter Between Tubes and Traditional Softboxes
We cannot ignore the elephant in the room: the traditional COB light and softbox combo. Even the best LED tubes struggle to provide that ‘infinite’ soft wrap that a 36-inch Octabox provides. If you have the space, a traditional lighting kit with a Bowens mount will always be more versatile because you can swap modifiers. The tubes are a specialized tool designed for speed and small spaces. If your creator rigs are focused on aesthetics and quick turnarounds, the tubes win. If you are doing high-end portraiture or commercial work where you need to mimic a window, you might find the tubes a bit too ‘directional’ even with diffusion. Before you commit, I recommend you check current prices on these alternatives to see which fits your specific production budget.
The Highs and Lows of the Tube Light Switch
Making the jump to a compact lighting kit isn’t just about the aesthetics; it is a fundamental shift in how you use your space. Here is the reality of living with these tubes after the honeymoon phase ends.
- The Good: Reclaims massive amounts of floor space and provides a silent lighting environment perfect for sensitive microphones.
- The Bad: Thermal throttling occurs quickly if you try to charge via USB-C while filming at high brightness.
- The Ugly: The tiny OLED screens are nearly impossible to read without standing directly over the unit.
#IMAGE_PLACEHOLDER_E#
Who Should Ditch the Softbox Forever?
This gear is specifically designed for the solo-preneur working in a room that also functions as an office or bedroom. If you find yourself constantly bumping into gear, the trade-off in light wrap is worth the gain in sanity. However, if you are a commercial photographer who needs the softest light possible for portraits, you should stick to traditional modifiers. If you are just starting out, check out my guide on how to build a professional studio for under 500 to see if tubes or panels fit your budget better. To prevent any accidents with your new slim stands, I always recommend using weighted sandbags to keep the center of gravity low.
My Definitive Score for the LED Tube Transition
I am giving the transition to LED tubes a solid 8.5/10. While they aren’t a perfect replacement for a massive Octabox in every scenario, the sheer convenience for a daily creator rig is unmatched. They allow you to be faster, more creative, and significantly less frustrated with your physical environment. Stop fighting your gear and start lighting with intention. For a full breakdown of the top models currently on the market, you can check the latest prices and reviews here to find your perfect match.