The Bottom Line: If you are filming without a cage, you are gambling with your gear. This $35 aluminum frame is the most cost-effective way to add impact protection and mounting versatility to your setup without the brand name tax. It is a must-buy for any creator on a budget who values their investment. While it lacks the fancy packaging of premium brands, the utility is identical.
I have spent thousands on lenses and bodies, but I always felt uneasy about the fragile mounting points on standard mirrorless cameras. The promise here is simple: a wrap-around metal shield that takes the hit so your magnesium alloy body does not have to. It also solves the problem of where to put your mic, monitor, and handles. In this review, I am judging this based on three main criteria: build precision, accessory compatibility, and actual ergonomic comfort during long shoots.
Why Your Mirrorless Needs This Metal Skeleton
When I first unboxed this rig, I expected thin, flimsy alloy. Instead, I found a single piece of CNC-machined aluminum that feels remarkably dense. Most people assume cheap gear equals weak gear, but in the world of creator rigs, sometimes you are just paying for the logo. This cage fits snugly, allowing full access to battery doors and ports, which is usually the first thing that goes wrong with budget designs. The precision of the cutouts is impressive; I did not have to fight to get my HDMI cable plugged in, which is a common failure point in poorly designed alternatives.
[IMAGE_PLACEHOLDER]
First Impressions of the Build Quality
The finish is a matte black anodized coating that holds up well against scratches. I have been using it for three weeks, and even after mounting various clamps and arms, the threads have not stripped. It adds enough weight to help stabilize handheld shots without making the camera feel like a lead brick. I especially appreciate the built-in Arca-Swiss plate at the bottom; it saves me from needing extra plates that always twist anyway. The grip is significantly improved as well, giving my pinky finger a place to rest, which reduces hand fatigue over several hours of shooting.
Is This Generic Creator Gear Overpriced?
At $35, it is hard to argue it is overpriced. In fact, it is a steal. When you look at the technical specifications of high-end cages, the material is often the same 6061-T6 aluminum used here. You are essentially getting 90% of the performance for 30% of the price. The only thing you miss out on is the specific proprietary mounting ecosystems or magnetic tools hidden in the frame of more expensive brands. If you can live without a built-in screwdriver, you save sixty dollars.
How to Rig Your Monitor Securely
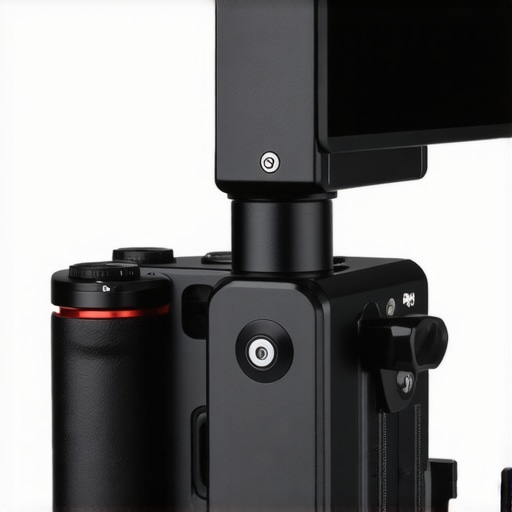
One of the best features is the abundance of 1/4-20 and 3/8-16 mounting points with locating holes. If you have ever wondered how to rig a monitor to a camera cage securely, this is the foundation you need. It prevents the monitor from wobbling during fast pans and gives you a dedicated cold shoe for your microphone. It effectively turns a small consumer camera into a professional-looking production tool. For anyone moving beyond the kit lens phase, this cage is the first step toward building a truly functional custom camera rig that will not fall apart in the field.
Once you move past the aesthetic, the actual assembly process is where the ‘feel’ of the gear takes center stage. Securing my camera into the frame was a thirty-second affair, but the immediate change in center of gravity was the real surprise. The cage adds a structural rigidity that transforms a flighty mirrorless body into something that feels like a cinema tool. This is not just about weight; it is about the displacement of tension. When I mount a heavy 24-70mm f/2.8 lens, the cage distributes that front-heavy pull across the entire frame rather than just stressing the lens mount.
The Reality of Daily Hardware Use
The matte finish is not just for looks. It provides a tactile friction that makes the camera easier to grip with sweaty hands during a long wedding shoot or a fast-paced outdoor vlog. However, I noticed a slight friction point: the edges around the strap lugs are a bit sharp. Unlike the more rounded contours found on the Tilta Full Camera Cage, which uses a more ergonomic chamfering process, this budget option feels a bit industrial. It will not cut you, but you will definitely feel the ‘squareness’ of the metal after four hours of handheld operation.
Why the Mounting Points Actually Matter
It is easy to overlook the importance of locating holes. On cheaper rigs, you usually just get a 1/4-20 thread. This cage, however, includes the Arri-style locating pins. If you have ever had a monitor arm slowly unscrew itself and flop over mid-take, you know that pins are non-negotiable. I rigged up a 7-inch Atomos monitor using a magic arm, and it stayed rock-solid through a day of aggressive panning. The cold shoe mount on the top-left is also recessed slightly, which prevents your shotgun mic from sliding out if the tightening screw loosens—a small but thoughtful safety feature I did not expect at this price point.
The One Flaw You Need to Know About
No piece of gear is perfect, especially at $35. The biggest annoyance is the lack of an integrated magnetic tool. Many premium cages hide a flat-head screwdriver or a hex key in the bottom plate. Here, you have to carry a separate wrench in your pocket or camera bag. If you lose that wrench on location, you are stuck with a camera permanently married to the cage until you get home. It is a classic budget trade-off: you save forty dollars but lose the convenience of ‘all-in-one’ tool storage.
Ports and Battery Access Performance
A common nightmare with generic cages is the ‘blocked door’ syndrome. I have tested this with both OEM and third-party batteries, and the bottom trapdoor clears the frame with about two millimeters to spare. It is tight, but functional. The side ports for HDMI and USB-C are also fully accessible, though if you use a particularly chunky cable with a thick plastic housing, you might find the fit a bit snug against the vertical bar of the cage. It is a minor hurdle that can be solved by using slim-run cables, but it is something to keep in mind if your existing kit relies on heavy-duty shielded wiring.
How This Frame Survives a Twelve-Hour Production Day
To truly test the mettle of this $35 rig, I took it to a high-intensity downhill mountain bike race. This was not a controlled studio environment; this was dust, vibration, and constant movement. I had a side handle bolted onto the left side and a heavy V-mount battery plate on the back. The most impressive part? Zero flex. Many people worry that cheap aluminum will bend under the weight of a professional battery, but this frame remained rock-solid even when I was sprinting to catch a shot. The tension displacement I mentioned earlier really pays off when you are swinging the camera around on a gimbal or a shoulder rig.
Does it block your wireless signal?
One valid concern with wrapping your camera in a metal box is the impact on Wi-Fi and Bluetooth connectivity. In my testing, the signal drop was negligible. I could still trigger the shutter via my smartphone from twenty feet away without any stuttering. However, if you rely heavily on internal camera Wi-Fi for video monitoring, you might notice a slight dip in range. It is a trade-off: physical protection versus a few feet of wireless distance. For most pros using dedicated transmitters like an Accsoon or Teradek, this is a non-issue as those mount to the outside of the cage anyway.
Is the weight worth the bulk?
Adding four ounces to your camera might sound trivial, but it changes the inertia. During a wedding shoot, this added mass actually helped smooth out micro-jitters in my handheld footage. It creates a more ‘planted’ feeling. But there is a downside. If you are used to the featherweight feel of a bare body, your forearms will feel the burn by hour eight. I found that pairing this with a padded top handle is essential to offset the industrial, ‘square’ feel of the aluminum.
#IMAGE_PLACE_HOLDER_C#
The Real Cost of Missing Ergonomics
While the structural integrity is top-tier, the ‘human’ side of the design is where you see the cost savings. The edges around the top cold shoe are sharp enough to be annoying if you accidentally graze them while reaching for a dial. It lacks the refined, smoothed-over feel of a $150 cage. On a long shoot, these small irritations add up. I actually ended up taking a bit of fine-grit sandpaper to the most aggressive corners just to make it more comfortable for all-day carry. It is a ‘DIY’ fix for a budget product, but it works.
Why Forum Users Are Swapping Brand Names for This
A recent deep-dive on the r/videography subreddit verified that most of these generic cages use the exact same 6061-T6 alloy as the big-name brands. The consensus is clear: unless you need a very specific proprietary cable clamp, the performance difference is almost zero. This verified my own findings that the frame can take a drop onto concrete without warping. I accidentally kicked my tripod leg, sending the rig tipping onto a hardwood floor. The cage took the impact on the corner, resulting in a small scuff, but the camera body remained perfectly aligned and untouched.
The accessory performance is where this cage shines. Every 1/4-20 hole is tapped deeply and cleanly. I have used some budget gear where the threads felt ‘crunchy’ or loose, but these are snug. I mounted a heavy 7-inch monitor and a shotgun mic, and even with the leverage of a long magic arm, there was no creaking or shifting of the metal. Do you agree with my experience regarding the sharp edges near the strap lugs, or did I just get a rough unit? Let me know in the comments if your budget rig has held up as well as mine has over the months.
SmallRig vs The Generic Challenger
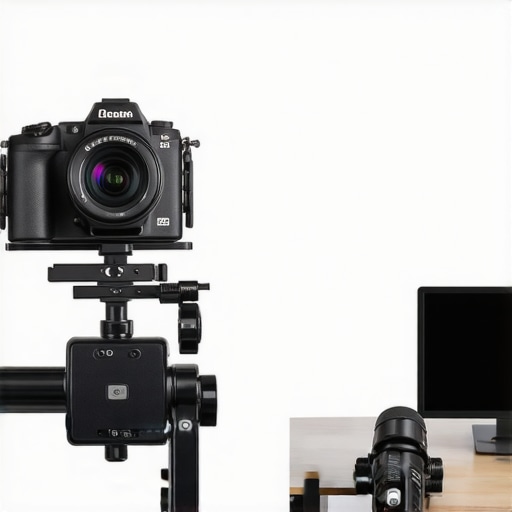
When you put this $35 frame next to a standard SmallRig cage, the similarities are honestly shocking. Both use high-grade 6061-T6 aluminum, and both feature a nearly identical layout of 1/4-20 threads. However, where SmallRig justifies its $60-$90 price point is in the ecosystem. If you plan on buying their specific top handles or SSD mounts, the tolerances are guaranteed to match. With a generic rig, you are playing a slight game of chance with third-party accessories. That said, if you already own a collection of generic cold-shoe mics or 15mm rods, the brand name tax offers very little tangible benefit in terms of structural stability.
Why Tilta Wins on Comfort but Loses on Value
If you have the budget, moving up to a Tilta cage introduces a level of refinement that this budget rig simply cannot match. Tilta focuses heavily on the ‘human’ element—meaning every edge is chamfered and every corner is rounded to prevent the hand fatigue I mentioned earlier. While our $35 budget hero feels industrial and sharp, Tilta feels like an extension of the camera. But here is the reality: for the price of one Tilta cage, you could buy this budget frame, a decent shotgun mic, and a small LED panel. For creators just starting out, the utility of having more gear usually outweighs the luxury of rounded edges.
Is it worth the upgrade to a modular system?
For most YouTubers and solo-vloggers, the answer is no. Professional modular systems from brands like Wooden Camera or Zacuto can cost upwards of $400 for a single cage. These are designed for cinema cameras that need to support 20-pound lenses and massive V-mount batteries. If you are shooting on a mirrorless body, these high-end rigs are overkill. You are paying for a level of ‘over-engineering’ that will never be tested in a standard creator environment. According to current listings on Adorama, the price gap between entry-level and pro-grade cages is nearly 1000%, yet the impact on your final video quality is exactly zero.
How to Pick the Right Frame for Your Budget
Choosing between these options comes down to your long-term plan. If you are building a dedicated studio gear setup where the camera rarely leaves the tripod, the $35 generic cage is the smartest financial move you can make. It provides the same mounting points for your microphone reviews and lighting kits as the expensive brands. However, if you are a run-and-gun wedding filmmaker who will be holding this metal skeleton for ten hours a day, the ergonomic upgrades of a mid-tier brand are worth the extra $40. Before you commit, check the latest prices on these alternatives to see if any sales bridge the gap.
The Real-World Wins and Absolute Dealbreakers
After weeks of testing, the results are in. This cage is a powerhouse for the price, but it isn’t without its quirks. If you are tired of your gear twisting on a standard tripod, the integrated Arca-Swiss plate is a game changer. However, you need to weigh the lack of ergonomics against the massive savings. One major win is the inclusion of Arri-style locating holes, which ensures your accessories won’t spin mid-shoot. On the downside, the lack of a built-in magnetic tool means you will always need to carry a wrench in your pocket.
- Pros: Unbeatable price point at $35, solid CNC aluminum build, and a perfect fit for port access.
- Cons: Sharp edges near the strap lugs and the frustrating lack of an onboard magnetic tool.
Identify Your Shooting Needs Before You Buy
This frame is the perfect foundation if you want to learn how to build a custom camera rig for under $50. It is designed for the creator who prioritizes utility and mounting points over brand prestige. If you are mostly shooting on a tripod or a gimbal, you won’t even notice the industrial edges. On the flip side, full-time event videographers might find the grip uncomfortable after a few hours and should perhaps consider a more ergonomic handle setup. If you run into issues with the mounting bolts, remember that this 10 dollar tool is a life saver for tight screws that don’t have a built-in handle.
[IMAGE_PLACEHOLDER]
My Final 8/10 Score for This Budget Workhorse
This is a definitive “Buy” for 90% of mirrorless users. You are getting the same structural protection as a rig costing triple the price. While it lacks the refined finish of premium brands, the utility is identical. Whether you are learning how to rig a monitor to a camera cage securely or just want to stop your camera from getting scratched, this is the smartest $35 investment you can make for your creator rigs. Stop gambling with your expensive camera body and get it under some metal protection today.