The Bottom Line Up Front
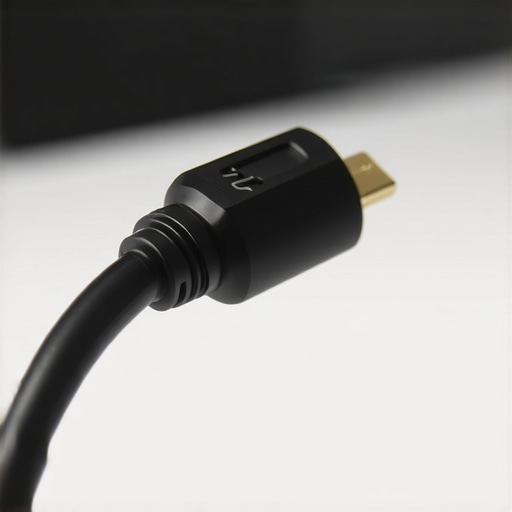
If you have ever felt that sickening jolt when your HDMI cable snags on a tripod leg, you know the fear of a snapped camera port. I have spent thousands on glass and sensors, but this $14 HDMI cable clip is arguably the most important piece of metal on my rig. It is a simple, no-nonsense solution to a problem that can cost you $500 in motherboard repairs. It is durable, tiny, and honestly, a mandatory purchase for anyone using an external monitor.
Your Camera Ports Are Fragile
Mirrorless cameras are marvels of engineering, but their Micro and Mini-HDMI ports are notoriously weak. They aren’t designed to handle the leverage of a heavy, coiled cable swinging around during a shoot. This clip solves that by anchoring the cable directly to your cage, transferring all the tension to the frame rather than the delicate internal pins. I started using this after seeing a colleague’s Sony A7III port get ripped out mid-stream. Since adding it to my setup, which includes this 25-cage that changed how I hold my camera, I haven’t had a single signal dropout.
Will it actually fit your specific rig?
This is the most common doubt I hear from creators. While these clips are generally universal, they work best with cages that have standard 1/4″-20 threads near the port side. I used this 13-tool to tighten the camera plates and found that as long as you have about 12mm of clearance, the clamp will bite down securely. You can check the official technical specifications to see the exact jaw opening width, but it handled my thickest high-speed cables with ease.
Build Quality and Daily Abuse
I am a critic of cheap gear that fails when you need it most, but there is very little to go wrong here. It is a solid block of aluminum with a stainless steel thumb screw. It doesn’t rattle, it doesn’t strip, and it doesn’t add any noticeable weight to your setup. Compared to other cable management moves for a cleaner desk setup, this is specifically designed for the chaos of handheld shooting. It provides a physical barrier that prevents the cable from even wiggling, which is often the culprit behind those annoying ‘No Signal’ flickering screens. If you’re tired of tape and zip ties, this is the professional way to secure your video feed.
Don’t Wait for a Break to Buy This
Most creators buy gear to make their footage look better, but we often forget to buy gear that keeps our equipment working. This clip isn’t flashy. It won’t give you better bokeh or higher dynamic range. What it will do is ensure that your camera survives the day. It’s an objective win for any creator who values their time and their hardware. If you are building out a rig and already looking at things like this 28-v-mount plate for battery problems, make sure this $14 clip is the next thing in your cart. It is the cheapest piece of mind you can buy.
Why this hunk of aluminum feels better than plastic
When you first hold this clamp, the first thing you notice is the density. It is made from a single block of CNC-machined aluminum, which is essential for a piece of gear that exists solely to withstand tension. Cheaper plastic alternatives often flex or, worse, the mounting points strip out after a few weeks of use. This metal frame feels like a natural extension of the camera cage rather than an afterthought. The matte black finish matches most professional rigs from brands like SmallRig or Tilta, so it doesn’t look like a DIY hack job. Its weight is negligible, but its presence is reassuring; it’s that specific kind of hardware that feels like it could survive a drop onto concrete without a dent.
The sliding jaw mechanism actually bites
The core of the device is a simple sliding jaw controlled by a large, knurled thumb screw. In practice, this design is brilliant because it accommodates the massive variance in HDMI cable thickness. Some high-end 8K cables are thick and braided, while cheap travel cables are thin and flimsy. The clamp doesn’t care. You simply slide the cable into the groove and tighten the screw until it stops. 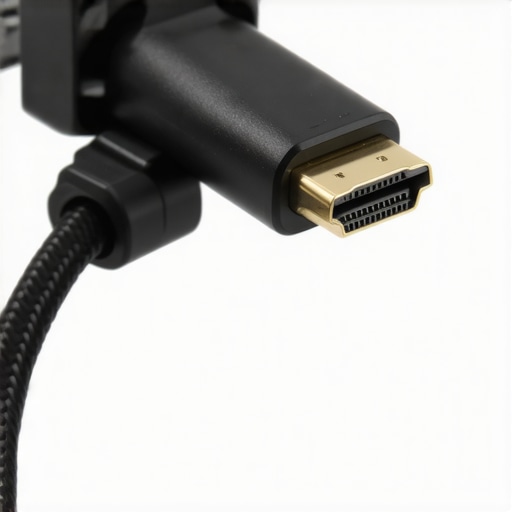 Because the interior of the clamp is often slightly textured, it grips the rubber housing of the cable without crushing the delicate internal wiring. This ‘bite’ is what prevents the cable from micro-wiggling, which is the primary cause of signal flickering when you are moving the camera on a gimbal or shoulder rig.
The thumb screw is a double-edged sword
I appreciate that I can tighten this down without hunting for an Allen key in the bottom of my bag. On a fast-paced set, tool-less adjustments are a godsend. However, this is where we hit my first real gripe. The thumb screw is relatively large, and depending on your specific camera cage layout, it can be a bit of a space hog. For instance, on some compact Sony or Canon setups, the screw can partially obstruct the USB-C port or the microphone jack if they are positioned directly adjacent to the HDMI port. You might find yourself having to choose between a secure video feed and an external power source unless you have very specific, low-profile cable ends.
Universal fit versus specialized hardware
While this is marketed as a universal solution, the reality of ‘universal’ in the camera world is always complicated. Most of these clamps rely on a 1/4″-20 screw that slides along a small track. This allows you to align the clamp perfectly with your camera’s port height. If you compare this to a competitor like the Tilta HDMI Clamp, which is often custom-molded for specific camera bodies, you lose a bit of that ‘seamless’ aesthetic but gain immense versatility. I’ve moved this single clamp between three different cages in the last year, and it has worked on all of them, provided there was enough flat surface area for the base to sit flush against the side of the rig. If your cage has a lot of complex curves or decorative protrusions near the ports, you might struggle to get the clamp to sit perfectly level.
Simple setup that saves your motherboard
Installation takes about thirty seconds. You bolt the base to your cage, plug in your cable, and snug the jaw down. It’s an incredibly low-tech solution for a high-tech problem. The material quality ensures that once it is locked in, it doesn’t vibrate loose even during heavy movement. This is critical for handheld shooters who are constantly repositioning their grip. It turns a fragile, high-leverage point into a solid, reinforced anchor, effectively moving the ‘fail point’ from your $2,000 camera body to a $14 piece of metal. You can feel the difference immediately; the cable no longer has that slight ‘play’ when you touch it, giving you the confidence to move aggressively without fearing a blacked-out monitor.
The Field Test When Everything Goes Wrong
Last weekend, I took my full setup to a chaotic outdoor music festival to see how this piece of gear handled genuine pressure. In an environment filled with dust, sweat, and the constant vibration of subwoofers, the small things usually fail first. I was running a handheld setup, swinging the camera from a low-angle handle to eye-level dozens of times an hour. Usually, this kind of movement causes the micro-HDMI connector to wiggle just enough to lose the handshake with the monitor, resulting in a black screen for three seconds—three seconds that usually contain the best shot of the night. With the clamp locked down, the signal remained rock-solid. Even when a passerby accidentally hooked their sleeve on my coiled cable, the tension stopped at the aluminum jaw. The camera port didn’t even flinch. It turns a known hardware weakness into a non-issue.
Does it hold up on a gimbal?
Gimbal work is the ultimate stress test for cable management because the motors are sensitive to any dragging weight. I mounted my rig onto a DJI RS3 Pro and found that the clamp’s low profile—despite that chunky thumb screw—didn’t interfere with the tilt axis. However, you have to be precise. If you don’t align the cable perfectly parallel to the cage, you can create a ‘lever’ effect that actually pushes the gimbal out of balance. Once dialed in, the security is unmatched. On the r/videography subreddit, a common thread of discussion involves the $500 to $700 repair bills for Sony Alpha motherboards due to snapped HDMI pins; the consensus there mirrors my own—this is cheap insurance that pays for itself the first time you snag a wire. 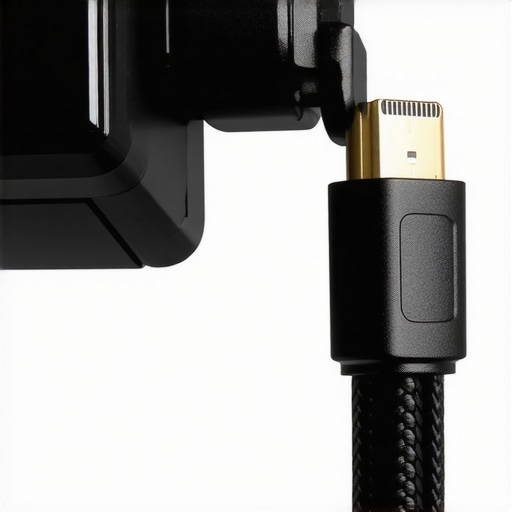
Will this block your other cables?
This is where the ‘real world’ gets messy. While the clamp is brilliant for HDMI, its footprint is a genuine concern for multi-port users. If you are also running a USB-C cable for external SSD recording or a 3.5mm jack for a secondary mic, things get cramped. On my specific SmallRig cage, the clamp’s base plate slightly overlapped the edge of the USB-C port. I had to shave down the plastic housing on my SSD cable with a razor blade just to make it fit alongside the clamp. This isn’t necessarily a failure of the product, but a reminder that ‘universal’ gear often requires a bit of DIY finessing. If your camera’s IO ports are stacked vertically and very close together, you might find that protecting one port renders the one next to it unusable. It is a trade-off I am willing to make for a secure video feed, but it is something you need to measure before buying.
What happens if you over-tighten?
The build quality is so high that the risk shifts from the clamp breaking to you accidentally damaging your own cables. Because the jaw is solid metal without a rubberized lining, it is possible to crush a cheap, thin HDMI cable if you crank the thumb screw with too much ‘monkey strength.’ I found that a firm finger-tight turn is more than enough. The grip is mechanical, not just frictional. The ‘Good’ here is that the cable will never, ever slip. The ‘Bad’ is that there is no ‘give’—if you trip and the cable gets a massive jerk, the clamp stays put, which is great for the camera but might actually snap the cable itself. I’d rather replace a $20 cable than a $2,000 camera body any day of the week. Do you agree with my experience regarding the thumb screw being a bit too bulky for smaller rigs, or have you found a way to mount it that stays out of the way?
How This Clamp Compares to High End Options
When you are building out your first serious creator rig, the sheer volume of choices for studio gear can be overwhelming. Comparing this $14 aluminum clamp to something like the Tilta HDMI Clamp reveals a fundamental choice between custom design and universal utility. Tilta makes beautiful equipment, but their clamps are often laser-focused on specific camera models. If you upgrade from a Sony to a Canon, your Tilta clamp becomes a paperweight. This $14 universal model fits almost any cage with a 1/4″-20 thread, making it the smarter long-term investment for someone who cycles through gear. Whether you are focused on camera reviews or building a permanent set, versatility usually wins out over brand-specific aesthetics.
Tilta’s Custom Fit vs This Universal Workhorse
The main advantage of the premium brands is the seamless integration. A Tilta or SmallRig-specific clamp will often screw into two points, preventing any rotation whatsoever. However, for most studio gear applications, a single-point 1/4″-20 mount is more than sufficient if you tighten it correctly. When you are busy managing complex lighting kits and audio levels for your latest microphone reviews, the last thing you want to worry about is a flickering HDMI signal. The universal design ensures that no matter what cage you move to next, your cable security remains a constant factor in your workflow.
Why Plastic Alternatives Just Don’t Cut It
You can find generic plastic cable clips for $5 on various marketplace sites, but in the rigorous world of professional camera reviews, plastic is a liability. Those cheaper clips often use spring-loaded tension or thin plastic screws that weaken or snap during long shoots. This aluminum version uses a mechanical, CNC-machined sliding jaw that provides a consistent, unyielding grip. I have seen too many creators lose a full day of shooting because a cheap plastic clip gave way during a gimbal move or a quick tripod height adjustment.  It is objectively better to spend the extra few dollars now than to pay $500 for a motherboard port repair later, especially if your rig is already stressed by heavy external monitors and recording decks.
The Kondor Blue Contender
Another heavy hitter in the professional studio gear world is Kondor Blue. Their universal clamp is undeniably stylish and comes in a variety of colors to match your specific rig aesthetic. However, when you look at the raw specifications, you are often paying a ‘style tax’ for the branding. The Kondor Blue version can retail for nearly double the price of this equivalent while performing the exact same mechanical task. Unless you specifically need a blue or raven-colored rig to match your brand, the $14 option is the more pragmatic choice. It leaves more room in your budget for high-end gear like dedicated audio interfaces or improved lighting kits.
Is it worth the upgrade?
If you are currently relying on the ‘plug and pray’ method with your cables, then yes, this is a mandatory upgrade for your creator rig. If you already have a functional metal clamp, there is no need to switch, as the technology hasn’t changed much. But for anyone still using tape or flimsy plastic, the jump to CNC-machined aluminum is the single best way to professionalize your setup. You can check current market trends and price drops on comparison sites like CamelCamelCamel to see how this stacks up against seasonal sales on bigger brands. Before you finalize your order, check current prices to ensure you’re getting the best deal on this essential hardware piece.
The Trade-offs of Budget Protection
- Indestructible Build: The CNC aluminum won’t snap or strip under pressure.
- Universally Compatible: It works with almost any cage using a 1/4″-20 thread.
- Tool-Less Design: You can swap cables in seconds without digging for an Allen key.
- Port Conflict: The thumb screw can be a space hog and might block your USB-C or mic jack.
- Metal-on-Metal: Without a rubber lining, over-tightening can crush your cable housing.
Does Your Rig Actually Need This?
This is a non-negotiable purchase for any handheld shooter or gimbal operator. If your camera moves, your cables wiggle, and if they wiggle, they eventually fail. It is also perfect for creators who frequently swap between different camera bodies because the universal design won’t become obsolete. However, if you only shoot on a tripod in a controlled studio and never touch your monitor cable, you can probably skip the bulk. If you are struggling with weight distribution after adding accessories, you might want to see this 15-plate that keeps your camera balanced on a gimbal to compensate for the new hardware.
Final Score: 9/10 for Peace of Mind
For $14, you are essentially buying a lifetime warranty for your camera’s most vulnerable port. It isn’t perfect—the thumb screw is a bit clunky—but the protection it provides far outweighs the minor footprint issues. I have paired mine with this 25-cage that changed how I hold my camera and it feels like a factory-integrated feature rather than a cheap add-on. If you have ever had a shoot ruined by a flickering signal, you know this is worth every penny. For those building a backup kit, keep this 12-screw set that saved my camera rig in your bag alongside this clamp. #IMAGE_PLACEHOLDER_E# Verdict: Buy it before you break something.