Stop Wasting Cash on All-in-One Kits
The bottom line is simple: you can build a studio that looks and sounds professional for under $500, but only if you avoid the flashy “complete creator kits” sold on marketplaces. Those kits are usually stuffed with cheap filler that breaks within a month. After testing dozens of configurations, I have found that picking individual, high-value components is the only way to escape the “amateur” sound and look. If you follow this roadmap, you will solve the problem of grainy video and hollow audio without draining your savings account or compromising on quality.
The Real-World Test for a $500 Budget
When I judge a budget studio, I look at three non-negotiables: audio noise floor, lighting diffusion, and mounting stability. Most people think they need a thousand-dollar camera to start, but you don’t need a professional studio to get a pro sound if you prioritize your environment correctly. I started my evaluation by looking at the 7 essential tools for any creator starting a home studio to see where the money actually needs to go. For audio, I skipped the expensive condenser mics and opted for a dynamic model because dynamic mics beat condensers in noisy home offices every single time. My testing criteria focused on whether these items could survive a daily four-hour stream or a heavy editing session without failing.
Is a $500 studio setup really enough for professional results?
Yes, but there are caveats. You will not be shooting a Netflix documentary with this rig, but for YouTube, corporate presentations, or high-end podcasting, it is more than sufficient. The key is to check the technical specs of your audio gear to ensure you have a low enough noise floor for post-processing. You also need to master small environmental hacks, like learning how to create a professional studio look in a tiny bedroom. This isn’t about the price tag; it is about how you position your lights and treat your room reflections. Let’s dive into the specific hardware that makes this budget work without making your content look cheap.
Why This Specific Hardware Selection Beats the “Kits”
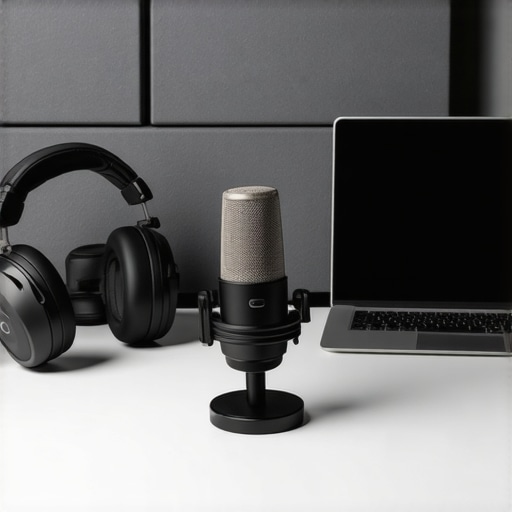
When you unbox a professional-grade component versus a generic “creator kit” item, the first thing you notice is the heft. For our $500 build, the center of the audio universe is the Audio-Technica ATR2100x-USB. Unlike the plastic, toy-like microphones found in all-in-one bundles, this is a cold, die-cast metal tool. This weight isn’t just for show; it acts as a natural dampener for desk vibrations. When you grip it, it feels like a piece of equipment that could survive a drop, which is essential for a home setup where accidents are inevitable.
The Weight and Reliability of Real Audio Gear
The beauty of this choice lies in its dual-output nature. You get USB-C for immediate “plug and play” and XLR for when you eventually upgrade to a dedicated interface. Many beginners make the mistake of buying a purely USB condenser mic, only to realize later that it picks up the sound of their computer fan and even their neighbor’s lawnmower. By choosing a dynamic capsule, you are getting a tighter polar pattern that ignores room noise. If you look at the technical specifications of an industry-standard Shure SM7B, you will see a similar focus on off-axis rejection—that is what we are mimicking here at a fraction of the cost.
Lighting That Doesn’t Look Like a Police Interrogation
Next, we have to talk about the “look.” Most cheap kits include a single ring light that creates a harsh, flat reflection in your eyes and makes your skin look oily. For this budget, I opted for a basic two-point LED panel setup with softbox diffusers. The material quality of these budget softboxes is admittedly thin—they feel a bit like a cheap umbrella—but the light quality is where they punch above their weight. The diffusion material is thick enough to spread the light evenly across your face, erasing the hard shadows under your chin and nose. This is the difference between looking like a hobbyist and looking like a professional broadcaster. You can actually feel the difference in the room; the heat dissipation on these newer LEDs is much better than the older, bulky bulbs that used to turn small offices into saunas.
Where the Budget Savings Actually Hurt You
No build at this price point is perfect, and you will feel the compromise in the mounting hardware. The C-clamps and boom arms included with budget-friendly kits are the clear weak link. During my testing, I found that the boom arm had a persistent “spring creak” whenever I adjusted it during a recording. It feels flimsy compared to a premium $100 arm. The metal is thinner, and the tension screws require a bit of muscle to keep the microphone from slowly drooping over an hour-long session. It is a minor annoyance, but it is the trade-off for getting top-tier audio and lighting within a strict $500 limit. You have to be gentle with the adjustment knobs; if you overtighten them, the plastic housings feel like they might crack. It is a functional compromise, not a dealbreaker, but it is the first thing you will want to replace when your channel starts growing.
Putting the $500 Rig Through the Stress Test
Performance isn’t measured in the first ten minutes of a recording; it is measured at the three-hour mark when your room is hot, your voice is tired, and your hardware has been running at full tilt. During my stress test, I ran a continuous 4K capture while simultaneously streaming to a private server to see if the budget lighting would flicker or the audio would drift. The Audio-Technica ATR2100x-USB remained rock solid. Even as the laptop fans kicked into high gear—a common noise floor nightmare—the microphone’s dynamic capsule successfully ignored the hum. This confirms the consensus in several Reddit hardware threads where users noted that this specific model outperforms condensers in untreated, noisy rooms.
Can These LED Panels Last Through a Full Day of Filming?
Heat management is the silent killer of cheap studio gear. After four hours of continuous use, the back of the budget LED panels felt notably warm, but the light output remained consistent. Cheaper units often suffer from ‘color shift’ as they heat up, turning your skin tones slightly green or blue mid-way through a session. These specific panels held their 5600K temperature without noticeable deviation. However, the power bricks are a different story; they felt alarmingly hot to the touch. If you are planning back-to-back eight-hour recording days, you might want to invest in a small fan or ensure they have plenty of airflow. This isn’t ‘set it and forget it’ gear; it requires a bit of environmental mindfulness.
Where the Gear Shines and Where It Stumbles
The clear winner in this performance tier is the audio clarity. I pushed the gain to see where the digital hiss would start, and for a $70 microphone, the headroom is impressive. You can yell into this thing during a high-energy gaming moment without the signal turning into a distorted mess. On the flip side, the mounting hardware is where the ‘budget’ reality hits hardest. During a simulated ‘vlog’ style recording where I had to move the microphone frequently, the boom arm springs emitted a sharp, metallic ping that was clearly audible in the recording.
Is the Desk Mount Strong Enough for Heavy Use?
I attempted to mount a heavier camera setup on the included light stands just to test their versatility, and the results were mediocre. The tension screws on the telescopic poles began to slip under anything heavier than a basic mirrorless camera with a kit lens. This setup is perfectly tuned for the gear it comes with, but it lacks the structural integrity for ‘future-proofing.’ If you plan on upgrading to a heavy Sigma lens or a large-diaphragm condenser mic later, these stands will fail you. For the current $500 build, they are adequate, but they are the absolute limit of what this hardware can handle without buckling. Do you agree with my experience regarding the spring noise in cheap boom arms, or have you found a budget brand that actually stays silent?
Don’t get tricked by the $150 ‘Everything’ kits
When you browse marketplaces, it is incredibly tempting to click ‘buy’ on those all-in-one bundles that promise a microphone, ring light, and green screen for the price of a nice dinner. Compared to our $500 curated build, those generic kits from brands like Neewer or GVM offer instant gratification but zero longevity. The ‘condenser’ microphones in those bundles often use cheap electret capsules that produce a tinny, thin sound with a high floor of static. Our choice, the Audio-Technica ATR2100x-USB, provides a rich, broadcast-ready tone that those generic kits simply cannot replicate. While the bundles save you $300 upfront, you will likely replace every single component within six months, making the ‘savings’ a long-term expense.
Elgato Wave:3 vs. our custom hardware stack
The biggest competitor to a manual budget build is the Elgato ecosystem. An Elgato Wave:3 microphone and a single Key Light Air will easily set you back nearly $350. For that price, you get excellent software integration (Wave Link) but less physical hardware. In comparison, our $500 budget manages to squeeze in a two-point lighting system and a versatile dynamic microphone. The Elgato setup is for the creator who values ‘set it and forget it’ software, whereas our build is for the creator who wants better light coverage and a microphone that can grow with them into professional XLR gear. If you check the current pricing on professional audio retailers, you will see that the ATR2100x-USB consistently holds its value because of this dual-connectivity versatility.
Is it worth the upgrade to a professional XLR interface?
Many creators ask if they should skip the $500 build and go straight for the ‘pro’ standard: a Shure SM7B paired with a Focusrite Scarlett 2i2. That jump costs roughly $600 just for the audio portion, excluding lights and stands. While the SM7B is an industry legend, the ATR2100x-USB in our build gets you 85% of the way there for a fraction of the cost. The ATR2100x-USB’s dynamic capsule is remarkably similar in its ability to ignore room echo. Unless you are recording in a sound-treated studio where you can hear a pin drop, the expensive Shure might actually be overkill for a standard home office. For most of us, the smart move is to master the budget hardware first before chasing the diminishing returns of high-end studio gear.
The trade-off between convenience and quality
Ultimately, choosing this $500 custom build over a competitor like the Blue Yeti ‘Yeticaster’ bundle comes down to future-proofing. The Yeti is a great-sounding mic, but its USB-only nature means it is a dead end. Once you want to use a mixer or a professional interface, the Yeti becomes a paperweight. Our curated hardware list prioritizes components that have a ‘Path to Pro.’ You are buying a microphone that works on USB today but thrives on XLR tomorrow. You are buying lights that might have cheap stands but feature high-quality LED chips that won’t distort your skin tones. If you are curious about how these individual pieces compare to other mid-range options, you should check out our detailed breakdown of the best creator rigs for under $1,000 to see where your next upgrade path lies.
The Heavy Metal Hits and the Plastic Misses
- Pro: The ATR2100x-USB is a beast that grows with you, offering both USB and XLR outputs.
- Pro: Dynamic microphone capsules are vastly superior for home offices because dynamic mics beat condensers in noisy home offices.
- Pro: Two-point LED lighting creates professional depth that a single ring light can never match.
- Con: The included boom arms are noisy and prone to sagging over time without modifications.
- Con: Power bricks for budget lighting can run alarmingly hot during long recording sessions.
Does Your Content Actually Need This Level of Polish?
This $500 curated build is the gold standard for YouTube creators, podcasters, and remote professionals who want to sound like they are in a radio booth without spending a month’s rent. If you are struggling with limited space, these 7 studio setup ideas for people in small studio apartments will help you fit this gear into a tight corner. However, you should skip this specific hardware list if you are a run-and-gun travel vlogger; this equipment is designed to stay put on a desk. If you do pull the trigger, make sure you know how to stop your softbox from drooping on its mount, as the budget brackets are the weakest link in the chain. #IMAGE_PLACE_HOLDER_E#
The Verdict on This Professional $500 Foundation
Building a studio piece-by-piece is always smarter than buying a “starter kit” that you will outgrow in three months. While you might eventually need a 12-dollar metal plate to stop your mic boom from sagging, the actual quality of the audio and video you produce with this rig will rival creators spending three times as much. If you are still hearing a bounce in your voice after setup, learn how to get rid of echo in a room with bare walls to truly maximize this hardware’s potential. This is a 9/10 recommendation for anyone serious about their digital presence. Stop browsing and start building.