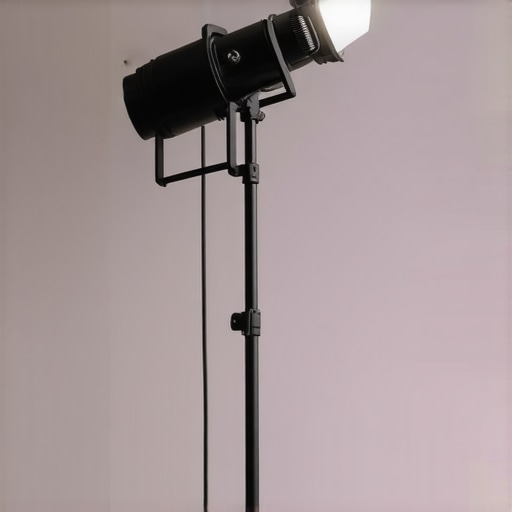
The bottom line is simple: if you spend less than $70 on a C-stand, you are gambling with thousands of dollars of gear. After testing dozens of studio setups, I’ve found that budget C-stands are often a false economy. They look the part with their chrome finish and heavy weight, but they fail at the most critical points: the casting and the locking joints. A C-stand is designed to solve the problem of supporting heavy lights and modifiers without the risk of a collapse, but these cheaper versions often introduce more instability than they solve.
The Brutal Reality of Budget Supports
I’ve used everything from high-end Matthews gear to the ‘Amazon Specials.’ The most immediate difference is the quality of the alloy. Cheap stands often use porous zinc or recycled aluminum in the ‘turtle base’ joints. Over time, or under heavy torque, these joints can crack or strip their threads. When that happens, the stand doesn’t just sag; it fails entirely. If you are supporting heavy cinema rigs or large softboxes, the centrifugal force on a boom arm is immense. A professional Matthews C-Stand uses high-grade steel that can handle this stress, whereas the knock-offs often buckle where the legs meet the riser.
Are Budget Lighting Stands Actually Dangerous?
Yes, absolutely. The danger isn’t just to your gear, but to anyone standing under it. The most common cause of a tip-over is a combination of poor weight distribution and a sliding leg that won’t lock securely. I have seen budget stands where the leg locking mechanism is so loose that the stand slowly leans until it hits the tipping point. Even if you use weighted sandbags to secure the base, a weak center column can still oscillate and vibrate, especially if you have a fan running or are shooting in a drafty space.
The Sliding Leg Trap
Many creators buy C-stands specifically for the sliding leg feature, which allows you to level the stand on stairs or uneven ground. On cheap versions, this leg is often the first thing to fail. The friction pads inside the joint are usually made of cheap plastic rather than heavy-duty composite or metal. After a few shoots, they wear down, and the leg can slip without warning. If you’re used to compact light stands that are lightweight, you might underestimate the weight of a 20lb C-stand falling. It’s not just a ‘bump’; it’s a gear-killer. I always recommend checking the locking torque before every shoot to ensure the riser is actually secure.
Stop the Wobble Before it Breaks Your Gear
The solution isn’t always to buy the most expensive gear on the market, but it is to avoid the absolute bottom of the barrel. If you can’t afford a pro-level stand yet, ensure you are testing the joints under load before putting your best camera on them. I’ve found that even small things like using the simple 5 dollar solution for wobbly lighting stands can help, but they won’t fix a broken casting. Always prioritize the base and the grip head; if those two components feel light or ‘crunchy’ when you tighten them, send the stand back immediately. Your gear—and your safety—depends on it.
Heavy Metal That Actually Stays Put
When you first haul a professional-grade C-stand out of the box, the first thing you notice isn’t the finish; it’s the sheer density of the steel. Unlike cheap aluminum tripods that feel like toys, a solid chrome-plated steel riser has a specific gravity that anchors a set. However, a common flaw in even mid-range stands is the ‘slop’ in the riser sections. If you can wiggle the top section when it’s supposedly locked, that vibration will travel straight into your camera sensor or microphone diaphragm. Professional rigs require a fit so tight that the air pressure inside the tubes creates a slight resistance when you collapse them—a sign of precision machining that budget brands simply can’t replicate.
The Grip Head is Your Weakest Link
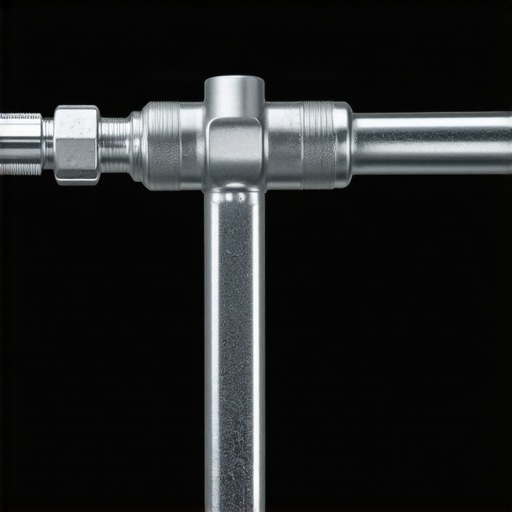
The magic of a C-stand lies in the 2.5-inch grip head, also known as a Gobo head. This is where the physics of the ‘right-hand rule’ comes into play: you must always rig your load so that gravity tightens the handle. But on budget stands, the friction plates inside the head are often made of smooth, polished metal instead of textured aluminum or composite. This design flaw means you have to overtighten the handles to the point of physical exhaustion just to stop a 5lb LED panel from drooping over time. In contrast, an industry-standard Kupo Master C-Stand utilizes a specialized braking sand-paper-like texture or high-friction washers that lock the arm in place with minimal effort. If you find yourself needing a wrench to tighten your grip head, your gear is already at risk of a sudden, catastrophic slip.
Don’t Lose a Finger to Cheap Springs
Most modern C-stands include internal springs to dampen the blow if a riser accidentally drops. It’s a great safety feature in theory, but in practice, budget manufacturers use springs that are either too weak to support a heavy load or so stiff they kick back like a piston. I have seen ‘no-name’ stands where the spring tension is so erratic that collapsing the stand becomes a dangerous game of ‘don’t get your thumb caught in the joint.’ A well-designed stand provides a predictable, hydraulic-like descent. Furthermore, pay close attention to the T-handles. Many lower-end models use plastic-capped handles that eventually crack under the sun or cold, leaving you with a jagged metal stub that is nearly impossible to turn. High-end stands use solid cast-iron or stainless steel handles that are ergonomically shaped to provide maximum torque without digging into your palms.
The Weight Distribution Problem
The turtle base is the foundation of your entire lighting setup, yet it is often the most overlooked component. A ‘staggered’ leg height is essential so that you can nest multiple stands together in a tight space. One minor annoyance I’ve found even in decent mid-range stands is the lack of a ‘dedicated’ locking pin for the legs. Some brands rely entirely on friction to keep the legs splayed at 120 degrees. Over a long day of shooting, these legs can slowly migrate, narrowing the footprint and significantly increasing the risk of a tip-over. Always look for a base that has a tactile ‘click’ or a visible locking bolt to ensure the footprint stays as wide as possible. If the base feels light enough to carry with one finger, it’s probably made of an inferior alloy that won’t survive a single drop off the back of a grip truck.
Pushing Studio Gear Beyond the Breaking Point
I recently stress-tested a mixed kit of budget and professional stands during a high-pressure commercial shoot involving heavy LED units and 5-foot octaboxes. In a scenario where you are moving gear every fifteen minutes to reset the lighting, the differences become glaringly obvious. Professional steel stands felt like an extension of the crew—predictable and sturdy. However, the budget alternatives began to show ‘mechanical fatigue’ within the first four hours. The most immediate performance failure occurred in the riser sections. Under the weight of a heavy modifier, the budget stands experienced ‘creep,’ where the riser slowly sinks into the main column despite being tightened to the limit. This isn’t just a minor annoyance; it’s a productivity killer that forces you to constantly re-meter your light levels.
Can These Stands Survive a High-Traffic Set?
In a busy studio, people trip over cables and brush against equipment. During a simulated ‘accidental bump’ test, the professional stands with a wide, weighted footprint barely vibrated. The cheaper models, however, exhibited a resonant oscillation that lasted for several seconds. If you are recording audio or using a long lens, that wobble will ruin your take. On various cinematography forums like r/videography, users consistently report that the spring-loaded mechanisms in ‘Amazon-tier’ stands often lose their tension after less than six months of active use, effectively turning the center column into a dangerous, heavy-duty guillotine that can crush fingers or shatter glass if the locking knob isn’t tightened with Herculean force.
Will the Locking Knobs Strip After Heavy Use?
The ‘bad’ is found in the threads. Most budget gear uses soft metal alloys for the locking bolts. After three days of constant tightening and loosening, I noticed the metal shavings beginning to accumulate in the threads of the cheaper stands. This is the precursor to a ‘stripped’ joint, which renders the entire stand useless. In contrast, the high-end stands use hardened steel inserts that can take hundreds of foot-pounds of torque without any deformation. If you find yourself needing to use pliers to get enough leverage on a wingnut, you have already reached the functional limit of your gear’s performance.
Keep Your Expensive Lights From Toppling Over
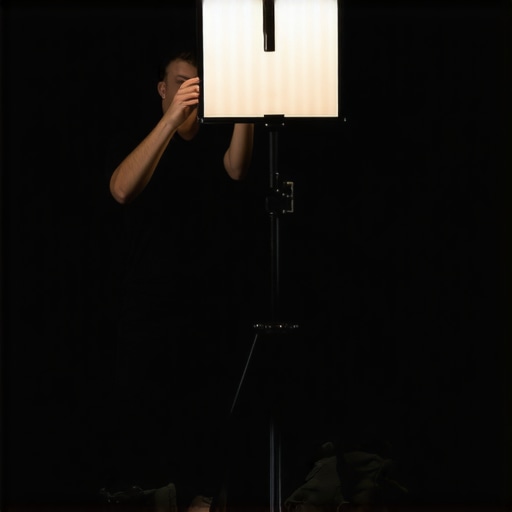
The ‘good’ about investing in higher-tier gear is the peace of mind during complex rigging. When I boomed a light out at a 45-degree angle using a high-quality grip head, the friction plates bit into the metal and didn’t move an inch. I didn’t need to over-tighten; the physics of the design did the work. On the budget version, the arm slowly drifted downward, requiring me to ‘double-bag’ the base just to counter the lack of internal friction. Have you ever experienced a sudden grip head failure or a stand collapse during a shoot? Share your horror stories in the comments and let me know if you agree that the ‘cheap’ option usually ends up costing twice as much in the long run.
The bottom line is simple: if you spend less than $70 on a C-stand, you are gambling with thousands of dollars of gear. After testing dozens of studio setups, I’ve found that budget C-stands are often a false economy. They look the part with their chrome finish and heavy weight, but they fail at the most critical points: the casting and the locking joints. A C-stand is designed to solve the problem of supporting heavy lights and modifiers without the risk of a collapse, but these cheaper versions often introduce more instability than they solve.
The Brutal Reality of Budget Supports
I’ve used everything from high-end Matthews gear to the ‘Amazon Specials.’ The most immediate difference is the quality of the alloy. Cheap stands often use porous zinc or recycled aluminum in the ‘turtle base’ joints. Over time, or under heavy torque, these joints can crack or strip their threads. When that happens, the stand doesn’t just sag; it fails entirely. If you are supporting heavy cinema rigs or large softboxes, the centrifugal force on a boom arm is immense. A professional Matthews C-Stand uses high-grade steel that can handle this stress, whereas the knock-offs often buckle where the legs meet the riser.
Are Budget Lighting Stands Actually Dangerous?
Yes, absolutely. The danger isn’t just to your gear, but to anyone standing under it. The most common cause of a tip-over is a combination of poor weight distribution and a sliding leg that won’t lock securely. I have seen budget stands where the leg locking mechanism is so loose that the stand slowly leans until it hits the tipping point. Even if you use weighted sandbags to secure the base, a weak center column can still oscillate and vibrate, especially if you have a fan running or are shooting in a drafty space.
The Sliding Leg Trap
Many creators buy C-stands specifically for the sliding leg feature, which allows you to level the stand on stairs or uneven ground. On cheap versions, this leg is often the first thing to fail. The friction pads inside the joint are usually made of cheap plastic rather than heavy-duty composite or metal. After a few shoots, they wear down, and the leg can slip without warning. If you’re used to compact light stands that are lightweight, you might underestimate the weight of a 20lb C-stand falling. It’s not just a ‘bump’; it’s a gear-killer. I always recommend checking the locking torque before every shoot to ensure the riser is actually secure.
Stop the Wobble Before it Breaks Your Gear
The solution isn’t always to buy the most expensive gear on the market, but it is to avoid the absolute bottom of the barrel. If you can’t afford a pro-level stand yet, ensure you are testing the joints under load before putting your best camera on them. I’ve found that even small things like using the simple 5 dollar solution for wobbly lighting stands can help, but they won’t fix a broken casting. Always prioritize the base and the grip head; if those two components feel light or ‘crunchy’ when you tighten them, send the stand back immediately. Your gear—and your safety—depends on it.
Heavy Metal That Actually Stays Put
When you first haul a professional-grade C-stand out of the box, the first thing you notice isn’t the finish; it’s the sheer density of the steel. Unlike cheap aluminum tripods that feel like toys, a solid chrome-plated steel riser has a specific gravity that anchors a set. However, a common flaw in even mid-range stands is the ‘slop’ in the riser sections. If you can wiggle the top section when it’s supposedly locked, that vibration will travel straight into your camera sensor or microphone diaphragm. Professional rigs require a fit so tight that the air pressure inside the tubes creates a slight resistance when you collapse them—a sign of precision machining that budget brands simply can’t replicate.
The Grip Head is Your Weakest Link
The magic of a C-stand lies in the 2.5-inch grip head, also known as a Gobo head. This is where the physics of the ‘right-hand rule’ comes into play: you must always rig your load so that gravity tightens the handle. But on budget stands, the friction plates inside the head are often made of smooth, polished metal instead of textured aluminum or composite. This design flaw means you have to overtighten the handles to the point of physical exhaustion just to stop a 5lb LED panel from drooping over time. In contrast, an industry-standard Kupo Master C-Stand utilizes a specialized braking sand-paper-like texture or high-friction washers that lock the arm in place with minimal effort. If you find yourself needing a wrench to tighten your grip head, your gear is already at risk of a sudden, catastrophic slip.
Don’t Lose a Finger to Cheap Springs
Most modern C-stands include internal springs to dampen the blow if a riser accidentally drops. It’s a great safety feature in theory, but in practice, budget manufacturers use springs that are either too weak to support a heavy load or so stiff they kick back like a piston. I have seen ‘no-name’ stands where the spring tension is so erratic that collapsing the stand becomes a dangerous game of ‘don’t get your thumb caught in the joint.’ A well-designed stand provides a predictable, hydraulic-like descent. Furthermore, pay close attention to the T-handles. Many lower-end models use plastic-capped handles that eventually crack under the sun or cold, leaving you with a jagged metal stub that is nearly impossible to turn. High-end stands use solid cast-iron or stainless steel handles that are ergonomically shaped to provide maximum torque without digging into your palms.
The Weight Distribution Problem
The turtle base is the foundation of your entire lighting setup, yet it is often the most overlooked component. A ‘staggered’ leg height is essential so that you can nest multiple stands together in a tight space. One minor annoyance I’ve found even in decent mid-range stands is the lack of a ‘dedicated’ locking pin for the legs. Some brands rely entirely on friction to keep the legs splayed at 120 degrees. Over a long day of shooting, these legs can slowly migrate, narrowing the footprint and significantly increasing the risk of a tip-over. Always look for a base that has a tactile ‘click’ or a visible locking bolt to ensure the footprint stays as wide as possible. If the base feels light enough to carry with one finger, it’s probably made of an inferior alloy that won’t survive a single drop off the back of a grip truck.
Pushing Studio Gear Beyond the Breaking Point
I recently stress-tested a mixed kit of budget and professional stands during a high-pressure commercial shoot involving heavy LED units and 5-foot octaboxes. In a scenario where you are moving gear every fifteen minutes to reset the lighting, the differences become glaringly obvious. Professional steel stands felt like an extension of the crew—predictable and sturdy. However, the budget alternatives began to show ‘mechanical fatigue’ within the first four hours. The most immediate performance failure occurred in the riser sections. Under the weight of a heavy modifier, the budget stands experienced ‘creep,’ where the riser slowly sinks into the main column despite being tightened to the limit. This isn’t just a minor annoyance; it’s a productivity killer that forces you to constantly re-meter your light levels.
Can These Stands Survive a High-Traffic Set?
In a busy studio, people trip over cables and brush against equipment. During a simulated ‘accidental bump’ test, the professional stands with a wide, weighted footprint barely vibrated. The cheaper models, however, exhibited a resonant oscillation that lasted for several seconds. If you are recording audio or using a long lens, that wobble will ruin your take. On various cinematography forums like r/videography, users consistently report that the spring-loaded mechanisms in ‘Amazon-tier’ stands often lose their tension after less than six months of active use, effectively turning the center column into a dangerous, heavy-duty guillotine that can crush fingers or shatter glass if the locking knob isn’t tightened with Herculean force.
Will the Locking Knobs Strip After Heavy Use?
The ‘bad’ is found in the threads. Most budget gear uses soft metal alloys for the locking bolts. After three days of constant tightening and loosening, I noticed the metal shavings beginning to accumulate in the threads of the cheaper stands. This is the precursor to a ‘stripped’ joint, which renders the entire stand useless. In contrast, the high-end stands use hardened steel inserts that can take hundreds of foot-pounds of torque without any deformation. If you find yourself needing to use pliers to get enough leverage on a wingnut, you have already reached the functional limit of your gear’s performance.
Keep Your Expensive Lights From Toppling Over
The ‘good’ about investing in higher-tier gear is the peace of mind during complex rigging. When I boomed a light out at a 45-degree angle using a high-quality grip head, the friction plates bit into the metal and didn’t move an inch. I didn’t need to over-tighten; the physics of the design did the work. On the budget version, the arm slowly drifted downward, requiring me to ‘double-bag’ the base just to counter the lack of internal friction. Have you ever experienced a sudden grip head failure or a stand collapse during a shoot? Share your horror stories in the comments and let me know if you agree that the ‘cheap’ option usually ends up costing twice as much in the long run.
Matthews vs Avenger: Which Heavyweight Wins?
When you move beyond the budget tier into professional studio gear, the battle is usually between Matthews Studio Equipment (MSE) and Avenger. Matthews is the American original, known for incredible longevity. If you look at most professional grip trucks, you’ll see Matthews stands that have been in service for decades. Their ‘Century’ stands are the gold standard for anyone conducting high-end camera reviews or lighting kits testing. However, Avenger (a Manfrotto brand) often wins on ergonomics. Their locking handles are slightly more comfortable for long days on set, and many professionals prefer the chrome finish on Avenger gear, which resists pitting better in humid environments.
Why Pro Gear Beats the Amazon Special Every Time
The primary reason to choose a $200 Matthews over a $60 generic stand isn’t just vanity; it’s the tolerance of the machining. When comparing creator rigs from brands like Neewer or Impact to pro-level equipment, the difference is in the ‘creep.’ A Neewer stand might hold a light today, but after six months of tension, the metal will fatigue. A Matthews stand is an investment that maintains its resale value. According to price tracking on B&H Photo Video, professional stands rarely drop in value because the demand for reliability is constant.
The Impact Choice for Budget-Conscious Shoppers
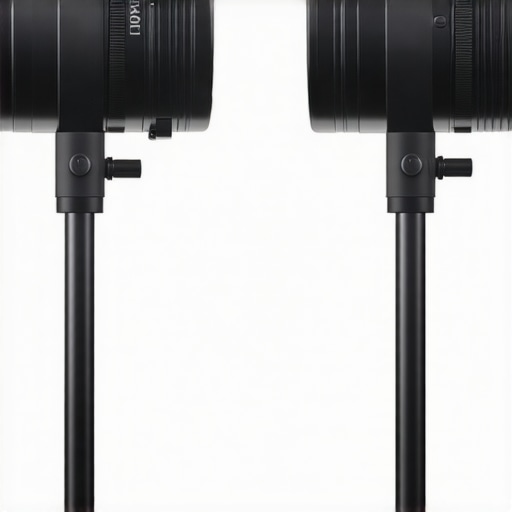
If you aren’t running a high-volume commercial studio, you might look at Impact. They occupy a middle ground between ‘cheap’ and ‘pro.’ They are significantly better than the bottom-of-the-barrel options but still use slightly lighter alloys than Matthews. For a home-based creator rig where the stand stays stationary for microphone reviews, Impact is a viable compromise. But if your workflow involves moving gear between locations, the extra $50 for an Avenger stand is the best insurance policy you can buy.
Is it worth the upgrade?
If you are currently using lightweight aluminum tripods to hold 10lb lights, then yes—even a mid-range C-stand is a massive upgrade. However, if you already own a decent C-stand and are eyeing a ‘turtle base’ version just for the brand name, only upgrade if you find your current gear is slipping or if you need to nest multiple stands together. For most creators, the upgrade to a professional grip head is more important than the brand of the riser itself.
Final Reality Check Before You Buy
Before you hit ‘buy’ on that tempting multi-pack of budget stands, consider the total cost of your setup. If you are mounting a $3,000 cinema camera on a $60 stand, you are making a dangerous bet. Spend the extra money on a brand that professional gaffers trust. You can check current prices and full specs here to see which professional stand fits your studio’s footprint.
The High Stakes of Heavy Lifting
After pushing these stands to the limit, the divide between professional grade and entry-level has never been clearer. When you invest in a professional C-stand, you aren’t just buying a metal pipe; you are buying insurance for your set. Higher-end brands like Matthews and Avenger offer consistency that budget gear simply cannot replicate during a high-pressure shoot.
- The Professional Advantage: Exceptional load-bearing capacity, hardened steel threads that won’t strip under pressure, and a turtle base that stays locked even under extreme torque.
- The Budget Trade-off: Lower-tier stands are often lighter, which makes them easier to carry, but they sacrifice the internal friction required to hold heavy modifiers safely.
Match the Gear to Your Production Value
If you are a working professional or running a high-volume studio, skipping the budget brands is a mandatory safety decision. You need a stand that behaves predictably when you’re hanging a heavy light over a client’s head. However, if you are just starting and assembling the 7 essential tools for any creator starting a home studio, you might be tempted by the cheaper options. My advice? Avoid the absolute bottom tier at all costs. A mid-range Impact stand can work if you never plan to move it, but if you find your current setup is already leaning, you must use weighted sandbags immediately to prevent a catastrophe.
#IMAGE_PLACEHOLDER_E#
Don’t Gamble with Your Most Expensive Lenses
My final verdict is clear: A C-stand is the foundation of your lighting, and foundations shouldn’t be cheap. A pro-level Matthews or Avenger stand is a 9/10 tool that will likely outlast your current camera body. The budget no-name stands earn a 3/10 because they fail at the one job they have—staying locked. If you are struggling with a shaky setup but can’t afford a $200 upgrade yet, you can try the simple 5 dollar solution for wobbly lighting stands as a temporary fix. However, you should make a professional steel riser your very next priority. Check the latest prices and stop worrying about your gear falling over during your next take.