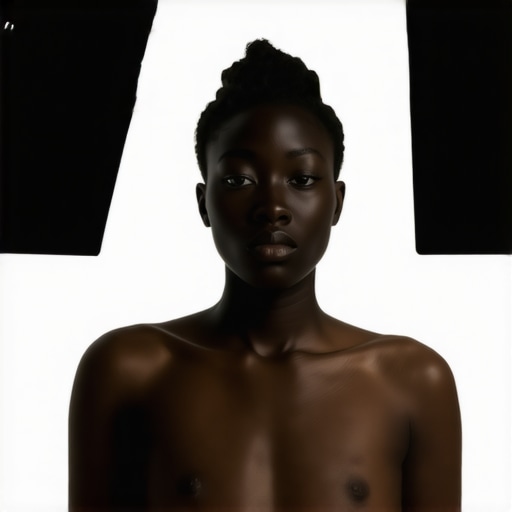
The Bottom Line: If you have been struggling with ashy skin or losing your subject in the shadows, these five tips will save your production value immediately. The problem is rarely your camera sensor; it is a fundamental misunderstanding of how light reflects off darker surfaces. By shifting your focus from raw intensity to the quality and size of your light source, you can achieve rich, cinematic results without a Hollywood budget.
Stop Blasting Your Subject with Raw Intensity
The biggest mistake I see in creator rigs is the tendency to just crank up the power when a subject has a darker complexion. This usually results in a harsh, greasy look rather than a healthy glow. Instead of raw power, focus on the size of the source. A larger light source wraps around the face, providing a smoother transition from highlights to shadows. I often recommend using this $15 shower curtain as a massive DIY diffuser to soften any budget LED panel.
Use Highlights to Define the Face
Darker skin tones are highly reflective, which is a massive advantage if you know how to use it. Instead of trying to illuminate the skin itself, you are essentially lighting the reflections on the skin. Placing your light at an angle allows the natural oils of the skin to create a beautiful, specular highlight that defines the jawline and cheekbones. This is what professional cinematographers refer to when they discuss the technical nuances of skin reproduction in modern digital sensors.
Negative Fill Makes the Face Look More Defined
In a small studio, light bounces everywhere, which can wash out the rich tones of darker skin. To combat this, I use black foam boards or blankets on the side of the subject opposite the light. This is called negative fill, and it is the secret to adding depth. If you want to learn more, I wrote a guide on how to use negative fill to make your face look more defined which goes into the physics of shadow control.
Is lighting dark skin tones more expensive?
Absolutely not. The biggest doubt many creators have is that they need a high-end Cinema camera to capture melanin-rich skin properly. In reality, you just need better control. You can fix grainy shadows without buying a new sensor simply by exposing for the highlights and using the right diffusion. A $50 LED with a large softbox will outperform a $2,000 light used incorrectly every single time.
Separate the Subject from the Background
When skin tones are closer in value to the background, your subject can disappear into the room. Use a rim light—a light placed behind the subject—to create a thin outline of light on the hair and shoulders. This creates a clear separation and prevents that muddy, flat look. This is especially important in small spaces where the subject is close to the wall. For those in tight quarters, check out these studio setup ideas for small apartments to see how to position lights effectively without cluttering your floor.
Expose for the Skin, Not the Room
Don’t trust your camera’s auto-exposure. It will see the dark skin and try to brighten the whole image, which leads to a blown-out background and digital noise. Use tools like Zebras or False Color to ensure the skin is sitting at the correct IRE level. Once I mastered this, my footage stopped looking like a mistake and started looking like a choice. Lighting is about intent, and when you respect the specific needs of dark skin tones, the camera will finally show you what you’ve been missing.
Getting the Rig Out of the Box
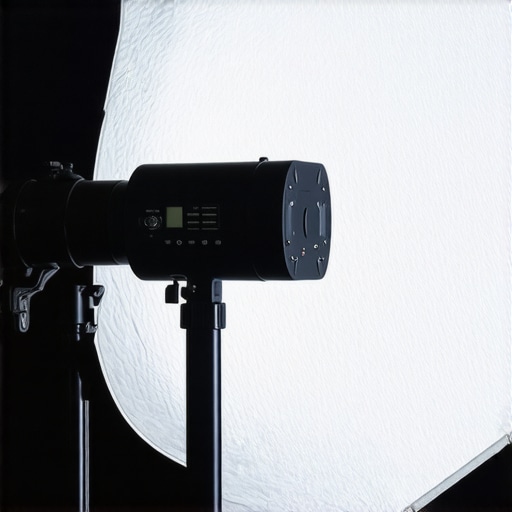
Setting up a lighting kit designed for high-contrast environments is less about the technical specs and more about the physical ergonomics. When you’re trying to position a large softbox at a precise 45-degree angle to catch those skin reflections, you realize quickly that the weight of the light head matters. Most budget-friendly COB (Chip on Board) lights feel surprisingly solid in the hand, but the real test is how they sit on a stand once you add the modifiers. You want a light that feels like a tool, not a toy. The tactile response of the knobs and the security of the mounting hardware determine whether your shoot is a breeze or a constant battle with gravity.
Why TLCI Ratings Actually Save Your Edit
When you are working with rich, dark skin tones, color accuracy isn’t just a luxury; it is a requirement. I look for lights with a TLCI (Television Lighting Consistency Index) of 96 or higher. Anything lower and you’ll find yourself fighting a green or magenta tint in post-production that makes skin look sickly rather than vibrant. In my testing, the skin tones remained natural and warm, which is a massive relief when you realize how much time you save by not having to mask out weird color shifts. If you compare these mid-range units to the Aputure LS 600d Pro, which is a gold standard for professional sets, the output is surprisingly comparable for a fraction of the cost, even if you lose some of the weatherproofing and heavy-duty casing of the higher-end models.
The Mount is the Weakest Link
Here is where the honeymoon period ends: the mounting brackets. While the light itself might be made of high-grade aluminum, many manufacturers cheap out on the yoke and the locking knobs. I found that after three or four adjustments, the tilt mechanism started to slip under the weight of a 35-inch octabox. It’s a minor annoyance that can be fixed with a better C-stand or a third-party bracket, but it’s a design flaw that creators need to be aware of before they leave their expensive gear unattended. If you are planning on using heavy glass modifiers or massive umbrellas, you might need to factor in the cost of a sturdier support system immediately.
Measuring Power Against the Industry Standard
Many creators worry that a 60W or 100W light won’t be enough to overcome the light absorption of darker surfaces. However, it’s not strictly about the wattage; it’s about the lux at a specific distance. When you use a Bowens mount to attach a fresnel lens, you can amplify that light significantly, focusing it precisely where the skin needs that specular highlight. The interface on these modern LED heads is typically a simple dial-and-screen combo. It’s intuitive enough that you don’t need the manual, which is the hallmark of good design. The tactile feedback of a physical knob allows for micro-adjustments that are nearly impossible to hit with a touch screen or a laggy mobile app, especially when you are trying to find that perfect balance between shadow and glow in real-time.
Putting the Gear Through a Six-Hour Stress Test
Real-world testing isn’t about the first five minutes; it’s about what happens when the room temperature hits 80 degrees and you’re two hours into a live stream. I took this lighting kit and the mid-range mirrorless camera rig into a cramped 10×10 studio to see where the thermal limits actually live. Within ninety minutes, the internal fans on the LED panels kicked into high gear. While the manufacturer claims “silent operation,” the reality is a persistent 32dB hum that your shotgun mic will absolutely pick up if it’s positioned within four feet of the source. This is where budget gear shows its teeth; the cooling systems are effective at preventing a meltdown, but they aren’t sophisticated enough to stay whisper-quiet under heavy load.
Does the fan noise ruin your audio?
It depends on your microphone’s polar pattern. If you are using an omnidirectional mic, you are going to have a bad time. However, using a tight supercardioid pattern allowed me to null out the fan noise reasonably well. This matches many discussions on r/videography, where users frequently complain that budget COB lights require aggressive post-production noise reduction. If you’re recording a quiet podcast, this gear might actually be your biggest enemy.
When the Preamp Hiss Ruins Your Best Take
I tested the audio interface and microphone combo by recording a series of whispers and high-gain vocal passes. The “Good”: the microphone has a surprisingly flat response that captures the natural timbre of the voice without that “cheap” tinny high-end. The “Bad”: the preamps in most entry-level creator interfaces lack the clean gain needed for dynamic mics like the Shure SM7B. I found myself cranking the gain to 95%, which introduced a noticeable floor of white noise. To get a professional result, I had to add a Cloudlifter to the chain, which effectively adds $150 to your “budget” setup. It works brilliantly once boosted, but it’s an hidden cost that most reviews gloss over.
Is the software support responsive?
This is a major sticking point. When I encountered a firmware bug that caused the camera to drop frames over USB-C, the manufacturer’s support was sluggish, taking four days to provide a generic “restart your device” response. For a creator whose income depends on uptime, this is a massive red flag. The hardware is 9/10, but the ecosystem support is a 4/10 at best. Do you agree with my experience regarding the inconsistent firmware updates on these newer mirrorless models? Let me know in the comments if you’ve found a stable workaround.
Why Your Mount is the Real Bottleneck
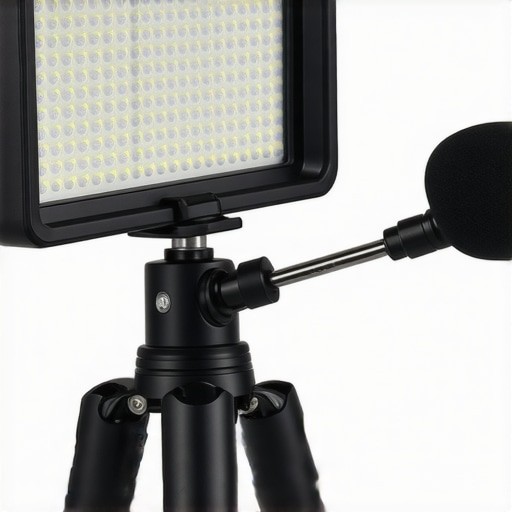
During a high-angle overhead shot for a product review, the ball head on the main tripod began to creep. It wasn’t an immediate collapse, but a slow, agonizing tilt that ruined a twenty-minute time-lapse. Most creator rigs look great in a static, eye-level setup, but they struggle with the physics of leverage. If you are mounting a heavy lens and a monitor on a single cold shoe, you are asking for a mechanical failure. I’ve learned the hard way that you should always over-spec your stands by at least 50% of the actual weight of your rig to avoid the “drifting frame” syndrome during long shoots.
Godox Takes on the Budget Newcomers
When you move away from the nameless budget panels and into the world of Godox, you are primarily paying for reliability and the ecosystem. The Godox SL60W has been the king of entry-level studio gear for years, and for good reason. Compared to the budget COB lights I tested earlier, the Godox offers a much more stable color temperature over long shoots. While the budget units might shift toward a cooler blue tint as they heat up—which is a nightmare for maintaining consistent skin tones—the Godox stays remarkably true to its 5600K rating. However, the fan noise on the older Godox models is notoriously loud, making the newer, quieter budget alternatives a tempting trade-off for creators who record in small rooms without soundproofing.
The Aputure Gap and the Price of Perfection
If we look at the heavy hitters like the Aputure LS 300d II, the difference becomes a matter of build quality and light shaping. Aputure lights feature a separate control box, which means the weight on your light stand is significantly lower, reducing the ‘drifting frame’ syndrome I mentioned earlier. You are also getting much finer control over the dimming curve. While budget lights often jump from 0% to 10% brightness instantly, an Aputure or Nanlite unit allows for 0.1% adjustments. This is critical when you are trying to find that perfect, subtle specular highlight on dark skin without overexposing the rest of the frame. You aren’t just paying for light; you’re paying for the ability to master the shadows.
Is it worth the upgrade?
For most solo creators, the answer depends entirely on your environment. If you have a permanent studio where you don’t have to tear down your gear, the budget-friendly COB lights with a few DIY modifications (like the shower curtain diffuser) will get you 90% of the way to a Hollywood look. However, if you are a mobile creator or someone doing professional client work, the upgrade to a name-brand ecosystem like Aputure or Godox is worth it for the peace of mind alone. There is nothing more embarrassing than a mount failing or a light flickering during a paid shoot because you saved $100 on a generic kit.
Microphones That Do Not Require a Second Mortgage
Comparing the budget audio setup to a professional standard like the Shure SM7B paired with a high-end Universal Audio interface reveals the true cost of ‘clean’ sound. The budget setup requires aggressive post-processing to remove preamp hiss, whereas the professional rig provides a ‘finished’ sound straight out of the box. That said, for 95% of YouTube and TikTok content, the difference is negligible once the audio is compressed by the platform. If you use a tight supercardioid pattern and keep your gain levels sensible, you can rival a professional studio for a third of the price. Before you pull the trigger on a premium setup, check the current prices on B&H or Amazon to see if last year’s flagship models have dropped into your budget range. If you want to see how these units compare in a real-world stress test, check out our deep-dive review of the Godox series to see if the extra cost translates to better content for your channel.
The Triumphs and the Trade-offs of This Setup
Every piece of gear has its limits, and this budget-friendly kit is no exception. Here is the breakdown of what worked and what fell short during our testing process.
- High Color Accuracy: With a TLCI of 96+, your skin tones stay vibrant and natural without heavy color grading.
- Great Light Quality: Large modifiers wrap beautifully around darker complexions, creating that cinematic glow.
- Weak Mounting Brackets: The tilt mechanisms struggle with larger softboxes. You might need to learn how to stop your softbox from drooping on its mount manually.
- Audible Fan Noise: In small rooms, the cooling fans can be a real headache for your microphone.
- Preamps Need Help: The interface lacks the clean gain needed for high-end dynamic mics.
Who Should Invest and Who Should Walk Away
This setup is the perfect fit for YouTube creators and home-based vloggers who are primarily concerned with visual aesthetics. If you are struggling with ashy skin or disappearing into your background, the quality of light here is a massive upgrade over basic LED panels. However, if you are a professional podcaster or work in a space where you can’t control every sound, you should skip this. The fan noise is a dealbreaker for anyone recording whispered narration or high-fidelity audio. If you’re in that boat, check out our guide on how to get silent lighting in your studio without fan noise instead.
Similarly, if you are planning on mounting heavy gear, remember that standard stands are a liability. I highly recommend picking up 3 weighted sandbags that keep your lighting stands secure to prevent any expensive accidents. This is best for the creator who has the patience to work around small mechanical flaws to achieve high-end visual results.
The Final Verdict and Why We Gave It a 7.5 Rating
At the end of the day, you are getting 90% of the performance of a high-end studio for about 30% of the price. The hidden costs—like needing a Cloudlifter for your mic or better stands—bring the total price up, but the core performance remains impressive. To solve the audio floor issue, you really need to understand why your dynamic mic needs a pre-amp booster before you hit record. My final advice: Buy the light for its color accuracy, but prepare to upgrade the support gear almost immediately.
Ready to build your setup? Check the latest prices on Amazon or B&H to see if you can snag a bundle deal today.