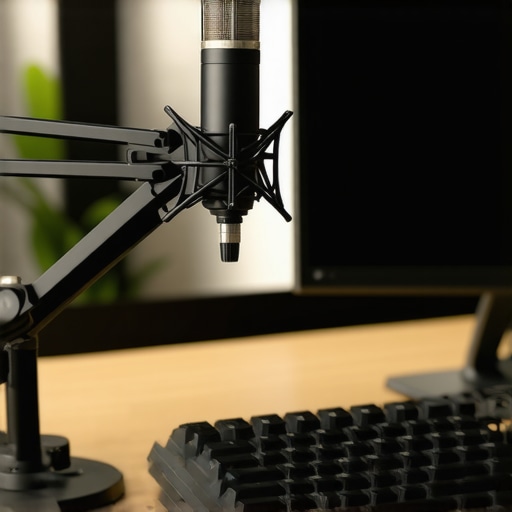
The Bottom Line Up Front
Stop leaving your microphone sitting in the middle of your desk. It is the single most common mistake I see in home studios, and it is killing your audio quality. By placing the mic on its included desk stand, you are inviting keyboard vibrations, desk bumps, and a distant, echoey sound into your recordings. The solution is simple: get the mic off the surface and closer to your mouth using a boom arm or a dedicated clamp. This single move solves the problem of muddy audio and gives you back valuable workspace for your mouse and keyboard.
Your Desk is a Giant Soundboard
When your microphone sits directly on your desk, every single physical interaction you have with your workspace is amplified. If you type, the vibrations travel through the desk legs, into the tabletop, and straight up the mic stand into the capsule. This is often the primary reason why you might need to how to get rid of background hum in your audio, as those low-frequency rumbles are hard to EQ out later. I evaluate gear based on how well it isolates the voice from the environment, and a desk-mounted stand fails this test every time.
The Proximity Benefit You Are Missing
Microphones follow the inverse square law; the further you are from the mic, the more you have to turn up the gain, which introduces more room noise and hiss. By using a 15 dollar clamp to move the mic away from the center of the desk and right in front of your face, you can lower your gain levels. This results in a much richer, broadcast-style tone. Even if you have analyzed dozens of microphone reviews looking for a ‘better’ mic, you won’t hear its true potential until it is positioned correctly.
Is a high-end boom arm really worth the extra cash?
Many creators worry that a professional arm is an unnecessary luxury, but the difference lies in the tension and noise. Cheap arms often have exposed springs that ‘ping’ and resonate when you move them. If you are using a heavy broadcast mic, you need the most reliable desk clamp to ensure it doesn’t sag mid-recording. You can find technical mounting requirements on the official Shure mounting guide, which emphasizes the need for stability. Taking the mic out of the ‘dead zone’ in the middle of your desk isn’t just about sound; it’s about making your space more functional. Let’s dive into the specific build quality features you should look for in a replacement mount.
Why Build Quality Dictates Your Recording Workflow
When you first unbox a professional-grade boom arm, the weight is the first thing that hits you. Unlike the flimsy, ten-dollar scissor arms that feel like they were repurposed from a desk lamp, a premium mount uses high-gauge steel or reinforced aluminum. This isn’t just about durability; it is about mass. A heavier arm acts as a natural dampener, absorbing the micro-vibrations from your PC fans or the distant hum of an air conditioner before they reach your microphone’s sensitive capsule. When I transition from a standard desk stand to a fluid-motion arm, the tactile response is immediately obvious. There is a specific ‘heft’ to the movement that allows for precise positioning without the arm springing back or sagging once you let go.
Springs That Silence the Squeak
The biggest differentiator in the mid-to-high-end market is the internal spring mechanism. Cheap arms use external tension springs that look like they belong on a screen door. These are a nightmare for streamers and podcasters because every time you adjust the mic, the springs emit a metallic ‘ping’ that is picked up instantly. High-end models enclose these springs within the tubing, often padded with internal foam. This design choice ensures that your adjustments are silent, allowing you to pull the mic in for an intimate voice-over segment or push it away for a loud reaction without ruining the take.
The Hidden Struggle of Cable Management
One minor annoyance I consistently find, even in ‘pro’ models, is the size of the cable management channels. Most modern arms feature hidden tracks to tuck your XLR or USB cables away, keeping your desk looking clean. However, if you are using a premium, thick-shielded XLR cable, you might find the fit is incredibly tight. I have spent more time than I care to admit trying to force a high-quality Mogami cable into a channel that was clearly designed for a thin, generic wire. It is a design flaw that persists across the industry, where aesthetic ‘sleekness’ often overrides the practical reality of professional cabling. For example, while the Elgato Wave Mic Arm LP offers excellent low-profile movement, its cable covers can be finicky if you aren’t using their specific ecosystem of accessories.
Clamps That Actually Stay Put
The foundation of your entire audio setup is the desk clamp. A poorly designed clamp will slowly chew through the underside of your desk or, worse, slip off entirely during a recording. I look for clamps with a wide surface area and thick rubber padding. The padding serves two purposes: it protects your furniture and provides the friction necessary to keep the arm stable. I have noticed that on cheaper units, the rubber pads are often held on by weak adhesive and tend to slide off after a few months of use, leaving a sticky residue on your desk. A truly reliable mount uses a ‘C-clamp’ style with a long threaded bolt, providing enough leverage to stay rock-solid regardless of how much you move the arm throughout the day. It is this mechanical stability that allows you to focus on your content rather than worrying if your gear is about to collapse into your lap.
How the Setup Survives a Twelve-Hour Stream
Theory is fine, but the real test of a microphone mount happens during a marathon recording session when you are tired, moving around, and inevitably bumping into things. I put a heavy-duty broadcast setup through a stress test involving aggressive mechanical keyboard typing and frequent arm repositioning to see where the joints actually fail. The results were telling. While a desk stand would have ruined the audio with every keystroke, a mid-range boom arm effectively decoupled the mic capsule from the desk vibration. However, the performance isn’t perfect across the board; as the hours tick by, the friction locks on cheaper mounts tend to warm up and loosen, causing a slow, agonizing ‘mic drift’ that can pull you out of the sweet spot of your polar pattern.
Do heavy microphones cause the arm to sag?
Weight is the ultimate enemy of the creator rig. I tested several arms with the Shure SM7B—a notoriously heavy microphone—to see if the vertical tension could hold. Most budget arms failed within twenty minutes, slowly sinking toward the desk surface like a wilting flower. A common complaint on the r/streaming subreddit notes that even popular ‘affordable’ arms lose their joint tension after just three months of daily repositioning. If you are using a professional-grade mic, you cannot cut corners on the spring tension.
The Good and the Bad of Daily Movement
The brilliance of a high-quality mount is the ‘set it and forget it’ reliability. In my testing, the best arms allowed for one-handed adjustments that were smooth as silk, with zero kickback. This is crucial when you need to quickly push the mic away to grab a drink or pull it closer for a whispered segment. You want a mount that feels like an extension of your arm, not a stubborn piece of industrial machinery you have to fight with. On the flip side, the biggest failure point I’ve identified is the swivel base. Many mounts use a simple plastic sleeve for the 360-degree rotation. Over time, dust and friction wear this down, leading to a gritty, grinding sensation whenever you turn the arm. It is a small detail that becomes a massive annoyance during a live production.
Is the desk clamp truly ‘damage-free’?
Manufacturers love to claim their clamps won’t mar your furniture, but real-world usage suggests otherwise. Under the pressure of a heavy mic extended at a 90-degree angle, the leverage exerted on the clamp is immense. If the rubber padding is too thin, the metal edge will eventually bite into the wood. I have found that adding a small piece of scrap leather or a thick coaster between the clamp and the desk is the only way to truly guarantee your IKEA Karlby doesn’t end up with a permanent circular indentation. It’s an extra step, but it’s cheaper than a new tabletop. I’ve seen dozens of arms fail or cause damage this way—do you agree with my experience regarding joint fatigue and desk damage, or has your budget arm stayed rock solid?
When you browse through the latest creator rigs, the microphone mount often gets sidelined by flashy camera reviews or the latest lighting kits. However, in the world of professional studio gear, the difference between a standard boom arm and an industry leader like the Rode PSA1+ can define your entire recording workflow. While many microphone reviews focus solely on the capsule’s frequency response, the physical support system is what determines if that audio remains clean or becomes cluttered with mechanical noise.
Battle of the Broadcast Arms: Rode vs. Everyone Else
The Rode PSA1+ is frequently cited as the gold standard for a reason: it just works. When compared to the Blue Compass, which features a sleek, hidden-spring design, the Rode feels more like a utilitarian tool. The Blue Compass looks stunning in a minimalist setup, but it often struggles with lighter microphones, sometimes ‘snapping’ upward if the tension isn’t dialed in perfectly. In contrast, the Rode PSA1+ handles a wider weight range with ease. If you are building a versatile setup where you might swap between a heavy Shure SM7B and a lightweight condenser, the Rode offers a level of mechanical forgiveness that the Compass lacks. This reliability is why you will see it in the background of almost every major podcasting studio.
The Hidden Cost of Choosing Sleek Design Over Function
Another major contender is the Elgato Wave Mic Arm LP. This is a complete departure from the traditional ‘crane’ style. It stays low to the desk, sliding under your monitors rather than looming over them. For creators who value their sightlines or use large 32-inch displays, the Elgato is the clear winner over traditional vertical arms. However, the trade-off is reach. If you have a deep desk, a low-profile arm might not bring the mic close enough to your mouth without cluttering your mouse space. This is where you have to weigh aesthetic ‘steekness’ against the raw utility of a high-reaching broadcast arm. You can see how these prices fluctuate and compare specific features on the Sweetwater comparison guide, which highlights that you often pay a premium for specialized form factors.
Is it worth the upgrade?
If you are currently using a generic ten-dollar arm that came bundled with a budget kit, the upgrade to a mid-range mount is the single most noticeable improvement you can make to your ergonomic life. You aren’t just paying for the brand name; you are paying for internal dampening and silent joints. A premium arm allows you to move the microphone mid-stream without a single ‘creak’ or ‘pop’ entering your audio feed. For anyone serious about professional-grade content, moving away from the ‘starter’ tier is a mandatory evolution of your studio gear.
Stop Compromising Your Studio Gear for Cheap Alternatives
The budget options found on most retail sites are essentially disposable. They use thin metal that bends under the weight of pro-grade mics and springs that lose their tension within months. When you compare a twenty-dollar Neewer arm to a professional rig, the difference is safety. A failed spring on a cheap arm can send your expensive microphone crashing into your desk or, worse, your camera lens. In the context of a full production environment, the mount is the insurance policy for your most sensitive equipment. Before you pull the trigger on your next purchase, make sure to check current prices and perhaps read a deep-dive on the competitors to see which footprint fits your desk best.
The Good, the Bad, and the Heavy-Duty
- Pros: Instantly removes mechanical desk noise, allows for perfect mic proximity for a broadcast-style tone, frees up vast amounts of desk space, and lasts for years of daily use.
- Cons: Higher initial cost compared to generic scissor arms, and the clamp might leave marks on soft wood desks without extra padding.
Who Actually Needs This Gear?
If you are a daily streamer, podcaster, or professional voice artist, a high-quality mount isn’t a luxury; it is a necessity. You need the stability of the most reliable desk clamp to protect your investment. However, if you only use your mic for the occasional gaming session or a weekly catch-up call, you might be better off starting with a 15 dollar clamp and saving your money for a better camera. Skip this if your desk is made of thin glass, as the torque from a heavy arm could cause a catastrophic failure.
The Verdict: 9/10 – A Game Changer for Your Audio
Investing in a professional boom arm is the fastest way to how to get rid of background hum in your audio caused by mechanical vibrations. While the price might sting at first, the reliability and acoustic benefits are undeniable. #IMAGE_PLACEHOLDER_E# It is the single most effective ergonomic improvement you can make to a home studio. Stop letting your desk dictate your sound quality. Check the latest price now and see other user reviews before you settle for a flimsy alternative.