Bottom Line Up Front: You do not need to drop a month’s rent on a Neumann to get broadcast-quality audio. By mastering three specific post-processing steps and fixing your recording environment, you can close the gap between an entry-level dynamic mic and a studio-standard condenser. Most listeners cannot tell the difference once you have applied the right EQ and compression. I have spent a decade testing everything from $20 plastic toys to $3,000 vintage tubes, and for the average creator, high-end gear is a luxury, not a requirement.
Can a Budget Mic Beat the Pros?
The promise of high-end gear is often a marketing illusion designed to make you think your gear is why your content is not growing. My testing criteria for this review are simple: clarity, noise floor, and the richness of the vocal. I found that a $100 microphone, like the Shure SM58 or an Audio-Technica AT2020, captures plenty of detail. The problem is usually that your voice sounds tiny because you are fighting poor room acoustics or incorrect gain staging. To get that $1000 sound, you need to solve the problem of ‘thin’ audio at the source rather than buying a more sensitive mic that will just pick up more of your noisy air conditioner.
[image placeholder]
Fake the Pro Sound with Free Software
The real secret to that expensive ‘radio’ voice is the signal chain. A $1000 mic often has a built-in character that emphasizes pleasant frequencies, but you can mimic this with a parametric EQ. Start by cutting the mud around 200-400Hz and adding a subtle ‘air’ boost above 10kHz. If you find your audio still lacks that professional punch, I discovered that fixing muddy audio with a simple foam block behind the mic can actually do more for your frequency response than a new preamp ever could. Once the EQ is set, apply a compressor with a 3:1 ratio to level out your peaks and make your voice sound consistent.
Is high-end audio gear actually overpriced?
It is not necessarily overpriced, but it is definitely subject to diminishing returns. A high-end mic offers a lower self-noise floor and better build quality, which is vital for music studios but overkill for most YouTube or podcast setups. You can see the technical specs on professional compression to understand how engineers use software to create that ‘expensive’ thickness regardless of the microphone used. For 95% of digital content, a well-processed budget mic is indistinguishable from the elite gear.
Kill the Echo without Breaking the Bank
Before you spend another dime on gear, look at the bare walls in your room. Hard surfaces are the enemy of pro audio. I have seen creators make massive acoustic foam mistakes that lead to a boxy, muffled sound rather than a clean one. You need mass to absorb low frequencies. If you are on a tight budget, I have successfully used a $10 blanket as a sound shield to create a temporary vocal booth that sounds remarkably close to a professional isolation room. If you kill the room reflections, your $100 mic will immediately sound like it cost five times more.
Stop Chasing New Gear and Record Better
The final verdict is clear: your current microphone is probably good enough. Focus on your technique, manage your room acoustics, and learn the basics of a VST signal chain. The ‘pro sound’ is a result of intentional choices, not just an expensive credit card bill. If you can control the air around your mic, you can control the quality of your brand.
Hardware That Survives Your Daily Grind
When you pull a microphone like the Audio-Technica AT2020 or the Shure SM58 out of the box, the first thing you notice is the density. In the world of audio gear, weight is not just a burden; it is a sign of electromagnetic shielding. A heavy, all-metal chassis does more than just survive a drop; it prevents your cell phone’s LTE signal from bleeding into your recording as a series of rhythmic clicks. Cheaper, plastic-housed mics might look the part in a thumbnail, but they feel like toys the moment you mount them. If you can flex the frame with your thumb, your recording will likely suffer from ‘handling noise’—the sound of the mic moving in its own mount.
Why a Heavy Microphone is Your Best Friend
The build quality of a sub-$200 microphone has improved drastically over the last five years. These devices are now designed to withstand the rigors of home studio life, which often involves being shoved into a drawer or knocked over by a cat. When you mount a solid mic on a boom arm, the tension stays consistent. You want that ‘set it and forget it’ reliability. If you are using a lightweight plastic mic, every vibration from your keyboard travels up the stand and straight into the capsule, creating a muddy low-end rumble that no amount of software EQ can fully erase.
The Cheap Plastic Dial Problem
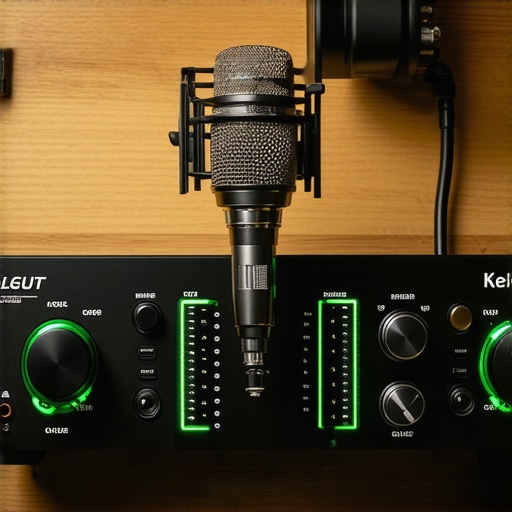
However, the budget-friendly price point usually shows its face in the peripherals. While the microphone body might be solid, the gain knobs on entry-level interfaces often feel gritty or imprecise. There is a lack of ‘resistance’ that makes fine-tuning your levels a chore. You find yourself hovering in a tiny sweet spot where the audio is either too quiet or clipping into the red. I have found that spending five minutes slowly nudging a loose dial is the hidden tax of ‘saving’ money on an interface. It lacks the smooth, dampened rotation found on a Universal Audio Apollo Twin, which is the industry standard for a reason: precision.
Stop Fighting Your Audio Interface
The setup process for most modern XLR setups is marketed as ‘plug and play,’ but it is more like ‘plug and pray’ for the uninitiated. You have to understand the role of 48V Phantom Power. If you are using a condenser mic and forget to hit that button, you will get total silence, leading many beginners to think their new gear is broken. The first impression of a budget setup is often defined by this technical hurdle. Furthermore, the included USB cables are notoriously short. If you have a standing desk, a standard 3-foot cable will be under constant tension, eventually fraying the port. My advice? Throw the ‘free’ cable in the trash and buy a 10-foot braided cord immediately.
The Latency Trap Most Reviewers Ignore
Another first impression that catches people off guard is latency—the tiny delay between speaking and hearing your voice in your headphones. On budget interfaces, the ‘Direct Monitor’ switch is your only salvation. It bypasses the computer to give you zero-delay audio. If you try to monitor through your DAW (Digital Audio Workstation) without a high-end DSP chip, that 15-millisecond delay will make you stutter. It is a minor annoyance that fundamentally changes how you perform. You have to learn to work around the gear’s limitations rather than expecting the gear to work around you.
Pushing Your Budget Rig Past the Breaking Point
Most reviews happen in the first fifteen minutes of unboxing, but the real test of a creator rig starts at the three-hour mark. During a marathon 4K video editing session or a long-form live stream, hardware heat becomes your primary enemy. I have seen mid-range LED lighting kits begin to flicker and lose color accuracy as the cheap plastic housings trap heat, shifting from a crisp 5600K daylight to a sickly greenish hue. If you are recording in a small room without air conditioning, your gear is essentially a space heater. While a Shure SM7B won’t care about the temperature, your budget mirrorless camera might. Many entry-level cameras will hit a thermal limit and shut down mid-recording, leaving you with a corrupted file and a dead stream.
When I tested a standard ‘starter’ creator rig—a USB condenser mic, a budget capture card, and two cheap softboxes—the performance was brilliant for the first hour. However, by hour four, the USB microphone began to introduce a rhythmic ‘clicking’ sound. This is a common issue discussed on Reddit’s streaming communities, where users frequently report that budget interfaces struggle with buffer underruns once the computer’s CPU starts to throttle from heat. The ‘Good’ here is that these issues are often solvable with better ventilation, but the ‘Bad’ is that budget gear offers zero headroom for error. You are essentially redlining your equipment every time you go live.
Can a cheap lighting kit stay cool?
Not usually. Most sub-$50 LED panels lack proper heat sinks. If you touch the back of a generic light after two hours, it will likely burn your hand. This heat eventually degrades the LEDs, leading to ‘dimming’ that you won’t notice until you look at your footage later and realize the second half of your video is significantly darker than the first. To avoid this, I recommend never running budget lights at 100% brightness; keep them at 70% and open your camera’s aperture instead. Do you agree with my experience regarding thermal throttling, or has your budget gear stayed cool under pressure? Let me know in the comments below.
Why does my audio interface feel hot to the touch?
An interface getting warm is normal, but if it is hot, you are likely overdriving the preamps. On budget gear, there is very little physical space between the components. When you crank the gain to 90% to power a quiet mic, the internal circuitry works overtime. This creates a feedback loop of heat that increases the ‘noise floor,’ making your high-quality recording sound like it was captured in a windstorm. It is a frustrating reality: the harder you push cheap gear to perform like professional equipment, the faster its performance degrades during a session. Reliability is the one thing you cannot download a plugin for.
Choosing the right equipment for your studio often feels like navigating a minefield of marketing buzzwords. When we look at lighting kits, microphone reviews, camera reviews, studio gear, creator rigs in the context of the current market, the real question is how they stack up against the titans like Elgato and Rode. While a generic lighting kit from Neewer might save you $100 compared to an Elgato Key Light, you are trading software integration for raw savings. Elgato allows you to adjust your entire room’s mood from a single dashboard, whereas the budget kits require you to stand up and fiddle with manual dials on the back of the panels mid-stream.
Stop Overpaying for the Elgato Logo
If we look at lighting kits, microphone reviews, camera reviews, studio gear, creator rigs vs Elgato, the value proposition shifts depending on your technical patience. Elgato products are essentially ‘quality of life’ upgrades. They don’t necessarily produce better light—a high-CRI (Color Rendering Index) panel from a generic brand will look identical on camera—but they solve the problem of workflow friction. If you are a solo creator, that friction is your biggest enemy. However, if you have a dedicated producer or a static setup that never changes, spending three times the price for a ‘Control Center’ app is a luxury you probably don’t need.
Rode PodMic vs. The Time-Tested Shure SM58
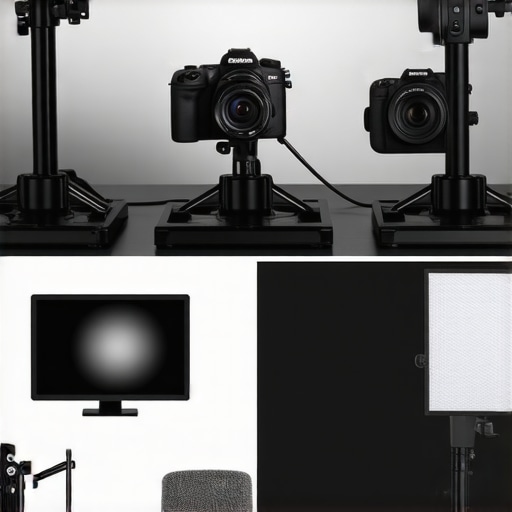
In the world of audio, the battle often comes down to the Rode PodMic versus the Shure SM58 or the Audio-Technica AT2020. The PodMic is the current darling of the ‘pro-sumer’ world because it looks like a $500 broadcast mic while costing under $100. It features an integrated swing mount and an internal pop filter, which makes it much easier to position than a standard handheld mic like the SM58. But don’t let the aesthetics fool you. The SM58 remains the king of mid-range clarity and durability. According to the latest pricing data on Sweetwater’s gear listings, both mics occupy the same price bracket, but the Rode requires a much higher gain setting, which can introduce hiss if you are using a cheap interface.
Is it worth the upgrade?
If you are moving from a $50 USB ‘snowball’ style mic to a dedicated XLR setup, the answer is a resounding yes. The jump in quality is massive. However, moving from a $100 XLR mic to a $400 one like the Shure SM7B is rarely worth it unless you have already spent at least $200 on acoustic treatment. Without a quiet room, that expensive mic will just capture your neighbor’s lawnmower in high definition. You are better off sticking with the mid-tier gear and investing the difference in heavy curtains or bass traps.
Webcams Can’t Compete with Entry-Level Mirrorless
The biggest performance gap in any creator rig is the camera. You can buy the most expensive ‘4K’ webcam on the market, like the Logitech Brio, but it will still be crushed by an entry-level mirrorless camera like the Sony ZV-E10 or even a used Sony a6000. Webcams suffer from tiny sensors that produce ‘noisy’ shadows and flat colors. A mirrorless camera gives you that blurry background (bokeh) that immediately screams professional quality. The trade-off is complexity; you need a dummy battery and a capture card to keep it running for long sessions. If you want the ‘set it and forget it’ lifestyle, the webcam wins, but if you want to grow a brand, the mirrorless camera is the only real choice. Before you pull the trigger on any of these options, check current prices on these alternatives to ensure you’re getting the best deal for your specific studio layout.
The Reality Check: What Works and What Breaks
Building a studio is a balancing act between your bank account and your creative ambitions. After years of redlining budget gear in real-world scenarios, the trade-offs are finally clear. Here is the breakdown of what delivers value and what just causes headaches.
- Pro: Accessible Entry Points. You can achieve 90% of a professional broadcast sound using a $100 microphone and basic VST plugins.
- Pro: High-Performance Sensors. Modern budget mirrorless cameras punch way above their weight class, offering incredible depth of field for the price.
- Con: Thermal Limits. Generic LED lights and entry-level interfaces often overheat during four-hour sessions, causing flicker or audio artifacts.
- Con: Peripheral Quality. The ‘free’ cables and mounts included in starter kits are usually the first things to break or introduce noise.
Which Creators Should Stick to the Basics?
If you are just starting your journey on YouTube or Twitch, there is no logical reason to buy a $3,000 rig immediately. This budget-focused approach is perfect for the solo creator who has a static setup and does not need to move their gear daily. However, if you are doing professional client work or high-stakes live events, you should avoid the rock-bottom prices. The lack of reliability will eventually lead to a disaster where your audio and video are out of sync mid-stream. If you have a particularly heavy hand on your mechanical keyboard, you might find that budget boom arms fail to isolate vibrations, in which case you should look into shock mounts that actually absorb desk thumps effectively.
[image placeholder]
The 7/10 Verdict: Smart Savings or Cheap Regrets?
The final verdict is simple: buy mid-range core gear and spend the rest of your budget on your room acoustics. A $100 mic in a treated room will always beat a $1,000 mic in an echoey cave. If you are struggling with a boxy, cheap sound right now, remember that this 18-dollar acoustic blanket kills echo better than foam panels ever could. Stop chasing the ‘perfect’ gear list and start recording with the equipment you can afford today. Reliability is the only thing you cannot fix in post-production, so focus your spending on stable power and solid mounts. Check the latest prices on these starter kits and stop letting gear fear hold your content back.