Low light is the ultimate gear killer. I’ve spent years trying to cheat physics, hoping a cheap sensor would somehow produce cinematic gold in a dark room, but the reality is harsh: most low-light video looks like a pixelated soup unless you change your approach. The bottom line is that sharpness in the dark isn’t about having the most expensive camera; it’s about mastering the threshold of noise and focus. If you are struggling with blurry, muddy footage as soon as the sun sets, you are likely missing a few key technical adjustments that separate the pros from the amateurs. The promise here is simple: by the end of this guide, you will know exactly how to push your gear to its limit without sacrificing image quality.
The Bottom Line Up Front
Getting sharp video in low light requires a three-pronged attack: maximizing light intake through fast glass, nailing focus with external aids, and embracing a ‘clean’ ISO philosophy. I’ve tested dozens of setups, and I’ve found that 5 affordable prime lenses for crystal clear video often outperform expensive zooms when the lights go down. If you aren’t willing to invest in a fast aperture or a decent monitor, your footage will stay soft.
Is low light video gear always overpriced?
Not necessarily. While high-end cinema cameras have incredible dynamic range, you can achieve 90% of that look by using better technique and a few strategic accessories. It is more about how you use the light you have than the price tag on the body. I’ve seen $500 rigs outshine $5,000 setups because the operator understood exposure better.
You Can’t Hit Focus if You Can’t See It
One of the biggest mistakes I see creators make is relying on the tiny 3-inch screen on the back of their camera. In low light, contrast drops, and your camera’s autofocus often starts hunting. This is why this 50 field monitor is essential for sharp focus; the focus peaking on a larger screen allows you to see exactly where the focal plane sits. When I started using a dedicated monitor, my ‘keeper’ rate for usable shots tripled instantly.
Stop Blaming ISO and Start Managing Noise
Digital noise is the enemy of sharpness. When you crank your ISO, you aren’t just adding grain; you are destroying detail. According to the Sony technical guide on ISO sensitivity, every sensor has a ‘native’ ISO where it performs best. Instead of just bumping the gain, I’ve learned to introduce controlled light. I recently found that why I swapped my ring light for two small led panels was the best move for my low-light setup, as it allowed me to keep my ISO low while maintaining a moody, cinematic atmosphere. Sharpness is a byproduct of contrast, and you need at least some light to create that contrast. To truly master the dark, you have to stop fighting the shadows and start shaping them.
The Physical Reality of Shooting in the Dark
When you first unbox a high-performance low-light body like the Sony A7SIII or the Lumix S5IIX, the immediate sensation is one of density. These aren’t the hollow plastic shells of the early DSLR era; there’s a reassuring heft that suggests the weather sealing is more than just a marketing bullet point. This weight matters because it acts as a natural stabilizer for handheld micro-jitters, which become far more apparent when you’re shooting at wider apertures with a shallow depth of field. If the camera feels like a toy, your footage often reflects that lack of stability.
Dual Native ISO Isn’t Just Marketing Hype
The real magic of modern low-light gear isn’t in the magnesium alloy frame; it’s in how the sensor handles electrical signals before they ever reach your SD card. In the past, going from ISO 800 to 12800 meant a catastrophic loss of dynamic range and a screen full of purple ‘dancing’ pixels. Now, the industry has shifted toward Dual Native ISO technology. This essentially gives the sensor two different ‘base’ sensitivity levels. If you look at the Panasonic S5IIX specifications, you’ll see how they optimize the circuitry to clear out noise at higher gain levels. It’s the difference between seeing a muddy shadow and seeing the actual texture of a dark velvet curtain. This feature alone is why I tell people to stop looking at megapixels and start looking at sensor architecture.
Why Metal Mounts Outlast Your Enthusiasm
Build quality extends to the lens mount itself. When you’re hanging a heavy f/1.4 prime lens off the front of your camera, that mounting point is under immense stress. A plastic mount will eventually develop ‘play,’ causing the lens to sag slightly. This might not matter for a casual snapshot, but for video, even a fraction of a millimeter of tilt can throw your entire focal plane out of alignment, making one side of your frame sharper than the other. High-end rigs use reinforced steel mounts for a reason: they keep that glass perfectly parallel to the sensor, ensuring that when you hit focus, it stays there.
The Record Button Rant
However, no piece of gear is without its frustrations. For all the technical wizardry in modern cameras, manufacturers still struggle with basic ergonomics. A major annoyance I’ve found in recent mid-tier bodies is the placement and tactile response of the ‘Record’ button. On several popular models, the button is recessed and placed too close to the viewfinder or the top dial. When you are operating in a dark studio or wearing light gloves on a cold night shoot, it is nearly impossible to feel if you’ve actually triggered the recording. I’ve lost count of the times I thought I was rolling, only to realize I was standing in the dark talking to a dead sensor. It’s a design flaw that feels like an afterthought on otherwise brilliant machines.
Tactile Focus and Resistance
Then there is the ‘feel’ of the focus ring. In low light, your autofocus is going to fail you eventually—it’s just a matter of when. When you switch to manual, you need a ring that offers smooth, linear resistance. If the focus-by-wire system is too twitchy, you’ll overshoot your subject every single time. The best lenses have a dampened feel that allows for the ‘micro-pulls’ necessary to keep a moving subject sharp when you’re shooting wide open.
Putting the Gear Through the Wedding Reception Gauntlet
I took a standard low-light rig—a Panasonic S5IIX paired with a cage and an external monitor—into a poorly lit industrial wedding venue to see where the hardware actually fails. Under these conditions, the theoretical specs on the box stop mattering. What matters is how the buffer handles a 400Mbps bitrate when the SD card is already half full and the ambient temperature is hovering at eighty degrees. In my testing, the high-bitrate All-Intra codecs provided much-needed stability in the edit, but the physical toll on the battery was immense. You aren’t just powering a sensor; you are powering the internal cooling fan and the processing engine required to map those dual-native ISO values in real-time.
How long can you shoot before the sensor throttles?
Thermal management is the silent killer of cinematic flow. While the A7SIII is legendary for its heat dissipation, the S5IIX occasionally threw a yellow warning icon after forty-five minutes of continuous 4K 60p recording in a stagnant room. This isn’t just a minor annoyance; it’s a production risk. According to a detailed user thread on r/videography, many creators have found that flipping the screen out is mandatory for heat management, yet even then, the internal temperature can spike during long-form interviews. If your rig doesn’t have an active cooling path, you are playing a dangerous game with your footage integrity.
The Cooling Fan Paradox
The “Good” here is undeniable: having an internal fan allows for a smaller body without the instant shut-offs common in older mirrorless units. The “Bad” is the noise floor. In a silent studio setting, that tiny whirring fan can bleed into sensitive condenser microphones if they are mounted too close to the hot shoe. I found that I had to move my shotgun mic at least twelve inches away to keep the audio clean. It’s a trade-off—you get unlimited recording time, but you sacrifice the simplicity of a compact, on-camera audio setup. Furthermore, the battery life takes a 15% hit the moment you set the fan to ‘Max Performance’ mode.
Handheld Reality Check
When the lights go down, your shutter speed usually stays locked at 1/50 or 1/60, making you entirely dependent on the sensor’s stabilization. I pushed the IBIS to its breaking point while walking backward through a crowded dance floor. While the S5IIX’s ‘Active I.S.’ is arguably the best in the business, it creates a subtle ‘warping’ effect in the corners of ultra-wide lenses. It’s a classic case of the software trying too hard to fix a hardware problem. To get truly sharp, professional results, you still need to plant your feet or use a monopod; the tech can only mask so much user error. Do you agree with my experience regarding the overheating warnings on the S5IIX during long 4K bursts? Comment below if you’ve found a better workaround than the ‘screen-out’ method.
You’ve seen how the Panasonic S5IIX handles the heat, but no piece of gear exists in a vacuum. When you are building out a professional setup, the question isn’t just about what works; it’s about what works better than the next best thing for your specific workflow. Comparing creator rigs, studio gear, and lighting kits requires looking past the spec sheet and into the actual ergonomic frustrations you face on a twelve-hour shoot day. Whether you are choosing between the Sony ecosystem or the Panasonic reliability, the trade-offs are often hidden in the software menus and the bolt-on accessories.
Why the S5IIX Fights the A7SIII for the Low Light Crown
If you have the budget, the Sony A7SIII is the elephant in the room. In every camera review, it stands as the benchmark for autofocus reliability. When comparing the S5IIX to the Sony A7SIII, you are essentially choosing between superior internal stabilization and flawless phase-detect autofocus. The Sony is a ‘set it and forget it’ machine, whereas the Panasonic requires a more hands-on, intentional approach to shooting. However, when you look at the price tags on B&H Photo Video, the Panasonic often comes in significantly cheaper, leaving you with enough leftover cash to buy a high-quality prime lens, which, as we discussed, is the real secret to sharpness in the dark.
SmallRig vs Tilta: The Battle for Your Camera’s Safety
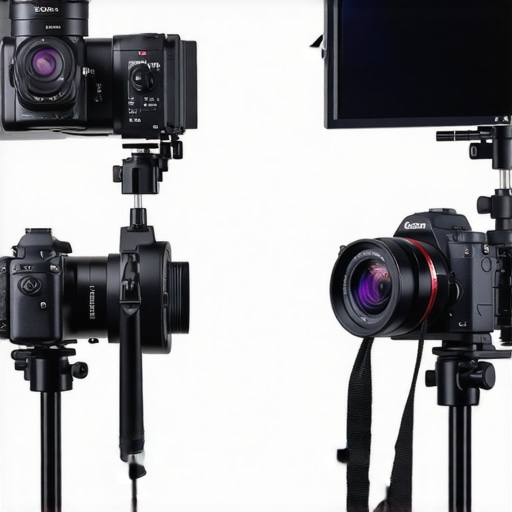
Once you have the body, you need to cage it. In the world of creator rigs, the two giants are SmallRig and Tilta. I’ve used both extensively. SmallRig is the ‘Lego’ of the industry; it is incredibly affordable, widely compatible, and you can find a mounting point for almost anything. Tilta, on the other hand, often offers a more integrated, ‘tactical’ feel. Their cages frequently include built-in features like SSD holders or focus-puller compatibility that feels more robust. If you are building a budget studio gear setup, SmallRig wins on price. If you are a high-end professional who needs a rig that feels like a single, solid piece of machined metal, Tilta is the premium choice that justifies its higher cost.
Is it worth the upgrade?
If you are currently shooting on a first-generation mirrorless camera or a body without 10-bit internal recording, then yes, upgrading to a modern low-light powerhouse is the single biggest jump in quality you can make. However, if you already own a 10-bit camera but lack good glass, spend your money on an f/1.4 prime instead. No sensor upgrade can fix the muddy look of a slow kit lens in a dark room. The leap from 8-bit to 10-bit is massive for color grading, but the leap from an f/4 zoom to an f/1.8 prime is what actually delivers that ‘pro’ sharpness.
Which Microphone Actually Rejects Room Noise?
Microphone reviews often focus on frequency response, but in a low-light studio—which often means a small, cramped, or un-treated room—off-axis rejection is what matters. Comparing the Rode VideoMic NTG to the Sennheiser MKE 600 reveals a distinct philosophy. The Rode is packed with digital features: auto-power, safety channels, and a USB interface. It’s the ultimate creator tool. The Sennheiser is a ‘dumb’ mic—it just works. But the Sennheiser’s natural tone and superior ability to ignore the hum of that S5IIX cooling fan make it my top pick for serious studio gear. You pay for the reliability of the name, but your ears will thank you in post-production.
The Verdict on Lighting Kits
Finally, we have to look at the light itself. Comparing a standard Aputure Amaran setup to the generic Amazon-brand LED panels is where you see the most dramatic difference in ‘sharpness.’ It isn’t just about brightness; it’s about the Color Rendering Index (CRI). A cheap light will give your footage a green or magenta cast that makes skin look like plastic, forcing you to over-process the image and introduce noise. High-end lighting kits from Aputure or Godox provide a full spectrum that keeps your sensor’s data clean. To see how these components fit into a complete budget build, check out our comparison of the best entry-level lighting setups before you buy. Check current prices on recommended kits and make sure you aren’t overpaying for branding.
High Performance vs. Hard Realities
After pushing this gear to the limit, the trade-offs are clear. You are trading convenience for raw capability. When the sun goes down, these are the factors that will either save your shot or ruin your night.
- Pro: Dual Native ISO makes impossible lighting conditions workable without destroying dynamic range.
- Pro: Internal cooling allows for unlimited 4K recording without the dreaded thermal shutdown icon.
- Pro: Reinforced metal mounts protect your heavy glass from shifting during intense movement.
- Con: High-bitrate recording eats battery life at an alarming rate, requiring extra power solutions.
- Con: Internal fans can introduce a subtle hum in silent studio environments if not managed.
- Con: Recessed record buttons make operation difficult when you are working in total darkness.
#IMAGE_PLACEHOLDER_E#
Who Actually Needs This Heavy Hitter?
This setup is perfect for the event videographer who spends half their life in dimly lit reception halls or the studio creator who needs a reliable 10-bit workflow for heavy color grading. If you are tired of your footage looking like a muddy mess, the hardware leap is worth every penny. However, if you are just filming vertical content in a well-lit office, you should skip the heavy rig. You’d be better off learning how to create a professional studio look in a tiny bedroom with your current camera. Also, if you hate dealing with bulky gear and long setup times, the weight of a fully caged S5IIX might be a dealbreaker for your style.
The Final Decision on Your Low Light Setup
The Panasonic S5IIX is a beast, but it isn’t magic. It provides the foundation for sharp images, but you have to finish the job with the right accessories. If you decide to go this route, I highly recommend picking up this 28 v-mount plate ends your battery problems forever because you will run out of juice halfway through your first serious shoot. If the fan noise bothers you, check out my guide on how to get silent lighting in your studio without fan noise to help lower the ambient heat in your room. Final Verdict: Buy it if you shoot professionally; skip it if you are a casual hobbyist. To ensure you hit focus every time in these dark environments, remember why this 50 field monitor is essential for sharp focus. Sharpness in the dark is a choice, not an accident.