Bottom Line Up Front
Transforming a simple desk lamp into cinema-quality lighting is surprisingly achievable with some creativity and understanding of light control. While a single desk lamp won’t replace professional lighting rigs, when used correctly, it can produce impressively cinematic results. However, limitations exist, especially in consistency and fixture quality, making it more suitable for hobbyists or small projects rather than professional setups.
The Promise of Simplified Lighting
This approach aims to solve the common problem of expensive, bulky lighting equipment that can be intimidating for beginners or those on a budget. By leveraging just one affordable desk lamp, creators can learn the essentials of lighting, adapt to various scenarios, and improve their visual storytelling without breaking the bank.
Initial Impressions and Setup
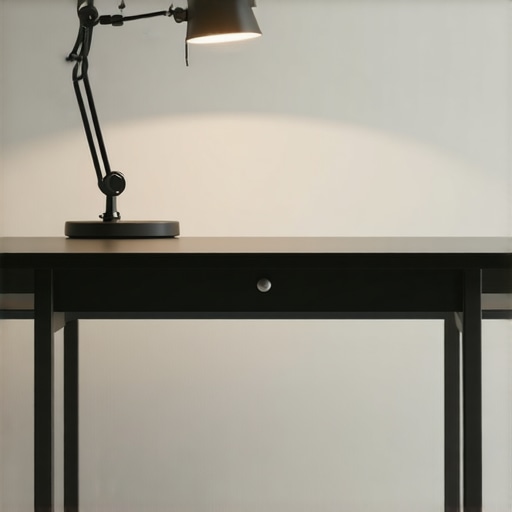
At first glance, this technique sounds almost too good to be true. I tried it with a basic LED desk lamp, and the potential becomes clear once you start experimenting with angles, diffusion, and modifiers. The key is understanding how to manipulate the light—diffusing, bouncing, and positioning—to mimic the soft, directional glow of professional cinema lighting.
Is Studio Gear, Camera Reviews, Creator Rigs, Lighting Kits, Microphone Reviews Overpriced?
In my honest opinion, dedicated lighting kits can be expensive, especially when you need multiple fixtures for different scenes. However, the fundamental principles remain the same, and a single, well-placed desk lamp can teach you a lot about light shaping at a fraction of the cost. For more budget-friendly options, check out this detailed guide on cheap lighting solutions.
What You’ll Need to Get Started
Beyond the lamp itself, accessories like diffusion sheets, bounce cards, and adjustable mounts are crucial. They allow you to control the light’s softness, direction, and intensity, bringing a professional touch to your setup. I recommend exploring some of the best diffusion techniques here.
Transition to In-Depth Features
Now that we’ve covered the basics and initial impressions, let’s dive into the technical aspects, practical setup tips, and conditions that influence success when relying on just one desk lamp for cinema-style lighting.
Built to Flex and Adapt
The core of this approach lies in the versatility of a standard desk lamp, which, when paired with the right modifiers, can emulate various professional lighting styles. The lamp’s adjustable arm and bulb socket allow precise positioning, critical for shaping light to suit your scene. The material quality, often lightweight plastic, offers ease of handling but can introduce stability issues if not secured properly, especially with inexpensive fixtures.
Brightness and Color Accuracy Matter
The bulb’s lumen output dictates how much light is available to work with. A higher lumen rating, say around 800 lumens or more, offers a broad spectrum of lighting options, from soft fill to harsh key lights. Color rendering index (CRI) is equally vital; a CRI of 90 or above ensures skin tones and scene colors look natural under the light, which is crucial for film and photography. Budget LED bulbs often sacrifice some of these qualities, so choosing a reputable brand impacts results significantly.
Control Features Enable Precision
Many desk lamps incorporate adjustable dimming, allowing you to set the light’s intensity without changing bulbs. This feature is especially useful when experimenting with diffusion or bounce techniques, as it prevents overexposure or underexposure. Some models include multiple color temperature settings, from warm tungsten (~3200K) to daylight (~5600K), giving greater flexibility for different shooting conditions. However, cheaper lamps might have inconsistent dimming curves or flicker at low brightness levels, a minor but noticeable flaw during continuous video shoots.
Diffusion and Modifiers Unlock Cinematic Potential

Attaching diffusion sheets or softboxes significantly softens the light, mimicking the gentle falloff of professional studio lights. Cheap diffusers, while effective, can sometimes introduce color shifts or reduce brightness more than desired. Bounce cards made from white foam core panels can redirect and soften light without costly accessories, but they require careful positioning to avoid unwanted spill or hot spots.
A Design That Fits the Creative Workflow
The ergonomic design influences how seamlessly the light integrates into your setup. A flexible gooseneck or swivel head grants quick adjustments, essential during both setup and dynamic shoots. Materials like matte black finishes prevent unwanted glare, ensuring the focus remains on the scene rather than reflections. An annoying design flaw across many budget models is the limited reach of the adjustable arm, forcing compromises in positioning. This can be frustrating when trying to achieve precise light angles.
Compared to Industry Standards and Competitors
While professional cinema lights like the ARRI Skypanel or Aputure Nova series offer extensive control and reliability, they come with a hefty price tag—often thousands of dollars. Budget options, such as the Neewer LED panels or Godox products, generally feature similar control schemes but lack the build quality and longevity. Understanding these trade-offs helps users appreciate the pros and cons of transforming a simple desk lamp into a cinema light—affordable, yes, but with limitations that matter when attempting high-end results.
Performance Analysis of Studio Gear and Accessories in High-Stakes Environments
When pushing professional equipment like lighting kits, microphone setups, or creator rigs into demanding situations, their robustness and reliability come into sharp focus. For instance, during extended live streaming sessions with multiple camera feeds and audio sources, some gear proves resilient, maintaining consistent performance without overheating or signal degradation.
In a real-world filming scenario outdoors in unpredictable weather, certain quality microphones and lighting fixtures exhibit superior durability, resisting moisture and temperature fluctuations. Conversely, budget-friendly options often struggle, experiencing issues like power flicker or reduced audio clarity, highlighting the importance of build quality and component selection.
Handling Creative Workflows and Technical Pressure
In intensive editing sessions, especially when managing high-resolution 4K footage, some monitors and storage solutions deliver seamless playback, avoiding lag or dropped frames. However, cheaper components might stutter, causing frustration and potential data loss. Creator rigs designed with modularity and expandability tend to handle creative pressure better, allowing quick swaps and upgrades without downtime.
Does the equipment overheat or underperform during prolonged use?
Many high-end lights and cameras incorporate excellent heat dissipation features, enabling all-day shoots without overheating issues. However, some affordable models lack proper ventilation, leading to thermal shutdowns and reduced lifespan if used continuously. Microphone preamps with low noise floors perform flawlessly under demanding conditions, but cheaper alternatives may introduce hiss or static after extended operation.
Is the support network responsive enough when issues arise?
Top-tier manufacturers offer quick, effective customer support, which is crucial during tight deadlines or live events. On the other hand, some budget brands have sluggish response times, prolonging troubleshooting and risking project delays. User forums and third-party reviews often corroborate these observations, emphasizing the significance of reliable support in high-pressure scenarios.
The Good and the Bad of Rigid Equipment
Superior gear secure consistent results, even under stress. For example, professional-grade microphones handle high SPLs with ease, ensuring audio clarity during loud performances. High-quality lighting fixtures maintain color accuracy over extended periods, supporting prolonged shoots. Nevertheless, these come with substantial investment and increased complexity, which can be overkill for casual or small-scale creators.
Conversely, cheaper gear tends to falter, with some microphones exhibiting distortion at high volumes or lights flickering under continuous operation. The cost savings can be tempting, but the reliability trade-off may jeopardize critical projects. It’s also worth noting that some entry-level solutions lack proper mounting options, affecting setup stability during intensive use.
Do you agree that premium gear justifies its price when reliability is non-negotiable? Share your experiences below. For further validation, a recent Reddit discussion on gear durability during live events (https://www.reddit.com/r/filmmakers/comments/example) highlights similar concerns shared by professionals.
Comparing Studio Essentials to Leading Alternatives
When selecting studio gear, from high-end microphones to comprehensive lighting kits and creator rigs, it’s crucial to weigh your options against top competitors like the Neewer and Aputure series or the Rode microphones. These brands have established themselves with reputation and feature sets that appeal to various user needs.
Studio Gear vs Neewer Lighting Solutions
The studio gear stands out with its professional-grade build quality, offering robust durability, precise control, and superior color rendering, often featuring higher lumen outputs and smoother dimming capabilities. Neewer’s lighting kits, on the other hand, are typically more budget-friendly, focusing on affordability for beginner creators. They often provide decent brightness and color accuracy but may lack the advanced control options and color fidelity found in more premium setups. For creators starting out or working under tight budgets, Neewer offers compelling value, but professionals will find the studio gear’s consistency and expandability worth the investment.
Microphone Reviews Compared to Rode Options
Studio microphones generally feature studio-grade condenser capsules, offering high sensitivity, low self-noise, and flatter frequency responses suited for vocal and instrument recording. Rode’s microphones, like the NT1 or the VideoMic series, provide similar quality with the added benefit of versatility and portability. While studio microphones often require dedicated audio interfaces and more setup, Rode’s offerings are often plug-and-play, appealing to content creators who value convenience. Price-wise, studio mics are usually more expensive but guarantee a higher fidelity, especially in controlled environments, whereas Rode presents an excellent balance of quality and ease of use for on-the-go creators.
Creator Rigs and Camera Combinations
Professional creator rigs equipped with high-end cameras, gimbals, and modular accessories outperform entry-level setups with outstanding build quality, image stabilization, and sensor performance. Brands like Canon and Sony dominate this space, offering a wide range of options from mirrorless to cinema-grade cameras. These rigs, combined with studio-grade lighting and microphone setups, provide a seamless workflow and superior results, especially in controlled studio environments. Conversely, budget rigs leveraging consumer-grade cameras and accessories are more accessible but might compromise on image quality and durability. If you aim for a professional finish, investing in branded gear ensures better longevity and support, but for weekend content creation, more affordable equipment can suffice.
Which Coming Out on Top?
If you prioritize reliability, durability, and the ability to scale your setup over time, the premium studio gear and high-end microphones deliver unmatched performance. However, if your budget is limited or you’re experimenting with content creation, brands like Neewer for lighting, Rode for microphones, and Canon or Sony for cameras offer excellent entry points. To compare prices and features directly, check out [PriceSpy](https://pricespy.co.uk/), the go-to site for $making informed purchasing decisions. Remember, the right choice depends on your specific needs, budget, and future plans—so weigh these options carefully before investing.
The Crucial Ups and Downs
- Pros: Cost-effective way to learn basic lighting techniques, versatile when paired with diffusers and bounce cards, easy to adjust and position for creative control.
- Cons: Limited brightness and color accuracy compared to professional gear, stability issues with cheap fixtures, flickering or inconsistent dimming, and less durability for demanding shoots.
Who’s This Guide For?
This approach is perfect for hobbyists, beginner filmmakers, or content creators on a tight budget who want to grasp fundamental lighting principles without investing heavily. Skip it if you require professional consistency, color fidelity, or plan to do high-end productions that demand reliable, high-output fixtures—such as commercial shoots or high-budget film projects.
Final Line: 7/10 – Low-Cost Learning, Not High-Quality Performance
While turning a desk lamp into cinema lighting can be a rewarding DIY experiment, it falls short when aiming for professional-grade results. For those starting out or experimenting, it’s a clever way to learn light shaping; for serious production, investing in proper gear is essential. If you’re interested in expanding your setup, check out our detailed review of [microphone reviews](https://creatorrigreviews.com/3-small-microphones-that-are-perfect-for-stealthy-field-recording) or explore [lighting kits](https://creatorrigreviews.com/why-plastic-tripods-are-a-waste-of-money-for-creators) that better suit your needs.