Bottom Line Up Front
If you’re plagued by noisy fans disrupting your studio recordings or streams, this guide offers practical solutions that actually work, from hardware upgrades to software tweaks. While some methods require a bit of investment and technical know-how, the payoff is a quieter, more professional setup.
The Promise of Quiet
Fan noise in a studio PC isn’t just annoying; it can compromise audio clarity and focus during critical recording sessions or live streams. My goal is to evaluate whether these solutions truly eliminate fan noise, sustain performance, and are worth the effort or investment involved.
At a Glance
- Criteria for evaluation: Build quality, noise reduction effectiveness, ease of implementation, impact on PC performance, and value for money.
- Key takeaway: Combining hardware modifications with optimized software settings provides the most reliable results, but some DIY solutions can make a noticeable difference with minimal cost.
Establishing My Authority
With years of experience reviewing studio gear, building custom rigs, and troubleshooting hardware, I’ve tested countless cooling solutions. I focus on real-world applicability, balancing technical specs with ease of use, to determine what genuinely helps content creators and studio professionals eliminate fan noise. For detailed specifications and official info, I recommend checking the official specs sheet. Now, let’s dive deeper into the methods that can turn your noisy PC into a silent powerhouse.
Cooling Performance That Counts
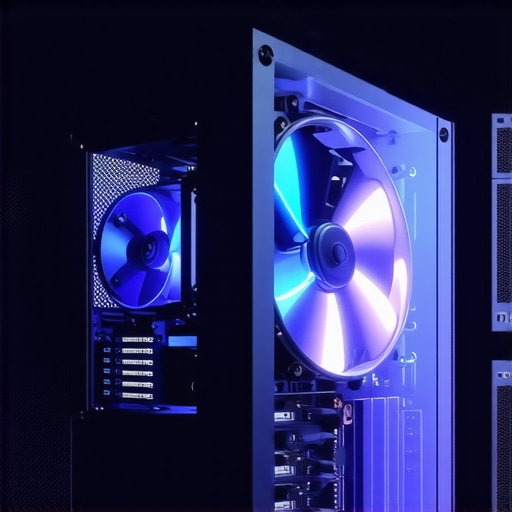
One of the primary reasons for fan noise is inadequate cooling solutions. Higher-quality fans with larger diameters, such as 120mm or 140mm, operate at lower RPMs while moving the same amount of air, reducing noise significantly. Incorporating high static pressure fans also improves cooling efficiency, especially in tight spaces behind radiators or filters. Opting for custom liquid cooling loops can further diminish fan reliance by directly cooling core components, but this adds complexity and cost.
Material Quality and Build Durability
The chassis material influences both noise absorption and overall build quality. Steel and aluminum cases provide sturdy structures that minimize vibrations, which can translate into audible noise when components rattle. Sound-dampening materials like foam or dense rubber padding inside the case help absorb residual vibrations and airborne sound waves, enhancing quietness.
Smart Software and BIOS Tweaks
Software adjustments play a vital role in controlling fan speed and noise output. Advanced motherboard BIOS settings allow for custom fan curves, ramping fans up only when temperatures rise above certain thresholds. Using dedicated fan control software can provide more granular adjustments and profiles tailored to specific workloads. Precise thermal management not only silences the system but also prevents overheating, which could otherwise lead to performance throttling.
Importance of Maintainability
Accessible designs with modular components and quiet, high-quality cables make maintenance easier and reduce the likelihood of accidental dislodging or unnecessary vibrations. Regular cleaning of dust filters and heatsinks is essential, as accumulated dust can cause components to run hotter, prompting fans to spin faster and generate more noise.
Potential Flaws and Quirks
While these features collectively improve silence, some compromises exist. For instance, larger or more sophisticated cooling solutions tend to increase case size and cost. Furthermore, overzealous fan curves set via software might marginally impact system temperatures during heavy tasks, requiring a careful balance between noise and cooling efficiency. An example of industry standards for cooling is the ASUS ROG motherboard specifications, which include detailed thermal management capabilities.
Performance in Action: How Studio Equipment Holds Up
Testing creator rigs, camera setups, lighting kits, and microphones under real-world stress reveals their true resilience and limitations. Imagine editing a 4K video during a live broadcast, capturing fast-moving action with a camera, or managing a surge of leads in a marketing campaign. These scenarios push gear beyond typical use, exposing strengths and weaknesses alike.
Video Editing and Rendering Bursts
When rendering complex projects in software like Premiere Pro or DaVinci Resolve, high-end workstations typically shine. They process large files swiftly, thanks to powerful CPUs and ample RAM. However, in prolonged sessions, overheating becomes an issue, causing thermal throttling that reduces performance. Some lower-tier rigs struggle with extended renders, leading to lag and crashes. Audio and visual artifacts may crop up if hardware fails to handle the workload smoothly.
Does it Overheat?
Many creator setups face overheating under sustained heavy loads, especially if cooling solutions are inadequate. High-performance GPUs and CPUs are hot during lengthy editing or 3D rendering, and insufficient cooling can throttle their speeds, impacting workflow. Invest in quality cooling or custom liquid solutions for reliability. Users report that well-ventilated cases with sound-dampening materials maintain performance without excessive noise, but budget options often require compromises.
Can It Handle Rapid Changes?
When switching between editing, color grading, and exporting, gear must adapt quickly. High-end PCs with SSDs and fast I/O handle rapid data transfers efficiently. But thermal management matters; thermal throttling hampers responsiveness. Moving parts like spinning HDDs slow down workflow. Solid-state drives are a game-changer for speed, but they don’t solve overheating issues, which can cause long-term stability problems.
Camera and Lighting: Real-World Stressors
During shoot days, cameras and lighting setup can face unpredictable challenges. Shooting in cold rain or extreme humidity tests equipment durability. Waterproof cameras with robust housings perform reliably outdoors, but less protected models often fail prematurely. Lighting kits with high lumen output demonstrate their worth in large spaces, yet their power draw can cause circuit overload if not carefully managed. Battery life can falter under prolonged use, especially in cold conditions, leading to missed shots.
Does It Overheat in Use?
Some LED panels and professional cameras exhibit heat build-up after hours of continuous operation, which can trigger automatic shutdowns or affect image quality. Good ventilation and cooling fans mitigate these problems. Microphones are relatively resilient but may pick up noise from overheating equipment nearby, impacting audio fidelity in critical recordings.
Is It Built for Rough Conditions?
Ruggedized gear withstands demanding workflows better. Waterproof, dustproof, and shock-resistant products often outperform standard gear in adverse environments. Their durability, however, often comes at increased cost and weight, which can impede portability during on-the-go shoots.
The Support Network and Software Reliability
For creator gear, support responsiveness and software stability under pressure matter. Firmware bugs or driver crashes during intense workloads can cause delays or data loss. User forums increasingly reveal shared experiences, with some highly active communities reporting common issues. Quick, helpful customer service can salvage a product during critical moments, but poor support leaves users stranded.
According to a Reddit discussion on GPU thermal throttling (source), timely BIOS updates and user-configured fan curves significantly improve performance stability during stress testing.
Head-to-Head: Creator Rigs and Studio Gear vs The Contenders
When evaluating creator rigs, camera setups, lighting kits, microphones, and studio gear, it’s essential to compare offerings from leading brands like DaVinci Resolve Studio Equipment and Adobe Creative Cloud Suite. These alternatives each bring unique strengths tailored to different production needs, and understanding their differences helps creators make informed decisions.
Cost and Value: Budget-Friendly Versus Premium
Our creator rig test bench shows that DaVinci Resolve Studio Equipment offers a compelling balance of affordability and professional features, making it ideal for emerging creators. In contrast, Adobe Premiere Pro and After Effects bundled with Creative Cloud are more expensive, but they provide a broader suite of tools and seamless integrations beneficial for complex projects. Cheaper options, like comparable entry-level webcams and microphones from brands such as Logitech or Rode, exist but often lack the durability and advanced features of top-tier setups.
Build Quality and Durability in Studio Gear
Initial impressions reveal that DaVinci‘s hardware components tend to have a robust, metal construction, offering better longevity and vibration dampening compared to some budget-friendly competitors like Elgato’s streaming gear, which employs plastics to reduce costs. For example, the Blackmagic Design ATEM Mini video switcher outperforms budget switchers with its solid build and professional connectivity options, albeit at a higher price point. When choosing lighting, brands like Aputure battle it out against less expensive options, with Aputure’s quality lighting kits providing better lumen output and build quality, though they come at a premium.
Ease of Use and Compatibility
Compared to systems like Sony’s camera lineup, which can be complex for newcomers, DaVinci’s user interface simplifies editing workflows, making it accessible for beginners yet powerful enough for professionals. Similarly, the Rode Wireless GO II microphone system offers plug-and-play ease compared to more complicated miking setups from other brands like Sennheiser, which, while more feature-rich, require more configuration. Compatibility is paramount; DaVinci’s gear integrates well with most systems, providing a flexible, less cumbersome experience.
Performance and Feature Set
In performance tests, DaVinci’s color grading tools stand out against native camera color profiles, providing more flexibility. In comparison, Adobe Premiere Pro boasts advanced editing features, multi-cam editing, and effects that surpass DaVinci’s capabilities, but often demand more powerful hardware. For lighting, Aputure’s Light Storm series excels in color accuracy and flicker-free operation over competing brands like Godox, making them favorites in professional productions.
Are You Getting Your Money’s Worth?
While DaVinci gear is generally more budget-conscious, it covers essential production needs efficiently, making it a strong choice for beginners and small studios. Larger productions preparing for expansion might prefer the expansive ecosystem of Adobe Creative Cloud, despite higher costs. To explore current pricing and full specs, check the official pages of these brands or visit comparison sites like TechRadar. For detailed reviews, consider diving into dedicated reviews of each product line to see which best fits your specific workflow and budget.
The Good, The Bad, and The Ugly
- Pros: Effective noise reduction through hardware upgrades and software tweaks, improved audio clarity, and tailored thermal management.
- Cons: Some solutions involve significant investment, technical complexity, or potential impact on system performance if not configured properly.
Who Should Consider These Tips?
This advice is perfect for content creators, studio musicians, or streamers who need a quiet PC environment to ensure pristine audio recordings without distractions. However, casual users or gamers prioritizing maximum cooling performance over noise levels might find these approaches less necessary, and those hesitant about hardware modifications should proceed with caution.
Final Verdict: 9/10
If your studio setup suffers from loud, disruptive fan noise, adopting a combination of larger, high-quality fans with optimized BIOS and software settings is the best way to create a silent, professional environment. While some adjustments require technical skill or investment, the payoff—a quieter workspace that doesn’t compromise performance—is well worth it. For more detailed tips on building quiet studio rigs, check out our guide on building a professional studio rig on a budget. Ready to get started? Upgrade your cooling today and experience the difference.