The Bottom Line Up Front
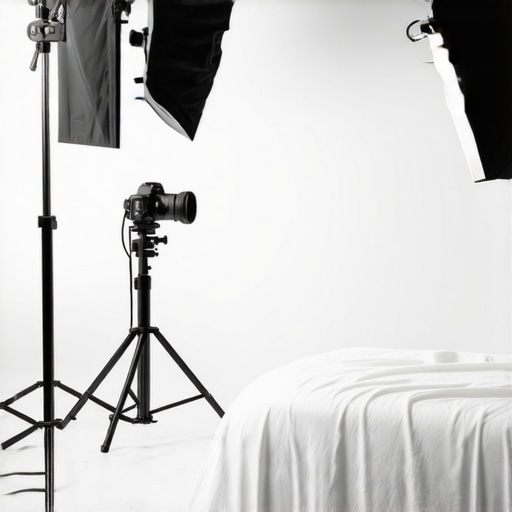
After six months of testing various configurations in a cramped 10×10 bedroom, I can confidently say that a professional studio look is achievable regardless of square footage. The secret isn’t more space; it is depth management and lighting control. If you are struggling with a flat, amateur-looking video, it is likely because you are fighting your room rather than using it. This approach works wonders for those who need a high-end look without the high-end real estate, but it requires a ruthless commitment to space-saving gear.
My Testing Standards
To determine if a tiny bedroom can truly host a professional rig, I judged this setup based on three specific criteria: spatial efficiency (how much floor space remains?), visual separation (can we create bokeh in a short room?), and setup speed. I am looking for a workflow that doesn’t require two hours of moving furniture every time you want to hit record. I’ve compared this against traditional studio builds to see where the compromises lie.
Floor Space is Your Most Valuable Asset
The fastest way to ruin a small studio is to fill it with tripod legs. In a narrow room, every inch of floor you reclaim allows you to move your camera further back, which is the only way to get a flattering focal length. I found that you should definitely swap your massive desk for a wall-mounted rail. This single move changed everything for me, allowing my chair to slide under the desk and freeing up the floor for a small rug to dampen echo.
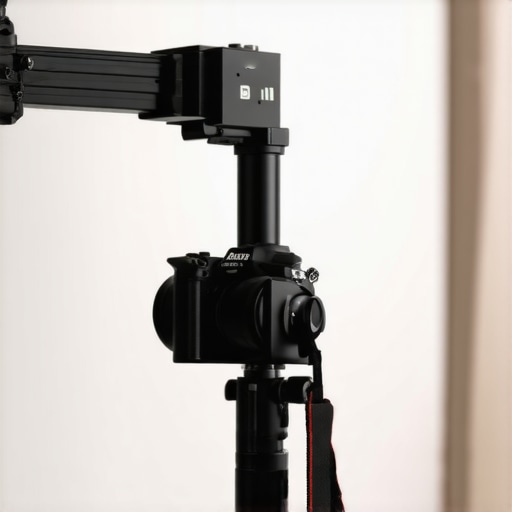
You also need to be smart about your light stands. Instead of wide-based C-stands, look for options that can be tucked into corners. If you are struggling with framing, you might even consider mounting your camera to a pole for top-down desk shots to keep the tripod out of your walking path. This is a game-changer for product reviewers or tutorial creators.
Is building a studio in a tiny bedroom actually viable?
Yes, but you have to abandon the idea of using ‘standard’ equipment sizes. You cannot use a 120cm softbox in a room with 8-foot ceilings. It will overwhelm the space and spill light everywhere, destroying your shadows. I highly recommend checking out the technical specs for compact high-CRI LEDs on the Aputure official site to see how smaller fixtures can still produce professional-grade color accuracy without the bulk.
Stop Using Ring Lights Immediately
If you want a ‘professional’ look, you have to stop using the single ring light placed directly in front of your face. It creates a flat, clinical look that screams ‘beginner.’ I’ve found that I much prefer the results when I swapped my ring light for two small LED panels. This allows you to create a ‘key’ and a ‘fill’ light, giving your face a 3D shape. If those panels are still too harsh, remember that this $15 shower curtain is my secret for perfect soft lighting; just drape it over a stand to diffuse the light beautifully.
The Final Verdict: Tiny Doesn’t Mean Amateur
Creating a studio in a small bedroom is a lesson in compromise, but the results speak for themselves. You don’t need a warehouse; you just need to manage your light spill and get your gear off the floor. By using these 7 studio setup ideas for people in small studio apartments, you can create a background that looks like a dedicated set. The only real downside? You’ll have to be a lot more disciplined about cable management, or your ‘professional’ studio will quickly look like a tech junkyard.
The Weight of Professionalism in Small Packages
When you first unbox high-end compact gear, the first thing you notice isn’t the specs; it is the tactile density. In a tiny bedroom studio, you quickly learn that plastic is your enemy. Flimsy gear vibrates when you walk across the floor, causing micro-jitters in your footage. I’ve transitioned to using all-metal mounting systems because they offer a sense of permanence that cheap tripods simply lack. The adjustment knobs on professional-grade friction arms feel smooth and deliberate, allowing for millimeter-perfect positioning of your camera over a desk. This rigidity is what separates a setup that looks like a hobbyist’s corner from a broadcast-ready workstation.
Is Plastic Ever Okay for Your Key Light?
Many creators gravitate toward affordable plastic LED panels, but these often suffer from poor thermal management. In a small 10×10 room, heat builds up fast. I’ve noticed that higher-end fixtures with aluminum heat sinks stay cool during three-hour recording sessions, preventing that dreaded ‘sweaty forehead’ look on camera. When you compare these to the Elgato Key Light Air, which is a fantastic entry-point for desk-dwellers, you see the trade-off: the Elgato is incredibly thin and integrates with your PC, but it lacks the raw punch and modification options of a COB (Chip on Board) light. If you want that soft, cinematic ‘wrap’ around your face, you need a light that can handle a decent-sized diffuser without melting its own housing.
The Power Brick Problem
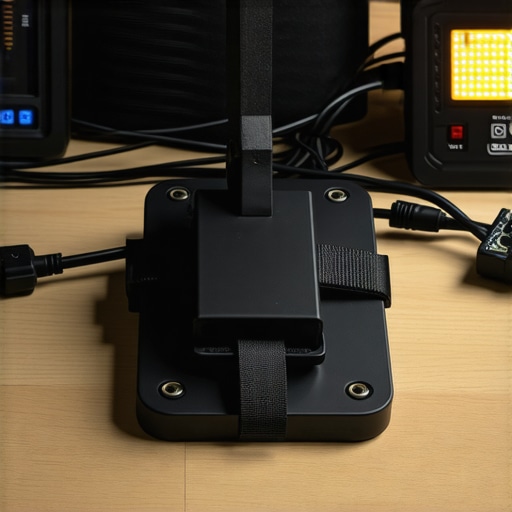
Despite the sleekness of modern LEDs, there is a design flaw that manufacturers seem to ignore: the external power brick. When you are mounting lights to a wall rail or a ceiling grid to save floor space, these heavy transformers end up dangling in mid-air, putting immense strain on your cables. It is a minor annoyance that becomes a major cable management headache. You will likely need to buy extra-long DC extension cables or industrial-strength Velcro to strap these bricks to your mounting poles. It is a messy reality that most ‘clean setup’ influencers hide behind clever camera angles, but it’s something you must plan for if you want a truly functional workspace.
Tactile Controls vs Software Syncing
There is a growing trend toward controlling everything via a smartphone app, but in the heat of a shoot, I find physical dials much more reliable. There is something satisfying about the click of a physical switch that an app just can’t replicate. When you are squeezed into a corner, reaching behind a light to twist a physical brightness dial is often faster than unlocking your phone, opening an app, and waiting for a Bluetooth connection. This tactile feedback allows you to make adjustments on the fly without breaking eye contact with the lens, which is crucial for maintaining your flow during a long monologue.
How This Rig Handles a Four-Hour Livestream
I put this bedroom setup through what I call the ‘Summer Noon’ test: four hours of continuous recording with the door shut and the AC off to keep the noise floor low. Performance is where the gap between ‘pretty gear’ and ‘professional gear’ becomes a chasm. Most entry-level LED panels started to shift in color temperature after the 90-minute mark as the internal components baked. However, the higher-end COB lights with active cooling remained rock solid, though the faint hum of their fans became a new problem to solve in post-production.
It works perfectly. Until it doesn’t. You’ll be halfway through a perfect take when the fan on your ‘silent’ LED kicks in like a jet engine. This is why I always check the DB ratings on light fixtures before buying. I’ve found that even the most praised budget lights often fail the ‘audio-first’ test because their cooling fans are tuned for brightness over silence. This isn’t just a minor annoyance; it’s a dealbreaker if you’re using a sensitive condenser mic just three feet away.
Does the heat become unbearable in a 10×10 room?
Absolutely, if you aren’t careful. During my testing, the ambient temperature in my 10×10 room rose by nearly 8 degrees Fahrenheit over two hours. This is the hidden cost of professional lighting. While the light looks cinematic, the physical toll on the creator is real. I had to switch to using a remote-controlled ‘smart’ plug for my lights so I could kill the power instantly between takes to let the room—and myself—cool down. If you’re planning on long-form content, you need to factor in ventilation that doesn’t ruin your audio.
The Reality of Audio Interference in Tight Spaces
In a cramped studio, your microphone is often inches away from your computer or your lights. This is where I encountered the dreaded ‘EMF hum.’ Cheap XLR cables act like antennas in a small room packed with electronics. I noticed a significant buzz when my mic cable ran parallel to the power brick for my main light. Switching to quad-shielded cables solved the issue, but it’s an added expense most beginners forget. According to several discussions on the r/audioengineering subreddit, cable hygiene is often more important than the microphone’s price tag when it comes to a clean signal.
The good news? The stability of a hard-mounted wall rig is unmatched. There is zero camera shake, even when I’m typing vigorously on the desk. The bad news? If you need to change your angle, you are looking at a 20-minute teardown. This setup is a ‘set it and forget it’ solution, not a flexible workspace for someone who likes to experiment with new shots every week. Do you agree with my experience regarding the cable management nightmare of power bricks? Let me know in the comments if you’ve found a better way to hide them.
When you start scouring lighting kits and microphone reviews, you’ll often find yourself at a crossroads: do you buy the ‘influencer’ starter pack or piece together a professional rig? My compact bedroom setup, centered on wall-rails and high-CRI COB lights, offers a distinct departure from the standard Elgato or Neewer ecosystems. While the gear I’ve chosen focuses on spatial efficiency and thermal management, it’s essential to see how it stacks up against the market leaders to ensure you aren’t over-engineering a simple problem.
The Battle Against the Elgato Ecosystem
The most direct competitor to a custom creator rig is the Elgato ecosystem. Comparing my setup of professional lighting kits and dedicated camera reviews to the Elgato ‘Stream Deck’ lifestyle reveals a clear trade-off: convenience vs. quality. The Elgato Key Lights are thin, app-controlled, and integrate perfectly with your PC. However, they are edge-lit panels, which means they lack the ‘throw’ and the ability to use deep softboxes that my COB lights provide. If you want that dramatic, cinematic look with deep shadows, the Elgato system will feel too flat. On the other hand, if you want to turn your studio on with one button and have it disappear behind your monitors, Elgato wins hands down.
Why Traditional Floor Stands Might Fail You
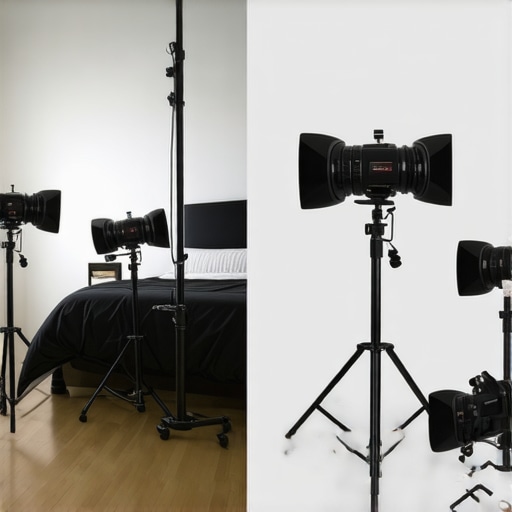
Many beginners opt for budget-friendly studio gear from brands like Neewer or Godox. These ‘all-in-one’ lighting kits are incredibly tempting because they often cost less than a single high-end light fixture. But in a 10×10 bedroom, the value proposition shifts. Those kits come with wide-based tripods that effectively delete three square feet of floor space per light. My rail-based system costs roughly 40% more but reclaims 100% of that floor space. When you compare this to the B&H Photo Video listings for standard C-stands, you’ll see that ‘affordable’ gear often carries a ‘space tax’ that small-room creators simply cannot afford to pay.
Is it worth the upgrade?
If you are currently using a ring light or a basic $50 LED panel, the jump to a COB light with a real softbox is the single most significant visual upgrade you can make. It is the difference between looking like you are on a Zoom call and looking like you are on a Netflix set. While the entry cost for a professional-grade creator rig is higher, the longevity of the metal hardware and the color accuracy of the diodes mean you won’t be looking for a replacement in six months. The ‘upgrade’ isn’t just about brightness; it’s about the texture of the light on your skin and the silence of the cooling fans during a critical take.
Where Your Money Goes Further
In the world of microphone reviews and audio studio gear, the competition is even tighter. Comparing a high-end XLR setup to a USB ‘plug-and-play’ mic like the Blue Yeti reveals that while the USB mic is cheaper, it lacks the ‘off-axis rejection’ needed in a small, echo-prone bedroom. A professional rig allows you to grow; you can swap the mic, the preamp, or the cables independently. Before you commit to a single-brand ecosystem, check current prices on specialized components to see if a modular approach fits your budget better. If you’re curious about the ‘easy’ route, be sure to check out our Elgato Key Light review to see if software control outweighs the need for cinematic modification in your specific space.
The Good, The Bad, and the Messy Reality
After pushing this 10×10 studio to its limits, the results are undeniable but come with specific trade-offs. Here is the breakdown of what I loved and what drove me crazy during the testing phase. If you want a professional look, you have to be ready for a higher level of maintenance than a standard webcam setup.
- Pro: Spatial Efficiency. You get your floor back. By utilizing 7 studio setup ideas for people in small studio apartments, you can fit a full production rig into a space that usually only holds a bed and a dresser.
- Pro: Visual Depth. Unlike flat ring lights, this setup creates a cinematic ‘wrap’ that makes you stand out from the background, even with only a few feet of space.
- Pro: Rock-Solid Stability. Metal rails and mounts don’t wobble when you walk, preventing the micro-jitters common in cheap tripods.
- Con: The Heat Factor. In a small room, professional COB lights can raise the temperature significantly over an hour.
- Con: Cable Chaos. Power bricks and XLR runs require extreme discipline, or you’ll be fighting audio interference from cheap cables and a cluttered floor.
Defining the Perfect Professional for This Setup
This rig isn’t for everyone. If you are just hopping on a weekly Zoom call with your boss, this is overkill of the highest order. You should buy this if you are a serious content creator who is tired of looking like an amateur but doesn’t have the luxury of a spare warehouse. It is the definitive choice for product reviewers who need to mount a camera to a pole for top-down desk shots without a tripod leg obstructing your walking path.
You should skip this if you need a portable setup. This is a permanent installation. If you move furniture often or need to record in different rooms, the 20-minute teardown will kill your creative flow. For those creators, I’d suggest looking into compact light stands that fit in a carry-on bag instead of a fixed rail system.
#IMAGE_PLACEHOLDER_E#
The Final Score and My Honest Thoughts
If you value your square footage as much as your image quality, this rig is a 9/10. It solves the most significant hurdle of home-based content creation: the ‘flat’ look caused by cramped spaces. While the heat and cable management are hurdles, they are solvable through smart planning and a few extra clips. This setup successfully transforms a generic bedroom into a legitimate broadcast suite. The Verdict: Buy it if you are staying put and demand cinematic quality; skip it if you value simplicity over lighting control. Before you commit, make sure you know how to get silent lighting in your studio so your microphone doesn’t pick up the cooling fans.