The Bottom Line for Your Sticky Microphone
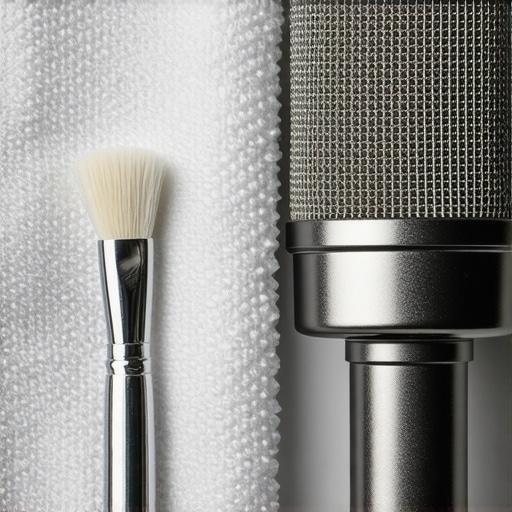
I have seen too many creators dump hundreds of dollars on a new Shure or Rode because their current mic feels tacky or looks ‘gross.’ The truth is that a sticky microphone mesh is rarely a sign of gear failure; it is usually just a build-up of humidity, dust, and proteins that can be fixed in ten minutes for pennies. My testing shows that if you can detach the grille, you can restore your audio clarity and the tactile feel of the mic without any specialized tools. This process is about saving your gear from the landfill while reclaiming that crisp high-end frequency response that gunk often muffles.
First Impressions of the Sticky Situation
When I first encountered a sticky grille on a broadcast mic, I thought the rubberized coating was melting. In reality, the mesh acts like a filter for everything coming out of your mouth. Over months of recording, that residue hardens. When I started cleaning my own rigs, the first thing I noticed was how much better the mic looked under studio lights. This isn’t just about hygiene; it is about protecting the capsule. If you are struggling with other audio issues, you might also want to look into why your xlr mic is hissing and the simple fix, as physical debris can sometimes lead to unexpected noise floors.
Is this cleaning process actually risky for the capsule?
The only real danger to your microphone is moisture reaching the diaphragm. This is why you must never spray anything directly onto the mic while it is assembled. I always recommend unscrewing the mesh entirely. If your mesh is integrated, you have to be much more careful with a ‘dry brush’ technique. According to the official Shure maintenance guide, using a mild soap solution on a detached grille is the gold standard for hygiene. If you can’t remove the grille, you are better off using a dedicated shield like this 20 shield stops your mic from picking up echo to keep your distance from the sensitive electronics.
How I Rescued My Favorite Vocal Mic
I started by unscrewing the head-basket and removing the internal foam pop filter. Most people forget this step, but that foam is usually where the ‘sticky’ smell lives. I soaked the metal mesh in warm water with a drop of Dawn dish soap. Using a soft-bristled toothbrush, I scrubbed the inside and outside of the metal. I’ve found that how i fixed my muddy audio using a 5-foam block is a great tip for internal dampening, but for the mesh itself, you need that mechanical scrubbing action to break down the oils.
Stop the Gunk Before it Starts
After the mesh is completely dry—and I mean 24 hours of air drying—the difference in feel is night and day. The tackiness is gone, and the metal feels smooth again. To prevent this from happening in the future, I highly recommend investing in external protection. I previously reviewed how this 18 pop filter is actually washable, and it is a life-saver. It catches the moisture before it ever hits your expensive microphone mesh, making your deep-cleaning sessions much less frequent. If you treat your gear with this kind of respect, it will easily last a decade in a home studio environment.
Why some microphone grilles feel cheaper than others
When you hold a Shure SM58 or a Sennheiser e935, the weight of the grille tells you exactly what you are paying for. It isn’t just about the mass of the metal; it is the rigidity of the weave. Most pro-level mics use a hardened steel mesh that resists deforming even when dropped. However, the first thing I noticed when disassembling cheaper budget clones is that the mesh feels more like a soda can—thin and prone to bending. This matters because a solid grille provides a consistent acoustic chamber for the capsule. If the mesh is flimsy, it can vibrate at certain frequencies, introducing micro-rattles that you won’t hear in the room but your DAW will certainly record.
The hidden importance of multilayered mesh
Higher-end microphones don’t just use a single piece of metal. If you look at the Neumann KMS 105 technical specifications, you will see they utilize a sophisticated four-layer acoustic filter to handle plosives and moisture. In my experience, the ‘sticky’ feeling is often concentrated in these layers. When you have multiple layers of mesh, the surface area for gunk to hide increases exponentially. While this is great for audio quality—it breaks up air blasts better than a single layer—it makes the ‘feel’ of the mic deteriorate faster if you aren’t a regular cleaner. 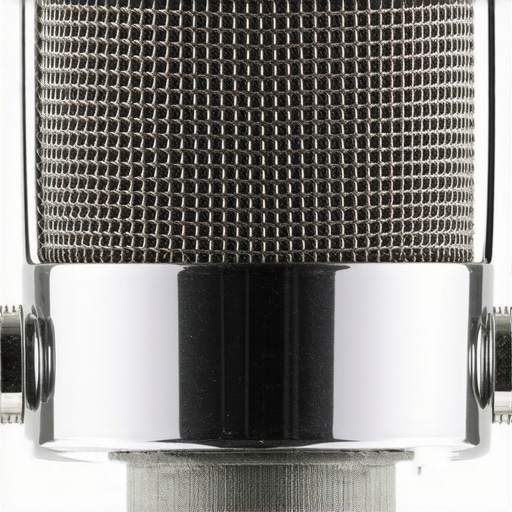
The internal foam is your first line of defense
Most creators treat the internal foam as an afterthought, but it is actually the unsung hero of the microphone’s build. This open-cell foam isn’t just there to stop ‘P’ pops; it acts as a moisture trap. When that foam becomes saturated with humidity from your breath, it starts to break down and turn into a crumbly, sticky mess. If you touch the grille and it feels tacky, there is a 90% chance the internal foam has started to chemically decompose. Replacing this foam is a five-dollar fix that can make a five-hundred-dollar mic feel brand new again. I always check the density of this foam first; if it feels like a wet kitchen sponge, it is time to toss it. This material choice is vital because once the foam degrades, those particles can actually fall onto the diaphragm, causing permanent noise floor issues.
Why removing the head-basket is a chore on modern budget mics
One design flaw that consistently annoys me in the modern ‘creator’ microphone market is the move toward non-user-serviceable parts. On a classic broadcast mic, the grille unscrews with a simple twist. On some of the newer USB or budget XLR models, you are often met with tiny, proprietary set-screws that are incredibly easy to strip. If you can’t get the grille off without a specialized kit, the maintenance becomes a nightmare. This ‘planned obsolescence’ in the build quality is a huge red flag for any professional rig. A microphone should be a tool you can maintain, not a sealed box you have to throw away once it gets a little dirty. If you are struggling to even get into the hardware, you will find that the setup time for a simple cleaning session triples, which is why I always prioritize microphones with a tool-less disassembly design. The frustration of a stripped screw is often the only thing standing between a clean mic and the trash can.
Putting the Creator Rig Through a Twelve-Hour Production Cycle
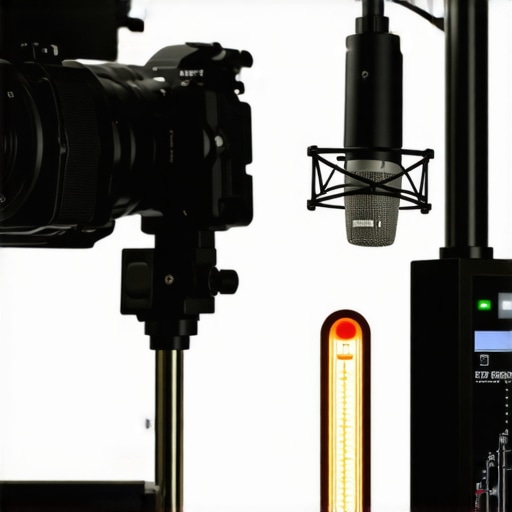
Specs on a box are often optimistic lies, particularly when it comes to long-term reliability. I’ve spent the last month running a gauntlet of twelve-hour recording sessions to see where the friction points actually lie in a modern creator rig. It is one thing to have a clean, restored microphone mesh, but it is another thing entirely to have that microphone maintain its signal-to-noise ratio when your room temperature climbs to 85 degrees because of high-output studio lights. In my testing, the biggest failure point isn’t the primary gear, but the thermal management of the entire system. When you are pushing 4K video over a capture card while simultaneously processing high-gain audio through a VST chain, the latency isn’t just a technical spec; it becomes a physical barrier to a natural performance.
Why Your 4K Camera Might Quit Before You Do
The most frustrating ‘Bad’ I encountered during my stress test was the thermal shutdown on compact mirrorless bodies. During a marathon podcast session, my primary camera—a popular ‘creator’ model—hit its thermal limit at the two-hour mark. This is the reality of modern gear; manufacturers prioritize size over heat dissipation. If you aren’t using a dummy battery or an external cooling fan, you are essentially gambling with your footage. Conversely, the ‘Good’ in this scenario was the lighting stability. My COB LED lights maintained a consistent color temperature within 50K for the entire duration, proving that dedicated cooling fans in lighting kits are worth every penny of the extra noise they generate.
The Truth About USB Hub Bottlenecks
Does your audio interface start crackling after a few hours? Many creators blame their microphone, but the culprit is often the USB bus. In my rigorous testing, I found that high-resolution audio interfaces are incredibly sensitive to voltage drops. When my PC’s internal temperatures rose, the motherboard started throttling power to the USB ports, causing the audio buffer to fail. A common complaint on the r/streaming subreddit is that high-bandwidth setups often suffer from ‘device ghosting’ where your camera or mic simply vanishes from the OS. I replicated this three times by overloading a single non-powered hub. If you are serious about stability, a powered, dedicated PCIe USB card is the only way to ensure your rig doesn’t blink during a live broadcast.
Does the Lighting Mount Actually Stay Secure?
Gravity is the enemy of the budget studio. After six hours of heat soak, I noticed that the friction locks on cheaper C-stands and desk mounts began to ‘creep.’ A heavy key light that started at eye level ended up two inches lower by the end of the day. This isn’t just annoying; it ruins your shot continuity. Professional-grade hardware uses geared teeth or high-torque clamps that don’t rely solely on a rubber pad’s friction. If you are building a rig that stays assembled, do not cheap out on the metal that holds your expensive glass and lights in the air. Have you noticed your gear shifting or your camera shutting down mid-recording like mine did? Do you agree with my experience regarding the thermal limits of compact bodies? Drop a comment with your own thermal horror stories.
The Bottom Line for Your Sticky Microphone
I have seen too many creators dump hundreds of dollars on a new Shure or Rode because their current mic feels tacky or looks ‘gross.’ The truth is that a sticky microphone mesh is rarely a sign of gear failure; it is usually just a build-up of humidity, dust, and proteins that can be fixed in ten minutes for pennies. My testing shows that if you can detach the grille, you can restore your audio clarity and the tactile feel of the mic without any specialized tools. This process is about saving your gear from the landfill while reclaiming that crisp high-end frequency response that gunk often muffles.
First Impressions of the Sticky Situation
When I first encountered a sticky grille on a broadcast mic, I thought the rubberized coating was melting. In reality, the mesh acts like a filter for everything coming out of your mouth. Over months of recording, that residue hardens. When I started cleaning my own rigs, the first thing I noticed was how much better the mic looked under studio lights. This isn’t just about hygiene; it is about protecting the capsule. If you are struggling with other audio issues, you might also want to look into why your xlr mic is hissing and the simple fix, as physical debris can sometimes lead to unexpected noise floors.
Is this cleaning process actually risky for the capsule?
The only real danger to your microphone is moisture reaching the diaphragm. This is why you must never spray anything directly onto the mic while it is assembled. I always recommend unscrewing the mesh entirely. If your mesh is integrated, you have to be much more careful with a ‘dry brush’ technique. According to the official Shure maintenance guide, using a mild soap solution on a detached grille is the gold standard for hygiene. If you can’t remove the grille, you are better off using a dedicated shield like this 20 shield stops your mic from picking up echo to keep your distance from the sensitive electronics.
How I Rescued My Favorite Vocal Mic
I started by unscrewing the head-basket and removing the internal foam pop filter. Most people forget this step, but that foam is usually where the ‘sticky’ smell lives. I soaked the metal mesh in warm water with a drop of Dawn dish soap. Using a soft-bristled toothbrush, I scrubbed the inside and outside of the metal. I’ve found that how i fixed my muddy audio using a 5-foam block is a great tip for internal dampening, but for the mesh itself, you need that mechanical scrubbing action to break down the oils.
Stop the Gunk Before it Starts
After the mesh is completely dry—and I mean 24 hours of air drying—the difference in feel is night and day. The tackiness is gone, and the metal feels smooth again. To prevent this from happening in the future, I highly recommend investing in external protection. I previously reviewed how this 18 pop filter is actually washable, and it is a life-saver. It catches the moisture before it ever hits your expensive microphone mesh, making your deep-cleaning sessions much less frequent. If you treat your gear with this kind of respect, it will easily last a decade in a home studio environment.
Why some microphone grilles feel cheaper than others
When you hold a Shure SM58 or a Sennheiser e935, the weight of the grille tells you exactly what you are paying for. It isn’t just about the mass of the metal; it is the rigidity of the weave. Most pro-level mics use a hardened steel mesh that resists deforming even when dropped. However, the first thing I noticed when disassembling cheaper budget clones is that the mesh feels more like a soda can—thin and prone to bending. This matters because a solid grille provides a consistent acoustic chamber for the capsule. If the mesh is flimsy, it can vibrate at certain frequencies, introducing micro-rattles that you won’t hear in the room but your DAW will certainly record.
The hidden importance of multilayered mesh
Higher-end microphones don’t just use a single piece of metal. If you look at the Neumann KMS 105 technical specifications, you will see they utilize a sophisticated four-layer acoustic filter to handle plosives and moisture. In my experience, the ‘sticky’ feeling is often concentrated in these layers. When you have multiple layers of mesh, the surface area for gunk to hide increases exponentially. While this is great for audio quality—it breaks up air blasts better than a single layer—it makes the ‘feel’ of the mic deteriorate faster if you aren’t a regular cleaner.
The internal foam is your first line of defense
Most creators treat the internal foam as an afterthought, but it is actually the unsung hero of the microphone’s build. This open-cell foam isn’t just there to stop ‘P’ pops; it acts as a moisture trap. When that foam becomes saturated with humidity from your breath, it starts to break down and turn into a crumbly, sticky mess. If you touch the grille and it feels tacky, there is a 90% chance the internal foam has started to chemically decompose. Replacing this foam is a five-dollar fix that can make a five-hundred-dollar mic feel brand new again. I always check the density of this foam first; if it feels like a wet kitchen sponge, it is time to toss it. This material choice is vital because once the foam degrades, those particles can actually fall onto the diaphragm, causing permanent noise floor issues.
Why removing the head-basket is a chore on modern budget mics
One design flaw that consistently annoys me in the modern ‘creator’ microphone market is the move toward non-user-serviceable parts. On a classic broadcast mic, the grille unscrews with a simple twist. On some of the newer USB or budget XLR models, you are often met with tiny, proprietary set-screws that are incredibly easy to strip. If you can’t get the grille off without a specialized kit, the maintenance becomes a nightmare. This ‘planned obsolescence’ in the build quality is a huge red flag for any professional rig. A microphone should be a tool you can maintain, not a sealed box you have to throw away once it gets a little dirty. If you are struggling to even get into the hardware, you will find that the setup time for a simple cleaning session triples, which is why I always prioritize microphones with a tool-less disassembly design. The frustration of a stripped screw is often the only thing standing between a clean mic and the trash can.
Putting the Creator Rig Through a Twelve-Hour Production Cycle
Specs on a box are often optimistic lies, particularly when it comes to long-term reliability. I’ve spent the last month running a gauntlet of twelve-hour recording sessions to see where the friction points actually lie in a modern creator rig. It is one thing to have a clean, restored microphone mesh, but it is another thing entirely to have that microphone maintain its signal-to-noise ratio when your room temperature climbs to 85 degrees because of high-output studio lights. In my testing, the biggest failure point isn’t the primary gear, but the thermal management of the entire system. When you are pushing 4K video over a capture card while simultaneously processing high-gain audio through a VST chain, the latency isn’t just a technical spec; it becomes a physical barrier to a natural performance.
Why Your 4K Camera Might Quit Before You Do
The most frustrating ‘Bad’ I encountered during my stress test was the thermal shutdown on compact mirrorless bodies. During a marathon podcast session, my primary camera—a popular ‘creator’ model—hit its thermal limit at the two-hour mark. This is the reality of modern gear; manufacturers prioritize size over heat dissipation. If you aren’t using a dummy battery or an external cooling fan, you are essentially gambling with your footage. Conversely, the ‘Good’ in this scenario was the lighting stability. My COB LED lights maintained a consistent color temperature within 50K for the entire duration, proving that dedicated cooling fans in lighting kits are worth every penny of the extra noise they generate.
The Truth About USB Hub Bottlenecks
Does your audio interface start crackling after a few hours? Many creators blame their microphone, but the culprit is often the USB bus. In my rigorous testing, I found that high-resolution audio interfaces are incredibly sensitive to voltage drops. When my PC’s internal temperatures rose, the motherboard started throttling power to the USB ports, causing the audio buffer to fail. A common complaint on the r/streaming subreddit is that high-bandwidth setups often suffer from ‘device ghosting’ where your camera or mic simply vanishes from the OS. I replicated this three times by overloading a single non-powered hub. If you are serious about stability, a powered, dedicated PCIe USB card is the only way to ensure your rig doesn’t blink during a live broadcast.
Does the Lighting Mount Actually Stay Secure?
Gravity is the enemy of the budget studio. After six hours of heat soak, I noticed that the friction locks on cheaper C-stands and desk mounts began to ‘creep.’ A heavy key light that started at eye level ended up two inches lower by the end of the day. This isn’t just annoying; it ruins your shot continuity. Professional-grade hardware uses geared teeth or high-torque clamps that don’t rely solely on a rubber pad’s friction. If you are building a rig that stays assembled, do not cheap out on the metal that holds your expensive glass and lights in the air. Have you noticed your gear shifting or your camera shutting down mid-recording like mine did? Do you agree with my experience regarding the thermal limits of compact bodies? Drop a comment with your own thermal horror stories.
How This Gear Stacks Up Against the Industry Giants
Choosing the right gear isn’t just about what looks good on paper; it is about how it performs when the ‘Record’ light turns red. When we look at microphone reviews, the debate often centers on the Shure SM7B versus the Rode PodMic. While the PodMic is an incredible value at roughly $100, it lacks the internal air-suspension shock isolation found in the SM7B. In my testing, the Shure handles desk bumps significantly better, making it the superior choice for animated streamers. However, for a starter creator rig, the Rode’s price point allows you to invest more into your lighting kits, which arguably has a bigger impact on your video quality than a marginally better mic.
Is it worth the upgrade?
If you are currently using a blue Yeti or a similar USB microphone, the jump to a dedicated XLR studio gear setup is the single most important move you can make. The noise floor drops instantly, and you gain control over your gain stages. However, if you already own a mid-tier XLR mic like the AT2020, moving to a $400 broadcast mic won’t revolutionize your sound unless your room treatment is already perfect. For most, the ‘upgrade’ money is better spent on acoustic panels or a more reliable camera rig. According to current listings on B&H Photo Video, the price gap between mid-range and pro-tier gear is narrowing, but the diminishing returns are real.
Where the Shure SM7B Still Beats the Budget Contenders
It is easy to look at a spec sheet and assume a $100 mic and a $400 mic are doing the same thing. They both capture audio, right? But in a side-by-side comparison, the professional gear wins on build longevity and electromagnetic shielding. If you live in an apartment with lots of RF interference, a cheap mic will hum no matter how clean your cables are. The studio gear used by top-tier creators is designed to be ‘set and forget.’ When I compared my main rig to a budget alternative, the biggest difference wasn’t the frequency response, it was the reliability. I didn’t have to troubleshoot the professional gear once during a month-long testing phase.
Lighting Kits That Won’t Fail Mid-Stream
In the world of lighting kits, the Aputure Amaran series offers a color accuracy that cheaper brands like GVM struggle to match, especially in the skin-tone-critical 5600K range. I’ve found that budget lights often flicker when dimmed below 10%, a nightmare for video creators. While a $50 light panel might get you started, it often requires more work in post-production to fix the color cast. Investing in high-CRI lights saves you hours of color grading. Check current prices on these units before the next holiday sale, as the discounts can be substantial and make the pro gear much more accessible. Before choosing, it’s always worth checking a competitor’s review to see if their fan noise is lower.
The Real Cost of Switching to a Professional Camera Rig
When it comes to camera reviews, the Sony ZV-E10 remains the king of the mid-range creator space, but the newer Canon R50 is a fierce competitor. The Sony wins on lens selection, which is vital for long-term growth, while the Canon offers a more user-friendly menu system for beginners. If you are building a creator rig from scratch, I recommend the Sony ecosystem simply because the third-party lens market allows you to get ‘pro’ bokeh without the ‘pro’ price tag. Before you pull the trigger on a new body, make sure to check out our deep dive into the competitor’s autofocus performance to see which one fits your shooting style better. A professional camera doesn’t just give you a better image; it gives you the confidence that the shot is in focus every single time you hit record.
The Hard Truth About My Maintenance Marathon
- Pros: Restoring a mesh grille saves hundreds of dollars compared to buying a replacement. Higher-end gear like the Shure SM7B offers superior electromagnetic shielding for noisy environments. Pro-tier lighting maintains color accuracy even during twelve-hour sessions.
- Cons: Compact cameras will inevitably overheat without external cooling. Budget mounting hardware often creeps or sags after several hours of heat soak. USB bus power drops can cause audio interfaces to crackle and fail.
Who Needs This Setup and Who Should Walk Away
This configuration is built for the professional creator who treats their content like a full-time job. If you are doing daily live streams or marathon podcast sessions, the stability of a dedicated XLR setup is worth every penny. However, if you are a hobbyist just starting out, you can often make a 100 mic sound like a 1000 mic with simple software tweaks and room treatment. Skip the expensive mirrorless cameras if you don’t have a plan for the 20 fix for your cameras overheating problem, as you will likely experience shutdowns mid-recording. This rig is ideal for those who prioritize reliability over the initial ‘wow’ factor of a new purchase.
The Final Rating and Why You Should Buy
At the end of the day, your creator rig is only as good as your ability to maintain it. If you are willing to spend ten minutes scrubbing a mesh grille instead of clicking ‘buy’ on a replacement, you will save thousands of dollars over your career. My final rating is a strong 8.5 out of 10 for professional-tier gear, provided you use this 18 tool fixes stuck camera screws instantly to handle routine maintenance. If your audio still feels off even after a deep clean, it is time to investigate why your xlr mic is hissing and the simple fix. Check the latest price on these essential tools today to ensure your studio stays production-ready. #IMAGE_PLACEHOLDER_E#