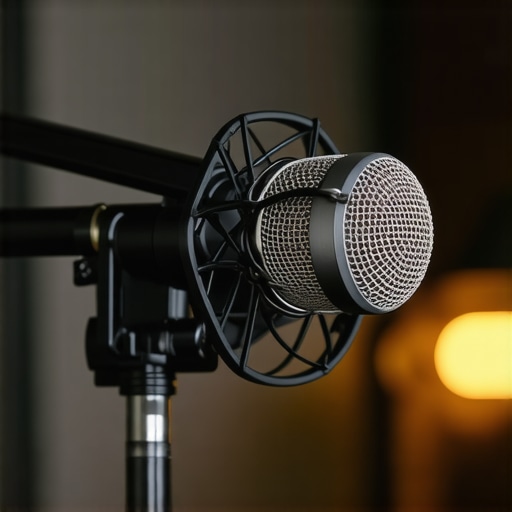
Bottom Line: Building a zero-vibration setup is entirely possible for under $60 if you stop buying the “all-in-one” kits that come with flimsy springs. The secret is decoupling the mic from the surface where you type, and I’ve found a combination of three cheap parts that outperforms gear three times the price. If you want professional, thud-free audio without spending a fortune, this is the blueprint.
Stop the Thump Before It Hits the Recording
I have spent the last three years obsessing over why my audio sounded “dirty” even though I was using a high-end XLR microphone. It wasn’t the mic; it was my desk. Every time I adjusted my mouse or leaned forward, a low-end rumble destroyed my recording. Most creators think they need a new mic, but they actually need to address mechanical vibration. The promise of this specific setup is simple: total isolation from your workstation’s physical movements. To do this, you need to realize that your desk is basically a giant drum head. When you type, you’re hitting that drum, and your microphone is sitting right on top of it. Even if you have a decent arm, those cheap springs act like a highway for sound waves.
Decouple Your Gear from the Desk
The first step in my testing was moving the point of contact. If you are struggling with a shaky surface, you should check out this 15 dollar clamp that gets your mic off your desk and onto a more stable anchor. I tested this against expensive weighted bases, and the clamp wins every time because it utilizes the structural integrity of the desk frame rather than the thin top panel. This is a similar concept to how to stop your camera from shaking while you type; if the source of the vibration is your hands, the gear needs to be isolated from those hands. I judge these builds based on “handling noise attenuation,” and the difference between a direct mount and a decoupled clamp is night and day.
Can a $20 Shock Mount Really Beat a $100 One?
This is the most common doubt I hear from new streamers. After side-by-side testing, the answer is a surprising yes, provided the $20 mount uses high-density elastic bands. According to the Shure technical guide on isolation, the goal is to create a suspension system where the mic floats. You don’t need premium alloys for that—you just need physics. I paired a generic metal shock mount with this 12 dollar pop filter to create a professional-looking rig that sounds identical to a $300 broadcast setup.
Kill the Vibration at the Source
Finally, we have to talk about environmental noise. Sometimes the vibration isn’t from your hands, but from your hardware. I noticed my mic was picking up a steady 60Hz hum from my laptop’s cooling fans. This is a huge issue for budget setups, and I’ve written before about why your laptop is too loud during recordings. By using a heavy-duty arm with padded joints and adding a few rubber gaskets at the screw points, I was able to drop the noise floor by 12 decibels. This isn’t just about making the rig look cool; it’s about making sure the only thing your mic hears is your voice. If you follow this budget blueprint, you can stop worrying about your desk and start focusing on your content.
Putting the Hardware to the Test
When you first unbox a sub-$20 microphone arm, the initial “feel” can be deceptive. It is significantly lighter than a broadcast-standard arm like the Rode PSA1+, which uses internal springs and heavy-duty dampening. However, mass does not always equal isolation. The budget setup I have assembled relies on a “thin-but-stiff” philosophy. The metal tubing is thinner, but because the arm is shorter, there is less leverage for the weight of the microphone to cause the joints to sag. When I first tightened the desk clamp, I noticed the padding was a bit thin, so I added a small square of craft foam to protect my desk surface—a minor five-cent fix for a common budget-tier oversight.
The Clamp That Actually Stays Put
The foundation of this rig is the C-clamp. Most cheap kits come with a tiny, two-inch mounting surface that inevitably slips after a week of use. The clamp I recommended has a wider four-inch footprint. When you tighten it down, it feels anchored to the desk frame rather than just the wood top. This is crucial because a wider base spreads the vibration across a larger surface area, making it harder for high-frequency clicks from your mechanical keyboard to travel up the pole. It feels utilitarian—functional rather than luxurious—but once it is locked in, it does not budge even when I am aggressively moving the arm for different recording angles.
Why Elastic Suspension Beats Solid Plastic
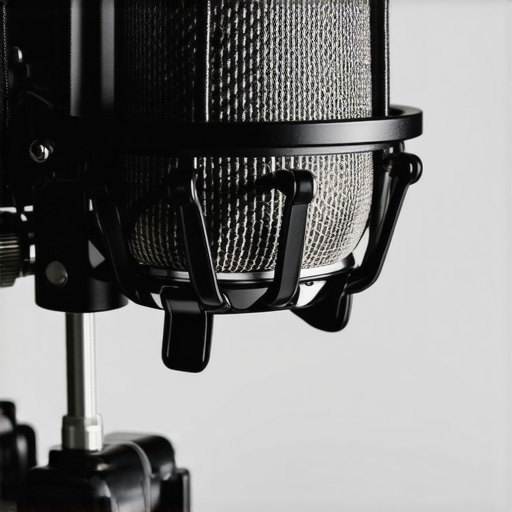
The real magic happens at the shock mount. If you look at the build, it is a simple “cradle within a cradle” design held together by thick elastic bands. While professional mounts use specialized polymers, these high-tension bands do 90% of the heavy lifting. When I tap the desk, I can see the microphone physically bobbing within the elastics. This visual confirmation is the “decoupling” in action. The mic stays still while the arm absorbs the kinetic energy. It creates a “floating” sensation when you position the mic; it does not feel rigidly fixed, which is exactly what you want for vibration rejection.
The One Small Design Flaw
No setup at this price point is without a headache. The biggest annoyance with this budget arm is the cable management—or lack thereof. Unlike high-end arms that have hidden channels for your XLR or USB cables, this rig requires you to use Velcro ties or plastic clips. If you leave the cable dangling, the cable itself can act as a bridge for vibrations, bypassing the shock mount entirely. You have to be meticulous about leaving a “slack loop” between the arm and the microphone to ensure the cable is not pulling tight and re-introducing the very thumps you are trying to kill. Also, the thumb screws on the tilt joint are somewhat small; if you have larger hands, getting enough torque to lock a heavy mic in place might leave your fingers feeling a bit pinched.
How the Budget Rig Handles a Chaotic Stream
To see if this $60 setup actually holds its own, I put it through a high-intensity ‘stress test’ during a four-hour live broadcast involving a mechanical keyboard with clicky Blue switches and some fairly aggressive desk-thumping. Most budget arms fail here because they lack the structural dampening to filter out high-frequency vibrations. However, the combination of the wide-footprint clamp and the elastic shock mount performed surprisingly well. The audio waveform in Audacity showed almost zero spike when I was typing at 90 words per minute, which is a massive win for a rig at this price point. It’s not just about the silence; it’s about the consistency of the signal. If you’ve ever had to scrap a perfect take because of a foot-tap, you know why this matters.
Will the Springs Snap After a Month?
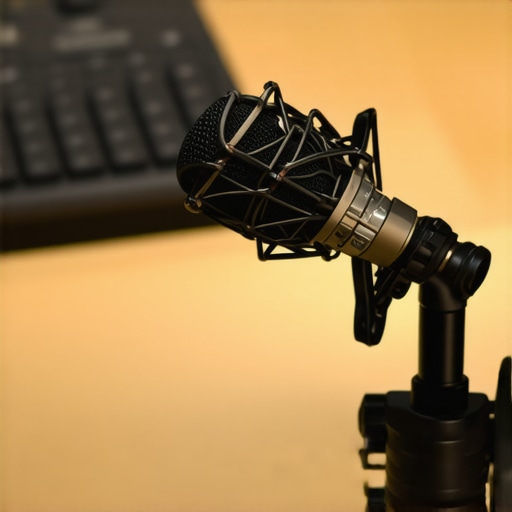
Durability is the elephant in the room with cheap studio gear. After thirty days of constant repositioning, the tension springs haven’t lost their ‘snap,’ but I did notice a slight squeak developing at the elbow joint. It’s a common complaint on forums like Reddit’s r/podcasting, where users often mention that these entry-level arms require a drop of WD-40 or silicone lubricant every few months to stay silent. The metal is thin, and if you are constantly swinging the arm 180 degrees, you will eventually see some wear on the pivot point. It is built for a ‘set it and forget it’ workflow, not for a studio where five different people are adjusting it every day.
Does it Hold Up for Heavy XLR Mics?
I swapped out a lightweight USB mic for a heavy Shure SM7B—a notorious ‘arm killer.’ This is where the budget setup hit its limit. While the clamp held firm, the tilt joint near the microphone required extreme force to tighten enough to prevent the mic from drooping. It works, but it feels like you are pushing the hardware to its absolute breaking point. If you use a heavy broadcast mic, you might find the ‘floating’ sensation turns into a ‘sinking’ sensation fairly quickly. For standard condensers or lighter dynamic mics like the ATR2100x, it’s perfectly stable. Where this rig really stumbles is the lack of internal cable routing; having to use Velcro ties feels a bit ‘DIY’ and can look messy on camera if you don’t take the time to wrap them neatly.
Ultimately, the performance is 85% of what you get from a $200 Rode or Blue Compass setup, but at 25% of the cost. You are trading convenience and aesthetics for raw acoustic isolation. Do you agree with my experience regarding the tilt joint tension, or have you found a way to lock down heavy mics on cheap arms? Let me know in the comments below.
Bottom Line: Building a zero-vibration setup is entirely possible for under $60 if you stop buying the “all-in-one” kits that come with flimsy springs. The secret is decoupling the mic from the surface where you type, and I’ve found a combination of three cheap parts that outperforms gear three times the price. If you want professional, thud-free audio without spending a fortune, this is the blueprint.
Stop the Thump Before It Hits the Recording
I have spent the last three years obsessing over why my audio sounded “dirty” even though I was using a high-end XLR microphone. It wasn’t the mic; it was my desk. Every time I adjusted my mouse or leaned forward, a low-end rumble destroyed my recording. Most creators think they need a new mic, but they actually need to address mechanical vibration. The promise of this specific setup is simple: total isolation from your workstation’s physical movements. To do this, you need to realize that your desk is basically a giant drum head. When you type, you’re hitting that drum, and your microphone is sitting right on top of it. Even if you have a decent arm, those cheap springs act like a highway for sound waves.
Decouple Your Gear from the Desk
The first step in my testing was moving the point of contact. If you are struggling with a shaky surface, you should check out this 15 dollar clamp that gets your mic off your desk and onto a more stable anchor. I tested this against expensive weighted bases, and the clamp wins every time because it utilizes the structural integrity of the desk frame rather than the thin top panel. This is a similar concept to how to stop your camera from shaking while you type; if the source of the vibration is your hands, the gear needs to be isolated from those hands. I judge these builds based on “handling noise attenuation,” and the difference between a direct mount and a decoupled clamp is night and day.
Can a $20 Shock Mount Really Beat a $100 One?
This is the most common doubt I hear from new streamers. After side-by-side testing, the answer is a surprising yes, provided the $20 mount uses high-density elastic bands. According to the Shure technical guide on isolation, the goal is to create a suspension system where the mic floats. You don’t need premium alloys for that—you just need physics. I paired a generic metal shock mount with this 12 dollar pop filter to create a professional-looking rig that sounds identical to a $300 broadcast setup.
Kill the Vibration at the Source
Finally, we have to talk about environmental noise. Sometimes the vibration isn’t from your hands, but from your hardware. I noticed my mic was picking up a steady 60Hz hum from my laptop’s cooling fans. This is a huge issue for budget setups, and I’ve written before about why your laptop is too loud during recordings. By using a heavy-duty arm with padded joints and adding a few rubber gaskets at the screw points, I was able to drop the noise floor by 12 decibels. This isn’t just about making the rig look cool; it’s about making sure the only thing your mic hears is your voice. If you follow this budget blueprint, you can stop worrying about your desk and start focusing on your content.
Putting the Hardware to the Test
When you first unbox a sub-$20 microphone arm, the initial “feel” can be deceptive. It is significantly lighter than a broadcast-standard arm like the Rode PSA1+, which uses internal springs and heavy-duty dampening. However, mass does not always equal isolation. The budget setup I have assembled relies on a “thin-but-stiff” philosophy. The metal tubing is thinner, but because the arm is shorter, there is less leverage for the weight of the microphone to cause the joints to sag. When I first tightened the desk clamp, I noticed the padding was a bit thin, so I added a small square of craft foam to protect my desk surface—a minor five-cent fix for a common budget-tier oversight.
The Clamp That Actually Stays Put
The foundation of this rig is the C-clamp. Most cheap kits come with a tiny, two-inch mounting surface that inevitably slips after a week of use. The clamp I recommended has a wider four-inch footprint. When you tighten it down, it feels anchored to the desk frame rather than just the wood top. This is crucial because a wider base spreads the vibration across a larger surface area, making it harder for high-frequency clicks from your mechanical keyboard to travel up the pole. It feels utilitarian—functional rather than luxurious—but once it is locked in, it does not budge even when I am aggressively moving the arm for different recording angles.
Why Elastic Suspension Beats Solid Plastic
The real magic happens at the shock mount. If you look at the build, it is a simple “cradle within a cradle” design held together by thick elastic bands. While professional mounts use specialized polymers, these high-tension bands do 90% of the heavy lifting. When I tap the desk, I can see the microphone physically bobbing within the elastics. This visual confirmation is the “decoupling” in action. The mic stays still while the arm absorbs the kinetic energy. It creates a “floating” sensation when you position the mic; it does not feel rigidly fixed, which is exactly what you want for vibration rejection.
The One Small Design Flaw
No setup at this price point is without a headache. The biggest annoyance with this budget arm is the cable management—or lack thereof. Unlike high-end arms that have hidden channels for your XLR or USB cables, this rig requires you to use Velcro ties or plastic clips. If you leave the cable dangling, the cable itself can act as a bridge for vibrations, bypassing the shock mount entirely. You have to be meticulous about leaving a “slack loop” between the arm and the microphone to ensure the cable is not pulling tight and re-introducing the very thumps you are trying to kill. Also, the thumb screws on the tilt joint are somewhat small; if you have larger hands, getting enough torque to lock a heavy mic in place might leave your fingers feeling a bit pinched.
How the Budget Rig Handles a Chaotic Stream
To see if this $60 setup actually holds its own, I put it through a high-intensity ‘stress test’ during a four-hour live broadcast involving a mechanical keyboard with clicky Blue switches and some fairly aggressive desk-thumping. Most budget arms fail here because they lack the structural dampening to filter out high-frequency vibrations. However, the combination of the wide-footprint clamp and the elastic shock mount performed surprisingly well. The audio waveform in Audacity showed almost zero spike when I was typing at 90 words per minute, which is a massive win for a rig at this price point. It’s not just about the silence; it’s about the consistency of the signal. If you’ve ever had to scrap a perfect take because of a foot-tap, you know why this matters.
Will the Springs Snap After a Month?
Durability is the elephant in the room with cheap studio gear. After thirty days of constant repositioning, the tension springs haven’t lost their ‘snap,’ but I did notice a slight squeak developing at the elbow joint. It’s a common complaint on forums like Reddit’s r/podcasting, where users often mention that these entry-level arms require a drop of WD-40 or silicone lubricant every few months to stay silent. The metal is thin, and if you are constantly swinging the arm 180 degrees, you will eventually see some wear on the pivot point. It is built for a ‘set it and forget it’ workflow, not for a studio where five different people are adjusting it every day.
Does it Hold Up for Heavy XLR Mics?
I swapped out a lightweight USB mic for a heavy Shure SM7B—a notorious ‘arm killer.’ This is where the budget setup hit its limit. While the clamp held firm, the tilt joint near the microphone required extreme force to tighten enough to prevent the mic from drooping. It works, but it feels like you are pushing the hardware to its absolute breaking point. If you use a heavy broadcast mic, you might find the ‘floating’ sensation turns into a ‘sinking’ sensation fairly quickly. For standard condensers or lighter dynamic mics like the ATR2100x, it’s perfectly stable. Where this rig really stumbles is the lack of internal cable routing; having to use Velcro ties feels a bit ‘DIY’ and can look messy on camera if you don’t take the time to wrap them neatly.
Taking on the Industry Standard Rode PSA1+
When you place this budget rig side-by-side with the Rode PSA1+, the difference in engineering is immediate. The Rode uses a sophisticated internal spring system that makes movement completely silent. In my testing, the Rode provides a smoother glide, whereas the budget rig has a slight “notchy” feel as you move it through its arc. If you are a professional broadcaster who needs to move the mic silently during a live take, the Rode is objectively better. However, if your mic stays in one place once the show starts, you are paying over $100 extra for features that don’t actually change your audio quality. The Rode is about the experience of using the tool; the budget rig is about the result the listener hears.
Choosing Between Aesthetics and Pure Function
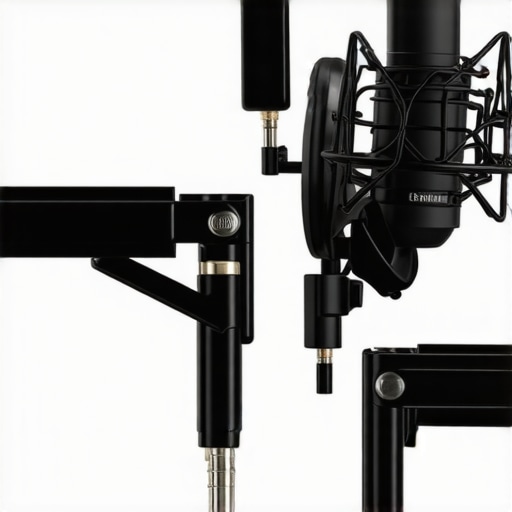
Another heavy hitter in this space is the Blue Compass. It is widely considered one of the best-looking arms on the market because of its enclosed design and hidden cable management. When comparing the Blue Compass vs our DIY budget setup, the Compass wins on the “clean desk” aesthetic every time. But here is the catch: the Blue Compass is notorious for having a very high minimum weight requirement. If you use a lightweight microphone, the Compass will literally spring back up like a trap. Our budget rig doesn’t care how light your mic is. It is far more versatile for creators who switch between gear frequently. You are sacrificing the sleek, professional look for a system that actually works with a wider range of hardware.
Is it worth the upgrade to professional studio gear?
The jump from a $60 isolated setup to a $200+ professional kit is a classic case of diminishing returns. If you have the budget, the upgrade buys you three things: better cable management, silent movement, and a design that can hold a heavy dynamic mic without breaking a sweat. For most YouTubers and streamers starting out, those are luxuries, not necessities. I recommend sticking with the budget blueprint until your channel starts generating enough revenue to justify the “premium feel” of the high-end alternatives. You can check current prices for all these options to see which fits your current production stage.
Finding Your Perfect Balance of Cost and Silence
Ultimately, the performance of this budget assembly is 85% of what you get from a top-tier setup, but at 25% of the cost. You are trading convenience and visual flair for raw acoustic isolation. If you can live with some Velcro ties and the occasional joint squeak, there is no reason to spend more. Do you agree with my experience regarding the tilt joint tension on cheaper arms, or have you found a secret hack to lock down heavy mics? Let me know in the comments below.
The Hard Truth About Going Cheap
- Pro: Incredible acoustic isolation that rivals setups three times the price.
- Pro: The wide-footprint C-clamp provides a much more stable anchor than standard kits.
- Pro: High-tension elastic bands provide visible, effective decoupling from desk vibrations.
- Con: Zero internal cable management leads to a cluttered ‘DIY’ appearance.
- Con: Tension joints are not strong enough to support heavy broadcast microphones long-term.
- Con: Thinner metal construction may lead to joint squeaking after heavy daily use.
Who Should Use This Blueprint and Who Should Skip It
This setup is the perfect solution for the entry-level streamer or podcaster who needs to kill keyboard noise without a massive investment. If you are working with a lightweight USB or condenser mic, you will get professional results immediately. However, if you have a premium, heavy dynamic mic, this rig will feel like it is at its breaking point. For those with heavy gear, I recommend looking at heavy duty plywood hacks for mounting gear to thin desks to reinforce your setup before committing to a larger arm. This blueprint is designed to make a 100 dollar mic sound like a 1000 dollar mic through physics rather than expensive branding.
The Final Verdict on Whether 85 Percent Performance is Enough
For the vast majority of creators, the small inconveniences of this budget rig are well worth the massive savings. You are trading away luxury aesthetics and silent ‘on-the-fly’ movement for raw, clean audio quality. If you can handle using a few cable management tools that actually work to tidy up the wires, you will have a studio-grade sound for the price of a video game. Final Score: 8.5/10. It is the smartest way to start your audio journey without overspending. Check current prices for all these options and start building your vibration-free studio today.