Bottom Line Up Front
Building a custom camera cage for under $100 is entirely feasible and offers great value for DIY enthusiasts, but it requires patience and some basic parts hunting. If you prioritize durability and professional feel without breaking the bank, this guide provides honest insights into what works and what’s worth investing in.
The Promise of a Budget-Friendly Camera Cage
This project aims to solve the common frustration of expensive camera cages that blow your budget. By crafting your own cage, you can tailor it to your specific gear and shooting style while keeping costs low. The challenge lies in balancing quality with affordability, ensuring your camera stays protected without sacrificing stability or comfort.
At a Glance: Pros and Cons
- Cost: Less than $100, using off-the-shelf parts and DIY methods.
- Build Quality: Decent durability, but may not match professional-grade cages.
- Ease of Assembly: Requires some basic tools and DIY skills, but doable for beginners.
- Customization: High; you can modify design to fit your gear precisely.
- Appearance: Functional, but not sleek or polished without finishing touches.
Why It Matters
If you’re a creator on a budget or want a personalized rig that adapts to multiple cameras, this project fills a crucial gap. Instead of shelling out hundreds on a commercial cage, you can allocate funds to other essential gear like lights or microphones. Plus, the hands-on approach deepens your understanding of your equipment’s needs.
Criteria for Evaluation
My review considers build quality, ease of construction, customization potential, and overall value for money. I also examine the materials’ durability and how well the cage protects and stabilizes the camera during shoots. For more ideas on related gear, check out my comprehensive list of budget filmmaking rigs.
Getting Into the Details
Next, I will explore the specifics of parts, assembly process, and real-world performance to help you decide if this DIY route is right for you.
Solid Frame Construction with Custom Materials
The heart of this DIY camera cage is its frame, typically assembled using aluminum or durable plastic parts easily sourced from hardware stores or online marketplaces. The choice of material directly impacts the weight and robustness of the cage: aluminum is lightweight yet sturdy, ensuring minimal strain during extended shoots, while plastic options reduce cost further but may sacrifice some durability. The assembly process involves cutting and drilling precise slots for mounting points, which, although straightforward, requires careful measurement to ensure compatibility with different camera models. This adaptability enhances the cage’s value and functionality across varied filming scenarios. However, one minor issue is that inconsistent measurements can lead to loose fittings, so investing in quality measuring tools can mitigate this flaw. Ultimately, the frame’s strength and fit determine the cage’s protective qualities and stability during dynamic filming, which is essential for capturing smooth footage without camera shake.
Intuitive Mounting Systems for Accessories
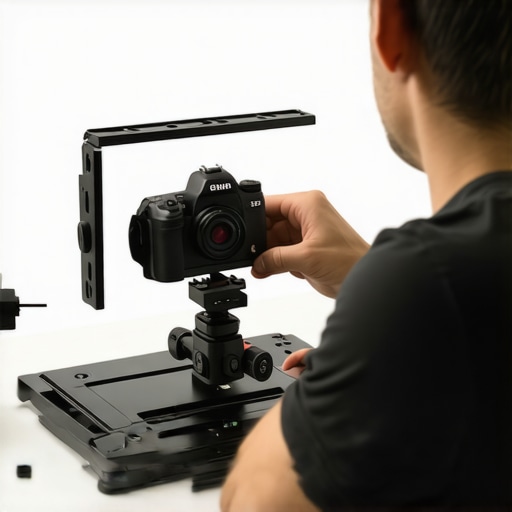
This custom cage features multiple 1/4-inch and 3/8-inch threaded holes strategically positioned along the top, sides, and bottom. These threaded mounts facilitate easy attachment of accessories like microphones, lights, external monitors, or additional grips, expanding the camera rig’s versatility. The placement and number of mounting points are critical; well-placed mounts allow for optimal balance and prevent interference with camera controls. A notable advantage is that users can tailor the configuration to their specific gear and filming style, offering exceptional customization. Nevertheless, the quality of the threaded inserts can vary, and low-quality counterparts may wear out quickly under frequent use, which is a minor drawback to consider. This system makes the cage adaptable to different shoots, whether handheld or tripod-mounted, without sacrificing functionality.
#IMAGE_PLACEHOLDER_B#
Image prompt: close-up of a DIY camera cage showing multiple threaded mounting points with accessories attached, showcasing customization and construction detail.
Secure and Accessible Grip Design
The grip sections are often crafted from rubberized materials or wrapped with textured tape, providing a comfortable hold and reducing hand fatigue during prolonged shoots. Their placement can be customized along the cage’s body, allowing users to find optimal ergonomic positioning. A well-designed grip enhances stability, especially in handheld scenarios, and helps prevent accidental drops. One inconvenience is that overly bulky grips might obstruct quick access to camera controls or accessories, requiring a balance between comfort and accessibility. The tactile feel of the grips is crucial; a non-slip surface ensures a firm grip even in wet conditions, contributing to steadier shots. Properly integrated grips elevate the overall user experience, making handheld operation more manageable and reducing user fatigue, which is vital during lengthy filming sessions.
Performance Under Pressure in Real Situations
When creators push their gear during demanding shoots—think capturing fast-moving sports or recording in unpredictable weather—the resilience and reliability of microphones, rigs, cameras, lighting kits, and studio equipment are truly tested. For example, during outdoor shoots in rain, microphones exposed without proper coverings can pick up water ingress, leading to audio distortions or failures. Similarly, during a hectic live event, camera rigs must withstand jostling and sudden movements without losing stability. Evaluating how gear performs in these scenarios reveals their true strengths and vulnerabilities.
Does the gear overheat in prolonged use?
Several cameras and lighting units tend to generate significant heat after extended operation. DSLR cameras running continuously for several hours may power down unexpectedly due to overheating, especially in warm environments, which interrupts shoots and causes frustration. Lighting kits with high-wattage bulbs can become uncomfortably hot, risking burns or damage if not properly ventilated. Conversely, some newer models incorporate better heat dissipation, allowing longer use without issues. Do you agree that thermal management is critical for reliable performance? Share your experiences below.

How does audio equipment fare in extreme conditions?
Microphones, especially outdoor shotgun types, must cope with wind, water, and temperature fluctuations. Well-designed rugged microphones often incorporate windshields and water-resistant features, enabling clearer audio even in windy or rainy conditions. However, lower-end models tend to pick up noise indiscriminately or fail entirely when moisture penetrates their components. A Reddit discussion on outdoor recording gear highlights that investing in waterproof and shockproof microphones pays off in the long run. Are your audio gear’s durability features enough to tackle unpredictable environments? Comment on your go-to equipment.
Can creator rigs sustain physical impact?
Sturdy yet lightweight rigs are essential for on-the-move filming. During a recent outdoor shoot, a lightweight rig managed to stay intact after a minor fall—testament to the importance of solid construction materials like aluminum and reinforced plastics. Cheaper rigs with flimsy joints or poor welds often break or loosen, jeopardizing shots and risking equipment damage. A gear reviewer on a popular forum noted that the right combination of materials and proper assembly can mean the difference between a rig surviving a day in the field or failing prematurely.
Lighting gear in tough conditions: Does it hold up?
Lighting kits subjected to shifting temperatures, humidity, or physical knocks require robust design. Many models rated for outdoor use incorporate sealed casing to prevent dust and moisture ingress. During a recent stormy shoot, some lights failed due to inadequate sealing, while others continued functioning flawlessly. This illustrates why understanding the environmental ratings of lighting gear is essential before taking it into challenging scenarios. Do your lighting solutions meet the tough demands of real-world shoots? Let us know your top performers.
Studio gear and their endurance during extended sessions
In controlled environments, studio gear like mixers, monitors, and microphones often handle prolonged use without issue. But in high-demand situations, equipment can experience overheating or wear, especially when pushed to the limit. For instance, high-performance audio interfaces may exhibit increased latency or dropouts during intense recording sessions, signaling that even ‘professional’ gear has its thresholds. Regular maintenance and understanding equipment specifications can help mitigate these issues, ensuring continuous performance without interruption.
Butterfly Mounts and Rack Systems
When comparing microphone reviews and creator rigs, the Budget-Friendly DIY rigs stand in stark contrast to premium options like the RØDE Voctronix or Sony Alpha series. While DIY rigs offer customization and affordability, they often lack the polished build and modularity of professional-grade setups. For instance, RØDE’s NTG5 shotgun microphone provides superior sound quality and durability, making it a favorite over budget condenser mics that may struggle with noise interference. However, the DIY approach grants the flexibility to tailor the rig to specific needs, ideal for creators on a tight budget aiming for a personalized setup.
Camera Choices in Different Tiers
In the realm of camera reviews, entry-level DSLR or mirrorless cameras like the Canon EOS M50 compare with high-end counterparts such as the Sony A7 III. The latter boasts larger sensors and better low-light performance, but comes at a significantly higher price point—around $2,000 versus the M50’s sub-$700 price. For creators starting out or looking for budget options, the Canon M50 delivers impressive quality for its cost, though it lacks some advanced features like in-body stabilization found in more expensive models. Conversely, premium cameras offer durability, higher-resolution video, and better color science, making them a preferred choice for professional shoots, albeit at a much higher investment.
Lighting Kit Options for Different Needs
Lighting kits range from basic ring lights to comprehensive LED panel systems. Budget lighting, such as the Neewer 660 LED Video Light, compares to high-end systems like the Aputure Light Storm LS 600d. The Neewer provides solid illumination at under $150, suitable for beginner creators or small setups. In contrast, the Aputure offers not only brighter and more color-accurate light but also advanced controls and build quality, making it a prime choice for professional studios. While the high-end option ensures consistent performance in diverse shooting conditions, budget kits serve well for casual or semi-professional use where cost-saving is a priority.
Studio Gear: Balancing Cost and Performance
Studio equipment like monitors, audio interfaces, and soundproofing options vary significantly in price and feature set. Affordable options such as the Behringer UMC22 audio interface provide respectable sound quality comparable to more expensive models like the Focusrite Clarett 2Pre. However, higher-end gear often includes better preamps, higher bit-depth, and greater durability, which are critical during long recording sessions. For example, the Yamaha HS8 monitors offer precise sound reproduction valued in professional environments, but budget options like the Mackie CR4 suffice for beginners or casual creators. The choice often boils down to the importance of fidelity versus budget constraints.
Is it worth the upgrade?
Upgrading to higher-tier microphones, rigs, or lighting can significantly enhance production quality, but the key is assessing whether the value aligns with your needs. For instance, creators with growing audiences might find the investment in a professional lighting setup justifiable for better visuals, whereas hobbyists may prioritize flexibility over absolute quality. To explore more, check out the detailed reviews and price comparisons on sites like PriceNews for the latest deals and alternatives.
The Good, The Bad, and The Ugly
- Pros: Cost-effective under $100, high customization options, decent durability with careful assembly, and an educational DIY experience.
- Cons: Build quality may not match commercial cages, requires time, patience, and basic tools, and may suffer from measurement inaccuracies leading to loose fittings.
Who Should Take the Plunge?
This DIY camera cage is ideal for beginner filmmakers, budget-conscious creators, or hobbyists eager to learn more about their gear. If you enjoy hands-on projects and want a personalized rig tailored to your needs, this guide is perfect. However, avoid it if you need a rugged, professional-grade cage for heavy production work or prolonged outdoor shoots, where durability and precision are critical.
Final Verdict: 7.5/10
If you’re comfortable with basic DIY tasks and understand that the build may not reach professional standards, creating your own cage offers tremendous value and satisfaction. It’s a smart choice for exploring creative customization without breaking the bank. Just be prepared for some trial, error, and patience along the way. If you prefer ready-made confidence, check out our review of industry-grade cages. Otherwise, roll up your sleeves and enjoy the process.