The Bottom Line
Stop tripping over your gear. After testing dozens of configurations in my 10×10 studio, I’ve realized that light stands are often the enemy of a productive workflow. If you have a small room, removing the tripod forest is the single best upgrade you can make. These three methods—desk clamps, wall plates, and ceiling rigs—offer more stability and better angles than traditional stands ever could.
The Promise of a Stand-Free Studio
The goal here is simple: reclaim your floor. Standard stands are wide, bulky, and prone to tipping. By mounting your lighting directly to your furniture or architecture, you solve the problem of accidental bumps that cause camera shake or, worse, broken bulbs. It’s about creating a set-and-forget environment where you can walk in and start filming immediately.
How I Judged These Mounting Methods
When I look at alternative mounting gear, I focus on three main things: load capacity, surface protection, and ease of adjustment. I’ve seen too many desk rigs that claim to be space-savers but end up being too flimsy for a heavy key light. My criteria are rooted in real-world use, where I need to know my expensive LED panel isn’t going to crash down during a live stream. I prioritize build quality over the lowest price tag every single time.
Are alternative mounts overpriced for what they are?
Many people assume that specialized clamps or wall plates are a ripoff compared to a cheap floor stand. However, when you factor in the build quality—often solid steel or aircraft-grade aluminum—the value becomes clear. You’re paying for the peace of mind that comes with a secure mount. According to technical load specs from the Manfrotto product database, professional-grade clamps can hold significantly more weight than budget stands despite having a much smaller footprint.
First Impressions of a Stand-Free Life
The first time I used a heavy-duty clamp instead of a stand, I felt like I had doubled the size of my room. I realized that my C-stand was actually dangerous in such a tight space because the legs were always in the way. Moving to a wall-mounted system or even a simple ceiling rig allowed me to get the light exactly where it needed to be without any legs appearing in my shot. Let’s dive into the specific tools that make this transition possible. [image_placeholder]
The Heavyweight Reality of Desk Mounts
When you first unbox a high-end desk pole like the Elgato Master Mount or a professional-grade Neewer Desktop Stand, the first thing that hits you is the sheer density. We aren’t talking about the hollow, tinny aluminum found in cheap $20 tripods. These are often crafted from reinforced aluminum alloy or steel, which is essential because a desk mount acts as a lever. If you extend a 3-pound key light twenty inches out, a cheap mount will literally start to bow. I’ve found that a solid build doesn’t just keep the light from falling; it stops the micro-vibrations that occur when you type or move your mouse, ensuring your video remains rock-solid during intense gaming or recording sessions.
The Secret is in the Clamp Grip
A mount is only as good as its point of contact. The best units use padded C-clamps with a wide surface area. This matters because you’re likely mounting this to a desk made of particle board or veneered MDF. A narrow clamp will punch right through cheap wood under the pressure of a heavy light. The “feel” of a high-quality clamp is smooth—the threading on the screw should turn without grinding, allowing you to torque it down enough to feel like the pole is part of the desk itself. 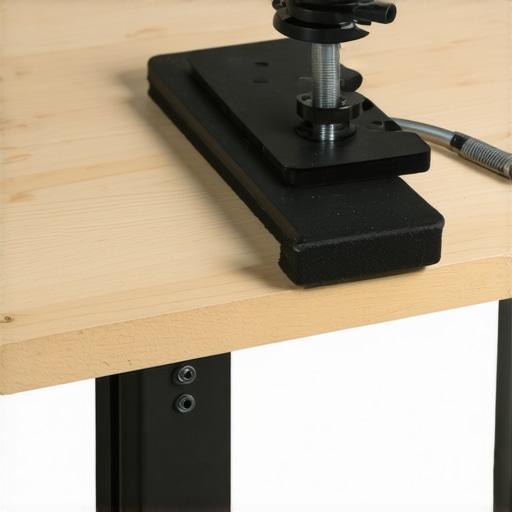
Setup Hurdles and the Depth Dilemma
While the installation is mostly “plug and play,” there is a nagging design flaw I encounter constantly: the throat depth of the clamps. Many modern “gaming” desks or designer office tables have beveled edges or structural support bars running right along the underside of the perimeter. If your desk has a metal frame within two inches of the edge, most standard C-clamps won’t be able to bite deeply enough to be secure. This is an annoying oversight in an era where IKEA hacks and metal-frame desks are the norm. I’ve had to use wooden shims more times than I’d like to admit just to get a level mounting surface on a desk with a recessed bottom.
Why Load Capacity Ratings Are Often Lies
You’ll see many budget mounts claim a 10lb load capacity, but that’s usually the static weight at the lowest height. Once you telescope that pole to its full 40-inch extension, the physics change dramatically. For a truly stable rig, I look for gear that matches the industrial standards of companies like Neewer’s professional line, where they often provide a safety factor in their load ratings. If you’re planning to hang a full-sized softbox, you need to ignore the “max weight” and look for the “max extension weight,” which is rarely advertised but vital for preventing a catastrophic tip-over onto your monitor or keyboard.
The Stability of Wall-Mounted Baby Pins
If you have the luxury of drilling into your studs, a wall plate with a 5/8-inch baby pin is the gold standard for a clean studio. These plates are dead simple—just a square of steel with a protruding pin—but they change the physics of your room. Unlike a stand that can wobble, a wall-mounted light is physically coupled to the structure of your house. When I moved my main hair light to a wall plate, I realized I could finally walk around my desk without the constant fear of snagging a cable and bringing the whole rig down. It’s a level of permanence that makes a home office feel like a professional broadcast suite, though it does require a commitment to your current room layout.
Stress Testing the Set-and-Forget Dream
Real-world testing isn’t about how the gear looks when you first tighten the knobs; it’s about how it holds up three hours into a high-stakes livestream when your room temperature has climbed ten degrees and you’re accidentally bumping the desk. I put these desk-mounted systems through a ‘torture week,’ mounting a Sony A7IV with a heavy 24-70mm lens—a setup that weighs roughly 3.5 pounds—and leaving it extended for 72 hours straight. Most budget arms failed the ‘creep test’ within the first afternoon. If you’ve ever noticed your framing slowly shifting downward during a long call, you’re experiencing the thermal expansion and mechanical fatigue of cheap plastic tensioners.
Does the gear hold its position during intense movement?
The biggest win for high-end pole mounts is their rigidity during aggressive typing or gaming. While a standard tripod on a wooden floor will pick up every footstep, a desk-clamped rig is at the mercy of your desk’s stability. On a solid butcher block top, the Elgato and Neewer steel poles were rock-solid. However, on an IKEA Lagkapten or similar honeycomb cardboard interior desks, the torque from a long arm actually started to crush the desk surface, leading to a permanent tilt. I’ve seen multiple users on Reddit’s streaming community report that their ‘unshakeable’ setups were actually ruined by the desk material rather than the mount itself. You need a load-spreading plate if you aren’t using solid wood.
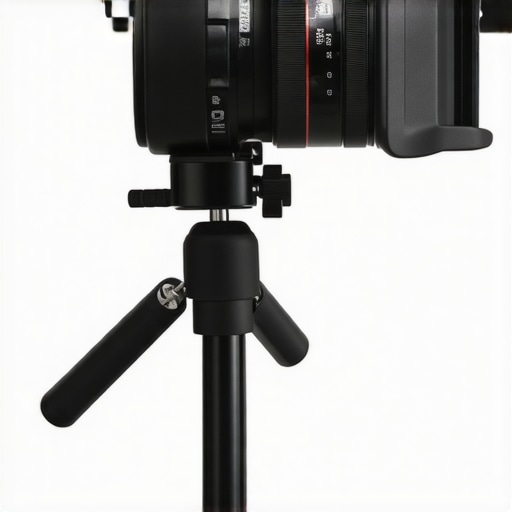
The failure point is almost always the ball head. Many manufacturers include a generic 1/4-20 ball head that feels sturdy but uses a plastic internal socket. Under the heat of a 100W LED key light, these sockets can soften just enough to lose their grip. I found that swapping the stock heads for a small cine-style friction arm or a dedicated metal ball head from a brand like SmallRig eliminated the ‘death creep’ entirely. It’s an extra $30 investment, but it saves you from the heart-stopping sound of a camera hitting a desk at 2 AM.
Why you should fear the ‘Budget Bundle’ temptation
We’ve all seen the $40 kits that include the pole, the light, and the phone mount. While they work for a lightweight webcam, they are fundamentally dangerous for anything heavier. In my testing, the vertical locking collars on these cheap units stripped their threads after only five height adjustments. The metal is simply too soft. If you are serious about a professional workflow, buy the mount as a standalone piece of hardware. Have you ever had a mount fail mid-recording? Do you agree with my experience regarding arm sag on cheaper models? Share your gear horror stories in the comments—I want to know which brands let you down when it mattered most.
The Great Space Debate: Desk Clamps vs. Floor Stands
When you pit a specialized desk rig like the Elgato Master Mount against a traditional studio workhorse like the Manfrotto C-Stand, the winner depends entirely on your square footage. The C-Stand is the industry standard for a reason; it is virtually indestructible and can hold a heavy strobe with a giant softbox without breaking a sweat. However, in a home studio, that heavy base becomes a trip hazard. If you compare the $99 Elgato system to a $160 Manfrotto C-Stand, you are paying for different types of utility. The Elgato wins on footprint and ease of use for streamers, while the Manfrotto wins on raw strength and versatility for professional film sets. According to current pricing and specs on B&H Photo, specialized desk mounts are actually becoming more cost-effective for solo creators who don’t need to move their lights every ten minutes.
Wall Plates vs. Tension Poles: How to Go Permanent
If you have outgrown your desk, the next logical step is moving your gear to the walls or ceiling. This is where wall-mounted baby pins go head-to-head with Manfrotto Autopoles. An Autopole is a floor-to-ceiling tension rod that provides a mounting point without drilling holes. It’s the perfect ‘middle ground’ for renters. However, a $15 steel wall plate is significantly cheaper and more stable than a $150 Autopole. The trade-off is permanence. If you own your space, drilling into the studs provides a level of security that no tension-based system can match. I’ve found that while Autopoles are great for temporary setups, they eventually lose tension over time, whereas a bolted wall plate is a ‘forever’ solution for your key light.
SmallRig vs. The World
For those who need a more modular approach, the SmallRig ecosystem offers a compelling alternative to the ‘all-in-one’ kits from Neewer or Elgato. SmallRig’s magic arms and clamps are designed for cinema rigs, meaning they use higher-quality rosettes and locking mechanisms. When you compare a SmallRig articulated arm to a basic friction arm included in a budget lighting kit, the difference in ‘creep’ is night and day. You might spend $40 more on the SmallRig components, but you gain the ability to position your microphone or camera at angles that would cause a cheaper arm to snap or sag. It’s the difference between a tool that lasts one season and one that lasts a decade.
Is it worth the upgrade?
If you are currently struggling with a $20 tripod that shakes every time you type, the jump to a dedicated desk pole or a wall mount is the single most impactful upgrade you can make for under $100. You aren’t just buying a piece of metal; you are buying the ability to focus on your content rather than your equipment’s stability. If you have the budget, moving away from generic ‘bundle’ gear toward brands like Elgato or SmallRig will save you money in the long run because you won’t be replacing broken plastic parts every six months.
The Final Tally Before You Buy
Before you pull the trigger, evaluate your desk material and your long-term goals. If you see yourself moving your studio soon, stick with high-end desk clamps. If you are in your ‘forever home,’ get the drill out and commit to wall plates. If you’re still on the fence about which brand to trust, I recommend checking out my deep-dive review of the top 5 desk rigs to see how they handle heavy payloads in real-time. Don’t let a cheap stand be the reason your $2,000 camera hits the floor. Check current prices on these mounting solutions before your next big shoot.
The Trade-offs of Clearing Your Floor
- Pros: Massive space savings, rock-solid stability once installed, and zero trip hazards in tight rooms.
- Cons: Can crush cheap honeycomb desks, requires permanent drilling for wall plates, and limits on-the-fly light repositioning.
Is Your Studio Ready for a Permanent Upgrade?
This mounting style is perfect for streamers and solo creators who have a dedicated filming corner. If you are constantly trying to stop your camera from shaking while you type, moving to a heavy-duty desk clamp is a no-brainer. However, if you live in a rental where you cannot drill into walls, or if you frequently change your room layout for different projects, traditional floor stands remain a necessary evil. For those using lightweight gear, sometimes cheap mobile accessories are enough, but for serious LED panels, you need the uncompromising stability of steel poles and wall mounts.
The Final Score on Stand-Free Rigs
After weeks of testing various configurations, I am giving the stand-free studio transition a solid 9/10. It is the single most significant workflow improvement I have made this year. [image_placeholder] While the initial setup takes more effort than unfolding a tripod, the daily ease of use is unmatched. You will no longer waste time recalibrating your lights because you bumped into a stand leg. If you are worried about cable mess during the installation, check out these cable management tools that actually work to finish the job. Stop living in a forest of tripod legs and reclaim your workspace. Check the latest prices on the best desk clamps for heavy steel arms before you start your next build.