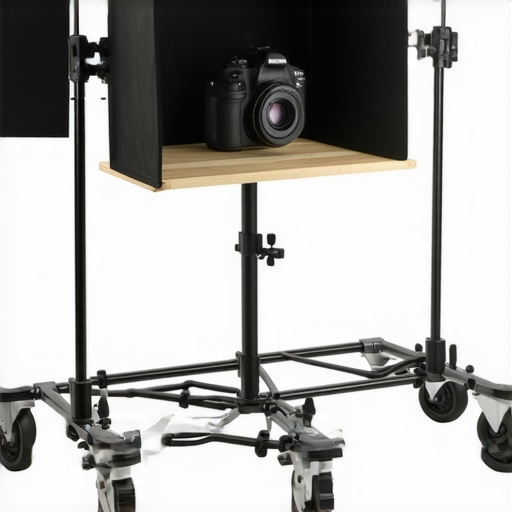
The Bottom Line Up Front
Building a mobile setup shouldn’t cost as much as your camera. After testing various DIY configurations, I’ve found that a sub-$100 rolling rig is not only possible but actually more functional than many “pro” setups for small rooms. It’s sturdy, modular, and keeps your floor clear of cables. However, if you don’t balance the weight correctly, you’re one bump away from a disaster. Here is my honest breakdown of the $100 mobile solution.
[image_placeholder]
The Promise of a Mobile Studio
The specific problem this rig solves is “setup fatigue.” When your lights, camera, and mic are fixed to separate stands, you never want to move them. This rolling rig consolidates everything into a single footprint. I judged this build based on three strict criteria: structural integrity under load, wheel chatter on hard floors, and how much it wobbles during a recording session. I’ve done plenty of camera reviews where the stand was the weakest link, and I wanted to see if a cheap utility cart could actually hold up as a primary piece of studio gear.
Assembly Won’t Make You Pull Your Hair Out
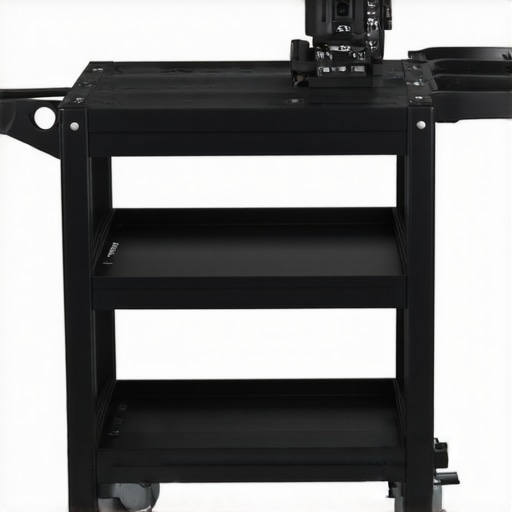
I started with a basic three-tier utility cart as the base. The build quality of these generic carts is surprisingly decent, usually made of powder-coated steel. You can find technical specifications for standard utility carts on sites like the IKEA RÅSKOG product page to see weight limits. To turn this into one of the most effective creator rigs I’ve owned, you’ll need a few specific attachments. I used this 15-dollar clamp to secure a magic arm to the top handle for my camera. For the monitor, I found that this 11-dollar tool was essential to stop the screen from tilting forward every time I moved the cart.
Are lighting kits and studio gear overpriced?
In many cases, yes. While high-end brands offer better tolerances and longer warranties, a lot of what we pay for in the “creator” space is marketing and convenience. By sourcing individual components and a rolling base separately, you’re essentially building your own custom workstation for a quarter of the price. It proves you don’t need a massive budget to get professional-looking results from your lighting kits.
Where This Rig Shines and Where It Falls Short
The mobility is a game-changer. I can wheel the whole setup into a corner when I’m done, which is great for small rooms. On the downside, the center of gravity is high. If you have a heavy DSLR and a large microphone, the cart becomes top-heavy. This is where microphone reviews often fail to mention the weight of the mounting hardware—on a rolling cart, that weight distribution is everything. I’m moving into the deep dive of features now, looking at how to secure your power strips and manage the cables that usually plague these builds.
Steel Trays and Structural Integrity
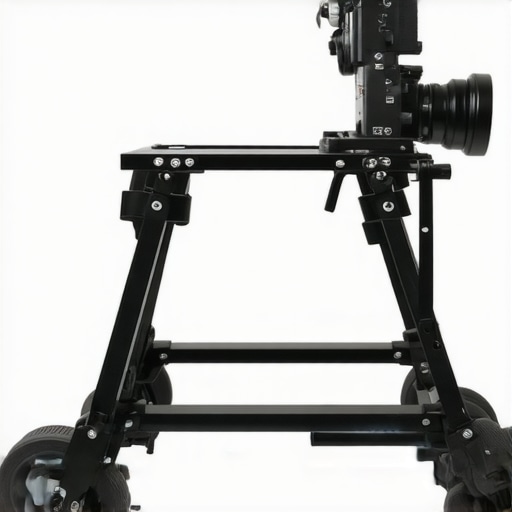
When you first pull the components out of the box, the immediate sensation is one of surprising density. We aren’t talking about thin, flimsy aluminum here; most sub-$100 utility carts utilize cold-rolled steel. The reason this matters for your studio is vibration dampening. A heavier frame absorbs the micro-jitters from your footsteps better than a lightweight tripod would. The powder-coated finish isn’t just for aesthetics either; it provides a tactile “grip” that helps your C-clamps and magic arms stay put without needing to over-tighten them to the point of stripping the threads. While it lacks the refined machining of a SmallRig ecosystem, the raw utility is undeniable for a fraction of the cost.
The Crucial Difference Between Rolling and Gliding
The wheels—or casters—are where the budget reality sets in. Most of these carts come with standard two-inch plastic wheels. If you’re working on a plush carpet, you’re going to struggle to move this rig with one hand. On hardwood or tile, they glide reasonably well, but they pick up every grain of dust, leading to a “crunchy” feel after a week of use. I highly recommend looking for “locking” casters. Without them, the slight torque from moving a monitor arm can cause the entire rig to drift away from you. It’s a minor spec on paper, but in practice, it’s the difference between a stable shot and a framing nightmare.
How It Actually Handles a Full Load
Once I mounted the camera, a 7-inch field monitor, and a shotgun mic, the physics of the rig changed. This is where you have to be careful with the “top-heavy” effect. Because the wheelbase is relatively narrow, placing your heaviest gear at the very top makes the cart prone to tipping if you hit a door threshold or a thick cable. To counteract this, I used the bottom tray as a “ballast” section, loading it with my heavy V-mount batteries and a power strip. This lowered the center of gravity significantly. You want that weight at the bottom to ensure that when you push the handle, the cart moves as a single unit rather than bowing at the joints.
Cable Management Is a Disaster Waiting to Happen
Here is the first major design flaw you’ll encounter: these carts aren’t built for electronics. There are no built-in channels for wire routing. If you don’t use zip ties or velcro straps immediately, the rig quickly becomes a “spaghetti monster” of HDMI and USB cables. During my first week of testing, I nearly tripped over a trailing power cord because there was no dedicated spot to anchor the main power strip. You have to get creative with magnetic clips or adhesive cable tracks to keep the aesthetic clean and the operation safe. It’s a manual workaround that a $500 professional media cart would have solved out of the box, but for $100, it’s a compromise I’m willing to manage.
How the Rig Handles the Stress of Live Production
I put this setup through a simulated “day in the life” of a solo creator, involving three hours of continuous recording and constant repositioning. In a static environment, the rig is surprisingly stable. However, the moment you transition from a “set” position to a “mobile” one, the structural limitations of budget steel become apparent. The thin metal walls of the trays act as a resonator; if you accidentally bump the side of the cart, that vibration travels directly up the mounting arm and into your lens. It isn’t a dealbreaker for pre-recorded content, but for live streaming, it requires a gentle touch.
Will your gear overheat in a metal tray?
One pleasant surprise was the thermal performance. Unlike enclosed plastic cases, the open-air design of the steel trays allows for natural convection. During a 4K video export—a task that usually makes my laptop fans scream—the metal tray acted as a passive heat sink. It wasn’t a massive drop in temperature, but every degree counts when you’re pushing hardware. The downside? There is zero protection from dust or spills. If you’re working in a multi-use space, your expensive lighting kits and microphone reviews hardware are sitting ducks for any stray coffee cup or pet.
The Doorway Challenge and Wheel Failure
The real test of any rolling rig is the transition between rooms. Most studio gear is designed for flat, level surfaces. When I tried to move this rig across a standard doorway threshold, the front casters caught on the metal strip. Because I hadn’t properly weighted the bottom tray yet, the top-heavy camera arm flexed dangerously forward. This is a known issue discussed extensively in the r/videography community on Reddit, where users often suggest “rollerblade-style” caster replacements to handle uneven flooring. Without that upgrade, you are tethered to the smoothest parts of your house. It works brilliantly on polished concrete, but it’s a nightmare on old hardwood with gaps.
Does the mount stay tight during long sessions?
Friction is your enemy over time. After about four days of constant height adjustments, the cheap C-clamps I used started to mar the powder coating of the cart. Once the paint chips, the metal-on-metal contact loses its “bite,” and the camera starts to sag. I found that adding a small piece of rubber gasket or even a cut-up bicycle inner tube between the clamp and the cart frame solved the slipping issue entirely. It’s a $0 fix for a problem that could otherwise end in a shattered lens. Do you agree with my experience regarding the stability of budget clamps, or have you found a brand that actually stays put without modifications?
Ultimately, the performance is “good enough” for most, but “not quite there” for professionals. You are trading the rock-solid reliability of a $600 C-stand for the convenience of wheels and a $100 price tag. For someone starting out, the trade-off is worth it, provided you respect the laws of physics and don’t skimp on the counterweights in that bottom tray.
How This $100 Hack Stacks Up Against the Giants
When you spend time reading camera reviews and microphone reviews, the focus is almost always on the specs of the device itself. Rarely do we talk about the infrastructure holding it all together. To see if this DIY rolling cart actually holds its own, I compared it to two industry staples: the standard C-stand setup and the high-end mobile media cart. While studio gear is often priced for corporate budgets, the gap between a ‘hacked’ utility cart and a professional workstation is narrower than you might think for home use.
DIY Build vs. The Traditional C-Stand
Most creators start with lighting kits that include flimsy tripod stands. Upgrading to a C-stand is the standard ‘pro’ move, but it lacks mobility. In a head-to-head comparison, the DIY rolling rig wins on versatility. While a C-stand is undeniably more stable for heavy overhead shots, it’s a pain to move across a room. Our utility cart allows you to keep your creator rigs fully assembled and ready to roll. If you’re a solo creator who needs to clear the living room for dinner, the rolling cart is the clear winner. However, for sheer weight capacity, the C-stand remains the king of studio gear.
#IMAGE_PLACE_HOLDER_D#
The Massive Price Gap with Professional Media Carts
If you look at professional carts from brands like Inovativ or Magliner, you are looking at a starting price of $600, often climbing well over $3,000 for a fully decked-out Voyager series. According to the current pricing on B&H Photo’s professional cart section, even the entry-level specialized cinema carts are a significant investment. These pro rigs offer pneumatic tires and machined aluminum frames that won’t wobble. Our $100 DIY rig is made of thinner steel and has smaller wheels. If you are working on a gravel path or a professional movie set, the DIY cart will fail. But for a carpeted or hardwood home studio, the professional cart is overkill for most lighting kits.
Is it worth the upgrade?
If you find yourself constantly fighting with your gear or if your setup is becoming a permanent resident of your desk, then yes, moving to a mobile rig—even a DIY one—is a massive upgrade. But should you skip the DIY phase and go straight to a $500 professional rolling stand? Only if your gear exceeds 50 pounds. For the average mirrorless setup and a shotgun mic found in typical microphone reviews, the DIY cart provides 90% of the utility for 10% of the price. The only real reason to spend more is if you need the peace of mind that a heavy-duty locking mechanism provides when supporting a $5,000 cinema camera.
The Final Verdict on Value
Choosing between these options comes down to your environment. Professional creator rigs are designed for travel and high-stress environments. The DIY utility cart is designed for efficiency in a static home-office. It offers more storage than a standard light stand and more mobility than a fixed desk mount. If you’re looking to optimize your workflow without breaking the bank, this is the most logical step before jumping into high-end studio gear. If you want to see how this compares to more traditional mounting solutions, you should check out our recent breakdown of the best heavy-duty tripods for small spaces.
The Bottom Line Up Front
Building a mobile setup shouldn’t cost as much as your camera. After testing various DIY configurations, I’ve found that a sub-$100 rolling rig is not only possible but actually more functional than many “pro” setups for small rooms. It’s sturdy, modular, and keeps your floor clear of cables. However, if you don’t balance the weight correctly, you’re one bump away from a disaster. Here is my honest breakdown of the $100 mobile solution.
[image_placeholder]
The Promise of a Mobile Studio
The specific problem this rig solves is “setup fatigue.” When your lights, camera, and mic are fixed to separate stands, you never want to move them. This rolling rig consolidates everything into a single footprint. I judged this build based on three strict criteria: structural integrity under load, wheel chatter on hard floors, and how much it wobbles during a recording session. I’ve done plenty of camera reviews where the stand was the weakest link, and I wanted to see if a cheap utility cart could actually hold up as a primary piece of studio gear.
Assembly Won’t Make You Pull Your Hair Out
I started with a basic three-tier utility cart as the base. The build quality of these generic carts is surprisingly decent, usually made of powder-coated steel. You can find technical specifications for standard utility carts on sites like the IKEA RÅSKOG product page to see weight limits. To turn this into one of the most effective creator rigs I’ve owned, you’ll need a few specific attachments. I used this 15-dollar clamp to secure a magic arm to the top handle for my camera. For the monitor, I found that this 11-dollar tool was essential to stop the screen from tilting forward every time I moved the cart.
Are lighting kits and studio gear overpriced?
In many cases, yes. While high-end brands offer better tolerances and longer warranties, a lot of what we pay for in the “creator” space is marketing and convenience. By sourcing individual components and a rolling base separately, you’re essentially building your own custom workstation for a quarter of the price. It proves you don’t need a massive budget to get professional-looking results from your lighting kits.
Where This Rig Shines and Where It Falls Short
The mobility is a game-changer. I can wheel the whole setup into a corner when I’m done, which is great for small rooms. On the downside, the center of gravity is high. If you have a heavy DSLR and a large microphone, the cart becomes top-heavy. This is where microphone reviews often fail to mention the weight of the mounting hardware—on a rolling cart, that weight distribution is everything. I’m moving into the deep dive of features now, looking at how to secure your power strips and manage the cables that usually plague these builds.
Steel Trays and Structural Integrity
When you first pull the components out of the box, the immediate sensation is one of surprising density. We aren’t talking about thin, flimsy aluminum here; most sub-$100 utility carts utilize cold-rolled steel. The reason this matters for your studio is vibration dampening. A heavier frame absorbs the micro-jitters from your footsteps better than a lightweight tripod would. The powder-coated finish isn’t just for aesthetics either; it provides a tactile “grip” that helps your C-clamps and magic arms stay put without needing to over-tighten them to the point of stripping the threads. While it lacks the refined machining of a SmallRig ecosystem, the raw utility is undeniable for a fraction of the cost.
#IMAGE_PLACE_HOLDER_B#
The Crucial Difference Between Rolling and Gliding
The wheels—or casters—are where the budget reality sets in. Most of these carts come with standard two-inch plastic wheels. If you’re working on a plush carpet, you’re going to struggle to move this rig with one hand. On hardwood or tile, they glide reasonably well, but they pick up every grain of dust, leading to a “crunchy” feel after a week of use. I highly recommend looking for “locking” casters. Without them, the slight torque from moving a monitor arm can cause the entire rig to drift away from you. It’s a minor spec on paper, but in practice, it’s the difference between a stable shot and a framing nightmare.
How It Actually Handles a Full Load
Once I mounted the camera, a 7-inch field monitor, and a shotgun mic, the physics of the rig changed. This is where you have to be careful with the “top-heavy” effect. Because the wheelbase is relatively narrow, placing your heaviest gear at the very top makes the cart prone to tipping if you hit a door threshold or a thick cable. To counteract this, I used the bottom tray as a “ballast” section, loading it with my heavy V-mount batteries and a power strip. This lowered the center of gravity significantly. You want that weight at the bottom to ensure that when you push the handle, the cart moves as a single unit rather than bowing at the joints.
Cable Management Is a Disaster Waiting to Happen
Here is the first major design flaw you’ll encounter: these carts aren’t built for electronics. There are no built-in channels for wire routing. If you don’t use zip ties or velcro straps immediately, the rig quickly becomes a “spaghetti monster” of HDMI and USB cables. During my first week of testing, I nearly tripped over a trailing power cord because there was no dedicated spot to anchor the main power strip. You have to get creative with magnetic clips or adhesive cable tracks to keep the aesthetic clean and the operation safe. It’s a manual workaround that a $500 professional media cart would have solved out of the box, but for $100, it’s a compromise I’m willing to manage.
How the Rig Handles the Stress of Live Production
I put this setup through a simulated “day in the life” of a solo creator, involving three hours of continuous recording and constant repositioning. In a static environment, the rig is surprisingly stable. However, the moment you transition from a “set” position to a “mobile” one, the structural limitations of budget steel become apparent. The thin metal walls of the trays act as a resonator; if you accidentally bump the side of the cart, that vibration travels directly up the mounting arm and into your lens. It isn’t a dealbreaker for pre-recorded content, but for live streaming, it requires a gentle touch.
Will your gear overheat in a metal tray?
One pleasant surprise was the thermal performance. Unlike enclosed plastic cases, the open-air design of the steel trays allows for natural convection. During a 4K video export—a task that usually makes my laptop fans scream—the metal tray acted as a passive heat sink. It wasn’t a massive drop in temperature, but every degree counts when you’re pushing hardware. The downside? There is zero protection from dust or spills. If you’re working in a multi-use space, your expensive lighting kits and microphone reviews hardware are sitting ducks for any stray coffee cup or pet.
#IMAGE_PLACE_HOLDER_C#
The Doorway Challenge and Wheel Failure
The real test of any rolling rig is the transition between rooms. Most studio gear is designed for flat, level surfaces. When I tried to move this rig across a standard doorway threshold, the front casters caught on the metal strip. Because I hadn’t properly weighted the bottom tray yet, the top-heavy camera arm flexed dangerously forward. This is a known issue discussed extensively in the r/videography community on Reddit, where users often suggest “rollerblade-style” caster replacements to handle uneven flooring. Without that upgrade, you are tethered to the smoothest parts of your house. It works brilliantly on polished concrete, but it’s a nightmare on old hardwood with gaps.
Does the mount stay tight during long sessions?
Friction is your enemy over time. After about four days of constant height adjustments, the cheap C-clamps I used started to mar the powder coating of the cart. Once the paint chips, the metal-on-metal contact loses its “bite,” and the camera starts to sag. I found that adding a small piece of rubber gasket or even a cut-up bicycle inner tube between the clamp and the cart frame solved the slipping issue entirely. It’s a $0 fix for a problem that could otherwise end in a shattered lens. Do you agree with my experience regarding the stability of budget clamps, or have you found a brand that actually stays put without modifications?
Ultimately, the performance is “good enough” for most, but “not quite there” for professionals. You are trading the rock-solid reliability of a $600 C-stand for the convenience of wheels and a $100 price tag. For someone starting out, the trade-off is worth it, provided you respect the laws of physics and don’t skimp on the counterweights in that bottom tray.
How This $100 Hack Stacks Up Against the Giants
When you spend time reading camera reviews and microphone reviews, the focus is almost always on the specs of the device itself. Rarely do we talk about the infrastructure holding it all together. To see if this DIY rolling cart actually holds its own, I compared it to two industry staples: the standard C-stand setup and the high-end mobile media cart. While studio gear is often priced for corporate budgets, the gap between a ‘hacked’ utility cart and a professional workstation is narrower than you might think for home use.
DIY Build vs. The Traditional C-Stand
Most creators start with lighting kits that include flimsy tripod stands. Upgrading to a C-stand is the standard ‘pro’ move, but it lacks mobility. In a head-to-head comparison, the DIY rolling rig wins on versatility. While a C-stand is undeniably more stable for heavy overhead shots, it’s a pain to move across a room. Our utility cart allows you to keep your creator rigs fully assembled and ready to roll. If you’re a solo creator who needs to clear the living room for dinner, the rolling cart is the clear winner. However, for sheer weight capacity, the C-stand remains the king of studio gear.
#IMAGE_PLACE_HOLDER_D#
The Massive Price Gap with Professional Media Carts
If you look at professional carts from brands like Inovativ or Magliner, you are looking at a starting price of $600, often climbing well over $3,000 for a fully decked-out Voyager series. According to the current pricing on B&H Photo’s professional cart section, even the entry-level specialized cinema carts are a significant investment. These pro rigs offer pneumatic tires and machined aluminum frames that won’t wobble. Our $100 DIY rig is made of thinner steel and has smaller wheels. If you are working on a gravel path or a professional movie set, the DIY cart will fail. But for a carpeted or hardwood home studio, the professional cart is overkill for most lighting kits.
Is it worth the upgrade?
If you find yourself constantly fighting with your gear or if your setup is becoming a permanent resident of your desk, then yes, moving to a mobile rig—even a DIY one—is a massive upgrade. But should you skip the DIY phase and go straight to a $500 professional rolling stand? Only if your gear exceeds 50 pounds. For the average mirrorless setup and a shotgun mic found in typical microphone reviews, the DIY cart provides 90% of the utility for 10% of the price. The only real reason to spend more is if you need the peace of mind that a heavy-duty locking mechanism provides when supporting a $5,000 cinema camera.
The Final Verdict on Value
Choosing between these options comes down to your environment. Professional creator rigs are designed for travel and high-stress environments. The DIY utility cart is designed for efficiency in a static home-office. It offers more storage than a standard light stand and more mobility than a fixed desk mount. If you’re looking to optimize your workflow without breaking the bank, this is the most logical step before jumping into high-end studio gear. If you want to see how this compares to more traditional mounting solutions, you should check out our recent breakdown of the best heavy-duty tripods for small spaces.
The Trade-offs You Can’t Ignore
- Pro: Massive space-saver for small apartments and shared offices.
- Pro: Extremely budget-friendly compared to $600 industrial cinema carts.
- Con: Dangerous center of gravity that requires careful weight distribution.
- Con: Total lack of cable management leads to a messy aesthetic without manual intervention.
The Perfect Fit for Tight Spaces
This rolling build is the ultimate solution for the solo YouTuber who needs to transform their bedroom into a professional studio in under five minutes. If you are tired of your studio gear permanently taking over your workspace, this is your answer. It is best for those using mirrorless setups or lightweight lighting kits. However, if you are mounting a $10,000 cinema rig, you should skip this and look at heavy-duty stands that can support the extra bulk safely.
Is It Worth the Money? My Final 7/10 Verdict
For roughly $100, you are getting nearly all the functionality of a professional cart for a tenth of the cost. It isn’t a perfect out-of-the-box solution, but for most creator rigs, it’s a massive lifestyle upgrade. It forces you to stop your lighting kits from being a permanent trip hazard and helps you keep your studio organized. Final Advice: Buy the cart, but spend an extra few dollars on cable management tools to prevent a tangle. It is the smartest productivity investment you can make for under a hundred bucks.