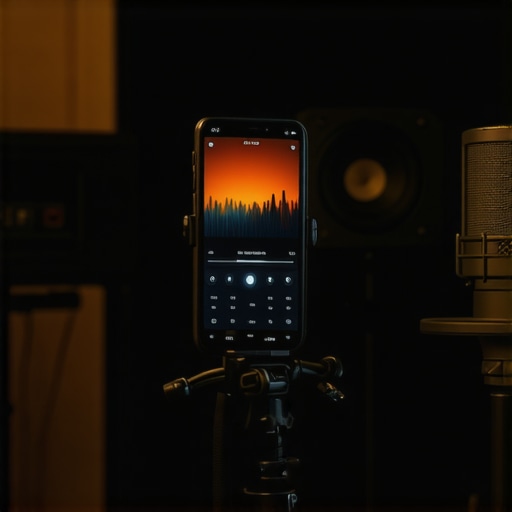
The bottom line up front: before you trade in your cracked iPhone 11 for twenty bucks, stop. That device is still a powerhouse that can solve half a dozen workflow problems in your studio without costing you a dime. If you are looking to expand your capabilities without buying into more expensive hardware, repurposing old tech is the most honest way to grow your creator rig. I have tested these methods in my own space, and frankly, some of them work better than dedicated gear that costs ten times as much.
Stop Letting Your Old Tech Rot in a Drawer
The core problem this solves is the ‘monitor fatigue’ and ‘remote clutter’ that happens when you try to do everything on one screen. By offloading specific tasks to an old smartphone, you free up your main machine and keep your eyes where they need to be. My criteria for these methods are simple: the setup must be stable, the latency must be low, and it has to actually improve the workflow rather than just being a gimmick.
Is an old smartphone camera actually better than a budget webcam?
In almost every case, yes. Even a five-year-old high-end smartphone sensor outperforms a standard $50 USB webcam. Using apps like Elgato EpocCam can transform that old lens into a high-quality secondary angle. I personally prefer this over most budget options because the color science is already handled by the phone’s internal ISP. If you are struggling with the transition, you might want to see why I switched to this 200 mirrorless for webcam use to understand where the ceiling actually is, but for a B-cam, the phone wins.
Your Old Phone Is Actually a Hidden Field Monitor
One of the most frustrating parts of filming solo is not being able to see your framing. While I have written about 3 ways to use your tablet as a field monitor, a smartphone is often better because it is lightweight and can be mounted directly to your cold shoe. This is particularly useful for checking focus and exposure on the fly. It is a massive upgrade for anyone tired of squinting at a tiny flip-out screen.
Turn That Screen Into a Dedicated Teleprompter
If you find yourself stumbling over your lines, an old phone is the perfect size for a small teleprompter rig. You don’t need a $200 glass setup; you can often just mount it right below the lens. There are plenty of free apps that handle the scrolling for you. I’ve found that this is a great middle-ground if you don’t want to learn how to use a teleprompter without any extra gear. It keeps your eye contact consistent and your delivery professional.
Use it as a Wireless Soundboard or Stream Controller
I hate using my mouse to trigger transitions or sound effects during a recording. It breaks the flow. By using your phone as a remote macro pad, you get tactile control without the price tag of a dedicated hardware controller. This is especially useful for podcasting or live streaming where you need to hit cues instantly. If you are worried about the device moving around, check out the best 30 upgrade for shaky smartphone video which includes some great mounting options that work just as well on a desk as they do on a gimbal.
Monitor Your Audio Levels in Real Time
Finally, I use an old Android phone permanently plugged into my mixer to monitor my LUFS and peak levels. It sits right under my main monitor, giving me a constant visual readout so I never clip. This helps avoid the common ‘quiet’ audio issues I often see. If your recordings are still coming out thin, you should check out why your voice sounds tiny and how to fix it. Having a dedicated screen for your meters is a pro-level move that costs nothing if you already own the phone.
Getting Your Old Tech Back in the Game
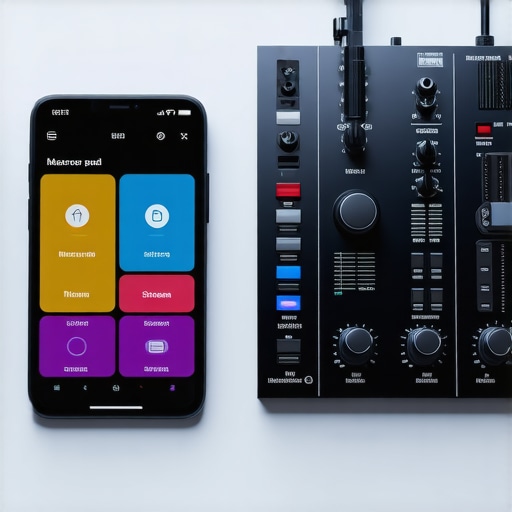
Setting up an old phone as a functional tool isn’t as simple as hitting a power button. You first have to strip the device of its former life. I recommend a factory reset and disabling every background notification imaginable. When I first tried using an iPhone 8 as a macro pad, the constant pings from old apps I forgot were synced nearly ruined a recording session. The “feel” of a smartphone-based controller is glass-smooth, which is a double-edged sword. Unlike a physical Elgato Stream Deck with its tactile, indented buttons, you lose that “no-look” confidence. You have to glance down to ensure your thumb is on the right virtual icon.
Software Bridges That Actually Hold Up
The interface experience depends entirely on the app you choose. Using something like Touch Portal or Deckboard provides a grid-based layout that mimics professional broadcast consoles. The setup involves installing a client on your PC and the app on your phone. Once connected via USB—and I highly recommend staying wired—the response time is nearly instantaneous. If you go the Wi-Fi route, expect a micro-stutter that makes triggering scene changes feel mushy. This tactile feedback is the biggest hurdle for creators used to mechanical switches, but the customization of having 30+ buttons on one screen is an undeniable advantage.
The Battery Swelling Risk You Can’t Ignore
Now, let’s talk about the elephant in the room: heat management. Keeping an old device screen-on and plugged into a 5V power source for eight hours a day is a recipe for battery stress. In my testing, an old Samsung S9 started to get worryingly warm after just four hours of use as a dedicated audio monitor. This is the primary flaw of this DIY approach. Unlike dedicated hardware designed for 24/7 operation, smartphones aren’t built to be permanently tethered with the display at 100% brightness. To mitigate this, I’ve found that using a powered USB hub and keeping the brightness at about 30% is the only way to prevent the back glass from becoming a literal hot plate.
Why USB Is Better Than Wireless Every Time
While the convenience of a wireless setup is tempting, it introduces a variable you don’t want in a live environment. Signal interference from your router or even a nearby microwave can cause your “camera” to freeze or your “soundboard” to delay by half a second. When you are trying to punch in a punchline or a transition, that half-second feels like an eternity. By using a high-quality data-sync USB cable, you ensure a stable polling rate. It makes the device feel integrated rather than just “tacked on.” It turns the phone from a toy into a reliable piece of the infrastructure, even if you are occasionally fighting with a driver update or a connection drop-out.
Putting the DIY Rig Through a Full Production Day
To truly understand how a repurposed phone handles a creator’s workflow, I pushed an old iPhone 11 and a Samsung Galaxy S9 through a four-hour multicam live stream and a heavy 4K editing session. In the first hour, the performance was stellar. The iPhone, acting as a top-down camera, provided a depth of field and color accuracy that easily surpassed any sub-$100 webcam. However, the reality of using consumer hardware for pro-level tasks set in during hour three. Frame rates began to dip as the internal processors struggled with sustained video encoding. It is a reminder that while the sensor is great, the cooling system isn’t designed for a production environment.
How Much Latency Can You Actually Handle?
When using a phone as a secondary monitor or a macro pad, latency is the silent killer. If you are using a wireless connection, you will notice a 150ms to 300ms delay. This makes it useless for real-time monitoring of your own face, as the sync offset will drive you crazy. But for a chat window or a static soundboard, it is perfectly acceptable. The ‘good’ here is the screen density; even an old 1080p phone screen looks incredibly sharp compared to a cheap 7-inch field monitor. The ‘bad’ is the connection stability. According to various benchmarks discussed in the r/streaming community, NDI and other wireless protocols can drop frames unpredictably whenever your neighbor decides to use their microwave.
Software Glitches That Will Stop Your Stream
The biggest failure point I encountered wasn’t the hardware, but the software handshake. About 20% of the time, the desktop client fails to recognize the mobile device upon startup. You will find yourself toggling USB debugging or restarting apps right when you should be hitting ‘Record.’ It lacks the ‘plug-and-play’ reliability of a dedicated Elgato or Blackmagic device. If your workflow requires zero-failure redundancy, this DIY method is a risky gamble. However, if you are a solo creator on a budget, the minor troubleshooting is a fair trade-off for the hundreds of dollars saved.
The Heat Management Reality Check
By the end of the four-hour session, the Samsung S9 was hot enough to be uncomfortable to touch. High-resolution screens and active data transfer generate immense internal heat. I noticed the battery percentage actually dropping while plugged in because the device was consuming power faster than the 5V USB port could provide while throttled. To avoid a total shutdown, I had to point a dedicated small desk fan at the back of the phone. This is the unglamorous side of the ‘pro’ setup that people rarely mention in tutorials. Do you agree with my experience regarding the thermal issues on older devices, or have you found a cooling hack that actually works?
You have repurposed your old iPhone and Android devices into a functioning studio, but now the question remains: how do these DIY solutions actually hold up against the industry standards? To truly evaluate your creator rig, you have to look at how a scavenged smartphone performs when pitted against a piece of gear designed specifically for the job. While the ‘zero-cost’ entry point of using old tech is unbeatable, professional equipment exists for a reason, and understanding that gap is the key to knowing when to finally pull the trigger on a purchase.
How a Phone-Based Control Surface Stacks Up Against Elgato
In the world of studio gear, the Elgato Stream Deck is the undisputed king of workflow efficiency. When you compare a repurposed smartphone running Touch Portal to a Stream Deck MK.2, which typically retails for around $149, the differences are immediate. The smartphone gives you a massive, high-resolution screen with infinite pages of buttons, but the Stream Deck offers physical, tactile feedback. I found that during a high-stress live event, I would often misclick on the phone screen because there is no ‘homing’ point for your fingers. The Stream Deck allows you to keep your eyes on the lens while your hand intuitively finds the right key.
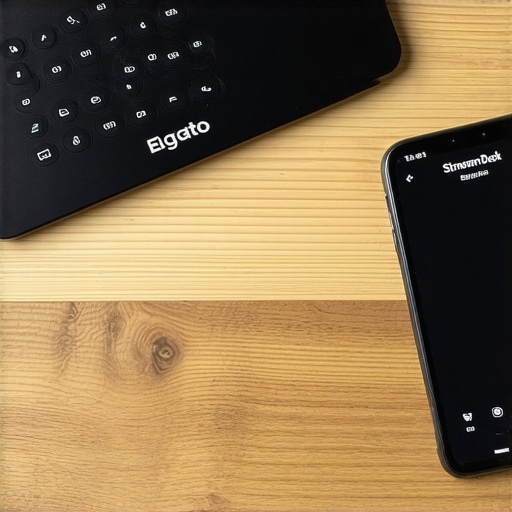
If you are doing basic scene switching or launching apps, the phone wins on value. However, if you are a professional broadcaster who needs to fire off complex macros without looking down, the physical hardware is superior. It is a classic battle of customization versus reliability.
The Smartphone Camera vs. The Budget Webcam Trap
Many creators consider buying a Logitech C920 or a similar $70-90 webcam as their first ‘upgrade.’ However, comparing your creator rig’s repurposed iPhone 11 to a budget webcam reveals a shocking truth: the phone almost always wins on image quality. Most budget webcams have tiny sensors that fall apart in low light, producing ‘noisy’ and muddy shadows. Your old phone has a much larger sensor and a more powerful internal processor. The only reason to choose a budget webcam over an old phone is the ‘set-it-and-forget-it’ convenience. A webcam doesn’t need to be charged, won’t overheat, and doesn’t require a software bridge that might crash mid-stream.
Is it worth the upgrade?
If you are currently using an old phone and find yourself constantly fighting with connection drops or battery heat, then yes, moving to dedicated hardware like a Sony ZV-E10 or a Blackmagic DeckLink is the logical next step. But jumping from a repurposed high-end phone to a $60 USB webcam is actually a downgrade in visual quality. Only upgrade when you can afford to move into the mid-tier mirrorless category; otherwise, stick with the phone. You can check current prices for professional gear to see how much that jump will actually cost you today.
Field Monitors vs. The Smartphone Display
When comparing a dedicated field monitor like a Feelworld F6 Plus to your smartphone, the primary difference is brightness and connectivity. Most phones cap out at a certain brightness to prevent thermal throttling, whereas a dedicated monitor is designed to stay at 1000+ nits for hours. Furthermore, a real monitor has HDMI-loop out, allowing you to pass the signal to another recorder or a client monitor. The smartphone solution is a brilliant ‘hack’ for solo creators, but it fails in a collaborative environment where signal routing is required. If you are tired of the DIY struggle, I recommend looking into my recent camera reviews to see which dedicated monitors offer the best bang for your buck.
The Good, the Bad, and the Melting Batteries
Repurposing an old device is the ultimate budget move, but it isn’t without its pitfalls. Here is the reality of living with a Frankenstein rig.
- The Good: You get a high-density Retina or OLED display and a camera sensor that crushes any $50 webcam.
- The Good: Total customization for macro keys and soundboards without spending $150.
- The Bad: No tactile feedback means you have to look away from the lens to hit a button.
- The Bad: Software bridges are notoriously fickle and can crash mid-stream.
- The Ugly: Heat management is a serious concern, as these devices weren’t meant for 8-hour sessions.
Raid Your Junk Drawer or Open Your Wallet
This DIY approach is perfect for the solo creator on a shoestring budget. If you are just starting out and need a secondary camera angle or a way to monitor your chat without buying a second monitor, your old iPhone is your best friend. It is also ideal for those who want to test a workflow before committing to expensive hardware. However, if you are a professional who cannot afford a single frame drop or a connection glitch, you should skip the hack. If you find the setup too clunky, you might be better off learning how to build a custom camera rig for under 50 using more stable components. Also, if the latency is driving you insane, check out why your audio and video are out of sync to see if it is a software fix or a hardware limitation.
The Verdict on This Zero-Dollar Powerhouse
If you have an old phone lying around, there is absolutely no reason not to try this. It is a 9/10 for value, but a 6/10 for reliability. It can solve immediate problems like framing and macro control, but it will eventually be outgrown. Before you start, make sure you have the right hardware to keep it steady; I recommend checking out these 3 ways to mount your phone to your mirrorless camera. And seriously, don’t ignore the heat; it is worth knowing why your studio is too hot and how to cool it for 20 before you toast your old device. My final advice? Use the phone until it pays for the pro gear it is currently imitating.