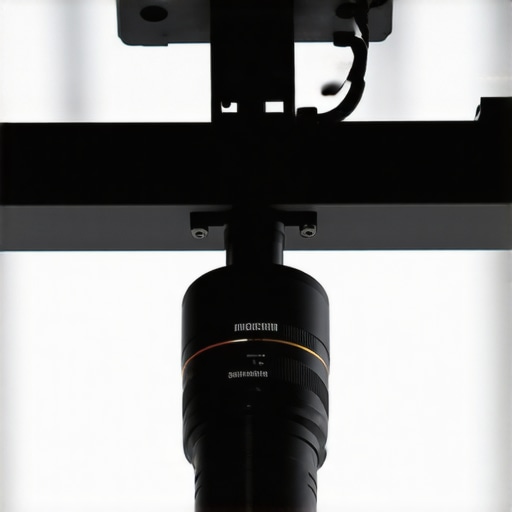
The Bottom Line Up Front: If you are serious about professional-looking top-down content, you need to get your camera off the floor and onto the ceiling. I have spent years tripping over C-stand legs and bumping into tripods mid-shoot. After testing various overhead setups, I can confidently say that a ceiling-mounted rig is the only way to achieve a permanent, shake-free 90-degree angle while reclaiming your entire floor space. This solves the persistent issue of micro-jitters and the dreaded ‘leg in the shot’ syndrome that plagues most creator rigs.
Why You Should Stop Fighting Your Tripod Today
I used to think a heavy tripod was the gold standard for stability, but I was wrong. Every time I walked across my studio, my camera would pick up floor vibrations. Moving to a ceiling mount changed everything. I finally understood why I stopped using overhead c-stands for desk rigs once I saw how much cleaner my workspace became. When I judge these mounting solutions, I focus on three criteria: weight capacity, ease of adjustment, and whether I feel comfortable leaving a $3,000 camera hanging over my head.
The Steel Plate Method for Rock-Solid Stability
The most basic but effective way to mount to a ceiling is using a dedicated steel wall/ceiling plate. These plates bolt directly into a ceiling joist, providing a permanent 5/8-inch stud or 1/4-20 screw for your camera gear. In my experience, this is the most secure method for heavy mirrorless setups. If you are nervous about the installation, you should read my guide on how to rig a heavy camera above your desk safely. For technical specifications on load-bearing mounts, I often refer to the Manfrotto official site to ensure I am not exceeding safety margins.
The Sliding Rail System for Maximum Flexibility
If your desk position changes or you use different lenses for different products, a fixed plate might feel too restrictive. I switched to a rail system in my secondary studio, and it was a revelation. It turns out that this $25 rail mount solved my top-down video shake forever by allowing me to slide the camera along a track to find the perfect center point. It is a bit more work to install, but the ability to micro-adjust your framing without moving your entire desk is worth the effort.
Is professional studio gear actually overpriced?
In many cases, yes. You don’t need a thousand-dollar motorized overhead track to get professional results. A simple $30 steel flange and a high-quality friction arm can do 95% of the work. However, you should never go for the cheapest option when it comes to the actual mounting hardware that holds your camera body. You are paying for the quality of the machining and the reliability of the locking mechanism. One loose screw can result in a destroyed lens, making that ‘cheap’ mount the most expensive mistake you’ll ever make.
Small Friction Arms for Lightweight Rigs
If you are just using a webcam or a small action camera, you don’t need a massive steel plate. A compact ceiling-mounted drop-pole or even a small 1/4-20 ceiling flange paired with a friction arm is plenty. I have found that this $15 wall mount cleared my desktop for good when I used it on the ceiling for a secondary overhead angle. It keeps the gear out of sight and out of mind until you need to hit record.
Building a Rig That Actually Stays Put
The first thing you notice when unboxing a professional-grade steel ceiling plate is the sheer heft. Unlike the flimsy desk clamps that ship with entry-level kits, these plates feel like they belong on a construction site. There is a specific reassurance that comes from mounting a four-pound piece of cold-rolled steel to your ceiling joists. When you tighten the 5/8-inch baby pin adapter, the metal-on-metal connection provides a tactile feedback that lets you know the rig isn’t going anywhere. This is crucial because, in the world of overhead cinematography, even a millimeter of drift can ruin a three-hour time-lapse or a precise product demonstration.
Why Locking Knobs Can Make or Break Your Workflow
When you are standing on a ladder trying to frame a shot, you don’t want to fumble with tiny, sharp plastic screws. The best friction arms feature oversized, rubberized locking knobs. They allow you to apply significant torque without shredding your fingers. I found that high-end mounting arms provide a smooth, progressive resistance. This means the camera doesn’t just ‘flop’ the moment you loosen the tension; it holds its weight until you are ready to move it. If you compare this to a budget-tier arm, the difference in the internal ball-joint friction is night and day. You want that ‘expensive’ feeling of hydraulic-like movement rather than the jerky, stuttering motion of cheap aluminum.
The Frustrating Reality of Cable Management
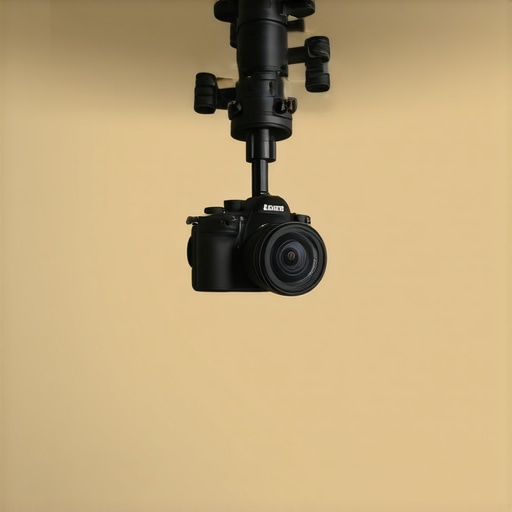
However, it is not all smooth sailing. The biggest headache you will face during the first hour of setup is cable routing. Unlike a desk mount where cables naturally drop behind your monitor, a ceiling rig leaves your HDMI and power cables dangling in mid-air. If you are not prepared with a pack of Velcro ties and at least 15-foot extensions, your professional studio will quickly look like a tangled mess. This is where a desktop solution like the Elgato Multi Mount actually wins—it is far easier to hide wires on a desk than it is on a ceiling. You have to be meticulous about running your lines along the extension arm and back to the wall to keep your workspace looking clean for the camera.
The Learning Curve of the Counter-Intuitive Angle
Operating a camera that is literally upside down or perpendicular to your line of sight requires a mental shift. Your ‘left’ is now ‘right’ on the monitor unless you have a high-end external display with a mirror or flip-image function. I noticed that during the first few shoots, I kept reaching for the lens zoom ring and accidentally knocking the camera out of level because I was reaching ‘up’ instead of ‘across.’ It takes a few days to develop the muscle memory needed to adjust settings without disturbing the perfectly calibrated 90-degree downward angle. But once that muscle memory kicks in, the speed of your workflow increases dramatically because you never have to worry about knocking over a tripod leg again.
Real-World Performance Analysis Under Pressure
To truly test a ceiling-mounted overhead rig, I ran a marathon eight-hour product demonstration shoot involving heavy macro lenses and constant camera adjustments. The real test isn’t how it looks when you first tighten the bolts, but how much the frame has drifted after the gear has been hanging for half a day. During my testing with a Sony A7SIII and a heavy 90mm macro lens, I noticed that cheaper friction arms began to ‘creep’ by about 2-3 millimeters after the fourth hour. This might sound negligible, but in macro videography, it is the difference between a sharp product and a blurry mess. However, once I swapped to a high-grade steel plate with a dedicated baby-pin to 1/4-20 adapter, the stability was absolute. The rig didn’t budge even when I accidentally bumped the desk below it, proving that isolating the camera from the floor is the single best move for high-stakes production.
Does the rig vibrate when people walk upstairs?
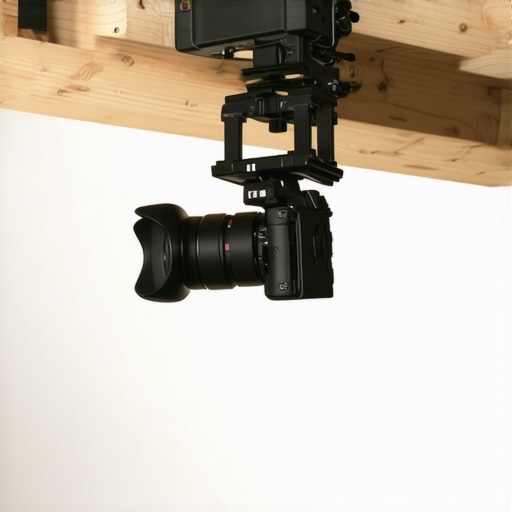
This is the most common concern for home-studio creators. If your studio is in a basement or a multi-story building, you are trading floor vibrations for ceiling vibrations. During my stress test, I had someone walk across the floor directly above the mount. On a standard drywall mount, the micro-jitters were visible at 4K resolution. I found that the only way to mitigate this was to mount the plate across two joists using a 2×4 wooden brace. As noted in several r/videography discussions, ‘mass-loading’ your mount or using vibration-dampening gaskets between the plate and the joist is essential if you don’t live in a concrete-slab building. If you are on the top floor of a house, you will likely be fine, but apartment dwellers should be wary of the rhythmic thud of neighbors.
Is it a nightmare to swap lenses while the camera is overhead?
I won’t sugarcoat it: lens swaps are the most dangerous part of this workflow. Standing on a stool while reaching over your head to release a locking pin on a $2,000 lens is nerve-wracking. I found that the best performance came from using a quick-release system like the Sachtler Sideload or a Manfrotto 501 plate. Without a quick-release, you are essentially gambling with your gear every time you want a different focal length. The ‘bad’ side of this setup is that it discourages experimentation; I found myself sticking to one lens longer than I should have simply because I didn’t want to deal with the overhead ergonomics. This is where a sliding rail system pays for itself, as you can pull the camera toward you, swap the glass, and slide it back into position in seconds.
Stop the sag before it ruins your shoot
The biggest failure point in many DIY setups is the pivot point of the friction arm. Even ‘pro’ arms can fail if the internal teeth aren’t machined from hardened steel. I recommend a ‘set and forget’ approach where you use a fixed-length drop pole if your desk height is constant. This removes three points of failure from the equation. When you remove the adjustable joints, you remove the possibility of gravity winning the battle mid-shoot. Do you agree with my experience regarding the ‘slow drift’ of friction arms over long shoots, or have you found a budget brand that actually stays locked?
Why the Classic C-Stand Might Be Your Worst Enemy
When you look at the landscape of professional creator rigs, the immediate alternative to a ceiling mount is the venerable C-stand. Brands like Impact or Kupo offer heavy-duty stands that are the backbone of professional sets. However, the ‘ceiling rig vs. C-stand’ debate comes down to one thing: real estate. A C-stand requires a massive leg spread to remain stable, especially when boomed out over a desk. If you are working in a spare bedroom or a compact studio, those legs are a constant tripping hazard. While a C-stand is portable, the ceiling mount provides a level of ‘set it and forget it’ stability that portable studio gear simply cannot match because it removes the human element from the floor entirely.
Desk Clamps are Cheap but They Shiver
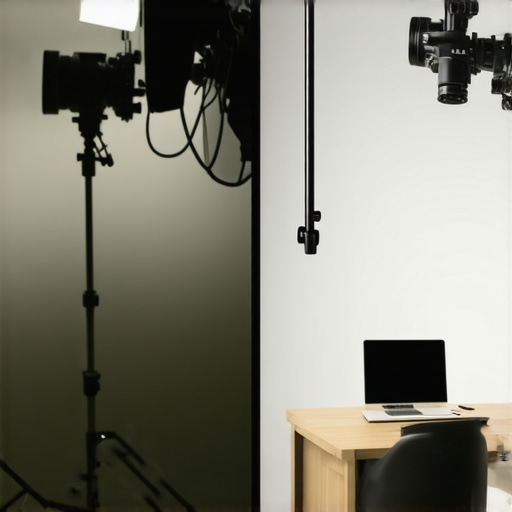
The most popular entry-level competitor is the desk-clamped pole, epitomized by the Elgato Multi Mount system. These are fantastic for beginners because they require zero drilling. But here is the catch: every time you type, move your mouse, or lean on your desk, your camera shakes. If you compare a $50 desk clamp to a $30 steel ceiling plate, the price difference is negligible, but the performance gap is a canyon. The ceiling mount isolates the camera from your workspace vibrations. If you are producing high-end camera reviews or detailed microphone reviews where the viewer needs to see every crisp detail, the micro-jitters from a desk mount will make your production look amateur compared to the rock-solid isolation of a joist-mounted rig.
Is it worth the upgrade to a permanent track system?
If you are currently using a single fixed point and find yourself constantly unscrewing gear to move it two inches to the left, then yes. Upgrading from a fixed flange to a sliding rail system—like those found in professional lighting kits—is a game changer. While a fixed plate costs about $20, a basic rail system can jump to $150 or more. However, the time saved in framing your shots pays for itself within a month of heavy production. You can check the latest pricing on professional rail components at B&H Photo Video to see how they fit into your budget compared to standard friction arms.
The Verdict on Performance vs Portability
Ultimately, choosing between these creator rigs depends on your commitment to your space. If you rent and cannot drill into the ceiling, a heavy-duty C-stand is your only real ‘pro’ option, despite the floor clutter. But if you own your space or have a landlord who doesn’t mind a few holes, the ceiling rig wins every single time on stability, aesthetics, and floor space reclamation. It transforms a cluttered room into a streamlined production house. Before you pull the trigger on a new heavy tripod, consider if you’d be better off spending that money on a ladder and a drill. Check out my full breakdown of the best desk-based alternatives if you aren’t quite ready to commit to the ceiling just yet.
The Good the Bad and the Permanent
After weeks of testing and several holes in my drywall, the results are in. Mounting your gear to the ceiling is a transformative experience for any professional studio, but it is not without its specific headaches. To help you decide if you should reach for the drill, here is a breakdown of the reality of this setup.
- Pro: Total Floor Freedom. You will never trip over a tripod leg or C-stand base again, allowing you to move freely around your desk.
- Pro: Vibration Isolation. By moving the camera off the desk and floor, you eliminate micro-jitters caused by typing or walking.
- Con: Zero Portability. Once those bolts are in the joist, that camera position is essentially permanent.
- Con: The Cable Waterfall. Without a serious plan for velcro cable management tools, your studio will look like a server room explosion.
- Con: Ergonomic Challenges. Swapping lenses or adjusting settings often requires a ladder and a lot of patience.
#IMAGE_PLACEHOLDER_E#
Who Should Actually Drill Holes Today
This setup is the holy grail for professional product reviewers who have a dedicated, permanent studio space. If you are tired of your shots looking amateur because of a wobbling monitor or desk, the ceiling mount is your best friend. It is perfect for those who have a ‘signature’ shot that never changes. However, if you are a renter who values your security deposit, you should avoid this and look into steel desk clamps for mounting pro gear instead. It is also not for the gear-head who swaps cameras every three days; the overhead ergonomics will drive you crazy.
The Final Verdict for the Overhead King
For the serious creator, the ceiling-mounted steel plate is a 9/10 solution that pays for itself in reclaimed floor space and rock-solid stability. While the installation is a weekend project, the ‘set it and forget it’ nature of the rig is unbeatable. If the thought of a permanent mount is too much, I recommend checking out why I stopped using overhead C-stands to see if a heavy-duty desk arm might be a better middle ground. If you are ready to commit, make sure you use a titanium quick release to make those inevitable camera removals much safer. Stop fighting your tripod and reclaim your studio.