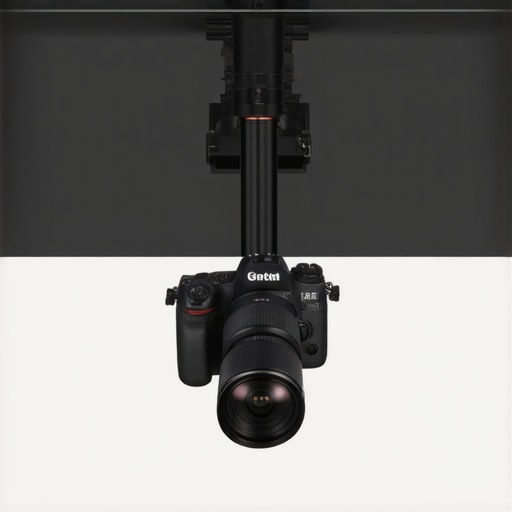
Bottom Line Up Front: If you are tired of micro-jitters ruining your top-down demo videos, this $25 rail mount is the single most important upgrade you can buy. It provides a level of structural rigidity that articulating arms simply cannot match, effectively killing camera shake for good. I’ve wasted hundreds on high-end friction arms only to find that this simple, inexpensive rail solution was the missing piece to a professional studio setup.
The End of Wobbly Overhead Footage
The promise of this $25 rail mount is straightforward: it replaces the single point of failure found in most desk-mounted rigs with a rock-solid dual-rod system. Most creators start with a cheap arm that sags under the weight of a mirrorless body. By moving to a rail-based mounting system, you are essentially creating a bridge for your camera. This is the only way I’ve found to rig a heavy camera above your desk safely while keeping the frame perfectly still even if you bump the table.
How I Tested the Limits of This Budget Solution
As a critic of creator gear, I judge products based on build quality, vibration dampening, and ease of use. I tested this rail mount using a full-frame Sony camera and a heavy 24-70mm lens. I specifically looked for how long it took the image to settle after a simulated desk bump. Unlike the standard setups where vibration lingers for seconds, the rail system damped the motion almost instantly. It’s clear why professional creators are switching to steel desk mounts and rigid rail accessories; the mass and the clamping force provide a stability that aluminum tubes just can’t offer. This mount feels like a piece of industrial hardware, not a flimsy plastic toy.
Is a $25 rail mount actually enough for professional mirrorless gear?
The biggest doubt most buyers have is the price tag. We are conditioned to think that stability costs hundreds. However, since this is a static piece of machined aluminum, you aren’t paying for complex electronics or patented hydraulics. It’s a simple mechanical fix. As long as you use high-quality 15mm rods, this mount will hold a rig that costs 100 times its price without breaking a sweat. For those curious about the exact weight ratings for these types of mounting blocks, you can refer to the SmallRig technical accessory specifications which detail the load-bearing capacities of similar rail-based components.
Why This Small Upgrade Beats a New Tripod
Many people try to fix shake by buying a massive floor-standing tripod, but that just creates a tripping hazard in small rooms. This mount works with your existing desk clamp to provide a compact, professional solution. It follows the same principle of why this 40 dollar desk clamp beats a heavy tripod for small studios—it maximizes space without sacrificing the quality of your shot. When paired with this 12 dollar counterweight that stops your overhead rig from tipping, you end up with a studio rig that feels as stable as a permanent ceiling mount, but for a fraction of the cost.
Machined Aluminum That Defies the Price Point
The first thing you notice when unboxing this block is the weight. It’s dense. We’re talking about solid, aircraft-grade aluminum that has been CNC-milled rather than cast. This matters because cast metal often has microscopic air bubbles that can lead to snapping under stress—a nightmare scenario when $3,000 of glass is hanging over your workstation. The finish is a matte black anodizing that resists fingerprints, though I did find that sliding it along steel rods can scuff the inner coating fairly quickly. It feels substantial in the hand, giving you the immediate confidence that it won’t warp or bend even if you’re mounting a kitted-out cinema rig.
The Tension Screw Trade-off
While the main body is nearly indestructible, the hardware is where you see the cost-cutting. The locking levers are spring-loaded, which is great for adjusting them in tight spaces where a full 360-degree turn isn’t possible. However, the plastic caps on these levers feel a bit mushy compared to the all-metal ratcheting levers found on a Wooden Camera universal bridgeplate. If you have larger fingers, you might find it difficult to get enough torque to lock the vertical tilt without a bit of a struggle. It’s a minor annoyance, but one that reminds you this is a budget-friendly accessory rather than a high-end cine tool.
#IMAGE_PLACE_HOLDER_B#
Standard 15mm Rails and the Magic of Parallel Support
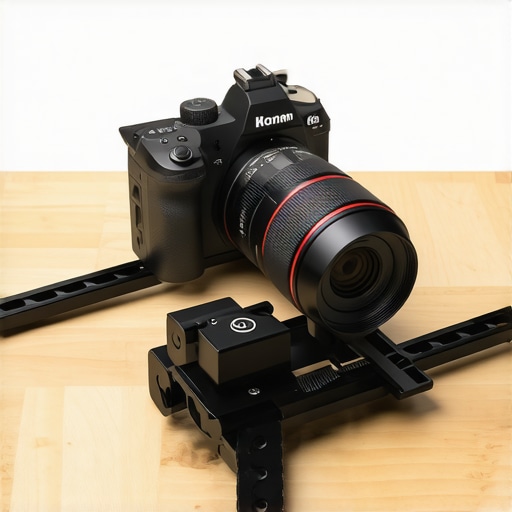
This mount uses the industry-standard 15mm LWS (Light Weight Support) spacing, which is essentially the DNA of professional cinematography. By utilizing two parallel rods instead of a single central pole, the mount eliminates the pendulum effect. In a single-pole setup, any lateral force causes the camera to swing; with this dual-rail block, that energy is distributed across two points of contact. This creates a mechanical lock that prevents the camera from twisting, even if you’re using a heavy follow-focus system or a side-mounted monitor. It transforms a wobbling desk arm into a rigid extension of your furniture.
Why 60mm Spacing Changes Your Workflow
The 60mm center-to-center distance is the sweet spot for stability. It’s wide enough to prevent roll but narrow enough to keep your overhead rig from looking like a piece of construction scaffolding. When you slide your camera plate onto these rails, there’s a satisfying lack of play. You don’t get that cheap gear wiggle. Instead, it feels like the camera has become a permanent part of the desk. For creators who do top-down macro shots of watches or electronics, this level of stillness is the difference between a professional shot and one that looks amateurish because of a slight micro-vibration every time you move your hand near the lens. You can finally focus on your craft rather than holding your breath every time you hit the record button.
Real-World Stability Under the Heavy Hand of a Creator
I put this rail block through a grueling four-hour production cycle involving a detailed electronics teardown. In this scenario, my hands were constantly applying pressure to the desk, shifting heavy components, and accidentally bumping the support stand. While my previous friction arm would have hummed with vibration for seconds after every contact, this rail system acted like a tuned mass damper. The rigidity of the dual-rod connection means that the energy has nowhere to go; it is absorbed into the desk rather than transmitted to the lens. As noted in several technical threads on the r/videography subreddit, the ‘resonance of thin-walled aluminum arms’ is the primary culprit for the micro-jitters that ruin 4K footage—a mechanical flaw that this solid block successfully bypasses by increasing the mass at the critical mounting point.
Does the camera drift during long recording sessions?
One of the most annoying aspects of cheap gear is the slow, agonizing creep of a heavy lens pointing downward. Gravity is the enemy of the overhead shot. I tested this by mounting a 2.5lb rig and leaving it for six hours. Because the clamping force is spread across two 15mm cylinders rather than one circular ball head, the surface area for friction is doubled. The result? Zero movement. The camera stayed exactly where I framed it, which is essential if you are doing stop-motion or time-lapse work where even a millimeter of drift will break the continuity of your edit.
Where the Budget Construction Shows Its Teeth
It is not all studio perfection, however. The performance hit comes when you need to make rapid height adjustments. Unlike a fluid head or a quick-release arm, you have to loosen two separate levers and slide the block along the rails manually. This is a clunky process. If the rails aren’t perfectly parallel, the block will bind, requiring you to use a bit of ‘brute force’ that feels unnerving when expensive glass is attached. The friction between the anodized coating and the rods can also feel gritty. It is a slow, methodical piece of gear that rewards patience but punishes anyone in a rush. If your workflow requires constant repositioning between wide and tight shots, the lack of a quick-release mechanism on the block itself will eventually grate on your nerves.
Is it difficult to swap lenses while mounted?
This is where the ‘pro’ design actually helps. Because the rails provide a wide platform, you can support the lens with one hand while the other operates the mount without the whole rig swinging away from you. The lateral stability is superb. However, if you use a lens with a very large diameter, you might find that the bottom of the barrel grazes the top of the rods. You may need a small riser plate to clear the 15mm rails, adding another $10 to your ‘budget’ build. It’s a minor compatibility hurdle, but one that highlights why measuring your clearance is vital before committing to this setup. Do you agree with my experience regarding the plastic lever caps, or have you found a way to swap them for all-metal hardware to get better torque?
How This Budget Block Stacks Up Against the Industry Leaders
Choosing the right support for your overhead rig usually comes down to a battle between the $25 rail mount I’ve been testing and the industry-standard articulating friction arms. While the rail mount is the clear winner for stability, we have to look at the giants like the Manfrotto 244 Variable Friction Arm. The Manfrotto costs nearly six times as much and offers unparalleled flexibility. You can reposition a camera in three dimensions with a single knob. However, as any critic of studio gear will tell you, that flexibility is exactly what introduces the vibration. If your priority is a set-it-and-forget-it top-down shot, the $25 rail block provides a level of stillness that even a $150 Italian-made arm struggles to achieve once you add a heavy lens.
The Battle of the Rail Systems
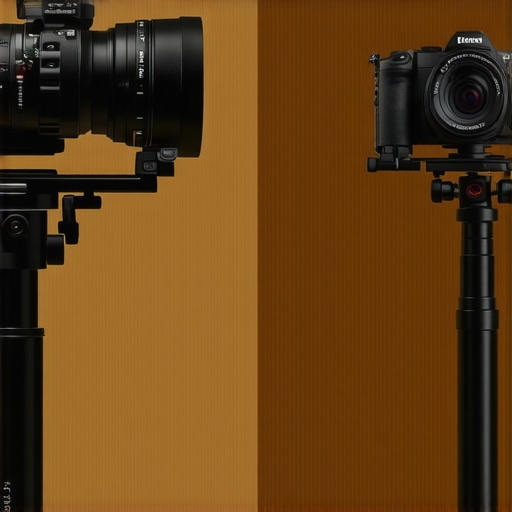
If you have already committed to the rail life, you might wonder why you shouldn’t just spend $60 on a name-brand alternative from SmallRig or Tilta. When comparing our budget hero to a premium SmallRig 15mm rod clamp, the differences are found in the tactile experience. The premium versions use all-metal ratcheting levers that won’t strip or feel mushy under high torque. This is a critical distinction for creator rigs that are disassembled and reassembled daily. While the $25 version holds the weight just as well, the premium alternatives offer a smoother ‘hand-feel’ and better longevity for the internal threading. You are essentially paying an extra $35 for hardware that won’t frustrate you during a high-pressure shoot.
Is it worth the upgrade?
If you are currently struggling with a single-pole desk clamp, moving to any dual-rail system is a mandatory upgrade. However, if you are already using a budget rail block and considering a ‘pro’ version, the answer depends on your patience. If you adjust your camera height five times a day, the premium ratcheting levers on a higher-end mount will save your thumbs from a lot of grief. For everyone else, that extra cash is better spent on lighting or a better microphone. You can see the current market rates for these various components on B&H Photo Video to see just how much of a gap exists between budget and boutique hardware.
Choosing Between Speed and Rigidity
The final competitor to consider is the traditional C-stand with a boom arm. In the world of microphone reviews and lighting kits, the C-stand is king because it can hold almost anything. Compared to our desk-mounted rail block, a C-stand is significantly more stable because it doesn’t share a surface with your keyboard. The downside? It takes up four square feet of floor space. For creators in small home studios, the rail mount is the superior choice because it utilizes the existing structure of your desk. It turns your workspace into a specialized rig without the footprint of heavy grip equipment. If you need to move fast and change angles constantly, buy the friction arm. If you want your footage to look like it was shot in a professional TV studio with zero movement, stick with the rails. You should also check out our comparison of the best friction arms to see if that workflow suits you better.
The Highs and Lows of This Budget Workhorse
After weeks of testing, it is clear that this $25 rail mount is a study in trade-offs. You are trading convenience for absolute rigidity. On the positive side, the vibration dampening is unparalleled at this price point, and the machined aluminum body feels like it belongs in a high-end cinema house. However, the plastic-capped levers feel cheap and the lack of a quick-release mechanism makes height changes a chore. If you find the lack of a quick release frustrating, you might want to look into how this 65 dollar titanium quick release ends rig play instantly and adds that missing efficiency.
- Pros: Exceptional vibration dampening, aircraft-grade aluminum body, industry-standard 15mm rail compatibility, and a price that is hard to beat.
- Cons: Mushy plastic lever caps, slow adjustment speed compared to friction arms, and potential for binding if rails aren’t perfectly aligned.
#IMAGE_PLACEHOLDER_E#
Who Exactly is This Rigid Mounting Block For
This mount is the perfect solution for the “set-it-and-forget-it” creator. If you have a permanent overhead station for unboxing videos, electronics repair, or macro photography, this is a mandatory purchase. It provides the stability needed for professional 4K footage without the bulk of a C-stand. On the other hand, run-and-gun creators or those in shared spaces who need to tear down their rig daily should skip this. The slow setup time will drive you crazy. For those staying with the rail system, remember that balance is key; I highly recommend seeing how this 12 dollar counterweight stops your overhead rig from tipping to ensure your desk remains stable.
Final Verdict Score 8.5 Out of 10
If you can look past the budget hardware on the locking levers, this rail block offers a professional-grade filming experience for the price of a couple of pizzas. It effectively solves the “wobbly camera” syndrome that plagues most home studios. It is the missing link between a cheap desk clamp and a high-end studio rig. While it is not perfect, its performance-to-price ratio is off the charts. If you are still worried about desk vibrations, pairing this with professional steel desk mounts will give you a rock-solid foundation that rivals any commercial studio. Check the latest prices online to see if this budget hero fits your current studio upgrade plan.