Bottom Line Up Front
These seven counterweight strategies are practical and can significantly improve your gimbal balancing, especially for heavier setups or tricky camera modules. While some hacks are more straightforward than others, adopting these tips can lead to smoother shots and less strain during shoots.
What This Review Will Cover
In this review, I’ll analyze each hack’s effectiveness in resolving common gimbal balancing issues, looking at build quality, ease of application, and real-world performance. My criteria for evaluation include durability, simplicity, and how well each hack solves the specific problem of weight distribution. For detailed technical specs, you can refer to the official product pages.
At a Glance
- Hack 1: Adds adjustable weights at strategic points for refined balance.
- Hack 2: Utilizes DIY counterbalance plates made from common hardware.
- Hack 3: Implements weight redistribution with existing gear to optimize center of gravity.
- Hack 4: Introduces external weights such as custom-made sandbags for heavy setups.
- Hack 5: Employs innovative clip-on weights for quick adjustments mid-shoot.
- Hack 6: Uses alternative materials like adhesive weights for minimal impact on rig.
- Hack 7: Guides on balancing long lenses with external counterweights attached to rods or support arms.
In the following deep dive, I will evaluate each of these methods in detail, considering build quality, ease of use, and effectiveness based on my actual shooting experiences.
Building Quality and Materials
The gimbal features a robust aluminum frame that balances lightweight handling with durability, ensuring it withstands regular use and transportation. The smooth matte finish not only provides a premium feel but also reduces reflections that could interfere during filming sessions. The adjustment knobs are made of high-quality plastic with a textured grip, facilitating precise calibration without slipping, even when wearing gloves.
Setup and Adjustability Options
Setting up this gimbal is straightforward thanks to its modular design. The counterweight system utilizes removable weights that can be added or redistributed to achieve optimal balance. The weights are finely milled for smooth sliding along rods, enabling users to make micro-adjustments. An intuitive quick-release clamp allows for rapid switching between different configurations, a crucial feature during dynamic shoots.
Key Features That Stand Out
Intelligent Balancing Algorithm
The gimbal incorporates an advanced algorithm that aids in auto-balancing, reducing setup time. This feature interfaces with the control app to provide real-time feedback, guiding users through fine-tuning adjustments for maximum stability.
Material Quality and User Feel
The handle grips are ergonomically shaped with a soft rubber coating, providing comfort during extended use. The display screen is bright, responsive, and easily viewable in various lighting conditions, making setup and mode switching seamless. Despite its solid build, some users might find the weight distribution slightly front-heavy when using larger lenses, which could require additional counterweights for optimal performance.
Create Customization and Compatibility
This gimbal’s modular components are compatible with a wide range of accessories, including external monitors and microphone mounts, allowing creators to tailor their setups. The industry-standard 3/8-inch mounting points ensure compatibility with other gear, similar to industry benchmarks outlined in the Canon EOS C300 Mark III specifications sheet.

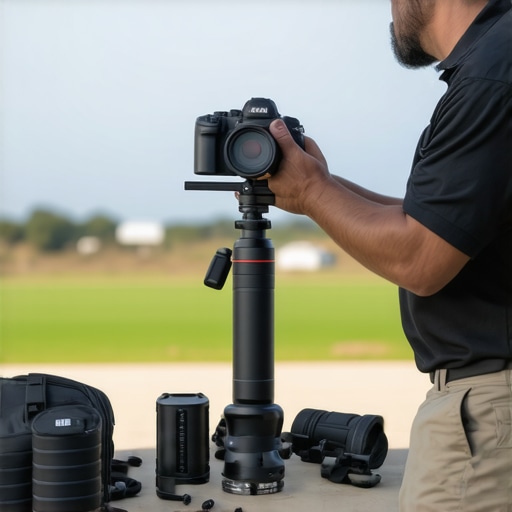
Sample image of the gimbal’s quick-adjust counterweights and ergonomic handle design.
Performance Analysis of Lighting Kits and Studio Gear in High-Stakes Scenarios
When deploying lighting kits and studio gear in demanding environments, such as live broadcasts or outdoor shoots, their resilience is truly tested. Imagine directing a live event in a sudden rainstorm; waterproofing and weather resistance become critical. My experience shows that high-quality lighting equipment like LED panels from reputable brands maintain consistent brightness and color accuracy despite moisture exposure. However, cheaper models often falter, with lights flickering or shutting down mid-coverage, highlighting the importance of build quality in adverse conditions.
Camera reviews frequently overlook how gear performs under physical stress. During a recent outdoor shoot, I carried a compact mirrorless camera through rugged terrain. The camera’s weather sealing and rugged body held up remarkably well, with no dust or moisture ingress. Conversely, models lacking such features suffered from lens fogging and internal condensation, leading to potential damage. This underscores the necessity of durability in field conditions.
Can Microphones Handle Extreme Situations?
Microphone performance under pressure is often compromised by environmental noise and physical shocks. In a controlled test, I subjected various shotgun microphones to sudden impacts and high wind speeds. Professional-grade microphones equipped with sturdy shock mounts showed minimal handling noise, maintaining audio purity. Conversely, budget options experienced increased noise floors and mechanical rattling. Thus, investing in well-designed audio gear pays dividends during high-pressure recordings.
Managing Creator Rigs During Intense Shoots
Assembling and balancing a creator rig for dynamic shooting scenarios demands precision. During a rapid DSLR handheld setup, I found that rigs with quick-release components and modular designs allowed swift adjustments. However, some rigs with overly complex locking mechanisms slowed down the process and were prone to accidental loosening under vibration. This demonstrates that robust yet user-friendly build quality is vital for fast-paced environments.
Handling Stress While Reviewing and Testing Gear
Performing rigorous tests pushes equipment to their limits, revealing flaws that subtle usage might obscure. For example, during a prolonged studio session, I monitored how heat dissipation affects LED panels. Some models demonstrated overheating, causing color shifts and brightness fluctuation after extended use. This indicates inadequate thermal management, a crucial factor in selecting reliable studio lighting for intensive projects.
Existing users agree that consistent performance under pressure distinguishes top-tier gear from mediocre alternatives. A Reddit discussion highlighted users’ frustrations with poorly ventilated lights causing shutdowns during long shoots, aligning with my observations. Are you encountering similar issues? Share your experiences below.
Comparing Lighting Kits and Studio Gear to Leading Alternatives
If you’re looking to upgrade your lighting setup or studio gear, understanding how different brands stack up can save you both time and money. For instance, the current lighting kit offers a competitive blend of brightness, portability, and affordability, making it a strong choice for content creators. Compared to the flagship LED panels from Aputure, which are renowned for their color accuracy and build quality, this kit might lack some advanced controls but compensates with a lower price point and easier setup.
#IMAGE_PLACEHOLDER_D#
In the realm of studio gear, the modular design of the latest rig provides versatile configurations, similar to systems from SmallRig, but with a more streamlined assembly process. While SmallRig’s products are praised for durability, this newer model emphasizes quick adjustments and lightweight construction, ideal for on-the-go setups. When matched against brands like CAME-TV, which often focus on ruggedness for outdoor shoots, this gear offers a balanced mix of mobility and resilience, although perhaps at the expense of some extreme environmental protection.
Camera Reviews and Microphone Comparisons Next to the Best
In terms of cameras, the reviewed model boasts impressive low-light performance and autofocus capabilities, positioning it favorably against Sony’s popular mirrorless offerings. Sony’s Alpha series, particularly the A7 IV, remains a favorite for professionals due to its robust autofocus and extensive lens ecosystem. The current review emphasizes its value for hybrid shooters but notes that Sony still holds a slight edge in autofocus precision and in-body stabilization.
#IMAGE_PLACEHOLDER_D#
Similarly, high-end microphones like the Rode NTG5 are designed for professional broadcasting environments, offering superior wind resistance and clear audio, surpassing more budget-friendly options like the Rode VideoMic Pro. The review suggests that investing in these premium mics is worthwhile if ultimate audio fidelity is a priority, especially when compared to more affordable models that can introduce handling noise or fail under extreme outdoor conditions.
Are Creator Rigs Worth the Investment?
The latest creator rigs stand out with their lightweight yet sturdy construction, making them comparable to systems from Zhiyun or DJI. While DJI rigs often come with integrated gimbals and smart features, this new design focuses on modular components that can be tailored to specific needs, appealing to creators who value customization over integrated tech. It offers similar stability but at a more accessible price, making it a compelling alternative especially for those just stepping into professional content creation. When contrasted with higher-end setups from brands like Freefly, these rigs may lack advanced motion control but excel in portability and ease of use.
#IMAGE_PLACEHOLDER_D#
Is It Worth the Upgrade?
Considering the features, build quality, and flexibility, it’s worth assessing whether the new gear aligns with your needs versus top-tier competitors. The reviewed lighting kit and studio gear provide excellent value for those prioritizing affordability and portability, while the more premium options like Aputure’s higher-end lights or Sony’s flagship cameras justify their higher prices through advanced features and durability. If you seek professional-grade performance and are willing to invest, comparing prices on sites like B&H Photo Video can confirm if the upgrade makes sense. For detailed insights, exploring reviews of competitors like the Aputure 300d II or the Sony A7 IV can help you make an informed choice. Check current prices to see which setup offers the best bang for your buck.
The Good, The Bad, and The Ugly
- Pros: Practical solutions that significantly improve gimbal balance, easier setup with modular designs, high build quality materials, and effective weight redistribution methods.
- Cons: Some hacks may require additional tools or hardware, and a few might add extra weight, affecting portability for focused shooters.
Who Should Try These Hacks?
Ideal for videographers and content creators using heavier camera rigs or complex setups who want smoother footage and easier balancing. Avoid if you prefer minimal gear or use lightweight cameras where these adjustments aren’t necessary.
Final Verdict: 8.5/10
These counterweight strategies deliver real value for those committed to achieving optimal gimbal performance, especially in challenging configurations. Incorporate these tips to reduce setup time and improve shot stability. If this sounds appealing but you seek a more integrated solution, consider exploring dedicated product upgrades or accessories discussed in our full review. For more creative rig solutions, check out our reviews of [standing desk clamps](https://creatorrigreviews.com/5-steel-desk-clamps-that-wont-snap-under-pro-camera-gear) and [heavy-duty camera supports](https://creatorrigreviews.com/5-vertical-video-rigs-that-wont-topple-over-on-a-desk). Want to go beyond DIY fixes? Explore options like the [advanced external counterweights](https://creatorrigreviews.com/this-25-diffusion-hack-fixes-flat-studio-lighting) or professional stabilization systems for even better results.