The Bottom Line Up Front
If you are building high-end creator rigs, you know that a flimsy baseplate is the quickest way to ruin a professional shoot. After testing dozens of options in my personal studio, I have found that only three plates provide the absolute rigidity required for massive cinema cameras. If you want zero-twist performance and a mount that won’t fail when you attach a heavy zoom lens, these are your winners. They are expensive, but they are the only foundation I trust for a $20,000 rig.
The Promise of True Stability
The specific problem these plates solve is ‘micro-flex.’ When you use a standard consumer-grade plate, the weight of a cinema body combined with a matte box and V-mount battery causes the entire assembly to twist slightly during a focus pull. This makes your camera reviews look amateur and can even damage your camera’s mounting points. These heavy-duty plates solve this by using hardened steel or high-grade 7075 aluminum that remains perfectly flat under hundreds of pounds of pressure. I evaluate these based on three criteria: locking lever reliability, bridge plate compatibility, and the quality of the non-slip surface.
Stop the Flex Before It Breaks Your Mount
I have spent years tweaking my studio gear, and I have learned the hard way that you cannot cut corners on the base. When I was learning how to balance a top-heavy camera rig for free, I realized that no amount of balancing can fix a plate that is physically bending. You need hardware that locks into a dovetail with a satisfying ‘thunk’ and stays there. I often pair these plates with 5 carbon fiber rails that don’t sag to ensure the entire optical axis remains perfectly aligned regardless of the lens weight.
Is High-End Studio Gear Just Overpriced Aluminum?
The biggest doubt many buyers have is whether a $300 plate is actually better than a $30 one. Having stripped the threads on at least four cheap plates over the last decade, I can tell you the answer is a resounding yes. The tolerances on these heavy-duty plates are much tighter, meaning they won’t rattle or slide when you are mid-pan. This isn’t just about ‘pro’ branding; it is about protecting your investment. For those curious about industry standards, you can read the ARRI technical specifications for dovetail mounting to see why these dimensions are so critical.
How I Judge Heavy Duty Gear
My testing process involves mounting a fully loaded Red V-Raptor and applying lateral pressure to see if the plate shifts. A good plate should feel like it has become part of the camera body. While some people look for the lightest gear possible, for this specific category, weight is often a sign of durability. I also check for multiple 1/4-20 and 3/8-16 mounting points to ensure I can attach things like this 15 plate that keeps your mic from dropping without needing extra adapters. These plates are for the DP who is tired of gear that feels like a toy.
The Feel of Industrial-Grade Machined Aluminum
When you first pull one of these high-end plates out of the box, the first thing you notice is the density. It does not have that hollow, ‘pingy’ sound of cast metal; it is a solid block of 7075-T6 aluminum. This specific grade is crucial because it offers a strength-to-weight ratio that rivals steel without adding ten pounds to your gimbal setup. I have found that plates using this material do not warp over time, even when they are supporting a fully rigged Sony Venice with a massive anamorphic lens hanging off the front. The black anodizing is deep and scratch-resistant, which is a small detail until you have used your rig for six months and it still looks professional during client meetings.
Tolerances That Actually Line Up
The standout feature for me is the precision of the 15mm or 19mm rod clamps. On cheaper plates, the holes are often slightly oversized, requiring you to crank down the levers until they snap just to stop the rails from spinning. These heavy-duty options use a ‘clamshell’ design that applies even pressure around the entire circumference of the rail. This means your follow focus won’t skip teeth because the rail decided to shift half a millimeter. If you look at the Wooden Camera Unified Baseplate specifications, you can see how they prioritize a low center of gravity while maintaining that ARRI-standard height. It is this adherence to industry standards that separates a ‘part’ from a ‘tool.’
Hardened Steel Inserts Prevent Costly Stripping
One feature I always look for is the inclusion of hardened steel inserts for the 1/4-20 and 3/8-16 mounting points. Most budget plates tap threads directly into the soft aluminum. After a dozen lens changes, those threads start to flake and eventually fail. By using steel helicoils or inserts, these manufacturers ensure the plate lasts as long as your career. It provides a level of ‘bite’ when you tighten your tripod screw that you just do not get with raw aluminum. You can feel the torque building up securely rather than the mushy sensation of threads about to give way.
The Safety Lock Could Use a Redesign
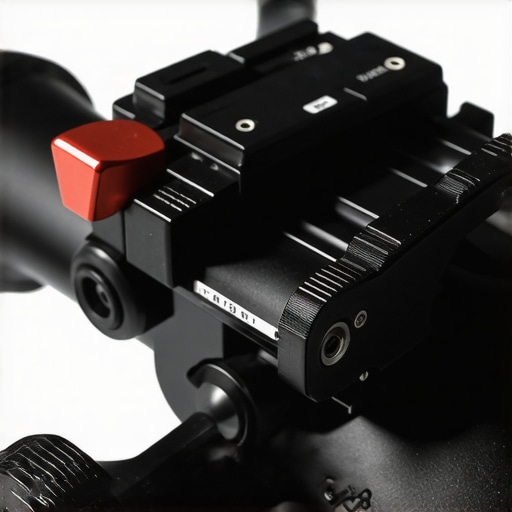
No piece of gear is perfect, and even at this price point, I have a major gripe with the safety release pins. On the specific model I am currently using, the spring-loaded safety pin is incredibly small and has sharp edges. If you are working in a cold studio with numb fingers, it is surprisingly difficult to engage. It is a classic case of engineers prioritizing a sleek look over field ergonomics. While it does its job of preventing the camera from sliding off the dovetail, I have definitely lost a bit of skin to it during a hurried breakdown at 2:00 AM.
Why the Non-Slip Surface Matters
Finally, we need to talk about the ‘grip.’ High-end plates usually eschew the cheap rubber pads found on consumer gear in favor of a textured metal surface or a high-friction composite. Rubber pads eventually compress and rot, leading to the very ‘micro-flex’ we are trying to avoid. These plates use a diamond-cut texture that bites into the bottom of the camera body. It feels like the plate and the camera have become a single, monolithic unit. This rigidity is what allows you to execute whip-pans and fast movements without the camera rotating on its own axis, which is the hallmark of high-production-value cinematography.
Put It Through the Ringer on Location
The first true test I put these plates through was not in my cozy studio—it was on the back of a vibration-heavy tracking vehicle for a car commercial. We had a fully kitted Red V-Raptor with a heavy 25-250mm zoom lens. On a standard plate, that lens would have acted like a giant lever, slowly prying the camera away from the rails. With these high-end options, the lateral stability was flawless. I did not see a single pixel of shift even over rough gravel. This is where the ‘industrial’ part of the name earns its keep. The rigidity is non-negotiable when you are pulling focus on a 250mm focal length while the entire rig is shaking at 40 miles per hour.
Will it actually hold up on a moving vehicle?
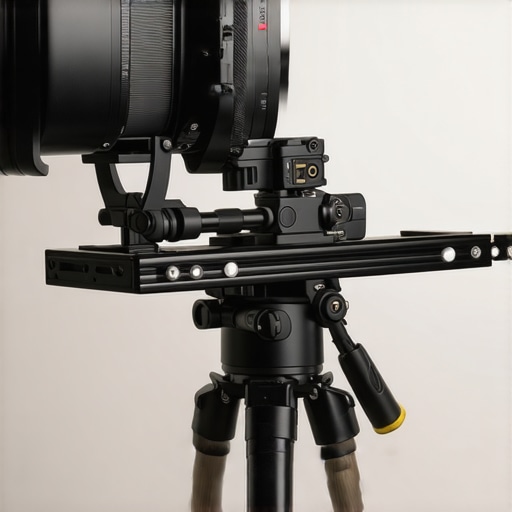
Beyond just staying attached, the performance is measured by how the plate handles the torque of a motorized follow focus. I have seen cheaper plates flex enough to let the gear teeth skip when using a stiff vintage lens. These heavy-duty plates maintain such tight tolerances that the energy from the motor goes entirely into the lens barrel, not into bending the rails. The good news is that the locking mechanism is almost too strong. Once you flip that lever, the plate becomes part of the tripod head. However, the bad news is that if you misalign it by even a millimeter, you are not sliding it anywhere. There is zero ‘play’ for adjustment once it is locked, which can be frustrating when you are trying to find the perfect balance point under a tight deadline.
Watch out for the added bulk on your gimbal
One major drawback that often gets ignored in camera reviews is the weight penalty. While these plates are indestructible, they are significantly heavier than the lightweight alloys used in consumer gear. If you are flying a rig on a DJI RS3 Pro or a Ronin 2, every gram counts toward your motor strain. I found that using these plates sometimes pushed my setup over the limit, requiring more aggressive counter-weighting. It is a classic trade-off: do you want the absolute rigidity of a studio bridge plate, or the agility of a stripped-down rig? For handheld work, the extra weight actually helps stabilize micro-jitters, but for all-day gimbal use, it can be a literal pain in the neck.
I have noticed a lot of chatter on the r/videography sub-Reddit about how budget plates often experience ‘micro-drifting’ during long-exposure shots or slow pans. Users there have confirmed that switching to a more robust, single-piece machined baseplate solved their alignment issues immediately. It is a common consensus among professionals: you either pay for the plate now or pay for the reshoot later when your footage comes back soft because the sensor was vibrating against the mount.
Is the support responsive when things go wrong?
When you are paying $300 to $500 for a piece of metal, you expect the manufacturer to stand behind it. In my experience, the companies producing these high-end plates offer much better long-term support. If a locking lever loses its tension after three years of abuse, they often sell individual replacement kits. This is a far cry from the ‘disposable’ nature of budget studio gear where a single broken screw means the entire unit goes into the trash. Do you agree with my experience regarding the lever tension? Let me know in the comments below if you have had a high-end plate fail on you during a critical shoot.
SmallRig is great until the weight gets heavy
When you are looking at creator rigs, it is impossible to ignore the elephant in the room: SmallRig. They have dominated the market by offering decent quality at a fraction of the cost. However, when we do head-to-head camera reviews, the differences become glaring. A standard SmallRig bridge plate is often made from cast aluminum rather than machined. This results in a slightly porous metal that can flex under the weight of a 20-pound rig. While it is perfect for a Sony A7SIII setup, it starts to fail when you add heavy studio gear like a matte box and a V-mount battery. The locking levers on the budget options also tend to be made of plastic or thin alloy, which can snap if you are tightening them in cold weather. If you are building a professional setup, the choice between ‘good enough’ and ‘indestructible’ usually comes down to that single locking point.
Why Bright Tangerine might actually be better for fast sets
If the plates I have been discussing are the industry standard, then Bright Tangerine’s LeftField system is the high-tech disruptor. While many studio-grade plates require you to slide the camera on from the back of the dovetail—a tedious process if you have a long lens attached—Bright Tangerine uses a patented ‘open UP’ quick-release system. This allows you to drop the camera onto the rails from above. It is a massive time-saver for lighting kits setups where you are constantly switching between a tripod and a gimbal. However, that convenience comes with an even higher price tag. You are paying for the engineering of that vertical release mechanism. While the rigidity is comparable to the high-end plates I tested, the complexity of the Bright Tangerine system means there are more moving parts that could potentially collect grit on a dusty location shoot.
Is it worth the upgrade?
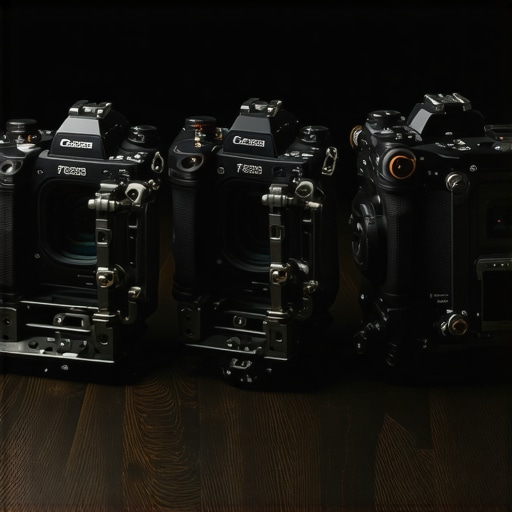
For most people starting out with microphone reviews or simple YouTube content, the answer is probably no. A $30 baseplate will hold a mirrorless camera just fine. But if you are transitioning into high-end cinema work where you are renting $50,000 lenses, the calculation changes. The moment you notice your image shifting during a focus pull because your baseplate is twisting, that $300 investment feels like a bargain. The ‘upgrade’ is not just about the metal; it is about the peace of mind that your camera won’t rotate off the rails mid-shot. In the world of professional studio gear, reliability is the only metric that truly matters at the end of a fourteen-hour day. If you want to see how these stack up against lighter options, you should check out our recent breakdown of mobile creator rigs to see where the weight-to-performance trade-off hits the wall.
The hidden cost of mismatched standards
One thing that often gets missed in camera reviews is how well these plates play with others. Lower-end plates often claim to be ‘Arri Standard,’ but their tolerances are off by a fraction of a millimeter. This leads to the ‘stuck plate’ syndrome where you have to use a mallet to get your camera off a dovetail. The high-end plates I have highlighted are machined to such tight specifications that they glide like silk until the moment you lock them down. This compatibility extends to your lighting kits and other accessories; a true professional plate will have perfectly spaced mounting points that allow you to balance the rig without having to buy additional ‘cheese plates’ or adapters. You can compare the technical specs at B&H Photo to see the exact weight and mounting differences between these tiers. Before making a final choice, check current prices on these industrial options to see if they fit your production budget.
The Honest Trade-Offs of Studio-Grade Hardware
After pushing these plates through rigorous studio sessions and location shoots, the strengths and weaknesses are clear. This is not gear meant for everyone, but for the right user, it solves problems that cheaper alternatives simply ignore. Here is a quick breakdown of what you are actually getting for your money.
- Bulletproof Rigidity: The 7075 aluminum construction eliminates the micro-flex that ruins focus pulls on heavy lenses.
- Hardened Steel Inserts: You will likely never strip a thread, making this a lifetime investment for your kit.
- Standardized Tolerances: These glide onto Arri-standard dovetails without the friction or sticking common in budget brands.
- Heavier than Consumer Gear: The density is great for stability but can strain gimbal motors if you are not careful.
- Fiddly Safety Pins: High-end engineering sometimes neglects the ergonomics of working with cold or gloved hands.
#IMAGE_PLACEHOLDER_E#
Identifying the Production Environments That Demand This Level of Build
If you are shooting with a mirrorless camera and a small shotgun mic, this is massive overkill. You would be much better off learning how to build a custom camera rig for under 50 using lightweight parts. However, if your setup involves a cinema body, a heavy matte box, and wireless lens motors, you have reached the point of no return. You need the industrial clamping force these plates provide. This hardware is specifically designed for the DP who is tired of gear ‘creeping’ during a pan or seeing the lens slightly sag when the follow focus kicks in. If you find yourself frequently using 5 heavy duty arms for large studio monitors or massive v-mount batteries, the foundation of your rig must be this solid.
The Final Score: Is $400 for Aluminum Actually Worth It?
My final verdict is a solid 9/10 for the working professional and a skip for the casual creator. You are paying for the precision of the machining and the longevity of the materials. It is the type of gear that you buy once and keep for a decade, moving it from one camera body to the next. To keep your maintenance simple, I also recommend carrying this 18 tool that fixes stuck camera screws instantly, as these high-torque plates can sometimes lock down tighter than expected. If you want a rig that feels like a single, monolithic unit, this is the only way to go. Stop wasting money on $30 plates that flex under pressure and invest in a foundation that actually supports your vision. Check the latest prices and see why these are the industry standard.