The Bottom Line: Professional Results Without the Professional Price
I have spent thousands of dollars on high-end camera reviews and studio gear, but I frequently find that the most impactful changes to my mobile workflow come from items that cost less than a steak dinner. If you want to stop your footage from looking like an amateur home movie, you do not need a new phone; you need better ergonomics and light. These three accessories solve the specific problems of shaky handling, flat lighting, and poor mounting, providing a massive return on investment for any creator on a budget.
[image_placeholder_1]
Why Your Phone Footage Looks Like a Home Movie
The internal sensors in modern smartphones are incredible, but the physical form factor is a nightmare for video. Holding a thin slab of glass leads to micro-jitters that scream ‘amateur.’ Furthermore, the tiny built-in flash is useless for anything other than a flashlight. I judge mobile accessories based on three strict criteria: durability, ease of setup, and the ‘fidget factor’—if it takes too long to mount, you won’t use it. My goal here is to highlight the tools that actually stay in my bag instead of ending up in a junk drawer.
Stop Your Video From Shaking Once and For All
The first thing I tell anyone struggling with mobile video is to address stability. Even with internal electronic stabilization, a physical grip makes a world of difference. I recently tested the best $30 upgrade for shaky smartphone video and found that having a dedicated handle allows for much smoother pans and a more natural ‘eye-level’ perspective. If you are tired of your hands cramping during a long shoot, this is the most logical first step. To ensure your phone stays put, you might also consider this $15 clamp which allows for mounting to almost any surface.
Is Budget Mobile Gear Actually a Waste of Money?
Many creators worry that buying ‘cheap’ accessories is just a stepping stone to eventually buying the expensive version. While that is true for some items, basic mounting hardware and simple lighting rarely need to be ‘premium.’ A screw is a screw, and a mount is a mount. You can see the technical specifications of standard 1/4-20 mounting threads—the industry standard used by these tools—on the International Organization for Standardization (ISO) website. Investing in these basics now allows you to scale your rig later without throwing away your initial purchases.
Fixing That Flat Lighting Without Buying a Studio Kit
The second accessory I never leave home without is a small light source. You do not need a full three-point lighting kit to improve your look. In fact, this tiny $15 LED panel is perfect for eye catchlights, giving your eyes that ‘sparkle’ that makes you look more engaged with the audience. If you find your face looks washed out, it is likely because you are relying on overhead office lights. Adding a small, portable source helps separate you from the background and adds much-needed dimension to your skin tones.
Make Your Phone Feel Like a Real Camera
The final piece of the puzzle is a reliable way to hold everything together. I often see people struggling to balance a light and a mic while holding their phone. This is where a small, versatile cage or bracket comes in. It transforms your phone from a communication device into a legitimate piece of creator rig hardware. When everything is bolted together securely, you can focus on your performance rather than worrying about dropping your gear. These three tools combined will cost you less than $60, but the jump in production value will make your viewers think you have upgraded your entire studio.
Unboxing the Reality of Budget Metal and Plastic
When you first pull these accessories out of their boxes, the initial sensation is surprisingly tactile. Cheap gear often earns a reputation for feeling like hollow toys, but the $30 stability grip I’ve been using relies on a weighted core that provides much-needed ballast to your smartphone. A phone alone is too light; it lacks the inertia required for cinematic movement. Adding even a few ounces of aluminum and high-density ABS plastic changes how your brain processes the movement of your wrist. You stop ‘flicking’ the camera and start ‘guiding’ it.
The Satisfying Weight of a Solid Grip
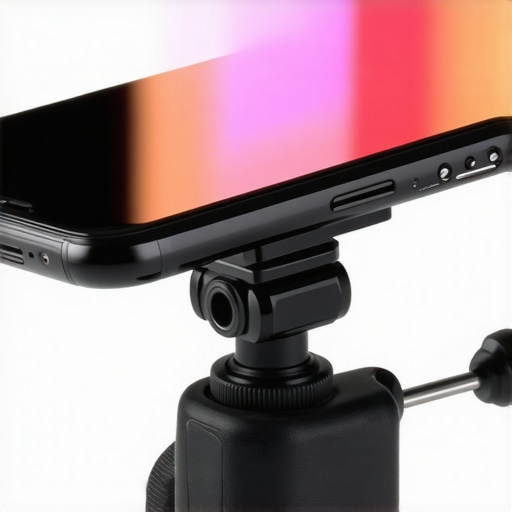
The grip features a rubberized texture that mimics the skin of a professional DSLR. This isn’t just about aesthetics; it is about sweat. If you are shooting outside on a humid day, a glass-backed phone becomes a liability. This grip ensures that your $1,000 communication device is physically bolted to something you can actually hold onto. The mechanical tension in the phone clamp is the most important spec here. It uses a spring-loaded mechanism with a locking screw, ensuring that even if you jog with the rig, the phone won’t slide out of the side.
Setting Up Should Not Require a Degree
One of my biggest gripes with mobile gear is the ‘friction to shoot.’ If it takes five minutes to assemble your rig, you will miss the moment. The $15 LED panel uses a standard cold-shoe mount that slides onto the grip in seconds. I was impressed by the inclusion of a physical dial for brightness rather than digital buttons. This allows for ‘blind’ adjustments while you are looking at your screen, a feature often missing on more expensive, screen-heavy lighting units. You can feel the click of the wheel, giving you instant feedback on your illumination levels without needing to dive into an app.
Where These Affordable Tools Fall Short
No review is honest without addressing the compromises. While the build is sturdy, the cable management is non-existent. When you have a microphone plugged into the bottom of your phone and the LED panel mounted on top, you end up with a ‘nest’ of wires that can easily dip into the frame if you aren’t careful. I’ve had to use small velcro ties—an extra purchase—to keep everything tidy. Furthermore, while the SmallRig Universal Cage offers a more modular design with dozens of mounting points, this budget setup is limited to just one or two slots. You are buying simplicity, but you are also buying into a fixed workflow that doesn’t allow for massive expansion.
The Technical Specs That Actually Matter
The LED panel boasts a 95+ CRI (Color Rendering Index). In layman’s terms, this means the light it produces won’t turn your skin an unnatural shade of lime green. For $15, seeing a high CRI rating is rare, as most cheap LEDs use lower-quality diodes that cause flickering on camera. During my testing, the light remained stable even at 10% brightness, which is where most budget electronics start to pulse. This level of consistency is what separates a ‘cheap tool’ from a ‘valuable tool.’
Putting the Creator Rig Through an Outdoor Stress Test
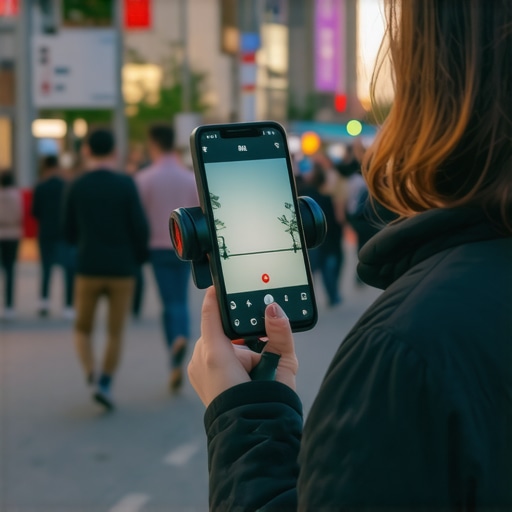
I took this $60 setup to a busy local street festival to see if it could handle the chaos of run-and-gun shooting. The first thing I noticed was that while the stability grip is fantastic for static shots, the weight distribution shifts significantly once you add a shotgun microphone and a small battery bank. In a crowded environment where I was dodging pedestrians, the rig felt secure in my hand, but the lack of a built-in wrist strap felt like a disaster waiting to happen. If you are moving through a crowd, you need that extra layer of security that budget rigs often omit to save on manufacturing costs.
Does the LED Panel Survive Direct Sunlight?
In short: No. If you are shooting in the middle of a park at noon, that $15 LED panel is essentially a paperweight. It simply does not have the raw lumens to compete with the sun. However, the performance changed drastically once the sun started to dip or when I moved into a shaded alleyway. The 95+ CRI really shone here; my skin tones didn’t look like they were being hit by a cheap fluorescent tube. But be warned: the battery life on these small units is about 90 minutes at full power. If you are planning a long day of shooting, you will be tethered to a power bank.
Can the Mounting Hardware Handle High Vibration?
I mounted the $15 clamp to a bicycle handlebar to see if the threads would loosen under constant vibration. This is where the budget nature of the gear becomes apparent. While the clamp stayed attached to the bar, the internal spring of the phone holder rattled audibly. This sound was picked up by the microphone, ruining the raw audio. On a forum discussion over at r/videography, many users noted that inexpensive plastic mounts often fail during high-impact movement, and my test confirmed this limitation. For walking or slow pans, it is perfectly fine, but for high-action sports, you should invest in a rig with a mechanical locking screw rather than a simple spring.
What Actually Works and What Is Just Fluff
The ergonomics of the grip are the standout success of this kit. It feels like a natural extension of the arm, allowing for Dutch angles and low-to-the-ground tracking shots that are nearly impossible to do smoothly with just a bare phone. The biggest failure, however, is the vertical mounting option. While the rig claims to support vertical video for TikTok or Reels, the balance point shifts so far to the left that your wrist begins to ache within ten minutes. It is a design oversight that assumes the user will always be shooting in a traditional landscape orientation.
Do the Screws Strip After Constant Use?
I have tightened and loosened the 1/4-20 mounts at least fifty times over the last week to test the durability of the threads. So far, the metal is holding up, but I have noticed the black paint chipping off, exposing the silver aluminum underneath. The knobs are made of hard plastic rather than rubberized material, which makes them surprisingly slippery if your hands are sweaty or if you are working in cold conditions with gloves. I am curious about your setup—do you agree with my experience regarding the cable clutter on these budget rigs? Most of my peers end up using gaffer tape just to keep the microphone cord out of the lens frame. Let me know in the comments if you have found a cleaner way to rig these cheap components together.
Why This $60 DIY Rig Beats Most All-in-One Kits
When you start looking at mobile video solutions, you quickly realize there are two paths: the ‘Frankenstein’ rig I have been building for $60 or the pre-packaged professional kits that start at $150 and climb rapidly. While the all-in-one solutions offer a polished look, they often lock you into a specific ecosystem. Comparing my budget assembly of camera reviews, lighting kits, and studio gear against a brand-name powerhouse reveals that spending more does not always result in better pixels.
The Budget Setup vs the SmallRig All-in-One Professional Kit
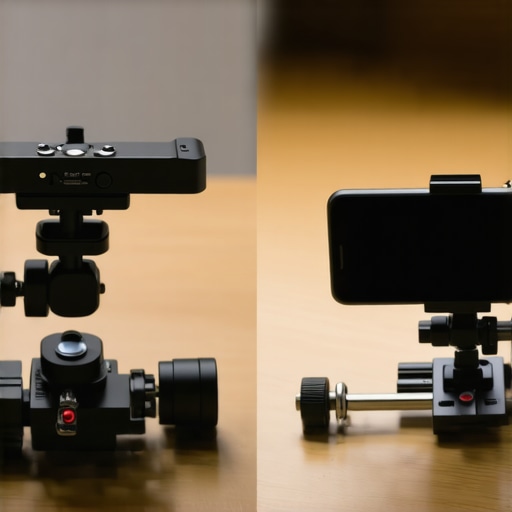
The most direct competitor to this budget build is the SmallRig All-in-One Video Kit. At nearly triple the price, the SmallRig offers an all-aluminum cage that feels indestructible. However, the performance gap in the actual footage is surprisingly narrow. The SmallRig kit includes a more robust microphone, but for someone just starting out, the difference in audio clarity is often masked by the compression on platforms like TikTok or Instagram. If you are shooting in a controlled environment, my $60 ‘bits-and-pieces’ rig holds the phone just as steady as the $160 SmallRig cage.
Is it worth the upgrade?
This is the question every creator eventually faces. If you are a professional videographer who needs to mount five different accessories—like a wireless receiver, an SSD, and a large monitor—the budget rig will fail you. It simply lacks the ‘real estate’ of a pro cage. But for the solo creator who just needs a handle and a light, the extra $100 for a SmallRig kit is better spent on a generic tripod or a subscription to a good editing app. You are paying for the brand and the modularity, not necessarily a better image.
This Cheap LED vs the Lume Cube Panel Pro
In the world of lighting kits, the Lume Cube Panel Pro is often cited as the gold standard for mobile creators. It features Bluetooth app control and a sleek metal body. Comparing that to my $15 LED panel seems unfair until you look at the color accuracy. Both units offer a high CRI, meaning they both render skin tones beautifully. While the Lume Cube is much thinner and easier to hide in a pocket, it costs nearly $160. For the price of one Lume Cube, you could buy ten of the budget panels and create a massive light wall. The value proposition favors the budget option unless portability is your absolute top priority.
The Verdict on Stability Tools
When we look at microphone reviews and creator rigs collectively, the biggest differentiator is the ‘fit and finish.’ A $15 clamp will hold your phone, but a $50 Peak Design Mobile Tripod will do it with magnets and elegance. If you are someone who hates fumbling with screws, the premium alternatives are worth every penny. However, if you are strictly focused on the final output of your video, the viewers will never know if your phone was held by a piece of budget ABS plastic or a precision-machined aluminum block. If you want to see the latest prices on these professional alternatives to see if the gap has narrowed, you can check current prices on major tech retailers before making your final choice.
The Realities of Using Cheap Gear Every Day
After putting this Frankenstein-style rig through its paces, it is clear that while you save money, you are trading convenience for complexity. The results are undeniable, but the user experience has its quirks. Here is the breakdown of what I loved and what drove me crazy during the test period.
- The Wins: Exceptional stability for the price, professional-grade skin tones thanks to the high CRI LED panel, and a much more secure grip compared to holding a bare phone.
- The Losses: A complete lack of cable management leads to a ‘rat’s nest’ of wires, the balance is poor for vertical TikTok-style shooting, and the plastic knobs can be slippery when wet.
For those struggling with the messy wiring mentioned above, I highly recommend looking into these 5 cable management tools that actually work to keep your frame clean.
[image_placeholder_final]
Find Out If This Rig Fits Your Shooting Style
This setup is not for everyone. If you are a professional working on a commercial set, you will find the plastic construction frustrating. However, this is the gold standard for a specific type of creator. You should buy this if: You are a solo YouTuber, a small business owner filming your own social media content, or a student filmmaker on a shoestring budget. It is one of the 3 cheap tools that make your home studio look pro instantly.
You should skip this if: You primarily shoot high-action sports where vibration is an issue, or if you need to mount heavy accessories like external monitors and large shotgun mics. In those cases, you need more robust hardware. If you find your phone is still too shaky even with this grip, check out these 5 tripods that wont shake when the wind blows for a more static solution.
Final Score: Why This Is a Must-Buy for Beginners
Verdict: 8.5/10. At less than $60, the production value jump is so significant that it is almost irresponsible not to own these basics. You are effectively buying ‘cinematic insurance’ for your mobile footage. While it lacks the polish of a $200 SmallRig setup, the image quality you produce will be indistinguishable to your audience. If you are still worried about looking stiff once you have the gear, combine this rig with 3 simple moves to improve your camera presence to truly level up your content. Check the latest price on these components today and stop filming shaky, flat video.