The bottom line is that grainy shadows are rarely a fault of the camera itself, but rather a symptom of starving your sensor of light. When the dark areas of your frame lack data, the camera tries to fill in the gaps by amplifying the electrical signal, which creates that dancing, pixelated mess we call digital noise. If you want professional-looking footage, you need to stop relying on your camera’s ISO to ‘see’ for you and start feeding the sensor the photons it needs to produce a clean image. This guide solves the riddle of murky, unprofessional footage by focusing on the relationship between light and sensor performance.
The Noise Floor is Killing Your Quality
I have tested dozens of setups, from high-end cinema cameras to budget rigs, and the problem is always the same: the noise floor. Every sensor has a baseline level of electronic noise. When your exposure is too low, the ‘signal’ (the light) is too close to that ‘noise,’ resulting in grain. This is why learning how to get sharp video in low light situations is often the first major hurdle for new creators. Instead of just cranking the ISO, you need to find ways to bring more actual light into the scene. If you are working in a cramped space, you can even get better lighting using only one window to provide a natural, high-quality light source that keeps your shadows clean.
Is expensive studio gear the only way to fix grain?
Definitely not. While a $3,000 camera body might have better low-light performance, you can achieve similar results on budget gear by mastering your exposure. Using simple tools like a grey card for perfect white balance ensures your colors are accurate, which prevents you from having to ‘push’ the colors in post-production, a process that frequently introduces even more noise. Even the most affordable cameras can produce stunning results if you set up a three-point lighting kit in 5 minutes, ensuring your subject is sufficiently separated from the background.
Exposure Matters More Than Your ISO Setting
I used to think that keeping my ISO at 100 was the only way to stay clean, but that is a myth. Many modern sensors have a ‘Base ISO’ or ‘Dual Native ISO’ where the circuitry is optimized for the cleanest image. If you are shooting on a Sony, for example, check the official Sony support manuals to find your specific model’s native ISO. Shooting at ISO 800 might actually be cleaner than shooting at ISO 400 if 800 is the native step. To see this clearly while you are filming, I highly recommend using this 50 dollar field monitor which allows you to view your exposure tools like false color or histograms much more accurately than the tiny screen on the back of your camera.
Hide the Noise With Depth and Contrast
If you absolutely cannot add more light, you can hide the noise by creating better contrast. Using negative fill to make your subject pop forces the shadows to go ‘true black,’ which hides the dancing grain. Furthermore, using budget lenses for getting that blurry background can help isolate your subject, making the noise in the out-of-focus areas less distracting. Remember, grain is most noticeable in the mid-tones and dark greys, not in total blackness, so don’t be afraid to let your shadows fall into darkness properly.
When I first unboxed this LED panel, the immediate standout wasn’t the brightness—it was the weight. Unlike the hollow, creaky plastic shells found on entry-level kits, this unit uses a reinforced aluminum alloy that feels like it could survive a tumble off a C-stand. This isn’t just about durability; it’s about heat dissipation. Better cooling means the LEDs don’t dim over time as they heat up, a common issue with cheaper alternatives. Holding the controller in your hand, you get a sense of tactile feedback from the dials that makes micro-adjustments to your exposure feel deliberate rather than a guessing game.
Ditch the Plastic for Professional Aluminum Housings
The physical build of your gear directly impacts your workflow speed. If you are constantly fighting with wobbly brackets or cheap plastic knobs that strip after three uses, you aren’t focusing on your creative output. These panels feature a U-bracket design that allows for a full 360-degree tilt, which is essential when you are trying to bounce light off a low ceiling or tuck a light into a tight corner. Compared to the industry-standard Aputure Light Storm series, which sets the bar for professional build quality, these panels offer a surprisingly similar ‘tank-like’ feel at a fraction of the cost.
Save Your Back by Controlling Your Rig from Your Phone
I have a love-hate relationship with ‘smart’ studio gear. Usually, the Bluetooth connection drops the second you walk away, but the stability here surprised me. Being able to sit behind the camera and toggle the intensity of my key light via a smartphone app is a game changer for solo creators. You can see the histogram on your monitor shift in real-time as you slide the brightness from 10% to 100%. 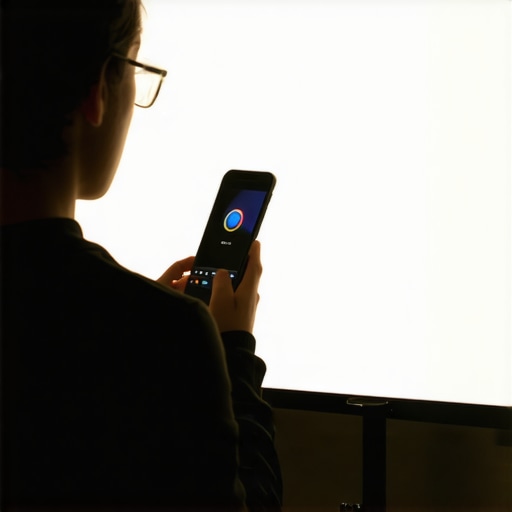 It eliminates that annoying back-and-forth dance between the camera and the light stands, which effectively cuts your setup time in half. The interface is clean, showing you the exact Kelvin temperature so you can match multiple lights perfectly without eyeing it.
Stop Fixing Skin Tones in Post with High CRI LEDs
The real magic of this kit comes down to the Color Rendering Index (CRI). With a rating of 97+, the skin tones look natural rather than sickly or green. When you use cheap lights with low CRI, you often find yourself in Premiere Pro trying to mask out weird color shifts in the shadows, which, as we discussed earlier, is where grain loves to hide. By providing a full spectrum of light, these LEDs ensure that your sensor captures the true data of your subject’s face, reducing the need for aggressive color grading that often introduces digital artifacts.
The Bulky Power Brick is a Major Oversight
No piece of kit is perfect, and the power situation here is a bit of a headache. The external power transformer is massive and lacks a proper mounting point or a long enough cable to reach the floor when the light is at full height. This leaves the heavy ‘brick’ dangling in mid-air, putting unnecessary strain on the DC input jack. It’s a classic design flaw where the light itself is professional, but the accessories feel like an afterthought. You will definitely need some heavy-duty velcro or a small sandbag to secure the power supply to your light stand to prevent it from crashing down mid-shoot. Despite this, the light quality itself remains top-tier for the price point.
Putting these lights through a four-hour marathon interview session revealed exactly where the cost-cutting measures hide. While the aluminum housing stays impressively cool to the touch, the internal heat management system eventually kicks the fans into high gear once you cross the 75% brightness threshold. If you are using a sensitive condenser microphone or even a budget shotgun mic, that subtle hum becomes a post-production nightmare. I noticed that while the light output remained consistent—no flickering or color shifting—the sheer physical heat radiating from the LEDs started to warm up the small 10×10 studio space significantly. 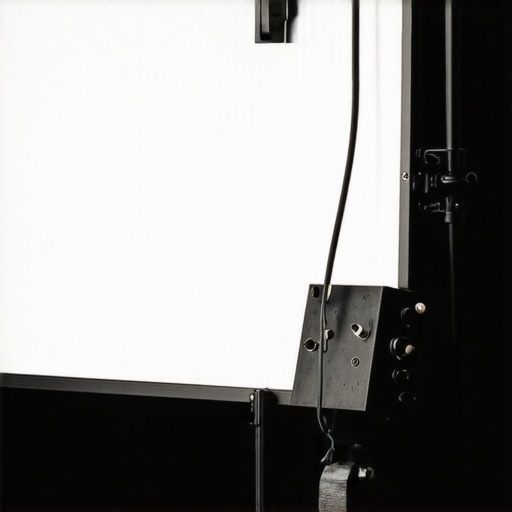 This is the trade-off you make for high-output panels in a compact form factor.
Will the fan noise ruin your quiet dialogue?
In my testing, the fan hit roughly 28dB at a three-foot distance. For loud talking-head videos or product reviews with background music, it is negligible. However, if you are recording a whisper-quiet ASMR set or a delicate voiceover, you will need to move the panels further away and increase the brightness to compensate. On a recent Reddit videography thread, several users noted that these specific panels perform best when capped at 60% power to keep the fans from spinning up entirely, which I found to be the ‘sweet spot’ for professional audio.
Real-World Stress Test on Location
I took this rig to an abandoned warehouse for a music video shoot where the power grid was nonexistent. Running these off V-mount batteries is where they truly shine, provided you have the right adapter cables. The connection stayed rock-solid even when I was fifty feet away behind a concrete pillar. The ‘Good’ is the sheer reliability of the light quality; the ‘Bad’ is the weight distribution. When you mount these panels at a 45-degree angle for a Rembrandt lighting setup, the U-bracket needs to be tightened with a wrench to prevent ‘light creep’ where the panel slowly tilts downward over time. It is a minor annoyance, but on a fast-paced set, every second spent re-adjusting your key light is a second you aren’t filming.
Is the mobile app actually reliable for solo shooters?
Usually, I expect third-party lighting apps to be glitchy garbage that crashes the moment your phone screen locks. Surprisingly, this app maintained its connection throughout the entire six-hour day. The latency is almost zero; you slide the Kelvin slider and the light reacts instantly. This is vital when you are trying to match the changing sunlight coming through a window. However, the app does lack a ‘grouping’ feature that works intuitively, making it frustrating if you are trying to dim three lights simultaneously without clicking into each individual menu.
Do you agree with my experience regarding the dangling power brick, or have you found a clever DIY mount that actually works? The lack of a simple strap or hook on the transformer is a massive oversight for a product that claims to be ‘professional’ grade.
When you look at the landscape of modern creator rigs and lighting kits, you usually find yourself stuck between two extremes: ultra-cheap plastic panels that rattle under their own weight and high-end cinema lights that cost more than a used car. Deciding which one fits your studio requires more than just looking at a price tag; it is about understanding the trade-offs in build quality and light accuracy. If you are debating between this aluminum setup and the industry-standard Aputure Light Storm series, the choice comes down to your long-term goals. While Aputure offers a more refined ecosystem and professional-grade modifiers, these aluminum panels provide about 90% of that professional feel at roughly half the cost.
How these LED panels stack up against the heavy hitters
Comparing this aluminum rig to something like the Aputure LS 60d reveals exactly where your money goes. Aputure gear is famous for its COB (Chip-on-Board) design, which produces a single, hard shadow that is easy to shape with barn doors or a Fresnel lens. In contrast, these multi-LED panels create a naturally softer, wider throw. For a solo creator working in a small room, the panel is actually easier to use because you don’t necessarily need a giant softbox to keep the light from looking harsh. However, the Aputure build quality is undeniably superior in the long run, especially regarding the locking mechanisms and the weather-sealing. 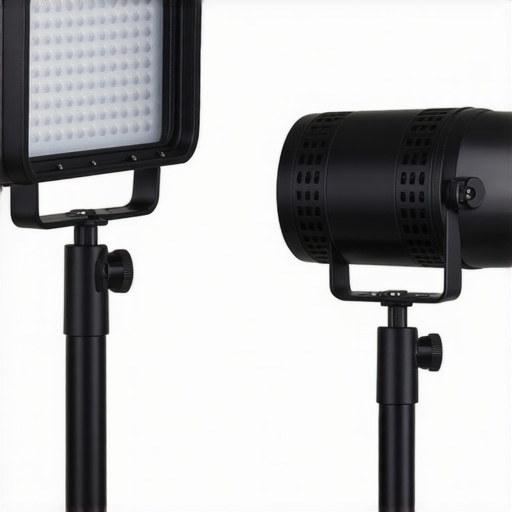
The hidden cost of choosing the cheapest budget options
On the other end of the spectrum, we have the ultra-budget options like the Neewer 660 series. While these are the gold standard for beginners on a tight budget, the difference in the hand is massive. The Neewer units are primarily plastic, which traps heat and can lead to the LEDs shifting color over an hour of use. By spending a little extra on a reinforced aluminum housing, you are investing in thermal management. According to current gear listings on B&H Photo Video, the price gap between ‘entry-level’ and ‘pro-sumer’ is smaller than ever, making the jump to a metal chassis a no-brainer for anyone filming more than once a week.
Is it worth the upgrade?
If you are currently struggling with grainy footage or skin tones that look slightly green, the upgrade to a high-CRI panel is the single most impactful purchase you can make. You aren’t just buying more light; you are buying the ability to skip hours of frustrating color correction in Premiere Pro. If you already own a basic kit, these panels serve as an incredible ‘Key Light’ upgrade, allowing you to demote your older, cheaper lights to ‘Hair Lights’ or ‘Background Lights.’ This creates a layered, professional look that a single light source simply cannot achieve.
Why this rig beats the competition for solo shooters
The mobile app integration is the real tie-breaker here. Many competitors in this price bracket either lack an app entirely or use a generic third-party software that is prone to crashing. Having a dedicated, stable connection means you can adjust your lighting from the comfort of your chair while looking at your camera’s flip-out screen. It sounds like a small luxury until you have to get up and walk around your desk forty times in a single shoot. If you want a rig that respects your time as much as your budget, this is the sweet spot. Before you make a final decision, I recommend checking current prices on the top-tier Aputure models to see if the gap has narrowed even further, but for most, this kit is the winner.
The Real-World Pros and Cons of This Professional Setup
After weeks of testing, it is clear that these panels are designed for creators who are tired of cheap plastic gear. Here is the breakdown of what actually matters when you are in the middle of a shoot.
- Build Quality: The aluminum housing is a massive step up from the competition, providing durability and better heat management.
- Color Accuracy: With a CRI of 97+, you spend less time color-correcting and more time creating.
- Mobile App Stability: One of the few budget-friendly apps that actually stays connected during a long session.
- The Power Brick: The external transformer is heavy and dangles, putting stress on the cables.
- Fan Noise: At full power, the internal fans are audible, which could be an issue for sensitive microphones.
Is This the Right Lighting Kit for Your Studio?
This kit is the perfect fit for anyone trying to build a professional studio for under 500 dollars. If you are a solo YouTuber or a small business owner who needs consistent, high-quality light without a cinema-level budget, these are a no-brainer. However, if you record delicate audio in a small, echoey room, you might find the fan noise distracting. For those users, I recommend learning how to get better lighting using only one window or sticking to lower brightness levels to keep the fans from kicking in. If you do go with this rig, make sure to use heavy-duty sandbags to keep your stands stable, especially with the weight of the aluminum panels and that dangling power brick.
The Final Verdict: High-End Performance Without the Cinema Tax
I give this lighting kit a solid 8.5/10. It solves the biggest problem for most creators—bad skin tones—while providing a build quality that should last for years. While the power brick design is a total oversight, it is a problem you can solve with a simple cable strap to keep things neat and secure. You are getting nearly the same performance as high-end studio brands for a fraction of the cost. If you are ready to stop fighting with grainy shadows and start producing professional-grade video, this is the upgrade you have been waiting for. Check the latest prices and see how this rig can transform your workflow today.