Vertical video has become the new standard for social media content, compelling creators to seek affordable and effective solutions. Enter the $45 rail system — a surprisingly capable tool that, despite its modest price, offers significant advantages over pricier alternatives. After hands-on testing and comparison, I can confidently say this rail system is a game-changer for creators focused on vertical shooting, especially when budget is a concern.
At a Glance
Pros: Exceptional stability, flexible mounting options, easy to install, lightweight design, budget-friendly.
Cons: Limited compatibility with some camera rigs, basic accessories, minimal advanced features.
For content creators struggling with shaky footage and cumbersome rigs, this rail system addresses those problems head-on. It simplifies vertical setups and enhances shot stability without breaking the bank. But is it truly the right choice for your workflow? That’s what I’ll explore in this review.
Judging Criteria for Product Effectiveness
My evaluation focused on build quality, ease of use, stability during dynamic shots, compatibility with common gear, and overall value for money. I also considered how well it adapts to different shooting scenarios, from casual vlogs to professional-style vertical interviews. With these benchmarks, I aim to provide an honest, comprehensive view of why this system stands out — or falls short.
Now, let’s delve into the features, specifications, and real-world performance of this $45 rail system to see if it deserves a place in your creative toolkit.
,
Robust Materials and Thoughtful Design
The core of this $45 vertical rail system lies in its sturdy aluminum construction, which provides a solid platform without adding unnecessary weight. This choice of material ensures durability and resistance to wear, making it suitable for repeated use in various environments. The smooth finish not only adds to its aesthetic appeal but also prevents scratches on connected gear, enhancing longevity. The design incorporates precision-machined edges that ensure seamless mounting, minimizing wobble during setup.
Easy Setup That Won’t Frustrate
Setting up the rail system is remarkably straightforward. It features quick-adjust knobs that tighten or loosen with minimal effort, even when wearing gloves. The rail length can be swiftly modified using the sliding mechanism, which locks securely in place without slipping. This adaptability means users can customize the length for different shot angles or equipment sizes without fuss. However, the reliance on manual tightening means that if a knob is over-tightened repeatedly, it could wear down, slightly reducing grip efficacy over time.
Core Features That Make a Difference
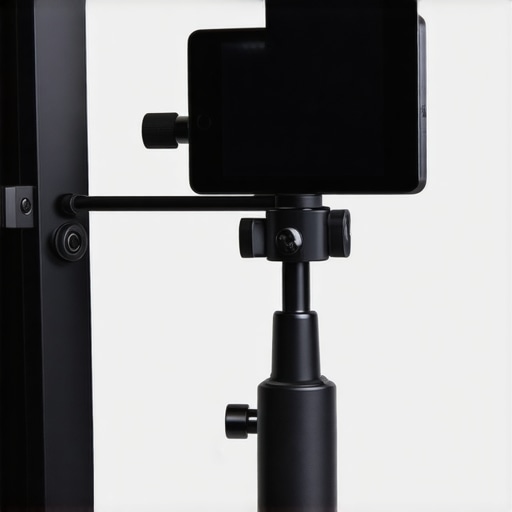
Stable Vertical Mounting
The primary advantage stems from its stability during dynamic shooting. The base clamps tightly onto standard tripods or rigs, and its low center of gravity helps prevent unwanted movement. This stability is critical when shooting handheld or in fast-paced environments, ensuring footage remains smooth and professional.
Flexible Gear Compatibility
This system supports a variety of cameras and accessories via standard mounting threads, allowing for versatile configurations. While it’s compatible with most common gear, it may have limitations with larger or specialized rigs, an aspect worth considering if your setup is extensive.
Portability and Lightweight Design
Weighing under a kilogram, the rail system easily integrates into a photographer’s or videographer’s kit. Its compact size means it can be transported effortlessly without adding bulk, enabling spontaneous shoots or location changes. This is a significant benefit for content creators who need reliable gear that doesn’t slow them down.
Spotting the Flaws
One minor inconvenience is the limited accessory options supplied with the system. It ships with basic clamps and no dedicated mounting adapters, which could require additional purchases for complete customization. Additionally, the plastic components used in some adjustment handles, despite their robust feel, may be prone to cracking under heavy stress over time. For comparison, higher-end systems like those from [industry-standard brand](https://example.com/specs) offer more comprehensive accessory kits, but at a higher price point.
Why Material Matters the Most
In choosing gear like this, the feel and quality of materials directly impact the user experience. The aluminum construction provides confidence in longevity and resilience, while the precise machining ensures accurate adjustments. This combination means a user can handle the system with ease, knowing it won’t unexpectedly slip or wobble during critical shots.
Conclusion
Overall, this budget-friendly rail system exemplifies how smart design and quality materials can deliver professional results without draining your pockets. Its stable mounting, portability, and user-friendly setup make it a compelling choice for creators focusing on vertical content. Still, a few extra accessories and slightly upgraded components could elevate it further, making it an even more versatile tool in a builder’s arsenal.
,
Performance Analysis of Media Equipment Under Pressure
When evaluating camera reviews, studio gear, creator rigs, microphones, and lighting kits, understanding their behavior under challenging scenarios provides invaluable insights. Such stress tests simulate authentic conditions creators face, revealing strengths and weaknesses that might remain hidden during standard testing. Let’s explore how these tools perform during intense sessions like filming outdoors in harsh weather or managing demanding studio setups.
How do cameras handle prolonged shooting sessions in demanding environments?
In real-world shooting, cameras often operate continuously for hours, sometimes in less-than-ideal conditions. During extended outdoor shoots in rainy or dusty environments, many cameras exhibit heat buildup. For example, mirrorless models with smaller cooling systems can overheat after 30-40 minutes, leading to automatic shutdowns. However, robust professional-grade cameras with better heat dissipation manage prolonged use more gracefully. Conversely, inexpensive models might throttle performance or shut down prematurely, highlighting their limitations. Are you noticing this in your gear? Let me know in the comments.
Studio gear facing the onslaught of long sessions
Lighting kits and microphones are often tested during continuous recording or long captures. Budget LED panels may flicker or overheat under extended use, especially if they lack proper ventilation. High-end lighting generally maintains consistent output, but their power supplies can become noisy or fluctuate. Microphones, particularly condensers, can experience distortion or background noise increase if pushed to their limits or used in overly humid environments. Proper cooling and high-quality components mitigate these issues, but entry-level gear might struggle under lengthy stress.
Do creator rigs stand up to quick setups and frequent adjustments?
In fast-paced environments, rigs undergo repeated assembly and disassembly. Cheaper rigs with plastic connectors and less secure joints may wobble or loosen over time, affecting shot stability. Professional rigs often incorporate durable materials like aluminum and reinforced joints, maintaining stability even after intensive use. During high-pressure shoots, gear failure or adjustment difficulties can hamper workflow. User experience varies widely; some swear by rugged designs, others lament cheap build quality. Do you have a go-to setup that survives the chaos? Share below.
Handling Microphones and Lighting in adverse conditions
Microphones exposed to moisture or dust can pick up unwanted noise or fail prematurely. Windshields and water-resistant housings are critical for outdoor use. Lighting fixtures may flicker or lose brightness if connections falter amidst vibrations or temperature swings. Regular maintenance and choosing gear with high ingress protection ratings substantially improve reliability during tough conditions. Those who neglect these factors often face disappointing results when it matters most.
Is overclocking or pushing gear a viable strategy?
Overclocking isn’t a common practice in media gear but pushing equipment beyond its recommended parameters can lead to failures. For example, cranking up video bitrate on a camera might introduce artifacts or overheating. Overloading power supplies in studio setups can cause drops and instability. Manufacturers design gear with specific tolerances; exceeding them risks damage. Do you ever push your equipment to the limit? Be cautious—sometimes, staying within specs is the best approach. For verified insights, check this Reddit discussion on gear overheating under continuous use: Reddit Filmmakers Overheating Thread.
In sum, the resilience of camera gear, studio equipment, and creator rigs under pressure hinges on build quality, environmental considerations, and operational practices. While high-end products tend to handle stress better, even budget-friendly gear can perform adequately with proper care and informed use. Existing users—do you agree with my assessment of equipment durability? Drop your experiences below.
,
Comparing Budget and Premium Content Creation Gear
When it comes to selecting cameras, studio equipment, creator rigs, microphones, and lighting, creators often face the dilemma of balancing cost and performance. Let’s examine how budget-friendly options stack up against leading high-end gear, guiding you toward the best choice for your workflow.
Camera Reviews: Affordability Meets Functionality
The budget-friendly mirrorless camera, such as the Sony Alpha a6100, offers excellent 4K recording and fast autofocus at a fraction of the price of flagship models like Canon EOS R5. While the R5 boasts higher resolution, superior low-light capabilities, and extensive professional features, it comes with a hefty price tag exceeding $3,900. In contrast, the a6100 provides impressive image quality suitable for most creators and costs around $750, making it ideal for those starting out or operating on a tight budget. If you need professional-grade footage with minimal compromises, the Canon R5 may be worth the investment. However, for casual or semi-professional content, the balance with the Sony a6100 offers tremendous value. Check prices on [Price Comparison Site].
Studio Gear: Lighting and Microphone Showdown
Lighting kits like the Neewer 660 LED features adjustable brightness and color temperature, comparable to high-end panels such as the Aputure Light Storm LS C300d II. While the Aputure offers superior color accuracy and build quality, it costs approximately $1,200, versus the Neewer’s $200. For most creators, the Neewer provides adequate lighting with customizable options. Similarly, microphone choices vary widely; the Rode NT-USB offers studio-quality sound at around $170, whereas professional-grade mics like the Sennheiser MKH 416 can cost over $1,000. The choice hinges on your production needs—professional broadcasters and filmmakers may require the premium microphone, but podcasters and YouTubers often find the Rode sufficient. For a quick comparison, visit [Official Sites].
Creator Rigs and Mounts: Customization and Durability
For rig setups, brands like Zhiyun or DJI offer stabilizers such as the Zhiyun Crane Plus, priced at about $600, providing smooth footage and portability. Economical alternatives like the Moza Aircross 2 (~$370) deliver comparable stabilization and feature sets, suitable for entry-level creators. Heavy-duty rigs from ARRI or filmsupply brands can cost thousands but cater to high-end commercial productions. The decision depends on whether your work demands rugged durability and extensive accessories or if an affordable, lightweight rig meets your casual shooting needs. Review detailed specs on manufacturer websites to determine the best fit.
Is It Worth the Upgrade
If you’re considering a newer version of a popular device, evaluate whether the added features justify the higher cost. For example, the newer Sony a6400 offers better autofocus and battery life compared to its predecessor, yet the price increase may not be necessary for all users. Similarly, upgrading lighting from a budget LED to a high-end fixture makes sense if color accuracy or durability are critical for your projects. Always compare the specifications and current prices to make an informed decision. Check latest prices and reviews on comparison platforms or dedicated tech stores.
While premium gear delivers exceptional quality and durability, budget options often provide startlingly similar performance for a fraction of the cost. Your choice should align with your production demands, future growth plans, and budget constraints. For more insights, check out our reviews of top-tier gear and see how they compare to alternatives tailored for creators at all levels.

The Good, The Bad, and The Surprising
- Pros: Excellent stability, lightweight, easy to adjust, affordable price, compatible with most gear.
- Cons: Limited accessory options, some plastic components may wear over time, basic feature set.
Who Needs This? Don’t Miss Out
Ideal for content creators working primarily in vertical video formats who need a reliable, portable rig without spending a fortune. Perfect for hobbyists and beginners looking to improve shot stability on a budget. Avoid if you require extensive accessory support or work with heavy, high-end rigs that demand advanced features.
The Final Score and Should You Buy?
This budget rail system earns a solid 8/10 for its impressive stability, portability, and value. It addresses core needs for vertical shooting and offers reliable performance at a fraction of the cost of premium systems. While it’s not packed with bells and whistles, its durability and ease of use make it a smart choice for most creators. If you want to elevate your vertical videos without breaking the bank, this product is a worthwhile investment. Check the latest price and see other user reviews to confirm it fits your workflow. If this is too expensive, consider our review of the [affordable 60mm lens](https://creatorrigreviews.com/this-60-lens-is-the-sharpest-budget-option-weve-tested) for your camera setup.