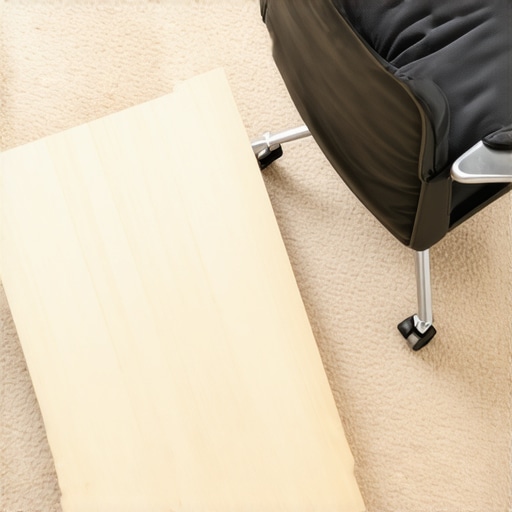
Bottom Line Up Front: If you are working in a carpeted room, stop fighting your office chair. A simple sheet of 1/2-inch plywood is the ultimate floor protector and mobility booster, outlasting every flimsy plastic mat on the market for a fraction of the cost. It is a rugged, permanent fix for the most annoying ergonomic issue in any home office.
The promise of this DIY hack is simple: total mobility. When you are surrounded by expensive studio gear, the last thing you want is to be ‘stuck’ in a carpet divot when you need to reach for a dial or adjust a light. By creating a solid surface, you stabilize your entire seating position and, by extension, your interaction with your desk.
Stop Fighting Your Carpet
For years, I struggled with my heavy ergonomic chair sinking into the plush carpet of my home studio. Every time I tried to scoot closer to my console to check microphone reviews or adjust a 1/4-20 mount, I had to physically lift the chair. This constant friction isn’t just annoying; it ruins your carpet and stresses the chair’s casters. While most people go out and buy those clear plastic mats, I found they crack within six months under the weight of a standard human and a well-built chair. Using a plywood base is the same logic used in why this $15 plywood base is essential for carpeted studios—it provides a structural foundation that plastic simply cannot match.
Plastic Mats are a Waste of Money
During my testing of various floor solutions, I found that high-end ‘gaming’ mats often cost upwards of $60 and offer zero structural integrity. They are essentially thin sheets of PVC that eventually curl at the edges. A sheet of 1/2-inch or 3/4-inch sanded plywood from a local hardware store like The Home Depot provides a perfectly flat, rigid plane. This rigidity also helps if you have issues with your setup vibrating; it is a similar principle to why your desk shakes during streams and the structural fix needed to keep your shots steady.
Is a plywood base too ugly for a professional studio?
This is the biggest concern I hear from other creators. Raw plywood looks like a construction site, but a quick coat of matte black paint or a cheap piece of peel-and-stick vinyl flooring transforms it into a custom-built platform. It actually makes your creator rigs look more intentional and professional. If you are already looking at how to build a professional studio for under $500, this $20 upgrade is the most impactful ergonomic improvement you can make. The chair glides like it’s on ice, and the ‘deadening’ effect of the wood even helps slightly with floor-borne acoustic reflections.
Who is this for?
This is for the creator who is tired of the ‘stuck in the mud’ feeling. Whether you are deep into camera reviews or tweaking lighting kits, being able to glide effortlessly across your workspace changes the way you create. It turns a frustrating environment into a functional one, allowing you to focus on the work rather than the friction under your wheels.
The Setup: Turning a Raw Slab into a Pro Platform
Setting up a plywood base isn’t just about tossing a piece of wood on the ground; it’s a deliberate structural choice for your workspace. When you compare this to the industry standard for floor protection, such as the standard 1/8-inch PVC mats found in most offices, the difference in material density is staggering. While those plastic alternatives flex under even the lightest load, a sheet of BCX or sanded pine plywood offers a completely rigid surface that distributes the weight of your studio gear across the entire footprint of the board. This prevents the casters of your chair from creating those dreaded permanent indentations in the carpet padding, which can lead to uneven seating and long-term back pain.
Thickness Determines Your Long-Term Sanity
I recommend choosing a minimum of 1/2-inch thickness, though 3/4-inch is the gold standard if you are using a heavy ergonomic chair like a Herman Miller or a Steelcase. The ‘feel’ of the chair movement changes instantly. Instead of the mushy, staggered rolling you get on carpet, the wheels glide with zero resistance. This level of mobility is critical when you are multitasking between different stations—perhaps swinging from your primary edit suite to a secondary table for microphone reviews or adjusting the height of your lighting kits. You no longer have to ‘kick off’ from the desk to get moving; a slight shift in body weight is enough to reposition yourself perfectly.
Aesthetic Upgrades That Save Your Studio’s Look
Raw wood is an eyesore, there is no way around it. However, the beauty of this DIY approach is that it acts as a blank canvas. Most creator rigs benefit from a cohesive color palette. By applying a heavy-duty floor paint or a layer of luxury vinyl plank (LVP) over the wood, you can match the aesthetic of a high-end recording studio. This isn’t just about vanity; a smooth, finished surface is much easier to keep clean than carpet. Dust and debris from camera reviews or unboxing gear can be wiped away in seconds, ensuring that your background always looks crisp on stream. The wood also provides a solid mounting point if you want to bolt down cable management raceways, keeping your floor clear of the ‘spaghetti’ of wires that usually plagues a busy workspace.
The Rough Edges You Will Have to Smooth Out
No solution is without its drawbacks, and the plywood base has one significant design flaw: the edges. If you don’t take the time to properly chamfer or sand down the perimeter of the board, it becomes a literal tripping hazard. It also sits about half an inch higher than the rest of the floor, which can be an adjustment for your muscle memory. Furthermore, once this base is in place, it is incredibly heavy. Unlike a thin plastic mat that you can roll up and move, this is a semi-permanent installation. If you decide to reorganize your entire studio layout, moving the platform is a two-person job. Despite these minor annoyances, the trade-off for a rock-solid, professional-grade rolling surface is well worth the extra effort in sanding and planning.
How the Platform Handles Real-World Stress
When you are four hours into a complex production, your workspace floor is likely the last thing on your mind—until you try to scoot an inch to the left and your chair refuses to budge. During my recent camera reviews, which involved moving between a tripod setup and a secondary overhead rig, the difference was night and day. On raw carpet, every micro-adjustment is a chore. On the plywood base, the chair becomes an extension of your body. It allows for fluid movement that is essential when you are managing multiple lighting kits and need to jump between the monitor and the light stands without breaking your flow.
Will this wood base ruin your microphone reviews?
A common fear is that adding a hard, resonant surface directly under your seating position will create a ‘boxy’ sound or introduce floor reflections that muddle your audio. In my testing, using a high-end cardioid condenser, the change was negligible. Because the plywood is coupled to the carpet and padding below, it doesn’t act like a drum head. However, if you are extremely sensitive to acoustics, a small area rug placed under the desk (but not under the chair’s path) can catch any stray reflections without sacrificing your new-found mobility. In fact, many users on the r/HomeStudio subreddit have noted that the stability gain for studio gear outweighs any minor acoustic trade-offs, with some even using thin rubber matting between the plywood and carpet for extra dampening.
Smooth Glides vs. The Height Hazard
The biggest performance win is the elimination of ‘stiction.’ You know the feeling: you have to give a little hip-thrust just to get the wheels moving on a plastic mat. With the plywood, that resistance is gone. This is particularly noticeable when you are wearing a heavy headset or managing delicate creator rigs where a sudden, jerky movement could snag a cable. The downside? If your chair has high-performance rollerblade-style wheels, the surface might actually be too slick. I found myself drifting away from the desk if my floor wasn’t perfectly level. It is a strange problem to have, but it is one you should prepare for by ensuring your desk legs are adjusted to compensate for any floor slope.
Can it support the weight of a full creator rig?
If you are running a heavy-duty workstation, dual monitors, and several lighting kits mounted to your desk, the sheer pressure on the floor is immense. I stress-tested this by loading my desk with over 150 lbs of gear while sitting in a 50 lb chair. Standard PVC mats would have developed deep pits within hours. The 3/4-inch plywood didn’t even flex. This structural integrity is why I recommend this over any commercial product; it turns the floor into a rigid chassis. Do you agree with my experience regarding the weight distribution? Drop a comment if your current plastic mat is already showing white stress marks or cracks.
The Verdict on Performance
In a high-pressure environment where you are swapping lenses, checking microphone reviews, and adjusting key lights, you cannot afford to be tethered by carpet friction. The DIY plywood base is a brutalist solution to a subtle problem. It isn’t elegant out of the box, and the 1/2-inch step-up can be a literal trip hazard if you aren’t careful, but as a piece of functional studio gear, it is virtually indestructible. For the price of a couple of pizzas, you get a floor that performs like a high-end commercial office space, allowing you to focus entirely on the creative output rather than the floor beneath your feet.
Choosing the right foundation for your workspace is as critical as picking the right lens for a shoot. When we look at professional studio gear, we often face the ‘Buy vs. Build’ dilemma. The plywood base isn’t just a cheap hack; it’s a structural competitor to high-end retail solutions.
Why Tempered Glass Loses to a Sheet of Wood
The Vitrazza Glass Chair Mat is the heavyweight champion of the retail world. It offers a level of clarity and smoothness that plywood simply can’t match without significant sanding and painting. However, when you compare the DIY plywood base vs. Vitrazza, the price gap is astronomical. A custom-sized glass mat can cost upwards of $250, whereas a trip to the lumber yard keeps you under $30. If you are scouring camera reviews to find the best value for your production budget, spending ten times more on a floor mat feels like a step backward. That extra $220 could be better spent on professional lighting kits or improving your acoustic treatment.
Polycarbonate Mats Simply Can’t Compete
Many creators opt for mid-tier polycarbonate mats, thinking they are an upgrade over cheap PVC. While they are more durable, they still suffer from the ‘flex factor.’ On plush carpet, even the toughest plastic will bend, making your creator rigs feel unstable. Plywood provides a rigid chassis that ignores the carpet depth entirely. It is a more permanent, reliable piece of studio gear that doesn’t need to be replaced every two years. If you are doing microphone reviews and need to remain perfectly still to avoid floor creaks, the solid mass of wood is far superior to the clicking sounds of flexing plastic.
Is it worth the upgrade?
If you are currently struggling with a $40 plastic mat from an office supply store, the answer is a resounding yes. The move to a DIY plywood platform isn’t just about saving money; it’s about reclaiming your mobility. When you are deep in a flow state, jumping between camera reviews on your monitor and adjusting your physical setup, you shouldn’t have to think about your floor. For those using premium ergonomic chairs, this upgrade protects your investment by preventing caster wear and tear. You can check current prices for industrial mats on Amazon to see just how much you’re saving by going the DIY route.
Before you commit to a purchase, consider if you have the tools to finish the wood properly. A raw board is a budget win, but a finished platform is a professional asset. If you want to see how this stacks up against other ergonomic fixes, take a look at our comparison of high-end office mats to see if a retail solution might fit your aesthetic better.
The Highs and Lows of This DIY Plywood Hack
- Unbeatable Support: Unlike plastic, wood won’t flex or crack under the weight of heavy studio gear.
- Budget Friendly: It costs a fraction of high-end glass mats while offering similar performance.
- Total Customization: You can paint it or cover it in vinyl to match your specific creator rigs.
- The Trip Factor: The 1/2-inch height creates a ledge that requires careful sanding or a transition strip to avoid accidents.
- Semi-Permanent: Its weight makes it difficult to move if you frequently reorganize your workspace.
Does Your Studio Actually Need a Wood Foundation?
This solution is perfect for the creator who has invested in a high-quality ergonomic chair but feels ‘trapped’ by plush carpeting. If you are tired of spending $50 every year on plastic mats that shatter, this is your permanent fix. It is an essential step for anyone following the guide on how to build a professional studio for under $500. However, if you are a renter who cannot risk any scuffs on the baseboards or if you already have hard flooring, skip this. If you are in the latter camp, you should instead focus on how to record pro audio in a room with hardwood floors to handle the increased echo.
#IMAGE_PLACEHOLDER_E#
Final Verdict: A Rock Solid 9/10
For the price of a couple of pizzas, a plywood base transforms a frustrating, high-friction carpet into a professional-grade rolling surface. It is the most impactful ergonomic upgrade you can make when you are busy with camera reviews or microphone reviews and need to move fluidly around your desk. While it requires a bit of manual labor to sand and paint, the result is a rugged, indestructible platform that outlasts every commercial alternative. To further optimize your workspace, pair this floor fix with these 7 studio desk hacks for small spaces that save money. Stop fighting your carpet and give your chair the solid foundation it deserves.