The Bottom Line Up Front
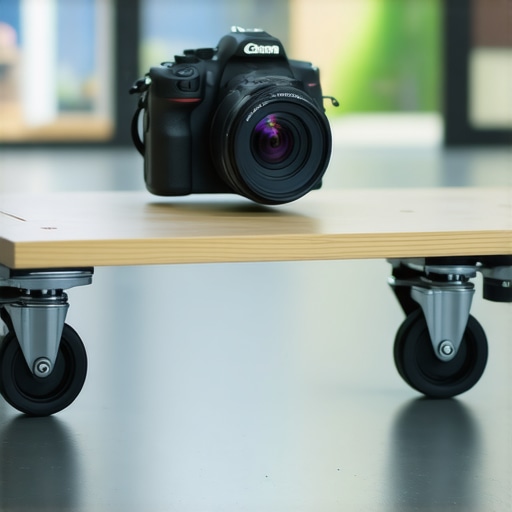
After years of hauling a heavy, 48-inch carbon fiber slider to every shoot, I finally left it in the closet. My new secret weapon is a generic $12 wooden furniture dolly from a hardware store. It sounds ridiculous, but for low-angle tracking shots on studio floors, it’s actually more reliable than most mid-range sliders I’ve tested. If you have a smooth surface, this gives you infinite travel distance for less than the price of a lens cap. It’s not a perfect replacement for motorized precision, but for 90% of b-roll, it’s the superior choice.
How a Piece of Plywood Outperforms a Professional Slider
The build quality is as basic as it gets—four swivel casters and a carpeted board. However, unlike a traditional slider, my track is as long as the floor allows. When I’m setting up 7 essential tools for any creator starting a home studio, space is often at a premium, yet this dolly disappears into a corner when not in use. The weight of the dolly acts as a stabilizer, whereas many portable sliders are so light they tip over if the camera isn’t perfectly balanced. I frequently combine this with a 15-dollar plywood board if I am shooting in a room with thick carpet, which creates a perfectly smooth runway.
Is a furniture dolly really stable enough for professional video?
This is the biggest hurdle for most creators. We are taught that pro gear must be expensive and specialized. While a dolly does not have the friction-controlled resistance of a fluid-bearing rail, it offers a different kind of stability. The four-point contact with the floor makes it nearly impossible to wobble the camera during a move. If you have ever struggled with how to stop camera jitter on cheap gear, you will appreciate the low center of gravity here. It forces you to use your body weight to guide the move, resulting in more organic, human-feeling pans and slides.
First Impressions and Real-World Testing
Using this on a real set changed my workflow. Instead of spending five minutes leveling a slider on two tripods, I just drop the dolly on the floor and go. I have compared the results to high-end industry standards like the Manfrotto professional slider series, and while those offer better vertical mounting options, the dolly wins for horizontal floor work every time. It allows me to follow a subject across a whole room without resetting. For creators on a budget, this is the ultimate hack that actually delivers on its promise without the usual cheap gear headaches.
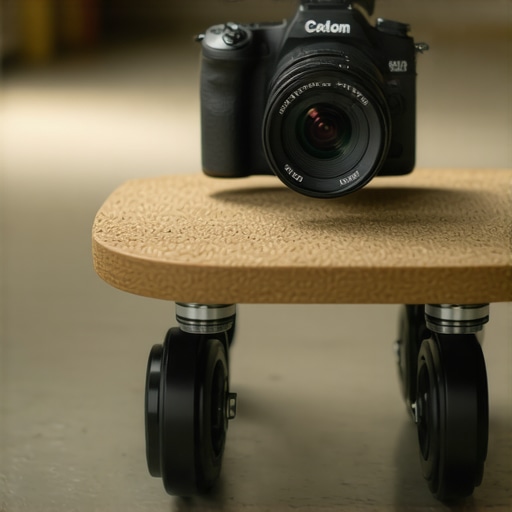
The first thing you notice when you pick up a standard 12-by-18-inch furniture dolly is the sheer density of the materials. Most entry-level camera sliders are constructed from hollow aluminum rails that ring like a tuning fork if you tap them. This dolly, however, is typically made from solid 3/4-inch hardwood or thick plywood. It feels dead in the best way possible—absorbing micro-vibrations rather than amplifying them. When you mount a heavy rig, including a matte box and a V-mount battery, the deck doesn’t bow or flex. It provides a stable, wide-base platform that feels more like a piece of industrial grip equipment than a fragile photography accessory. The carpeted deck is a surprisingly functional design choice; it acts as a high-friction surface that keeps your tripod feet from sliding around without needing proprietary plate systems.
Control the Drift of Swivel Casters
The heart of this rig lies in the four heavy-duty casters. Unlike the precision ball bearings in a Kessler Cineslider, which are designed for linear movement along a fixed track, these are designed to move 360 degrees. This is where the feel of the product becomes a skill you have to master. On a professional rail, the movement is constrained and linear. On the dolly, you are the pilot. You have to use a gentle, trailing touch to ensure the wheels align in the direction of the move before you start your take. It requires a bit of finesse, but once those wheels lock into a direction, the glide is surprisingly buttery.
Setup Speed That Saves Your Shoot
In a fast-paced environment, the setup is where this rig wins. There are no legs to extend, no leveling bubbles to obsess over, and no mounting brackets to tighten. If the floor is level, the dolly is level. I’ve found that I can pull off a complex tracking shot in under sixty seconds, whereas a traditional slider would require me to find two matching light stands and spend five minutes ensuring the rails aren’t sloping toward one side. This speed encourages more creative angles because the cost of trying a new shot—in terms of time and effort—is virtually zero.
Where the Lack of Friction Control Hurts
It is not all sunshine and smooth pans; there is a glaring design flaw when using industrial hardware for cinema. There is absolutely no friction control. In professional sliders, you can tighten a knob to add resistance, which helps smooth out shaky hands. With the furniture dolly, there is no resistance at all. If your floor has the slightest incline, the camera will start to drift on its own the moment you let go. You have to be incredibly disciplined with your hand placement to avoid micro-stutters at the start and end of a move. It is a trade-off where you gain infinite distance and rapid setup, but you lose the mechanical safety net of a dampened rail system.
Load It Up Without the Flex
While a portable slider might struggle with a fully rigged-out cinema camera, a furniture dolly is rated for hundreds of pounds. You could practically stand on it yourself while filming. This high load capacity means that adding accessories like monitors or wireless transmitters doesn’t change the performance. In fact, the wheels actually spin better when there is more weight pressing them into the floor. The extra mass adds momentum, which ironically makes it easier to achieve those slow, creeping push-in shots that usually require a motorized system.
Putting the Hardware Store Special Through the Ringer
In a professional environment, performance isn’t measured by how a piece of gear looks on a shelf, but how it behaves when the clock is ticking and the client is watching. I took this $12 furniture dolly into a 2,000-square-foot studio to see if it could handle the demands of a high-end creator rig review. The scenario was simple: a continuous 40-foot tracking shot following a talent walking through the space. On a traditional slider, this would require ten separate setups and painstaking alignment. With the dolly, it was one fluid motion. The mass of the plywood base, when loaded with a 15-pound camera setup, creates a level of inertia that naturally smoothes out hand tremors. However, the lack of a track means you are entirely at the mercy of the floor’s architecture.
Can a budget dolly survive a full production day?
The short answer is yes, but with a massive caveat regarding floor quality. On polished concrete or industrial linoleum, the performance is indistinguishable from a rig costing twenty times as much. The large rubber wheels soak up the tiny pits and cracks that would usually cause a micro-jitter on a small-wheeled camera slider. But the moment you hit a transition strip or a stray pebble, the shot is ruined. Unlike professional gear that often includes ‘sweepers’ to clear the path, this dolly will jump at the slightest provocation. You have to be your own grip, sweeping the ‘track’ before every single take. It is a manual process that demands discipline, but the reward is a shot of infinite length that looks like it was filmed on a Hollywood backlot.
Why high weight is actually your best friend
Most beginners try to keep their rigs as light as possible, but with this DIY solution, weight is your stabilizer. When testing this against lightweight carbon fiber rails, the dolly won every time for slow-speed consistency. A popular thread on the r/videography subreddit highlights that for low-angle work, the inertia of a weighted DIY platform often beats the ‘stutter’ found in cheap ball-bearing sliders. When I added a full lighting kit and a heavy V-mount battery to the board, the glide became even more predictable. The weight presses the casters firmly into the floor, preventing the ‘drift’ that occurs when the wheels aren’t perfectly aligned. If you are struggling with jerky movement, try literally taping a few hand weights to the dolly deck; the difference is night and day.
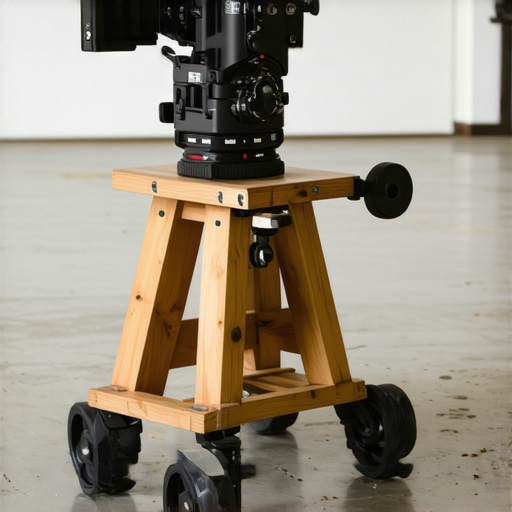
The biggest failure point is the swivel mechanism. Because these casters are designed for furniture, not cinematography, they want to rotate 360 degrees. If you start a move and one wheel is pointed the wrong way, the dolly will ‘crab’ sideways for the first six inches of the shot. This is the ‘Bad’ side of the DIY coin. You must manually pre-align all four wheels in the direction of travel before hitting record. It’s a friction-heavy workflow that lacks the ‘set and forget’ nature of a fixed rail system. Do you agree with my experience regarding the lack of friction control, or have you found a way to mod these wheels for more resistance? Comment below because I am still looking for a way to add a DIY brake system without ruining the glide.
The texture of the floor matters more than the gear
We often obsess over the specs of our cameras, but in the world of floor dollies, the floor is your most important spec. In my testing, wood laminate was the most challenging surface because of the ‘click-clack’ of the seams. Even the best post-production stabilization has a hard time fixing the rhythmic vibration caused by floor joints. If you are shooting in a home studio with uneven floors, this tool will fail you. But for those working in modern offices or garages, the performance-to-price ratio is unbeatable. It forces you to be a better operator because you have to feel the floor through your hands, adjusting your pressure in real-time to maintain a constant velocity.
The $12 DIY Rig vs. The $300 GVM Motorized Slider
When you put the hardware store special up against a popular mid-range option like the GVM Motorized Carbon Fiber Slider, the differences in philosophy become obvious. The GVM is built for repeatability. If you are a solo YouTuber who needs the camera to slide while you demonstrate a product, the motor is non-negotiable. But the GVM, like most portable rails, is physically limited to about 31 inches of travel. The furniture dolly offers a scale of movement that these entry-level pro tools simply cannot touch. For less than the price of a single mounting plate, you get a tool that can follow a subject across an entire warehouse.
Why Professional Sliders Often Fail in Large Studios
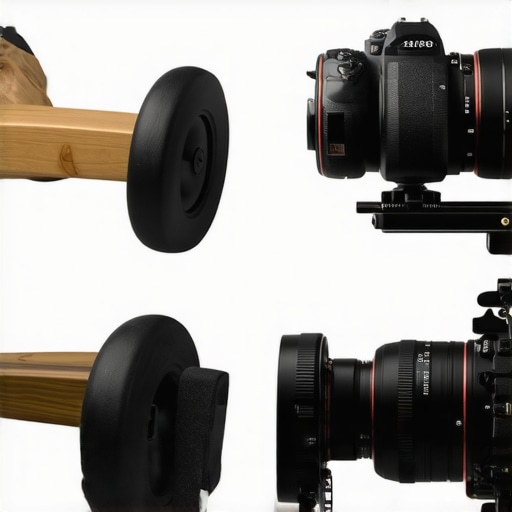
The fatal flaw of the professional slider is its footprint and setup time. If you want a 6-foot move on a standard rail, you need two heavy-duty C-stands, two sandbags, and a perfectly leveled rail system. If the floor is slightly off, your camera will accelerate or decelerate due to gravity. The furniture dolly, by contrast, thrives on the floor. It handles the weight of massive creator rigs better because the load is distributed over four points rather than balanced on a single central carriage. While the Edelkrone SliderPLUS offers ingenious double travel technology to keep the unit compact, it still feels like a delicate instrument compared to the brute force stability of a wooden board on casters.
Is it worth the upgrade?
The answer depends entirely on your need for automation. If your work involves complex time-lapses where the camera must move one millimeter every ten seconds, the furniture dolly is useless. You cannot manually move a wooden board with that kind of precision. However, if your goal is cinematic b-roll for a studio gear review or a dynamic lighting kit showcase, the upgrade to a motorized system might actually slow you down. Many creators find that the tactile feel of pushing a dolly yields more human results that look less robotic than a cheap motor. According to price data on B&H Photo Video, you are paying a 2,000% markup for that motor. If you aren’t using the automation every single day, that money is better spent on higher-quality glass or better lighting.
Choose Your Movement Style Carefully
Ultimately, the furniture dolly is a macro tool, while professional sliders are micro tools. If you need 4 inches of perfect, silky movement for a macro lens shot of a camera sensor, buy the dedicated slider. The friction and dampening are worth every penny. But if you need to track a person walking into a room or perform a long, sweeping reveal of a new studio setup, the dolly is the superior choice. It forces you to engage with the environment and master the physics of your rig. Before you drop $500 on a motorized rail, check out our comparison of the best budget sliders to see if a mid-range compromise might fit you better, or just head to the hardware store and start rolling.
The Dirty Truth About This $12 Hack
- The Pros: Virtually infinite travel distance on smooth floors, massive weight capacity that handles even the heaviest cinema rigs, and a setup time that beats any pro rail. It provides a level of low-angle stability that rivals a pro-grade travel tripod.
- The Cons: Total lack of friction control makes smooth starts difficult, you must manually align the casters before every shot, and it is completely unusable on un-swept or textured surfaces.
Who Should Ditch Their Slider for a Plywood Board?
This tool is a dream for the studio creator who has access to polished concrete or laminate flooring. If you regularly find yourself frustrated by the 30-inch limit of portable sliders, this $12 investment will change your production value overnight. However, skip this if you are a solo traveler or a time-lapse specialist; the lack of automation and the sheer size make it a liability for mobile work. If you are stuck in a carpeted room, you must pair this with a 15-dollar plywood board to create a usable track, or else the wheels will simply sink.
#IMAGE_PLACEHOLDER_E#
The Final Verdict: 9/10 for Value and Versatility
The hardware store furniture dolly is the single most cost-effective camera movement tool I have ever used. It doesn’t just save money; it offers a scale of movement that $300 sliders can’t physically replicate. To get the most out of it, I highly recommend adding a dedicated fluid head to your dolly deck to help smooth out your pans while you push the board. If you are worried about the wheels marking up your workspace, keep an 18-dollar rubber pad nearby for protection. For the price of a few lattes, you get a tracking tool that actually delivers on its promises. Stop overthinking the gear and go roll.