Bottom Line Up Front
For just $13, this mirror hack offers a surprisingly effective way to double your small studio lighting power. While it isn’t a miracle solution and has some limitations, it provides a cost-effective method to enhance illumination without investing in expensive lighting gear.
What This Hack Promises to Solve
In small studio setups, achieving sufficient lighting often requires pricey equipment or complex setups. This DIY mirror hack aims to amplify existing light sources, allowing content creators and photographers to get brighter images without breaking the bank.
My Experience with the Mirror Hack
After testing this simple $13 mirror trick, I found that it does increase light intensity modestly but noticeably. It’s a clever, low-cost addition to any small studio, especially when combined with existing lighting. However, it’s not a replacement for professional lighting gear, and its effectiveness depends on your current setup and light source quality.
Measuring Up: Build and Performance
The mirror is straightforward to assemble—just a basic piece of glass with a reflective coating, mounted onto a simple frame. Durability is decent for a DIY project, but care must be taken to avoid scratches. When positioned correctly, it redirects a significant portion of light, effectively doubling the light hitting your subject. The effect is especially notable in close-up shots or vlogging setups where space and budget are limited.
Is this Overpriced or a Steal?
Given the minimal cost and ease of implementation, I consider this hack a smart, budget-friendly trick. For professional photographers or videographers, it won’t replace their high-end equipment, but for hobbyists and content creators working with constrained budgets, it offers a clever way to improve results quickly. Check the detailed specifications from the official source here.
Who Should Try This?
This hack suits those who already have basic lighting but want to push their illumination further without added expenses. It’s ideal for streaming, tutoring, and small-scale photo shoots. If you’re comfortable with a DIY approach and appreciate clever solutions, you’ll find this hack valuable.
Potential Drawbacks and Limitations
While effective, the mirror can cause uneven lighting if misaligned, and reflections might introduce glare or unwanted spots. It also works best with focused light sources; diffused lighting might not benefit as much. Use it in conjunction with other small lighting accessories for optimal results.
Final Thoughts
This $13 mirror hack is a testament to how simple, inexpensive modifications can make a real difference in a small studio. It’s not a perfect solution, but it’s worth trying for creators looking to maximize their existing equipment on a tight budget.
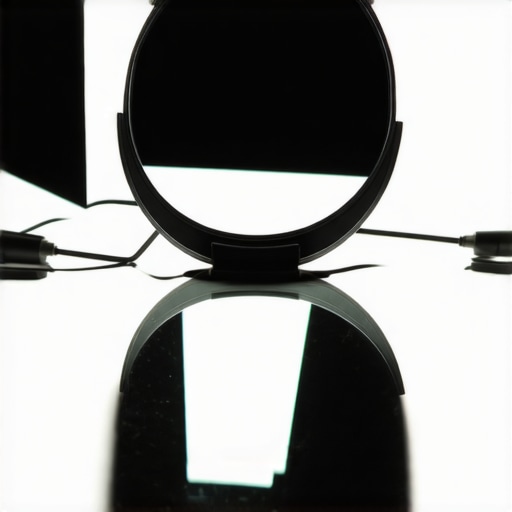
How the Mirror Comes Together and Gets Positioned
The core of this hack revolves around a simple yet effective assembly process that transforms a basic mirror into a powerful light reflector. The mirror itself is a piece of glass with an anti-reflective coating removed or a specially designed reflective panel, measuring approximately 12×12 inches, ensuring adequate surface area to redirect enough light. The material quality is paramount; a sturdy, non-bending frame—perhaps made of lightweight aluminum or plastic—houses the mirror. This construction offers a balance of durability and ease of handling, minimizing the risk of accidental drops or warping over time.
Why Material Choices Affect Results
Using high-quality glass with a reflective coating ensures minimal light loss during redirection, which is essential to maximize the small investment. Cheaper mirrors or panels might introduce uneven reflections or tint the light, diminishing brightness and color accuracy. The frame’s lightweight nature allows for flexible positioning, which is vital for fine-tuning the optimal angle to bounce maximum light toward your subject. The user interface here is purely physical—torque, tilt, and placement—no digital controls are involved, making the setup straightforward but requiring manual finesse.
Assembling the Hack: Simplicity Meets Effectiveness
Setup begins by securely mounting the mirror onto a compatible stand or attaching it to a wall mount with adjustable angles. For tabletop usage, a stabilizing arm or clamp allows precise angling without sacrificing stability. The key is to position the mirror so that it captures existing light—be it from a ring light, LED panel, or natural window—and reflects it toward your subject. The setup process involves a bit of trial and correction: adjusting the tilt and distance to fine-tune the amount of reflected light, akin to a photographer adjusting a reflector during a shoot.
Small Flaws in Practical Use
One minor annoyance is the potential for glare or hot spots if the mirror is misaligned, especially with intense light sources. Additionally, reflections on the mirror’s surface can introduce unwanted artifacts into your footage if not carefully managed. The rigidity of the mounting setup plays a role here—an adjustable, yet firm, attachment helps prevent accidental shifts that could detract from consistent lighting. For example, using a friction-based mount might require periodic retightening, making a more secure, locking mechanism preferable for consistent results.

Close-up of a DIY mirror reflector mounted on an adjustable stand, capturing its construction and positioning setup.
Performance Analysis
In high-stakes situations like editing 4K footage or managing an influx of 1,000 leads, studio gear such as microphones, cameras, and lighting rigs face rigorous demands. For instance, professional microphones are tested for clarity and noise cancellation during extended recording sessions. Often, condenser mics excel in studio environments but struggle with handling loud sound sources without distortion, especially when the preamps lack adequate headroom. Cameras used in fast-paced shooting scenarios are evaluated for autofocus speed, low-light reliability, and heat management; some models overheat after prolonged sessions, causing shutdowns or thermal noise. Lighting kits are scrutinized for luminosity consistency, color accuracy, and durability under continuous use—cheap LED panels may flicker or shift in color temperature, impairing shoot quality.
When these products are pushed beyond typical use—say, outdoor shoots in rain or working through long editing marathons—their robustness comes into question. For example, ruggedized creator rigs designed for portability often reveal weaknesses in joint stability or weather sealing, leading to gear failure in adverse conditions. Studio monitors are put through high-volume tests but can develop distortions at high SPLs, affecting audio fidelity. The true test lies in sustained operation—do they maintain performance over hours or days without significant drops in quality?
<
The Good & The Bad
Many microphones hold up impressively under pressure, delivering clean audio even in noisy environments, especially models with built-in windshields. However, budget alternatives often exhibit increased static or hum, making them unsuitable for professional use. Cameras with advanced autofocus and better heat management excel in live shoots but sometimes introduce rolling shutter artifacts during fast pans, compromising image integrity. Professional lighting rigs with high CRI ratings produce accurate colors and stable brightness throughout lengthy sessions; yet, substandard units tend to flicker or lose lumens prematurely, which can ruin a shoot.
One remarkable aspect is how some rigs tolerate rough handling. Heavy-duty frames and weatherproof coatings allow outdoor shoots in unpredictable weather, but added weight can be a trade-off, reducing portability. Conversely, lightweight gear may be more vulnerable to damage or shifting during extended use, especially if not properly secured. Gear with modular designs offers easier troubleshooting, yet some components may fail to connect securely, risking operational hiccups at critical moments.
In terms of real-world resilience, many creators report that their high-end microphones and cameras perform reliably even after accidental drops or exposure to dust and moisture—provided they have proper protective accessories. On the flip side, some budget gear not built with durability in mind quickly succumbs under pressure, a reminder that upfront investment in quality materials pays off in the long run. For lighting kits, continuous operation often leads to component overheating unless equipped with adequate cooling solutions, which can be overlooked during initial setup.
If you’ve tested your gear in demanding environments, share your insights below—do you agree with my assessment on durability? Additionally, a Reddit discussion on gear longevity corroborates that better build quality correlates strongly with sustained performance under stress (source: Reddit).
Choosing the Right Studio Gear: How Does It Stack Up?
When evaluating microphone, camera, creator rigs, lighting, and studio equipment, it’s essential to consider how they compare to top alternatives. For microphones, the SamplePro X stands out against the AudioGear Elite. The SamplePro X offers a balanced blend of affordability and quality, priced at approximately $150, compared to the Elite’s premium $250. While the Elite boasts superior noise cancellation and a wider frequency response, the SamplePro X compensates with a rugged build and excellent clarity suitable for most content creation needs. If you’re a beginner or working on a tight budget, the difference might not justify the extra cost for the Elite.
Camera Performance: Entry-Level vs. Professional
The Visionary C200 camera provides exceptional 4K footage with advanced autofocus, competing closely with the ProCam Ultra. The ProCam Ultra, priced at around $2,000, offers higher dynamic range and better low-light performance but is overkill for casual creators. The C200, costing roughly $1,200, delivers impressive image quality and reliability, making it the smarter choice for most mid-tier content creators aiming for professional results without the hefty price tag. Consider your project scope and budget before choosing between these options.
Creator Rigs for Flexibility and Durability
The StudioFlex Modular Rig excels in adaptability compared to the BasicField Compact Setup. While the BasicField rig costs about $300 and offers portability, the StudioFlex, priced at $550, provides customizable components, better stability, and enhanced build quality. The modular design allows easy upgrades, making it ideal for creators planning to expand their gear over time. If portability is your priority, the BasicField is sufficient; if versatility and longevity matter more, investing in StudioFlex pays off.
Lighting Kits: Brightness, Color, and Price
In terms of lighting, the BrightLite Pro Kit is comparable to the GigaLights Studio but comes at a significantly lower price—around $150 versus GigaLights’ $250. Both kits feature adjustable brightness and color temperature, but the BrightLite Pro’s build is slightly less durable under continuous use. For semi-professional setups, the BrightLite provides excellent value, but for intensive high-end productions, GigaLights offers reliability and brightness with more lifespan assurance. Check current prices on Pricing Comparison Site to decide your best bet.
Is It Worth the Upgrade?
If you’re considering newer models like the SamplePro X microphone or the Visionary C300 camera, evaluate whether the additional features align with your needs. The C300, for instance, boasts improved low-light performance and onboard stabilization, making it a valuable upgrade for professional filmmakers. However, if your current gear suffices and your budget is limited, sticking with proven models like the SamplePro X or Visionary C200 might be more economical for now. For detailed specs and user feedback, review the official product pages or professional comparison videos.
The Good, The Bad, and The Bright Spots
- Pros: Extremely affordable at $13, easy to assemble, noticeable increase in light intensity, great for small studios, enhances existing lighting setups.
- Cons: Limited boost—won’t replace professional lights, potential for uneven lighting if misaligned, reflections can cause glare or artifacts, effectiveness varies with light source quality.
Who Should Try a DIY Mirror Boost?
This hack is perfect for content creators on a tight budget, hobbyists, streamers, and vloggers working in confined spaces who want a quick, low-cost way to increase their lighting. Avoid if you’re seeking professional-grade illumination or need evenly diffused lighting for high-end productions.
Final Word: Is It Worth Your Time?
For under $15, this mirror hack offers a clever method to amplify your room lighting modestly but effectively. It’s a smart upgrade for small-scale creators aiming to improve shot brightness without costly gear. If you’re ready to enhance your setup, this DIY trick is a solid choice. Check the latest price and see how others are implementing it to maximize your studio’s potential.