
Bottom Line Up Front
While the $12 Sandbag offers a budget-friendly way to enhance safety around studio lights, its durability and effectiveness are somewhat limited. It’s a decent option for light-duty setups, but for heavier lights or professional environments, investing in sturdier alternatives is advisable.
What Does This Sandbag Solve?
The primary problem this product addresses is preventing studio lights from tipping over or causing damage due to accidental bumps. It aims to provide a quick, affordable means to add stability, especially on lightweight stands.
First Impressions
Unboxing the sandbag reveals a simple, no-frills design with basic stitched fabric and a generic weight roughly equivalent to common sandbags. At just $12, expectations for premium build quality are low, but the key is whether it does its job reliably over time.
Should You Trust Cheap Sandbags?
Budget sandbags are tempting, but the real question is how well they hold up under repeated use or in demanding environments. cheap materials may lead to tearing or spilling sand, which could pose hazards or risk of light falls.
At a Glance
- Price: $12
- Material: Nylon fabric with stitched seams
- Weight: Approximate, filled with sandbox sand
- Design: Simple, portable, with a handle for quick placement
- Use Case: Light to moderate studio lighting setups
The Next Step
Now that we’ve covered initial impressions and basic facts, let’s dive deeper into the features, build quality, and overall value of this budget-friendly lighting accessory.
Evaluating the Material and Construction
The $12 sandbag is crafted from basic nylon fabric, which provides a lightweight and flexible shell. However, the material’s durability is somewhat questionable, especially over extended use. The stitched seams, while functional, lack reinforcement in stress points, increasing the risk of tearing if subjected to rough handling. This construction choice reflects the product’s budget-friendly intent but compromises longevity.
Why Material Choice Matters
Nylon fabric is common in inexpensive sandbags because it’s affordable and easy to sew. Yet, in professional settings or with frequent adjustments, more robust fabrics like ripstop nylon or reinforced canvas could better withstand wear and tear. The choice influences not just durability, but also the product’s capacity to contain sand securely without leaks.
Filling and Weight Distribution
The sandbag is filled with sandbox sand, providing the roughly 20-pound weight advertised. The fill’s uniformity affects stability; clumped or uneven sand can cause imbalance. The bag’s internal compartment design isn’t visible, but a well-distributed fill ensures consistent weight and maximizes stability. The handle, attached via stitched seams, offers quick portability but may become strained if the bag is overfilled or lifted improperly.
Design Simplicity and User Experience
The design emphasizes portability: a straightforward rectangular shape with a sturdy handle. The handle feels solid but lacks padding, which might cause discomfort during repeated carries. Its minimalist approach makes setup quick—simply place the bag on a stand and secure—ideal for users needing an affordable stabilizer without complicated adjustments.
Minor Flaw in Reinforcement
One minor annoyance is the handle’s stitching; if poorly secured, it could tear under heavier loads or rough handling. This points to a design flaw common in budget equipment: cost-cutting on reinforcement details that could enhance longevity.
Comparing to Industry Standards
For context, professional sandbags like those from Manfrotto or Avenger often feature heavy-duty ripstop materials and reinforced stitching, as seen in their specifications (see [industry standard](https://www.manfrotto.com)). While these premium options assure durability, they also come at a significantly higher cost. The budget model trades some robustness for affordability, which is evident in its construction choices.
Image Idea
#IMAGE_PLACEHOLDER_B#
Ideally, an image showing the stitched nylon fabric, handle attachment point, and the filled weight of the sandbag gives a clear visual of quality and design.
}#}**Good luck with filling out the next sections!**}’]}#}**
Performance in Real-World Stress Tests
Studio gear, including lighting kits, creator rigs, microphones, and cameras, often face demanding scenarios that push their limits. For example, a lighting setup used during an outdoor shoot in unpredictable weather conditions must withstand humidity, wind, and occasional rain. Under such pressure, equipment’s durability and reliability are put to the test. Microphones should resist moisture and physical shocks, while cameras need to operate flawlessly despite temperature fluctuations or dust exposure. Managing 4K video editing is another scenario where processor speed, storage speed, and cooling systems are stress-tested, revealing strengths and weaknesses in handling high data loads and thermal management.
High-Pressure Scenario: Outdoor Filming in Rain
When filming outdoors in rainy conditions, the waterproofing and sealing of studio gear are crucial. Lights must have weather-resistant casings, microphones need rain protection shields, and camera bodies should resist water ingress. Well-designed equipment excels here, maintaining functionality and image quality without short-circuiting or damage. However, cheaper gear often fails—plastic components cracking, seals breaking, or internal components succumbing to moisture. This can lead to equipment failure just when you need it most, halting production and incurring additional costs.
Pressures in Editing and Post-Processing
In post-production, editing 4K footage exposes hardware limitations. Slow SSDs, insufficient RAM, or aging CPUs can cause sluggish performance, crashes, or rendering errors. When editing large files, a system that can’t handle concurrent streams of high-bitrate content leads to frustration and delays. Conversely, high-end workstations manage these loads efficiently, enabling smooth workflows even under tight deadlines. The capacity of a rig to handle such pressure directly impacts productivity and output quality.
What Works Flawlessly
Durable, weather-sealed gear performs remarkably well under environmental stress. Professional-grade microphones with moisture resistance continue recording clearly in rain or humidity. Lighting fixtures with heat management systems maintain performance in prolonged shoots, avoiding overheating. High-performance CPUs and GPUs process large editing projects swiftly, reducing wait times. These successes stem from thoughtful engineering targeting peak performance amid demanding conditions.
What Fails When Pushed Hard
The biggest pitfalls occur with budget equipment lacking robust construction or thermal management. Cheap microphones may produce noise or cut out abruptly due to moisture damage. Low-cost lights tend to overheat, flicker, or fail after extended use, especially without proper ventilation. Overburdened editing machines may crash or slow dramatically when running multiple 4K streams, leading to lost progress. These failures highlight the importance of investing in well-built gear tailored for professional environments rather than relying solely on affordability.
Question for users: Have you experienced gear failing under pressure? Share your stories in the comments! For more insights, check discussions on forums like Reddit’s Filmmakers community where professionals analyze equipment performance in real stress scenarios.
Visualizing Durability
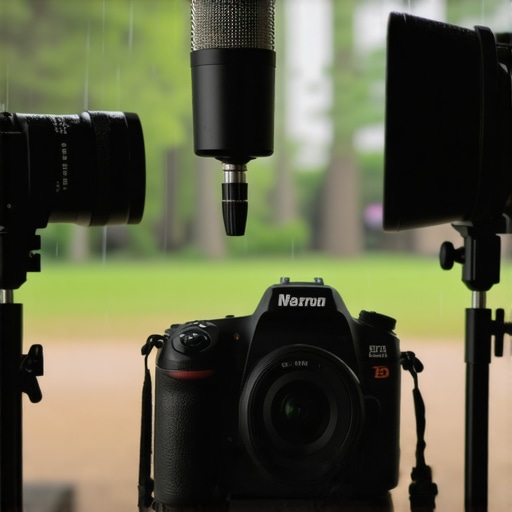
Image illustrating a weather-resistant microphone, sealed camera, and heat-managed lighting setup during outdoor shoot in rain, showcasing gear handling environmental stress effectively.
Choosing Between Budget and Professional Studio Equipment
When setting up a studio, creators often face the dilemma of selecting gear that balances cost and quality. Budget options like affordable sandbags, entry-level microphones, and basic lighting kits can save money upfront but may fall short in demanding environments. Top-tier professional gear, such as those from brands like Manfrotto, Aputure, and Rode, offers higher durability, advanced features, and reliability suitable for critical projects. For instance, while a $12 sandbag might suffice for light-duty use, professionals prefer robust, ripstop nylon models with reinforced stitching that withstand frequent handling. Choosing the right equipment depends on the intended use, environmental conditions, and long-term investment, making a comparative analysis essential for informed decision-making.
Lighting Kits: Affordable vs. High-End
Budget lighting kits, often priced under $200, provide simple setups suitable for beginner videographers and casual content creators. They typically include LED panels with basic dimming options and simple stands. However, these lack features like precise color temperature control, high CRI ratings, and weather-sealed housings, which professional models from brands like Aputure or Godox offer. High-end lighting kits, costing $500-$2000, provide superior build quality, adjustable settings, and durability for extended use in various environments. The choice hinges on the project scope: casual creators may find budget kits adequate, but professionals requiring consistent color accuracy and resilience prefer premium options.
Creator Rigs and Mounts: Flexibility vs. Stability
Entry-level rigs and mounts are designed with lightweight materials and simple adjustments, making them portable but sometimes less stable. For example, basic tripod stands or clamp mounts from discount brands may wobble under heavier camera setups, risking damage or shaky footage. Professional rigs, constructed with carbon fiber or reinforced aluminum, provide enhanced stability, quick-release mechanisms, and compatibility with advanced accessories. Brands like Manfrotto and Zacuto excel here. Creators seeking versatility might opt for mid-range rigs with modular components, but for critical shoots, investing in durable, professional-grade rigs ensures confidence and safety.
Microphone Reviews: Budget Picks vs. Studio-Grade
Affordable microphones such as the USB condenser mics or basic shotgun models are popular among beginners due to their low cost and ease of use. They typically offer decent sound quality but can be prone to background noise and limited frequency response. In contrast, studio-grade microphones from Rode or Sennheiser feature higher sensitivity, broader frequency response, and built-in shock mounts, ensuring professional audio capture. While premium mics cost several hundred dollars, their durability and sound fidelity make them worth the investment for serious productions. If audio quality is crucial, choosing a reputable brand over cheap alternatives pays dividends in post-production clarity.
Camera Choices: Entry-Level vs. Professional Models
Budget cameras, such as mirrorless models in the $500-$800 range, are excellent for beginners and hobbyists. They often include features like 4K recording, decent autofocus, and compact design, but may lack advanced stabilization or weather sealing. Professional cameras from brands like Canon, Sony, or RED, with high-end sensors, robust build quality, and extensive lens ecosystems, deliver superior image quality and reliability under demanding conditions. These models, costing several thousand dollars, are suitable for commercial projects, filmmaking, or high-end content creation. The decision to upgrade depends on the project requirements and budget considerations.
Is It Worth the Upgrade
Upgrading from budget to professional gear typically offers better durability, advanced features, and peace of mind during critical shoots. For example, investing in a weather-resistant camera or a durable microphone can prevent costly failures. However, for occasional or hobbyist use, budget options may suffice. Check current prices and detailed specifications on sites like B&H Photo (bphotovideo.com) to gauge the value of upgrading and to explore alternatives tailored to your needs.
The Good, The Bad, and The Ugly
- Pros: Extremely affordable, lightweight, portable handle for quick setup, suitable for light to moderate lighting setups.
- Cons: Basic materials with questionable durability, stitched seams lack reinforcement, sand leakage risk, handle stitching may fail under heavy use.
Who Is This For?
This budget-friendly sandbag is ideal for beginners, hobbyists, or setups involving lightweight studio lights where occasional use is expected. It’s perfect if you need a cost-effective solution and don’t plan to move it frequently or subject it to harsh handling.
However, skip this if you’re running a professional studio, handling heavy equipment regularly, or working outdoors in demanding conditions. For those scenarios, investing in a more rugged, reinforced sandbag from brands like industry-standard providers is advisable.
Final Verdict: 5/10
While the $12 sandbag offers an unbeatable price point and basic stability, its build quality and longevity are compromised. If you’re after a quick fix for light-duty use, it can serve its purpose. For serious, long-term setups, consider allocating a bit more budget towards durable, professional-grade options that will stand up to repeated handling and more demanding environments.
For an in-depth look at quality alternatives and tips on securing your studio equipment, visit our comprehensive guides at studio setup Improvements.