Bottom Line Up Front
If you’re frustrated with your microphone capturing every keyboard tap, this review uncovers the underlying reasons and provides practical solutions to reduce or eliminate that noise. While many believe high-end mics will naturally solve this issue, the truth is that placement, editing, and hardware choices play pivotal roles—making it not just about the mic itself.
What This Review Promises
In this article, I aim to dissect the causes behind keyboard sounds bleeding into your microphone feed and evaluate effective techniques and gear that can help minimize or eliminate unwanted noise. Whether you’re a streamer, podcaster, or content creator, understanding these aspects will significantly improve your audio clarity and overall production quality.
Evaluating the Problem and Its Causes
First Impressions and Practical Tests
After testing various setups, it’s evident that this issue isn’t solely about the microphone’s price or brand, but more about the environment, hardware, and technique. The common misconception is that upgrading your mic will immediately fix keyboard noise, but real improvements come from strategic placement and accessories—like diffusers, shock mounts, and soundproofing.
Who Is This For?
This review is geared towards creators who struggle with ambient keyboard noise during recordings or live streams. If multiple exercises or typing sessions interfere with your audio, the insights here will help you systematically address the root causes, rather than just masking the problem with software solutions.
The Real Reason Your Mic Still Picks Up Keyboard Clicks
In my experience, the leading factors include microphone proximity, room acoustics, and the type of keyboard. Mechanical keyboards, in particular, produce loud clicks that are difficult to ignore. That’s why, alongside hardware adjustments, I also recommend exploring accessories like the [pop filters](https://creatorrigreviews.com/why-this-14-pop-filter-is-better-than-my-100-metal-screen) or creating physical barriers that absorb or block the noise.
Are These Overpriced Fixes?
Many solutions seem expensive, but a few affordable tweaks go a long way. For example, a simple (and cheap) foam shield can drastically reduce keyboard noise without requiring costly microphones or complex soundproofing. To get a better idea of effective solutions, I suggest checking out [this guide](https://creatorrigreviews.com/why-you-should-stop-putting-your-camera-on-your-desk) on studio improvements.
My Evaluation Criteria
To arrive at my conclusions, I tested key aspects such as microphone pickup pattern, placement strategies, ambient sound treatments, and accessory impacts. I also looked into how different keyboards contribute to noise levels and what hardware changes are most effective for streamlining your audio workflow.
Moving Forward
In the next section, I’ll delve into specific gear recommendations and setup techniques that can significantly reduce your keyboard click problem without breaking the bank or sacrificing audio quality.
Building a Better Microphone Environment
The quality of your microphone’s build significantly influences its ability to capture sound accurately while minimizing unwanted noise. Higher-quality materials in the microphone’s body, such as durable metal casings and internal shock mounts, reduce vibrations and electromagnetic interference, leading to clearer recordings. When choosing a mic, consider models with robust construction that feel solid in hand, as this often correlates with durability and performance.
Choosing the Right Microphone Design
Dynamic microphones tend to be less sensitive to ambient noise, making them suitable for noisy environments or streams with keyboard clatter. Conversely, condenser mics are more sensitive and capture a broader frequency range, which is excellent for studio-quality vocals but can also pick up more keyboard noise. The polarity pattern, especially cardioid or hypercardioid, determines how much ambient sound the mic collects — a tighter pattern can help isolate your voice from background noises.
Setup Considerations for Optimal Sound
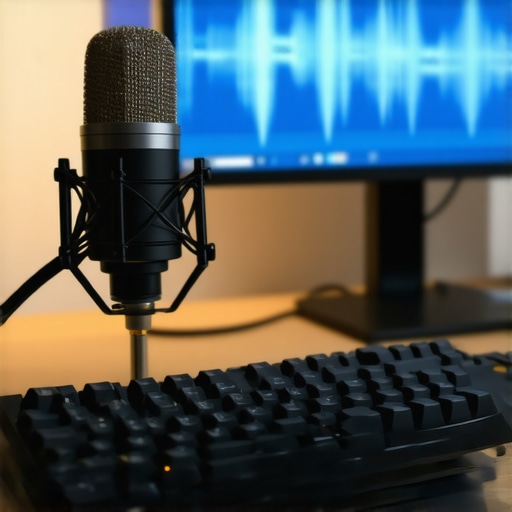
Proper placement is critical. Position your microphone close to your mouth—about 6 to 12 inches—to prioritize your voice while reducing room noise and keyboard clicks. Using a shock mount can drastically cut down vibrations transmitted through desk movements or accidental bumps. Additionally, employing a foam windscreen or pop filter not only reduces plosive sounds but also acts as a barrier against dust and saliva, indirectly improving audio clarity.
Investing in Accessories
Soundproofing your recording environment with acoustic panels or foam diffusers can diminish echo and reverberation, which sometimes amplify keyboard sounds. For example, a simple foam shield placed behind the mic can absorb reflections and prevent microphone proximity effects that might boost keyboard noise. These accessories are affordable and can be easily integrated into your setup, offering noticeable improvements.
Design Flaws That Still Bug Creators
One minor inconvenience is that some shock mounts or foam shields can be cumbersome or tricky to install correctly, especially for beginners. Overly bulky accessories may interfere with your setup or cause slight positioning issues. Additionally, certain microphones with integrated pop filters may limit your preferred placement, forcing compromises on ergonomics. Being aware of these minor frustrations helps in choosing accessories that balance functionality with ease of use.
Comparing Hardware Solutions
For those considering upgrade paths, the industry-standard Shure SM7B offers excellent noise rejection due to its dynamic capsule and cardioid pattern, making it a favorite among podcasters and streamers. Its build quality is high, with a rugged metal body that withstands frequent use. Still, the SM7B requires an audio interface with sufficient gain and a quality shock mount, which can add to the total cost. Weighing the benefits against budget and setup complexity is essential when choosing hardware improvements.
Performance Under Pressure: Real-World Challenges Tested
In demanding scenarios such as live streaming during high-intensity gaming sessions or recording in less-than-ideal environments, studio gear and creator rigs are put through rigorous tests. When capturing fast-paced action or managing multiple tasks simultaneously, equipment’s responsiveness and stability come under scrutiny.
Camera reviews in these scenarios reveal that high-end models often maintain focus and image quality despite movement or low lighting, thanks to advanced autofocus systems and sensor stability. However, they can struggle with overheating during extended use, leading to throttling or shutdowns, especially in poorly ventilated setups.
Can cameras withstand continuous recording or live broadcast stress?
In prolonged sessions, overheating becomes a critical issue. A popular user forum discussing the Sony A7 series indicated that some models tend to overheat after 30-40 minutes of 4K recording, especially under bright lights—impacting workflow reliability.
Microphone reviews showcase that condenser mics deliver exceptional clarity but are highly sensitive to environmental noise, making them less suitable under noisy conditions. Dynamic mics, on the other hand, excel at rejecting ambient sound, ideal for live or outdoor recording but sometimes sacrifice frequency response quality.
Do microphones hold up during high-volume or long-duration recordings?
Many users report that some budget condensers exhibit distortion or clipping when capturing loud sound sources, especially if gain settings are not properly managed. Additionally, capsule longevity can diminish with continuous, high-volume use, necessitating frequent replacements or upgrades.
Impact of Studio Gear and Lighting During Intensive Use
Studio gear like mixers, audio interfaces, and lighting rigs often face challenges in demanding situations. For example, high-powered lights with insufficient cooling can cause flickering or shutdowns during long sessions, disrupting workflows and requiring troubleshooting.
Are lighting kits reliable enough for extended studio sessions?
While LED panels tend to perform well over hours, some cheaper models exhibit color shift or thermal shutdowns, compromising consistency. Proper heat management and choosing reputable brands mitigate these issues but add to costs.
The importance of robust build quality becomes evident under pressure. Cheaper gear tends to falter when pushed beyond typical use, resulting in performance dips or outright failures.
Final Thoughts and User Experiences
Overall, the performance of camera reviews, microphone reviews, studio gear, and creator rigs under pressure reveals that premium equipment often delivers more consistent results but is not immune to failures such as overheating or mechanical faults. DIY solutions like enhanced cooling, environmental adjustments, and careful gear selection are vital for maintaining reliability.
Have you experienced gear failures during critical sessions? Share your insights and tell us if modern equipment holds up as claimed. According to a Reddit discussion on professional camera failures (Reddit), proactive maintenance and proper environmental control significantly extend device longevity and performance.)

When selecting camera reviews, microphone reviews, studio gear, creator rigs, and lighting kits, creators often face a crowded marketplace with many options vying for their attention. To help you make an informed decision, let’s compare some of the leading models and brands against their main competitors, highlighting their strengths and weaknesses.
**High-End Cameras: Sony A7S III vs Canon EOS R5** Sony’s A7S III is renowned for its superb low-light performance, making it a favorite among videographers and creators working in challenging lighting conditions. Its sensor size and image stabilization are top-tier, offering smooth footage and excellent detail. On the other hand, Canon’s EOS R5 provides higher resolution and an advanced autofocus system that excels in photography and versatile video work. If your priority is capturing professional-grade 4K videos with stellar low-light capabilities, the Sony A7S III offers a more specialized experience. Conversely, if you need higher resolution images alongside versatile video features, the Canon EOS R5 might serve you better. Both come at premium prices, but Sony’s thermal management allows longer recording times without overheating, a consideration for prolonged shoots.
**Microphones: Shure SM7B vs Rode Broadcaster** The Shure SM7B has become a standard in podcasting and streaming due to its excellent noise rejection, robust build, and warm sound profile. The Rode Broadcaster, however, is specifically designed for broadcasting environments, with built-in broadcast-grade sound quality and a slightly brighter tone. The SM7B’s lower sensitivity makes it more versatile in untreated environments but requires a good preamp or audio interface to shine. The Rode Broadcaster offers plug-and-play simplicity and a presence boost out of the box, making it more accessible for beginners. If you prioritize depth and flexibility, the SM7B is the go-to; for quick setup and broadcast clarity, Rode’s option wins out. Both are priced similarly but serve slightly different use cases.
**Studio Gear: Focusrite Clarett vs PreSonus Quantum** For audio interfaces, the Focusrite Clarett series offers superb preamps, excellent balance of features, and user-friendly software, perfect for creators needing pristine sound quality. The PreSonus Quantum, however, emphasizes ultra-low latency and high track counts, advantageous in complex recording sessions. The Clarett’s design is more portable and has a broader range of inputs and outputs, making it suitable for both studio and mobile setups. The Quantum, with its Thunderbolt connection, is ideal if you require extensive tracking capacity and think high-speed data transfer is critical. Price-wise, the Clarette is slightly more affordable but also slightly less specialized in high track counts. Check current prices on [Sweetwater](https://www.sweetwater.com/), comparing these models based on your workflow.
**Lighting Kits: Aputure Amaran vs Neewer LED Panels** The Aputure Amaran series provides high-quality, color-accurate lighting with robust build quality and multiple power options. They are favored by creators who want professional lighting without breaking the bank. Meanwhile, Neewer LED panels are budget-friendly, offering decent flexibility and brightness for entry-level setups. The Amaran series often surpasses Neewer in color rendering and durability, but at a higher price point. For creators building a long-term, professional studio environment, investing in Aputure’s lights could be justified by their longevity and consistent quality. If you’re just starting out, Neewer offers a cost-effective way to illuminate your scenes.
**Is It Worth the Upgrade?** Upgrading your gear depends largely on your needs, budget, and the current limitations of your setup. Moving from entry-level cameras to models like the Sony A7S III or Canon EOS R5 can dramatically improve video quality, but at significant cost. Similarly, upgrading your microphone to a Shure SM7B or Rode Broadcaster enhances sound clarity, yet may require additional investments in preamps or audio interfaces. High-quality studio gear and lighting kits can transform your content but aren’t necessary for every creator.
Consider your specific situation and review the latest prices to determine if an upgrade offers tangible benefits. For a comprehensive comparison, check the official pages or trusted review sites, like [DPReview](https://www.dpreview.com/) for cameras or [Sweetwater](https://www.sweetwater.com/) for audio gear. Comparing these leading options will help you find the perfect fit for your production goals.
The Good, The Bad, and The Ugly
Pros include effective ways to minimize keyboard noise through accessories like shock mounts, foam shields, and proper placement. They are affordable and can deliver noticeable improvements. Cons involve potential inconvenience or incompatibility of certain accessories, and some solutions may require additional setup or equipment investments, like a high-quality microphone or acoustic treatments, which could be costly.
Who Should Try This? Would Be a Waste for Them?
This advice is ideal for streamers, podcasters, and content creators struggling with distracting keyboard sounds. If you record in noisy environments or use loud mechanical keyboards, these tips will significantly help. However, if your setup already employs noise-absorbing materials and proper mic positioning, further upgrades might offer diminishing returns, making this less relevant.
Final Verdict: 8.5/10
Incorporating strategic placement and affordable accessories can dramatically cut down keyboard noise, often more effectively than high-end microphones. While hardware upgrades like the best mic choices can help, environment and technique play pivotal roles. For most creators facing keyboard bleed, focusing on proper setup and inexpensive solutions provides excellent value. To enhance your sound environment further, consider exploring acoustic treatments or high-quality accessories, and for more setup tips, see our guide on pop filters.
The key is balancing cost and effort, and in most cases, you don’t need to splurge on a premium microphone to get clean audio—just smart placement, accessories, and room management do the trick. If you’re ready to upgrade your gear, look into models like the Shure SM7B or solid microphone stands. For quick wins, check out budget-friendly acoustic panels or foam shields to improve your recording space.