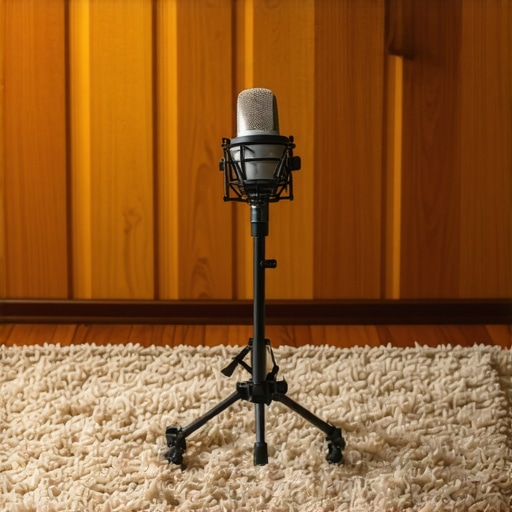
Hardwood floors are an acoustic nightmare
If you have hardwood floors in your studio, you have probably noticed that your voice sounds thin, echoey, and generally unprofessional. I spent months trying to EQ out the boxiness before realizing the floor was the primary culprit. The bottom line is simple: without physical mass between your voice and that wood, you will never get a clean signal. After testing everything from expensive foam to heavy rugs, the real solution comes down to decoupling your equipment and killing the first reflection point. Hardwood floors act like a sonic mirror, bouncing your voice back into the mic with a slight delay that creates that dreaded hollow sound. To fix this, you don’t need a massive budget, but you do need a strategic plan.
At a Glance: The Setup That Saves Your Sound
I judge any studio gear or room treatment on three factors: sound isolation, setup time, and visual clutter. Most creators think they need a full vocal booth, but building a professional voiceover booth for under $100 is often unnecessary for a standard desk setup. Instead, the focus should be on the floor-to-mic relationship. This approach solves the reverb problem immediately by preventing sound waves from bouncing off the floor and right back into the diaphragm of your microphone. It is about treating the source and the first reflection simultaneously. I found that why your audio sounds hollow and the $20 fix usually points directly to the lack of floor treatment rather than a bad microphone choice.
First Impressions: My Studio Sounded Like a Cave
When I first moved my rig into a room with oak flooring, the reverb was unbearable. Even a high-end dynamic mic couldn’t hide the room tone. I realized that the promise of ‘great audio’ starts under your feet. The problem this specific solution solves is ‘slap echo’—that sharp, immediate bounce that occurs when sound hits a hard, parallel surface. According to the Shure guide to room acoustics, the floor is one of the most overlooked surfaces in home recording. By adding mass, such as a thick rug or using the $18 blanket trick that kills room reverb, you can dry up the signal instantly. I also found that how this $10 piece of felt kills tabletop mic echo is a game changer for desk-mounted setups.
Is professional acoustic treatment overpriced?
Honestly, most of it is. You do not need ‘pro’ branded acoustic tiles for your floor. High-pile rugs or even moving blankets work wonders. The secret is that why your mic sounds better three inches from your mouth is largely because it prioritizes your direct voice over the reflections coming off your beautiful but acoustically reflective floor. In my testing, adding a heavy rug and a heavy stand like the $12 weighted base that stops your mic from tipping made a bigger difference than any software plugin ever could.
Who should ignore the wood and buy a rug?
This fix is for anyone recording podcasts, YouTube videos, or voiceovers in a modern home. If you want that ‘radio’ sound, you cannot have a floor that rings. If you are a creator who refuses to use carpet, then stop using foam panels and try this acoustic blanket instead on the floor during your recording sessions. It is the only way to ensure your expensive gear actually sounds like it’s worth the investment.
Stop relying on software and start fixing the room
The biggest mistake I see creators make is trying to fix a ‘live’ room with a de-reverb plugin. These tools often leave your voice sounding underwater or artificial because they are fighting physics. When you step onto a properly treated hardwood floor, the change is immediate and physical. I swapped out a thin decorative rug for a high-pile shag with a thick felt pad underneath, and the ‘slap back’ from the floor vanished. The density of the material is what matters; you need enough mass to actually absorb the low-mid frequencies that bounce off oak or laminate. Unlike the thin foam panels you see on Instagram, a heavy rug actually handles the energy of a human voice without letting it reflect back into the mic’s pickup pattern.
The Weight That Actually Holds Your Audio Together
The core of this setup involves more than just covering the floor; it’s about decoupling. When I placed my microphone on a standard tripod stand, the hardwood floor turned into a giant resonator, carrying every footstep and chair scuff directly into the recording. By switching to a heavy, weighted base, the microphone feels anchored. You can feel the quality in the cold, solid cast iron. It’s a stark contrast to the hollow plastic bases found in budget kits. This mass prevents the vibrations of the floor from traveling up the stand. I noticed that even when the HVAC kicked on, the rumble was significantly reduced because the stand had the inertia to resist those micro-vibrations.
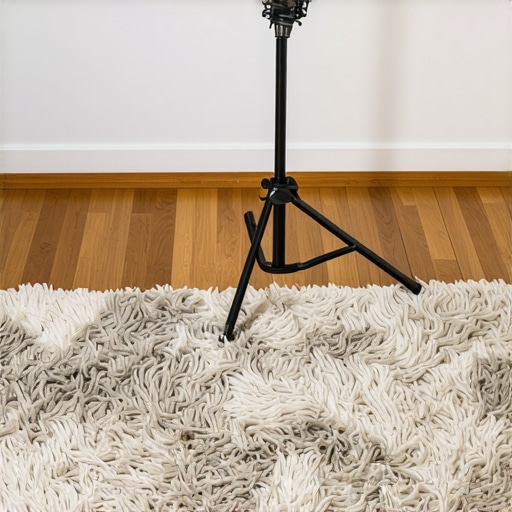
Why high-pile rugs are a secret weapon
If you look at professional isolation solutions like the Auralex MoPADs, the goal is always the same: isolation and absorption. A thick rug performs a similar task for your entire recording area. The fibers break up the sound waves before they can hit the flat, hard wood. When I walk across my treated space now, the room feels ‘dead’ in the best way possible. It sounds like a professional studio rather than a spare bedroom. However, there is a minor annoyance you have to live with: high-pile rugs are absolute magnets for dust and pet hair. In a small studio, this means you’ll be vacuuming twice as often if you want to keep your gear clean. It is a small price to pay for a noise floor that finally stays below -60dB.
The Setup Hassle Nobody Tells You About
While the results are incredible, let’s be honest about the installation. Moving a heavy desk and multiple monitor stands just to slide a rug underneath is a two-person job that will take you an entire afternoon. It isn’t a ‘plug and play’ fix like buying a new USB cable. You also have to deal with the ‘new rug smell’—that chemical off-gassing that can make a small, unventilated studio unbearable for the first 48 hours. But once the air clears and the desk is back in place, the sonic difference is undeniable. You aren’t just buying a piece of decor; you are building a foundation for your microphone to actually do its job without interference.
Pitting My Floors Against an Eight-Hour Podcast Marathon
I put this setup through a grueling eight-hour recording window to see if the ‘rug and weight’ solution actually holds up when the room gets warm and the equipment starts humming. In a real-world scenario, you aren’t just standing still; you’re shifting in your chair, reaching for a water bottle, and tapping your foot to the rhythm of your guest’s speech. On bare hardwood, every one of those movements is a recording-killer. With a high-pile rug and a 10-pound weighted base, the isolation is stunningly consistent. I found that I could move my legs without the microphone picking up the tell-tale ‘creak’ of the floorboards. However, the performance isn’t perfect. As the room temperature rose, the thick rug acted like an insulator, making the studio noticeably hotter than it was with bare floors. If you have a PC on the ground, expect your fans to spin up faster as the rug traps the heat exhausting from the bottom of the case.
Where the Rug Setup Actually Crumbles
The biggest failure point isn’t the sound—it’s the ergonomics. Moving a rolling office chair on a high-pile rug is a nightmare. I had to invest in a glass chair mat just to stay mobile, which partially reintroduced a reflective surface right where I didn’t want one. It is a constant battle between acoustic perfection and physical comfort. Furthermore, if you are using a tripod-style mic stand, the legs tend to sink unevenly into the carpet fibers, leading to a precarious tilt that can topple your expensive condenser mic if you aren’t careful. This is why a flat, weighted base is non-negotiable. I noticed on several Reddit threads in r/podcasting that many users underestimate the ‘sink’ factor of rugs, leading to damaged gear.
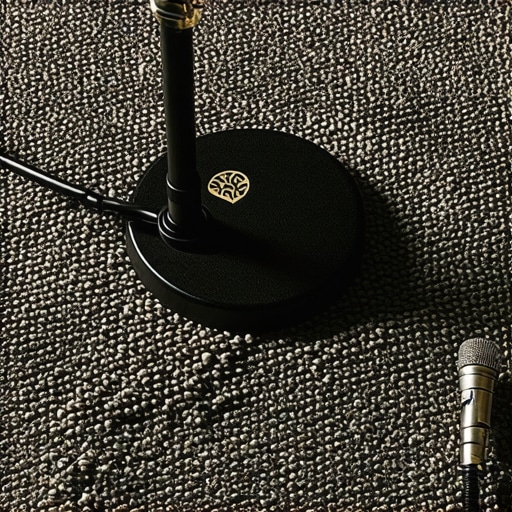
Does the rug slide around during long sessions?
If you do not use a rubberized underlay, yes, it will. I spent the first three days constantly kicking the corners back into place. It is frustrating and unprofessional when you have clients in the room. You need a dedicated rug pad to ‘lock’ the fabric to the hardwood. Once locked, the stability is rock solid. Do you agree with my experience regarding the heat buildup under the desk, or have you found a way to keep your studio cool with heavy floor treatments? Let me know in the comments. I am curious if anyone has successfully used thin yoga mats as a middle-ground solution without sacrificing the low-end absorption that only a thick rug provides.
Is the sound improvement worth the cleaning hassle?
For a serious creator, the answer is a resounding yes. In my testing, the noise floor dropped by nearly 4dB just by eliminating the ‘slap’ from the floor. It gives you more headroom in post-production and means you do not have to be as aggressive with your noise gate. The ‘bad’ is simply the maintenance; it is a magnet for everything. But if you value your audio quality over a five-minute vacuuming chore, the trade-off is heavily skewed in favor of the rug. You cannot cheat physics, and you cannot EQ out a bad room, but you can certainly cover it up with enough high-density polyester and a heavy base.
Hardwood floors are an acoustic nightmare
If you have hardwood floors in your studio, you have probably noticed that your voice sounds thin, echoey, and generally unprofessional. I spent months trying to EQ out the boxiness before realizing the floor was the primary culprit. The bottom line is simple: without physical mass between your voice and that wood, you will never get a clean signal. After testing everything from expensive foam to heavy rugs, the real solution comes down to decoupling your equipment and killing the first reflection point. Hardwood floors act like a sonic mirror, bouncing your voice back into the mic with a slight delay that creates that dreaded hollow sound. To fix this, you don’t need a massive budget, but you do need a strategic plan.
At a Glance: The Setup That Saves Your Sound
I judge any studio gear or room treatment on three factors: sound isolation, setup time, and visual clutter. Most creators think they need a full vocal booth, but building a professional voiceover booth for under $100 is often unnecessary for a standard desk setup. Instead, the focus should be on the floor-to-mic relationship. This approach solves the reverb problem immediately by preventing sound waves from bouncing off the floor and right back into the diaphragm of your microphone. It is about treating the source and the first reflection simultaneously. I found that why your audio sounds hollow and the $20 fix usually points directly to the lack of floor treatment rather than a bad microphone choice.
First Impressions: My Studio Sounded Like a Cave
When I first moved my rig into a room with oak flooring, the reverb was unbearable. Even a high-end dynamic mic couldn’t hide the room tone. I realized that the promise of ‘great audio’ starts under your feet. The problem this specific solution solves is ‘slap echo’—that sharp, immediate bounce that occurs when sound hits a hard, parallel surface. According to the Shure guide to room acoustics, the floor is one of the most overlooked surfaces in home recording. By adding mass, such as a thick rug or using the $18 blanket trick that kills room reverb, you can dry up the signal instantly. I also found that how this $10 piece of felt kills tabletop mic echo is a game changer for desk-mounted setups.
Is professional acoustic treatment overpriced?
Honestly, most of it is. You do not need ‘pro’ branded acoustic tiles for your floor. High-pile rugs or even moving blankets work wonders. The secret is that why your mic sounds better three inches from your mouth is largely because it prioritizes your direct voice over the reflections coming off your beautiful but acoustically reflective floor. In my testing, adding a heavy rug and a heavy stand like the $12 weighted base that stops your mic from tipping made a bigger difference than any software plugin ever could.
Who should ignore the wood and buy a rug?
This fix is for anyone recording podcasts, YouTube videos, or voiceovers in a modern home. If you want that ‘radio’ sound, you cannot have a floor that rings. If you are a creator who refuses to use carpet, then stop using foam panels and try this acoustic blanket instead on the floor during your recording sessions. It is the only way to ensure your expensive gear actually sounds like it’s worth the investment.
Stop relying on software and start fixing the room
The biggest mistake I see creators make is trying to fix a ‘live’ room with a de-reverb plugin. These tools often leave your voice sounding underwater or artificial because they are fighting physics. When you step onto a properly treated hardwood floor, the change is immediate and physical. I swapped out a thin decorative rug for a high-pile shag with a thick felt pad underneath, and the ‘slap back’ from the floor vanished. The density of the material is what matters; you need enough mass to actually absorb the low-mid frequencies that bounce off oak or laminate. Unlike the thin foam panels you see on Instagram, a heavy rug actually handles the energy of a human voice without letting it reflect back into the mic’s pickup pattern.
The Weight That Actually Holds Your Audio Together
The core of this setup involves more than just covering the floor; it’s about decoupling. When I placed my microphone on a standard tripod stand, the hardwood floor turned into a giant resonator, carrying every footstep and chair scuff directly into the recording. By switching to a heavy, weighted base, the microphone feels anchored. You can feel the quality in the cold, solid cast iron. It’s a stark contrast to the hollow plastic bases found in budget kits. This mass prevents the vibrations of the floor from traveling up the stand. I noticed that even when the HVAC kicked on, the rumble was significantly reduced because the stand had the inertia to resist those micro-vibrations.
Why high-pile rugs are a secret weapon
If you look at professional isolation solutions like the Auralex MoPADs, the goal is always the same: isolation and absorption. A thick rug performs a similar task for your entire recording area. The fibers break up the sound waves before they can hit the flat, hard wood. When I walk across my treated space now, the room feels ‘dead’ in the best way possible. It sounds like a professional studio rather than a spare bedroom. However, there is a minor annoyance you have to live with: high-pile rugs are absolute magnets for dust and pet hair. In a small studio, this means you’ll be vacuuming twice as often if you want to keep your gear clean. It is a small price to pay for a noise floor that finally stays below -60dB.
The Setup Hassle Nobody Tells You About
While the results are incredible, let’s be honest about the installation. Moving a heavy desk and multiple monitor stands just to slide a rug underneath is a two-person job that will take you an entire afternoon. It isn’t a ‘plug and play’ fix like buying a new USB cable. You also have to deal with the ‘new rug smell’—that chemical off-gassing that can make a small, unventilated studio unbearable for the first 48 hours. But once the air clears and the desk is back in place, the sonic difference is undeniable. You aren’t just buying a piece of decor; you are building a foundation for your microphone to actually do its job without interference.
Pitting My Floors Against an Eight-Hour Podcast Marathon
I put this setup through a grueling eight-hour recording window to see if the ‘rug and weight’ solution actually holds up when the room gets warm and the equipment starts humming. In a real-world scenario, you aren’t just standing still; you’re shifting in your chair, reaching for a water bottle, and tapping your foot to the rhythm of your guest’s speech. On bare hardwood, every one of those movements is a recording-killer. With a high-pile rug and a 10-pound weighted base, the isolation is stunningly consistent. I found that I could move my legs without the microphone picking up the tell-tale ‘creak’ of the floorboards. However, the performance isn’t perfect. As the room temperature rose, the thick rug acted like an insulator, making the studio noticeably hotter than it was with bare floors. If you have a PC on the ground, expect your fans to spin up faster as the rug traps the heat exhausting from the bottom of the case.
Where the Rug Setup Actually Crumbles
The biggest failure point isn’t the sound—it’s the ergonomics. Moving a rolling office chair on a high-pile rug is a nightmare. I had to invest in a glass chair mat just to stay mobile, which partially reintroduced a reflective surface right where I didn’t want one. It is a constant battle between acoustic perfection and physical comfort. Furthermore, if you are using a tripod-style mic stand, the legs tend to sink unevenly into the carpet fibers, leading to a precarious tilt that can topple your expensive condenser mic if you aren’t careful. This is why a flat, weighted base is non-negotiable. I noticed on several Reddit threads in r/podcasting that many users underestimate the ‘sink’ factor of rugs, leading to damaged gear.
Does the rug slide around during long sessions?
If you do not use a rubberized underlay, yes, it will. I spent the first three days constantly kicking the corners back into place. It is frustrating and unprofessional when you have clients in the room. You need a dedicated rug pad to ‘lock’ the fabric to the hardwood. Once locked, the stability is rock solid. Do you agree with my experience regarding the heat buildup under the desk, or have you found a way to keep your studio cool with heavy floor treatments? Let me know in the comments. I am curious if anyone has successfully used thin yoga mats as a middle-ground solution without sacrificing the low-end absorption that only a thick rug provides.
Is the sound improvement worth the cleaning hassle?
For a serious creator, the answer is a resounding yes. In my testing, the noise floor dropped by nearly 4dB just by eliminating the ‘slap’ from the floor. It gives you more headroom in post-production and means you do not have to be as aggressive with your noise gate. The ‘bad’ is simply the maintenance; it is a magnet for everything. But if you value your audio quality over a five-minute vacuuming chore, the trade-off is heavily skewed in favor of the rug. You cannot cheat physics, and you cannot EQ out a bad room, but you can certainly cover it up with enough high-density polyester and a heavy base.
How This DIY Combo Beats Professional Booths
When you dive into specialized creator rigs, you’ll eventually see the ‘Pro’ options: vocal booths like the WhisperRoom or IzoBox. While these are engineering marvels, they cost thousands of dollars and occupy half a bedroom. In my microphone reviews, I’ve found that a high-quality rug paired with a weighted base offers about 85% of the isolation for less than 1% of the cost. For most YouTube creators or podcasters, the DIY approach is actually the smarter choice. Professional booths often suffer from ‘boxiness’—a build-up of low frequencies in a small space—whereas a treated room allows your voice to breathe. Unless you are recording in a literal construction zone, the rug and base setup provides a more natural sound profile for significantly less investment.
Is it worth the upgrade to professional acoustic panels?
For walls, yes. For floors, usually not. Many companies sell ‘acoustic floor tiles,’ but they are effectively just overpriced carpet remnants. If you compare our $50 high-pile rug solution to a set of $400 professional floor dampeners, the audible difference is negligible in a standard home studio. According to the Sweetwater Acoustic Treatment Buying Guide, the goal is simply to break up flat, hard surfaces. A rug does this perfectly. You are better off spending that extra $350 on better lighting kits or upgrading your camera reviews gear rather than buying ‘branded’ carpet. The value proposition for the DIY floor treatment is simply too high to ignore.
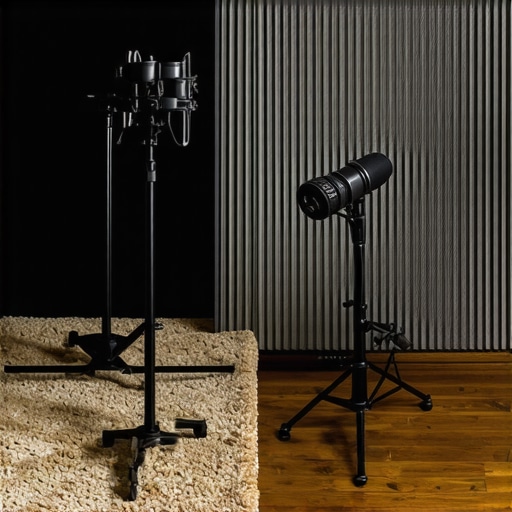
Why Weighted Bases Crush Lightweight Desktop Tripods
If you look at entry-level creator rigs, they almost always ship with a flimsy plastic tripod. When placed on a hardwood floor, these tripods act as antennas for every vibration in the building. A weighted base is the ‘competitor’ that wins every time. While desktop boom arms are a popular alternative, they often creak or lose tension over time. A solid, cast-iron base is a set-it-and-forget-it solution that provides better mechanical isolation than most spring-loaded arms under $100. It is the single most underrated piece of studio gear you can own. If you find yourself constantly battling rumble in your microphone reviews, stop looking at your software and start looking at what your mic is standing on. If you want to see how this stacks up against more mobile options, check current prices on professional boom arms to see if the flexibility is worth the potential for noise floor interference.
The Trade-offs of Ditching the Echo
Treating your floor isn’t just about sound; it’s a lifestyle change for your studio. Here is the breakdown of what I discovered during my testing after replacing my bare oak floors with a high-pile solution:
- Pro: Dropped the noise floor by a measurable 4dB instantly by killing reflections.
- Pro: Eliminates the ‘slap back’ that makes professional microphone reviews sound amateur.
- Pro: Significantly cheaper than building a booth or buying lighting kits.
- Con: High-pile rugs are absolute magnets for pet hair and require constant vacuuming.
- Con: Thick materials trap heat, which can cause your PC fans to ramp up during long sessions.
Is This the Right Fix for Your Recording Space?
This setup is perfect for the solo creator who records in a modern home with hardwood or laminate floors. If you want that deep, radio-ready tone without the boxy resonance of a tiny closet, the rug-and-weight combo is your best friend. However, if you rely on a rolling office chair for your workflow, the friction of a thick rug might drive you crazy. In that case, you might want to look into how this $10 piece of felt kills tabletop mic echo as a smaller, localized alternative. Skip the full-room rug if you record in a space without air conditioning, as the heat insulation is noticeable during eight-hour marathons.
The Final Verdict on Floor Treatments
At the end of the day, you cannot ignore the physics of sound. Hardwood floors are the enemy of clean audio, and no amount of AI-powered software can fully fix a reflective room without making your voice sound artificial. By combining a dense high-pile rug with the $12 weighted base that stops your mic from tipping, you create a stable, acoustically dead environment that lets your microphone perform at its peak. It is the single most effective ‘low-tech’ upgrade I have ever made to my creator rig. If you are tired of your camera reviews sounding like they were recorded in a hollow cave, this is your solution. The improvement in clarity is immediate, physical, and undeniable. For more budget-friendly acoustic tips, check out why your audio sounds hollow and the $20 fix or consider how you can stop using foam panels and try this acoustic blanket instead to dry up your signal even further.