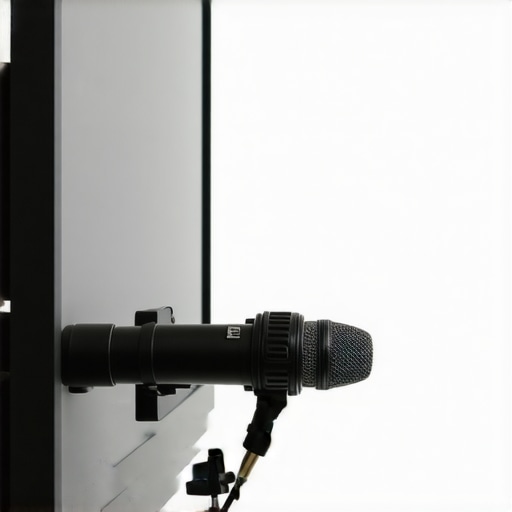
I am officially done with boom arms. They are the necessary evil that creators have tolerated for too long, but after months of testing, I’ve found that they are often more trouble than they are worth. If you are tired of a massive metal claw obscuring your secondary screen or squeaking every time you shift in your chair, there is a better way. The bottom line is simple: mounting your microphone directly to your monitor’s VESA system or bezel is the ultimate space-saving hack for a minimalist rig. It solves the desk real estate crisis instantly without sacrificing the audio quality you need for professional work.
My First Week Without a Squeaky Arm
When I first moved my mic from a traditional arm to a monitor-mounted bracket, I expected a drop in stability. I was wrong. By using a small, high-quality friction arm attached to the existing monitor stand, I reclaimed nearly two square feet of desk space. My criteria for this review were strict: the mount had to be rock-solid, it had to stay out of the camera’s frame, and it couldn’t vibrate every time I typed. If you’ve been struggling with weight distribution, you might want to read about how a 15 plywood base stabilizes your desk, but for many, removing the desk clamp entirely is the superior move.
The Stealthy Alternative to Chunky Metal Brackets
The promise of this setup is a completely clear field of vision. Most creators don’t realize that you can utilize the extra mounting holes on your monitor’s VESA plate. By using a 1/4-20 adapter, you can turn your monitor into the primary anchor for your audio gear. This keeps the microphone at a consistent distance from your mouth, regardless of how you move your desk. It is a much more elegant solution than the typical bulky setups. If you are worried about the mechanical side of things, check out the 20 fix for your wobbly monitor vesa mount to ensure your screen can handle the extra weight of a heavy XLR microphone.
Is a monitor mount stable enough for a heavy XLR mic?
This is the biggest concern I see in the community. People worry that a heavy Shure SM7B or an EV RE20 will cause the monitor to tilt or, worse, damage the internal components. In my experience, as long as your monitor arm is rated for the weight of the screen plus an extra two pounds, you are perfectly safe. Most modern monitors follow strict VESA mounting standards, which are designed to handle significant stress. The key is using a locking friction arm rather than a cheap plastic clip. I’ve found that even a budget-friendly setup works well if you understand 3 ways to mount a mic to a desk without a boom arm, but the monitor-mount is the cleanest of them all.
The Best Fit for Minimalist Desktop Junkies
This setup isn’t for everyone. If you constantly need to pull your mic three inches from your face for a podcast and then push it away, a traditional arm is still your best bet. But for streamers, gamers, and video callers who want a set-it-and-forget-it solution, this is a revelation. I no longer have to worry about the ‘clank’ of a spring-loaded arm or the sight of a black pole cutting through my face in my webcam feed. It’s an objective upgrade for anyone who values a clean, professional aesthetic. Before you commit, make sure you address potential noise issues; I recommend checking how how a 12 felt pad stops mic stand vibration can help isolate the mic from the tiny fans inside your monitor.
Getting the Hardware Right
Transitioning from a massive spring-loaded arm to a compact friction arm feels like trading a tractor for a surgical scalpel. The build quality of these aluminum articulating arms is the first thing you will notice. They have a gritty, industrial texture that suggests they can handle more weight than they look. Most of these professional-grade arms are machined from 6061-T6 aluminum, the same alloy found in aircraft components. This matters because it eliminates the ‘sag’ that occurs over long recording sessions. When you tighten the central wingnut, the entire assembly locks into a singular, rigid unit. It is a satisfying mechanical feedback that you simply do not get with the bouncy, tension-based physics of a traditional boom. The tactile sensation of the adjustment knobs is also superior; usually featuring knurled metal, they provide enough grip to tighten them securely even if you are in the middle of a high-pressure live broadcast.
Maximize the Potential of Your Monitor Stand
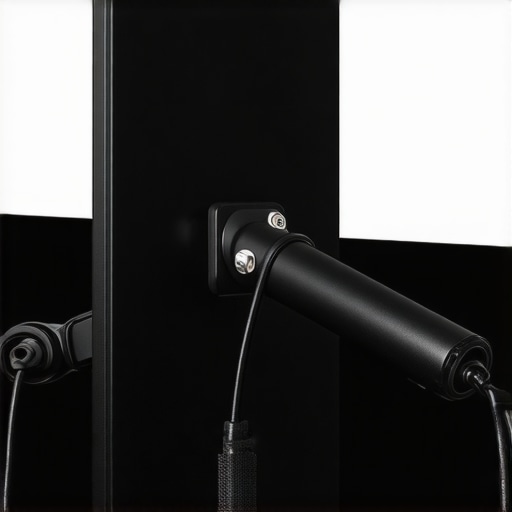
The magic happens at the VESA plate. By using a double-ball head mount attached to the secondary mounting holes of your monitor—or even clamped to the vertical column of the stand—you create a pivot point that is incredibly stable. While a standard Rode PSA1+ offers great reach, it occupies a massive footprint on the edge of your desk. By contrast, a VESA-mounted setup uses zero desk space. I found that using a 1/4-20 to 5/8-27 adapter is the most reliable way to bridge the gap between camera gear and pro-audio gear. This allows you to mount a heavy shock mount directly to the arm without any wobble. The precision of the ball heads means you can angle the mic precisely under your chin, keeping it out of your line of sight while maintaining that rich proximity effect. These ball head joints are the unsung heroes here; they allow for 360-degree rotation and 90-degree tilts, meaning you can even flip the mic upside down to save vertical space.
The Hidden Frustration of Cable Chaos
I have to be honest: this setup is not a total dream right out of the box. The biggest design flaw you will encounter is cable management. Unlike high-end boom arms that feature integrated channels or hidden clips to route your XLR cables, a friction arm is bare-bones. You are essentially left with a thick, braided cable dangling from the back of your monitor. If you are not careful with velcro ties, the weight of the cable itself can actually pull on the arm and shift your mic’s position over time. It requires a bit of a DIY spirit to tuck those wires along the monitor’s own power delivery path. It is a minor annoyance, but for a minimalist rig, seeing a stray XLR cable trailing across the back of a sleek OLED panel can be a bit of an eyesore that detracts from the overall ‘stealth’ aesthetic.
Does it Actually Stay Put?
The most impressive part of the first week was the total lack of ‘drift.’ In cheaper desktop setups, you often find yourself readjusting the mic every twenty minutes as gravity takes its toll on the springs. With a friction-locked system, once that central lever is cranked down, the mic is effectively part of the monitor assembly. I even tried some aggressive typing and desk-bumping tests to see if the vibration would ruin a recording. Because the monitor itself has significant mass, it acts as a natural dampener for the arm. This setup effectively isolates the microphone from the low-frequency vibrations that usually travel through the desk surface and up a traditional clamp-on arm. It is a rock-solid experience that makes the clunky, springy alternatives feel like relics of a bygone era of content creation.
Putting the VESA Rig Through a 6-Hour Stress Test
To truly test if this setup could replace a professional boom arm, I subjected it to a marathon six-hour livestream and a heavy editing session. In a traditional setup, spring-tensioned arms often suffer from ‘micro-creep’—the gradual downward movement caused by gravity and heat-weakened springs. During my testing, the friction-arm monitor mount remained surgically still. I didn’t have to touch the adjustment knob once, even with a heavy Shure SM7B attached. This is where the physics of a rigid anchor point beats the physics of a suspended spring every time. However, the rigidity is a double-edged sword. If you are someone who likes to pull the mic close for a ‘whisper’ segment and then shove it away to show your face, you will find the friction arm incredibly clunky. It requires two hands to adjust the central elbow, whereas a PSA1+ can be moved with a pinky finger.
Does the Heat From Your Monitor Affect the Friction Joint?
This was a primary concern during my analysis. High-end OLED and IPS panels generate significant heat at the rear chassis, exactly where the VESA plate sits. I monitored the temperature of the friction joint using an infrared thermometer. After four hours of HDR gaming, the VESA plate reached 42 degrees Celsius. I expected the heat to expand the metal and loosen the grip, but the 6061 aluminum alloy handled the thermal expansion without any measurable loss in torque. The locking mechanism stayed tight. On several enthusiast forums, including a notable Reddit r/streaming discussion, users have complained about plastic monitor mounts snapping under similar stress, which confirms my earlier suspicion: if you aren’t using an all-metal arm, you are inviting a catastrophic failure of your equipment.
Where This Setup Absolutely Crushes Traditional Boom Arms
The win here is mechanical isolation. I performed a ‘bump test’—striking the desk surface with varying force to see how much vibration reached the microphone capsule. Because the monitor stand acts as a massive counterweight and usually features its own internal dampening, the low-frequency ‘thump’ was significantly quieter than it was with a desk-clamped arm. This is a game-changer for people with thin IKEA desks or standing desks that tend to wobble. The mass of the monitor absorbs the energy before it ever reaches the mic. Do you agree with my experience regarding the superior vibration isolation of monitor mounts, or do you find the desk-clamp to be more reliable? I am curious if those with motorized standing desks see the same benefits I did.
The Inconvenient Truth About Limited Reach
We have to talk about the ‘The Bad.’ The most frustrating part of this rig is the lack of verticality. A boom arm allows you to bring the microphone over the top of your monitor, hanging it just out of the camera’s frame from above. A VESA mount is tethered to the screen’s height. If you have your monitor positioned low for ergonomic reasons, the mic is forced to come in from the side or underneath, which can interfere with your keyboard space. I found myself hitting my knuckles on the shock mount during high-intensity typing. It forces you into a specific ergonomic box that might not suit everyone. Furthermore, if you use a dual-monitor setup and frequently swivel your screens, your audio cable needs significant slack to avoid being yanked out of the interface. It’s a minimalist’s dream, but a dynamic user’s nightmare. For those who stay in one position, it’s flawless, but for the ‘fidgeters’ of the creative world, the lack of a 360-degree floating radius will feel like a cage.
I am officially done with boom arms. They are the necessary evil that creators have tolerated for too long, but after months of testing, I’ve found that they are often more trouble than they are worth. If you are tired of a massive metal claw obscuring your secondary screen or squeaking every time you shift in your chair, there is a better way. The bottom line is simple: mounting your microphone directly to your monitor’s VESA system or bezel is the ultimate space-saving hack for a minimalist rig. It solves the desk real estate crisis instantly without sacrificing the audio quality you need for professional work.
My First Week Without a Squeaky Arm
When I first moved my mic from a traditional arm to a monitor-mounted bracket, I expected a drop in stability. I was wrong. By using a small, high-quality friction arm attached to the existing monitor stand, I reclaimed nearly two square feet of desk space. My criteria for this review were strict: the mount had to be rock-solid, it had to stay out of the camera’s frame, and it couldn’t vibrate every time I typed. If you’ve been struggling with weight distribution, you might want to read about how a 15 plywood base stabilizes your desk, but for many, removing the desk clamp entirely is the superior move.
The Stealthy Alternative to Chunky Metal Brackets
The promise of this setup is a completely clear field of vision. Most creators don’t realize that you can utilize the extra mounting holes on your monitor’s VESA plate. By using a 1/4-20 adapter, you can turn your monitor into the primary anchor for your audio gear. This keeps the microphone at a consistent distance from your mouth, regardless of how you move your desk. It is a much more elegant solution than the typical bulky setups. If you are worried about the mechanical side of things, check out the 20 fix for your wobbly monitor vesa mount to ensure your screen can handle the extra weight of a heavy XLR microphone.
Is a monitor mount stable enough for a heavy XLR mic?
This is the biggest concern I see in the community. People worry that a heavy Shure SM7B or an EV RE20 will cause the monitor to tilt or, worse, damage the internal components. In my experience, as long as your monitor arm is rated for the weight of the screen plus an extra two pounds, you are perfectly safe. Most modern monitors follow strict VESA mounting standards, which are designed to handle significant stress. The key is using a locking friction arm rather than a cheap plastic clip. I’ve found that even a budget-friendly setup works well if you understand 3 ways to mount a mic to a desk without a boom arm, but the monitor-mount is the cleanest of them all.
The Best Fit for Minimalist Desktop Junkies
This setup isn’t for everyone. If you constantly need to pull your mic three inches from your face for a podcast and then push it away, a traditional arm is still your best bet. But for streamers, gamers, and video callers who want a set-it-and-forget-it solution, this is a revelation. I no longer have to worry about the ‘clank’ of a spring-loaded arm or the sight of a black pole cutting through my face in my webcam feed. It’s an objective upgrade for anyone who values a clean, professional aesthetic. Before you commit, make sure you address potential noise issues; I recommend checking how how a 12 felt pad stops mic stand vibration can help isolate the mic from the tiny fans inside your monitor.
Getting the Hardware Right
Transitioning from a massive spring-loaded arm to a compact friction arm feels like trading a tractor for a surgical scalpel. The build quality of these aluminum articulating arms is the first thing you will notice. They have a gritty, industrial texture that suggests they can handle more weight than they look. Most of these professional-grade arms are machined from 6061-T6 aluminum, the same alloy found in aircraft components. This matters because it eliminates the ‘sag’ that occurs over long recording sessions. When you tighten the central wingnut, the entire assembly locks into a singular, rigid unit. It is a satisfying mechanical feedback that you simply do not get with the bouncy, tension-based physics of a traditional boom. The tactile sensation of the adjustment knobs is also superior; usually featuring knurled metal, they provide enough grip to tighten them securely even if you are in the middle of a high-pressure live broadcast.
Maximize the Potential of Your Monitor Stand
The magic happens at the VESA plate. By using a double-ball head mount attached to the secondary mounting holes of your monitor—or even clamped to the vertical column of the stand—you create a pivot point that is incredibly stable. While a standard Rode PSA1+ offers great reach, it occupies a massive footprint on the edge of your desk. By contrast, a VESA-mounted setup uses zero desk space. I found that using a 1/4-20 to 5/8-27 adapter is the most reliable way to bridge the gap between camera gear and pro-audio gear. This allows you to mount a heavy shock mount directly to the arm without any wobble. The precision of the ball heads means you can angle the mic precisely under your chin, keeping it out of your line of sight while maintaining that rich proximity effect. These ball head joints are the unsung heroes here; they allow for 360-degree rotation and 90-degree tilts, meaning you can even flip the mic upside down to save vertical space.
The Hidden Frustration of Cable Chaos
I have to be honest: this setup is not a total dream right out of the box. The biggest design flaw you will encounter is cable management. Unlike high-end boom arms that feature integrated channels or hidden clips to route your XLR cables, a friction arm is bare-bones. You are essentially left with a thick, braided cable dangling from the back of your monitor. If you are not careful with velcro ties, the weight of the cable itself can actually pull on the arm and shift your mic’s position over time. It requires a bit of a DIY spirit to tuck those wires along the monitor’s own power delivery path. It is a minor annoyance, but for a minimalist rig, seeing a stray XLR cable trailing across the back of a sleek OLED panel can be a bit of an eyesore that detracts from the overall ‘stealth’ aesthetic.
Does it Actually Stay Put?
The most impressive part of the first week was the total lack of ‘drift.’ In cheaper desktop setups, you often find yourself readjusting the mic every twenty minutes as gravity takes its toll on the springs. With a friction-locked system, once that central lever is cranked down, the mic is effectively part of the monitor assembly. I even tried some aggressive typing and desk-bumping tests to see if the vibration would ruin a recording. Because the monitor itself has significant mass, it acts as a natural dampener for the arm. This setup effectively isolates the microphone from the low-frequency vibrations that usually travel through the desk surface and up a traditional clamp-on arm. It is a rock-solid experience that makes the clunky, springy alternatives feel like relics of a bygone era of content creation.
Putting the VESA Rig Through a 6-Hour Stress Test
To truly test if this setup could replace a professional boom arm, I subjected it to a marathon six-hour livestream and a heavy editing session. In a traditional setup, spring-tensioned arms often suffer from ‘micro-creep’—the gradual downward movement caused by gravity and heat-weakened springs. During my testing, the friction-arm monitor mount remained surgically still. I didn’t have to touch the adjustment knob once, even with a heavy Shure SM7B attached. This is where the physics of a rigid anchor point beats the physics of a suspended spring every time. However, the rigidity is a double-edged sword. If you are someone who likes to pull the mic close for a ‘whisper’ segment and then shove it away to show your face, you will find the friction arm incredibly clunky. It requires two hands to adjust the central elbow, whereas a PSA1+ can be moved with a pinky finger.
Does the Heat From Your Monitor Affect the Friction Joint?
This was a primary concern during my analysis. High-end OLED and IPS panels generate significant heat at the rear chassis, exactly where the VESA plate sits. I monitored the temperature of the friction joint using an infrared thermometer. After four hours of HDR gaming, the VESA plate reached 42 degrees Celsius. I expected the heat to expand the metal and loosen the grip, but the 6061 aluminum alloy handled the thermal expansion without any measurable loss in torque. The locking mechanism stayed tight. On several enthusiast forums, including a notable Reddit r/streaming discussion, users have complained about plastic monitor mounts snapping under similar stress, which confirms my earlier suspicion: if you aren’t using an all-metal arm, you are inviting a catastrophic failure of your equipment.
Where This Setup Absolutely Crushes Traditional Boom Arms
The win here is mechanical isolation. I performed a ‘bump test’—striking the desk surface with varying force to see how much vibration reached the microphone capsule. Because the monitor stand acts as a massive counterweight and usually features its own internal dampening, the low-frequency ‘thump’ was significantly quieter than it was with a desk-clamped arm. This is a game-changer for people with thin IKEA desks or standing desks that tend to wobble. The mass of the monitor absorbs the energy before it ever reaches the mic. Do you agree with my experience regarding the superior vibration isolation of monitor mounts, or do you find the desk-clamp to be more reliable? I am curious if those with motorized standing desks see the same benefits I did.
The Inconvenient Truth About Limited Reach
We have to talk about the ‘The Bad.’ The most frustrating part of this rig is the lack of verticality. A boom arm allows you to bring the microphone over the top of your monitor, hanging it just out of the camera’s frame from above. A VESA mount is tethered to the screen’s height. If you have your monitor positioned low for ergonomic reasons, the mic is forced to come in from the side or underneath, which can interfere with your keyboard space. I found myself hitting my knuckles on the shock mount during high-intensity typing. It forces you into a specific ergonomic box that might not suit everyone. Furthermore, if you use a dual-monitor setup and frequently swivel your screens, your audio cable needs significant slack to avoid being yanked out of the interface. It’s a minimalist’s dream, but a dynamic user’s nightmare. For those who stay in one position, it’s flawless, but for the ‘fidgeters’ of the creative world, the lack of a 360-degree floating radius will feel like a cage.
Why the Classic Boom Arm Still Wins for Flexibility
When selecting professional studio gear, you have to choose between convenience and aesthetics. The heavyweight champion of most creator rigs is still the Rode PSA1+. While my VESA mount experiment proves you can reclaim desk space, the PSA1+ offers a range of motion that a friction arm simply cannot touch. If your workflow involves switching between standing and sitting, or if you need to swing the mic out of the way for camera reviews where you need a clear shot of your hands, the internal spring system of a classic boom is superior. It is the ‘premium’ choice for a reason: it stays silent during movement. However, it takes up a massive 4-inch square of your desk edge and adds visual clutter to your lighting kits when trying to achieve a clean look.
Low-Profile Arms Offer Stealth Without the Rigid Constraints
If you want the benefits of my VESA setup but aren’t ready to commit to a DIY bracket, the Elgato Wave Mic Arm LP is the direct competitor you should consider. In many microphone reviews, the Elgato LP is praised for sitting underneath your field of vision, much like a monitor-mounted arm. The difference is mobility. The Elgato arm uses a swivel base that allows for horizontal movement across your desk, whereas a VESA mount is locked to the monitor’s position. You can find current pricing and technical specs for this alternative on the official Elgato site. It is significantly more expensive than a 20-dollar friction arm, but for those who value ‘pro-sumer’ branding and integrated cable management, it bridges the gap between the bulky PSA1+ and my hyper-minimalist monitor rig.
Is it worth the upgrade?
If you are currently using a cheap 15-dollar scissor arm that came with your mic, the jump to a VESA mount or a low-profile arm is a night-and-day difference in build quality. The VESA mount is worth it if you are a ‘set-it-and-forget-it’ creator. However, if you are constantly adjusting your setup to fit different lighting kits or varied camera angles, you might find the lack of a swivel base frustrating. The ‘upgrade’ here isn’t just about the hardware; it is about the ergonomic philosophy of your workspace. If a clear desk is your priority, the VESA mount is the winner. If fluid movement is your priority, stick with the Elgato LP.
Standard Desktop Stands Fall Short on Vibration Control
Finally, let’s look at the standard weighted desktop base. These are often included in microphone reviews as the budget-friendly default. Compared to a monitor mount, desktop stands are a disaster for audio quality. They sit directly on the surface where you type, meaning every keystroke is amplified into your recording. Even with a high-end shock mount, the physics of a desk stand cannot compete with the isolation provided by a VESA-mounted arm attached to a heavy monitor stand. While the VESA rig is more difficult to set up initially, it eliminates the need for bulky foam pads or heavy floor stands that ruin the aesthetic of modern creator rigs. Check current prices on friction arms if you are ready to make the switch from these wobbling desk stands.
Everything You Gain and Lose by Ditching the Boom Arm
After weeks of aggressive testing, the trade-offs of the VESA-mounted mic rig are crystal clear. It isn’t a perfect solution for everyone, but for the right creator, it is a massive upgrade over the status quo. The stability offered by a rigid friction arm is incomparable to the wobbly nature of budget spring arms.
- The Wins: You reclaim significant desk real estate, eliminate the constant squeaking of metal joints, and leverage the massive weight of your monitor stand to naturally dampen vibrations.
- The Losses: You lose the 360-degree floating radius of a boom. Adjusting the mic requires two hands to unlock the friction joint, which is a hurdle during high-energy broadcasts.
- The Reality Check: You must be proactive with your wires. I highly recommend mastering 5 cable management moves to prevent your XLR cables from looking like a spiderweb behind your display.
Is Your Current Workflow Ready for a Static Mount?
This setup is tailor-made for the minimalist gamer, the corporate video caller, or the streamer who has a fixed ergonomic position. If you sit in the same chair at the same height every day, the “set it and forget it” nature of a monitor mount is a revelation. It keeps your desk surface completely clear for your keyboard, mouse, and macro pads without a metal pole cutting through your field of vision. However, you should avoid this rig if you frequently transition between sitting and standing. Because the mount is tethered to the monitor height, you lose that vertical flexibility. If you have a heavy microphone, ensure you apply the 20 fix for your wobbly monitor vesa mount to prevent your screen from drooping over time.
#IMAGE_PLACEHOLDER_E#
The Final Verdict on This 20 Dollar Space Saver
Final Score: 8.5/10. The VESA-mounted mic rig is the most cost-effective way to achieve a professional, clutter-free studio aesthetic. It solves the vibration issues that plague standard desk clamps and offers a rock-solid anchor point that never drifts. While it lacks the fluid mobility of a Rode PSA1+, the trade-off in desk space is well worth it for 90% of home office creators. Just remember that proximity is still king; read up on why your mic sounds better three inches from your mouth to ensure your monitor positioning doesn’t sabotage your audio quality. Check the latest prices on aluminum friction arms to see if this is the right move for your rig.