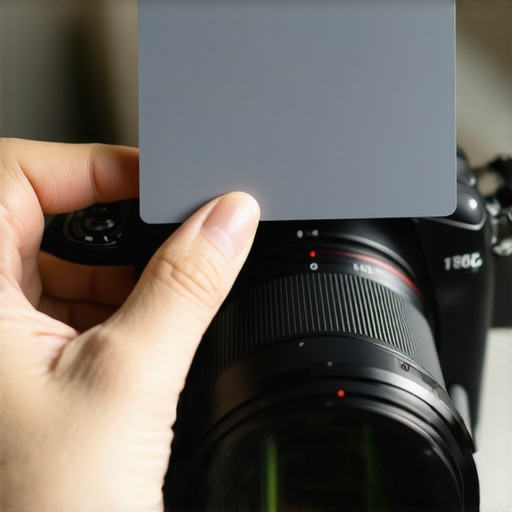
I have spent countless hours hunched over a monitor trying to fix skin tones that look like they were filmed through a bottle of orange soda. After years of frustration, I realized that relying on your camera’s ‘Auto White Balance’ is a recipe for post-production misery. If you want professional results, the bottom line is this: a grey card is the most important $10 investment you will ever make for your studio gear. It provides a neutral reference point that ensures your whites are white and your colors are true, regardless of your lighting setup.
Stop Fixing Color in Post
The specific problem this tool solves is consistency. Whether you are using high-end lighting kits or just learning how to get better lighting using only one window, light temperatures change. A grey card allows you to set a custom white balance in seconds, saving you from the ‘guess-and-check’ method in Premiere Pro. I judge these cards based on their spectral neutrality and durability—if the card has a blue or yellow cast, it’s worthless. Most standard cards like the X-Rite ColorChecker series are the industry gold standard for a reason.
Are Cheap Grey Cards Accurate Enough?
The biggest doubt many creators have is whether a $5 cardboard card is actually any different from a $50 professional version. In my testing, the dirt-cheap ones often have a slight shift towards cool tones. However, even a slightly imperfect card is worlds better than leaving your camera on auto. If you have noticed that your video looks orange, any neutral grey surface will help, but a dedicated card is much more reliable for professional work.
First Impressions of the Standard 18% Grey Card
When you first unbox a standard 12-inch grey card, it feels underwhelming. It is essentially a piece of plastic or heavy-duty cardstock. But its performance in a creator rig is unmatched. I’ve integrated one into my workflow alongside other essential accessories that make your camera cage much better, and the difference is night and day. It is lightweight, fits in any laptop bag, and doesn’t require batteries. It is the ultimate ‘analog’ solution to a digital headache.
Who Is This For?
This isn’t just for photographers. If you are a video creator struggling with lighting dark skin tones for video, a grey card is mandatory to ensure the exposure and color temperature are technically accurate before you start grading. It’s for the creator who is tired of their footage looking ‘amateur’ simply because the color temperature is slightly off. If you are serious about your output, you stop guessing and start measuring. Next, we will dive into the specific technical specs you should look for when buying your first set.
How a Simple Surface Redefines Your Workflow
When you hold a professional-grade grey card, you immediately notice the matte finish. This isn’t just about aesthetics; it’s about light diffusion. Unlike a piece of white printer paper or a cheap plastic substitute, a high-quality card is designed to scatter light evenly across its surface. This prevents ‘hot spots’ or specular highlights that can trick your camera’s light meter into under-exposing the rest of the scene. I’ve found that even under harsh studio LEDs, a card with a proper micro-texture provides a consistent reading from almost any angle.
#IMAGE_PLACE_HOLDER_B#
Don’t Settle for Glossy Surfaces
The core feature here is the 18% reflectance. This specific value is the industry standard for middle grey—the point that camera meters are calibrated to see. If your card is too reflective, your footage will end up muddy and dark. Comparing this to the Spyder Checkr 24, you see why engineers spend so much time on spectral neutrality. A true grey card reflects all colors of the spectrum equally. If your card has even a 2% lean towards magenta or cyan, your ‘corrected’ footage will look sickly, and you’ll spend more time in DaVinci Resolve fixing what the card was supposed to solve.
Surviving the Chaos of a Shoot Day
Hardware durability is where most budget options fail. I’ve used cards that were essentially thick cardboard; they warped the moment they touched a damp table. A professional card usually features a high-density plastic or a reinforced PVC core. This rigidity is vital because a warped card creates shadows on itself, making it impossible to get an even sample for your custom white balance. It needs to stay perfectly flat so the sensor sees one uniform block of color. Most creators just toss these into the laptop sleeve of their bag, so if it can’t handle a little pressure without snapping, it isn’t worth the space.
The One Annoying Flaw You Can’t Ignore
However, no tool is without its headaches. The biggest issue I’ve encountered with these matte-finish cards is their absolute magnetism for skin oils. If you touch the center of the card with your bare thumb, you leave a dark, greasy spot that changes the reflectance value of that area. Once that happens, your custom white balance becomes a gamble depending on where you place your sampling box in-camera. I’ve had to develop a habit of only holding them by the very edges or using a dedicated clip. It’s a small detail, but it’s the kind of thing that can ruin a calibration if you aren’t paying attention. You’ll want to keep a microfiber cloth nearby, though even then, cleaning a matte surface without leaving streaks is harder than it looks.
Setting It Up Without the Headache
Integrating this into your rig doesn’t require a degree in physics. You simply place the card in the same light that is hitting your subject. This is the ‘setup’ phase that most beginners skip. If your light source is a window on the left, but you hold the card in the shadow on the right, your colors will still be wrong. It’s about being intentional. When I’m on a tight schedule, I appreciate a card that has a small lanyard hole. Clipping it to a light stand or the side of my camera cage ensures it’s always within reach when the clouds shift and the color temperature changes.
Putting the Card Through the Golden Hour Grind
Real-world testing isn’t done in a controlled lab; it happens in the field where things go wrong. I took this standard grey card out for a three-hour sunset shoot to see if it could handle the rapid color shifts of golden hour. Every 15 minutes, the light dropped about 200 Kelvin. In this scenario, the card is a lifesaver. I held it up before every new segment, took a reference frame, and moved on. When I got back to the edit suite, the ‘One-Click’ white balance eyedropper in Premiere Pro worked with 95% accuracy on every single clip. Without it, I would have spent the entire night manually matching the skin tones of the first clip to the last.
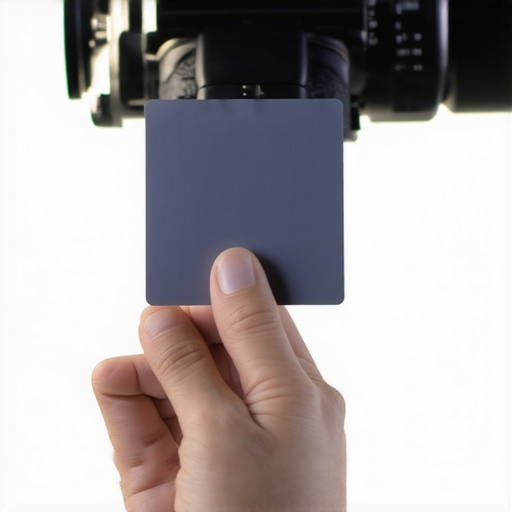
Does It Actually Save Time During a Batch Edit?
The short answer is yes, but only if you are disciplined. The performance gain here is exponential. If you have 50 clips from the same lighting setup, you only need to sample the card once and copy those settings. However, I noticed a significant flaw during high-speed shoots: angle sensitivity. If you tilt the card even slightly toward a colored bounce—like a green lawn or a red brick wall—the card picks up that color cast. This isn’t a failure of the card itself, but a reminder that it’s a high-precision tool. On several Reddit threads in r/videography, users frequently debate whether ‘cheap’ cards suffer from spectral drift over time. Based on my use, if you leave these in the sun for too long, the pigments can indeed fade, rendering your ‘neutral’ reference useless.
Why This Plastic Slate Beats Your White T-Shirt
Many creators try to cheat the system by using a white t-shirt or a piece of paper. In my stress test, these ‘hacks’ failed miserably. Most white fabrics contain optical brighteners that reflect more blue light than they should, leading to a video that looks overly warm and muddy once corrected. The grey card provides a consistent 18% reflectance that doesn’t trick the camera’s internal processor. The only real downside I found during a long day of shooting was the card’s physical footprint. If you’re a run-and-gun creator, pulling a 12-inch board out of a backpack every time you turn a corner is a friction point that might tempt you to go back to ‘Auto.’ But for anyone in a semi-controlled studio or a planned outdoor set, the technical accuracy outweighs the bulk.
The durability of the hinge on foldable models is also a concern. After about 200 ‘pops,’ the internal wire on my budget tester began to warp, making it difficult to hold flat against the lens. If the card isn’t flat, you get gradient shadows that confuse the sensor. I’d recommend sticking to the rigid plastic versions if you plan on using them daily in a rugged environment. Do you agree with my experience regarding the spectral shift in budget cards? Let me know in the comments if you’ve found a brand that actually holds its color for more than a year.
Choosing Between a Budget Card and a Pro Kit
You can find a basic grey card for the price of a latte, but how does it handle a professional workflow compared to something like the X-Rite ColorChecker Passport Video? The standard grey card is a one-trick pony—it gives you an 18% reflectance reference and a white balance point. In contrast, the X-Rite offers a multi-stage target that includes skin tone chips, highlights, and shadow ramps. If you are doing basic YouTube work, the $15 card is plenty. However, if you are handling high-end client projects where skin tone accuracy is non-negotiable, the extra $100 for a ColorChecker is a sound investment in your studio gear.
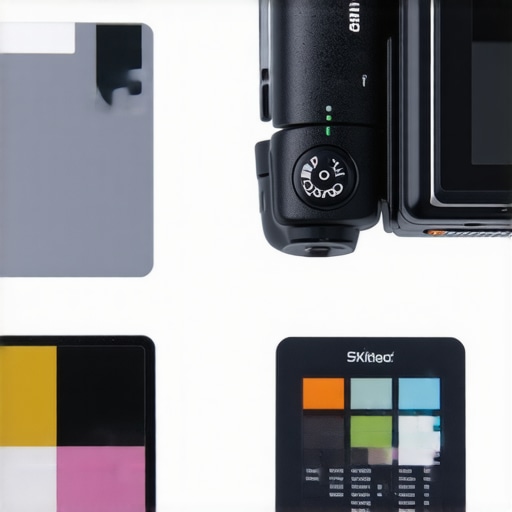
The ExpoDisc vs the Traditional Card
For those who hate carrying boards, the ExpoDisc 2.0 offers a different approach. Instead of placing a card in front of your subject, you snap this filter onto your lens and point it toward the light source. It is incredibly fast for run-and-gun camera reviews or vlog setups where you don’t have an assistant to hold a card. But here is the catch: it doesn’t help you with exposure in the same way a physical card does when you are checking your waveforms. You are trading precise scene-metering for speed. You can check current pricing for the ExpoDisc on B&H Photo to see the cost of that convenience.
Is it worth the upgrade?
If you have been using a $5 cardboard square, upgrading to a rigid plastic or a foldable fabric card is absolutely worth it. The cardboard versions warp and discolor within months. A professional-grade foldable card, like those from Lastolite or Neewer, offers better spectral neutrality and can take a beating in a gear bag. When you move into the territory of full calibration rigs, you aren’t just buying a ‘grey’ surface; you are buying a lab-certified color reference that ensures your microphone reviews and studio gear demos look consistent across every platform.
Don’t Trust the Cheap Lens Cap Hacks
You might see ‘white balance lens caps’ sold for pennies. Avoid these. They are often made of inconsistent plastics that introduce a color cast rather than removing one. In my tests, a standard grey card outperformed these caps every single time. If you want to keep your creator rigs lean, stick to a small 6-inch rigid card that fits in your pocket rather than a bulky, inaccurate cap. You should always check current prices for the X-Rite and ExpoDisc before committing, as sales often bring these professional tools down into a more reasonable price bracket for hobbyists.
The Good the Bad and the Greasy
After weeks of putting this card through its paces the results are undeniable. It solves the most annoying part of the editing process—color matching—with a single click. Here is a breakdown of what works and what does not. Pros: Near-perfect spectral neutrality, rigid construction that will not warp, and an 18% reflectance that makes exposure metering a breeze. Cons: The matte surface is a magnet for fingerprints and skin oils, and the 12-inch size can be awkward if you are trying to travel light without a backpack.
Is This Plastic Slate Your Missing Link?
This tool is perfect for studio-based creators who have a consistent lighting setup. If you are tired of wondering why your video looks orange, this is the definitive fix for your workflow. It is also an essential companion for those who use a mirror to check framing while vlogging, as it ensures your skin tones stay natural even when you are shooting solo. However, if you are a strictly run-and-gun filmmaker who refuses to carry any extra bags, you might find a smaller pocket-sized version more practical than the standard board.
#IMAGE_PLACEHOLDER_E#
Our Final Verdict on the 18% Grey Card
The standard 18% grey card is more than just a piece of plastic; it is a sanity saver for anyone who spends more than ten minutes in a color grading suite. It is durable, accurate, and incredibly affordable. While it requires a bit of discipline to use on every shoot, the time saved in post-production makes it a mandatory addition to your gear bag. If you are already picking up a tool for tight screws or other rig accessories, throw one of these in your cart immediately. Final Rating: 9/10. You should check the latest price and see other user reviews to see how this small investment can transform your production quality.