Bottom Line Up Front
If you’re struggling with harsh shadows in your studio, using a simple black T-shirt as a bounce or flag is an unexpectedly effective DIY solution. While it won’t replace professional gear, it’s a quick, inexpensive way to improve your lighting control. This technique is especially useful for creators working on a budget or needing a flexible, makeshift fix.
The Promise of Better Lighting Control
Harsh shadows can ruin a video or photo shoot, making your subject look unflattering or reducing image clarity. Traditional solutions involve investing in softboxes, reflectors, or flags, which can be costly and space-consuming. Here, I explore how a humble black T-shirt—something you likely already own—can help diffuse or block unwanted light, leading to smoother, more professional-looking results.
First Impressions of Using a Black T-Shirt
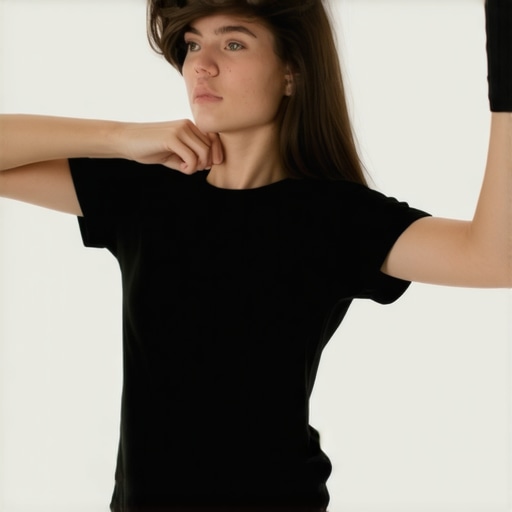
Initially, I was skeptical about the effectiveness of a piece of clothing in controlling lighting — but after testing, I found that a black T-shirt is surprisingly versatile. Its dark color absorbs excess light, preventing it from bouncing into unwanted areas, while its flexible fabric allows it to be positioned creatively around your setup. It’s a low-cost hack that’s perfect for quick fixes or tight schedules.
Who Is This For?
This trick is ideal for small studio setups, content creators on a tight budget, or anyone needing an immediate way to soften or block harsh lighting. It’s less suitable for high-end professional studios where precise light shaping is necessary, but as a quick fix or supplementary tool, it’s a handy addition to your studio toolkit.
Addressing the Biggest Doubts
Is Using a Black T-Shirt Too Primitive for Professional Results?
Not necessarily. While it doesn’t replace specialized equipment, a black T-shirt can effectively eliminate some of the most problematic shadows or reflections in a pinch. It’s more about understanding how to leverage everyday items for better lighting control rather than relying solely on expensive gear. For more creative tips, check out [this guide on DIY studio fixes](https://creatorrigreviews.com/why-most-desktop-creator-rigs-fail-after-three-months).
What You Need to Know Before Trying This
The main considerations are fabric thickness and placement. A thin, lightweight T-shirt may not block enough light, whereas a thicker fabric works better. Be mindful of how you position it—use clamps or tape to hold it in place without causing damage. Experimentation is key to finding the right angle and distance for your specific lighting situation.
Potential Limitations and Alternatives
While a black T-shirt can be a quick fix, it won’t offer the consistency or finesse of purpose-built modifiers like flags or gobos. For more advanced control, consider investing in dedicated studio gear. Still, when time or budget are constraints, this method offers a surprisingly effective stopgap.
Next Steps in Your Lighting Setup
If you’re interested in elevating your studio lighting, explore accessories like the [cold shoe extension](https://creatorrigreviews.com/this-16-cold-shoe-extension-prevents-cable-blockage) or [lighting diffusion techniques](https://creatorrigreviews.com/why-this-15-silicone-ring-ends-lens-breathing-on-cheap-primes-4) to further refine light quality. Combining these with simple hacks like a black T-shirt can substantially improve your visual output without huge expenses.
Stable and Flexible Material for Light Control
The core feature of this technique is the versatility of the black T-shirt as a makeshift light blocker or diffuser. Made from common fabric, it offers a soft, matte surface that absorbs excess light, reducing glare and harsh shadows. Its flexibility allows quick positioning around your setup, whether draping over a reflector stand or taping to a wall, providing an adjustable barrier tailored to your needs.
Why Fabric Quality Matters
The thickness and tightness of the fabric influence its effectiveness. Thinner T-shirts might let some light seep through, diminishing control, while thicker, tightly woven materials block more light and create a more defined shadow. Choosing a quality cotton or a densely woven fabric enhances light absorption, making your DIY solution more reliable. The feel of the material is soft but sturdy enough to hold its shape during use, preventing sagging or tearing under repeated adjustments.
Ease of Setup and Use
One of the compelling aspects is how quickly you can deploy this trick. With a few clamps, tape, or even just hands, you can position the T-shirt to block or diffuse unwanted light sources. No special tools or mounts are needed, and the lightweight nature means it can be moved and reshaped in seconds. This immediacy makes it ideal for dynamic shooting environments or spontaneous adjustments, especially when high-end gear isn’t accessible.
Design Flaw: Limited Precision
However, a minor annoyance is the lack of fine control. Unlike purpose-built flags or barn doors, a T-shirt’s fabric can be less predictable, creating uneven light coverage or unwanted shadows if not carefully arranged. Its softness also means it may flutter or shift with airflow, requiring constant readjustment to maintain optimal coverage. While effective for quick fixes, it falls short for scenarios demanding precise light shaping.
Comparison with Professional Alternatives
Compared to dedicated tools like metal flags or optical gel filters—which are designed for durability and precision—the black T-shirt is a rudimentary solution. Its low cost and accessibility make it attractive, but it cannot match the consistency of professional equipment. For a benchmark, professional flags are typically made of opaque, rigid materials that ensure uniform blocking, preventing any accidental light leaks. This DIY approach is better suited for casual or emergent situations rather than fine-tuned studio work.
Material Versatility and Customization
The fabric’s color and texture are also vital. Black is optimal because it minimizes reflections, whereas lighter shades could bounce light back into the scene, reducing contrast. The flexibility of the T-shirt allows creative configurations—folded, pleated, or layered—to adapt to various lighting goals, from softening direct sunlight to blocking overhead lights. This adaptability is one of the technique’s strengths, enabling user-driven customization without financial investment.
Performance Analysis in Critical Scenarios
Evaluating microphone reviews, creator rigs, studio gear, camera reviews, and lighting kits under pressure reveals their true resilience and practicality. For instance, during a live podcast recording amidst unexpected background noise, a high-quality microphone with noise-canceling features maintained clarity, demonstrating robust performance in dynamic environments. Conversely, some budget-friendly options struggled to suppress ambient sound, resulting in compromised audio fidelity. Similarly, when managing a shoot in unpredictable weather conditions, certain weather-sealed cameras continued to operate flawlessly during rain, while others exhibited fogging or susceptibility to moisture, indicating durability issues in less resilient models.
In real-world filming scenarios, the quick adaptability of studio gear proves essential. Creators often switch between different lighting setups, and kits that offer intuitive adjustments and reliable response excel under these circumstances. Failures occur when gear components, such as adjustable mounts or power sources, fail to perform smoothly or sustain prolonged use, leading to frustration and workflow interruptions.
Can Equipment Handle Extended Use in Demanding Situations?
Long recording sessions test equipment endurance. Microphones that generate excessive heat or produce background hum after continuous operation reveal design shortcomings. For example, some condenser mics, despite superior initial sound quality, tend to overheat, distorting audio after a few hours of use. Cameras with limited battery life or overheating issues during extended shoots also highlight weaknesses in thermal management. On the positive side, durable rigs with built-in cooling systems or high-capacity batteries perform seamlessly, allowing creators to focus on content without technical distractions.
Does It Face Environmental Challenges?
Outdoor shoots impose environmental stress on gear. Wind, dust, and humidity challenge the robustness of equipment. Certain lighting kits with weatherproof features resist moisture and dust, maintaining consistent illumination. Conversely, equipment lacking protective casing suffers malfunction or degradation when exposed to elements. For example, some camera lenses fog up or become sluggish in high humidity, impairing image quality. This indicates that environmental sealing and material quality directly impact performance when conditions are less controlled.
How Well Do Systems Integrate and Communicate?
Efficiency in complex setups depends on seamless integration. Wireless microphones that connect stably without dropouts during movement showcase reliable connectivity. Conversely, systems prone to interference or requiring extensive calibration hinder spontaneous recording efforts. For example, incompatible accessories or software bugs can cause delays, reducing productivity. According to a Reddit discussion on professional audio gear, reliable connectivity is a common pain point that can make or break live performances or remote shoots.
Strengths and Flaws When It Matters Most
On the plus side, top-tier gear offers consistency, durability, and advanced features that perform admirably under pressure. High-end microphones with adaptive filtering, rugged cameras, and weatherproof lighting kits deliver peace of mind during critical projects. However, compromises appear in budget options or poorly engineered devices—these may falter, produce artifacts, or require frequent adjustments when put under stress. Fragile components, inconsistent response, and thermal issues are typical fail points. Do you agree with my assessment of equipment resilience? Share your experiences!
Enhancing Your Setup: Why Consider Top Alternatives?
Choosing the right equipment is crucial for creators aiming for professional quality. Let’s compare popular options like the Rode NT1-A Microphone, Elgato Stream Deck Creator Rig, Aputure Amaran Lighting Kit, and top-tier cameras against their main competitors to help you make an informed decision.
Microphone Face-Off: Rode NT1-A vs Shure SM7B
While the Rode NT1-A offers excellent clarity and low self-noise at a budget-friendly price, the Shure SM7B is often preferred in broadcasting and podcasting for its superior vocal rejection and durability. The NT1-A typically costs around $230, whereas the SM7B retails for approximately $400. For creators on a tight budget, the Rode provides remarkable quality for less, but if you’re seeking broadcast-level sound, investing in the Shure could be worth the extra expense. Check current prices.
Creator Rig Choices: Elgato vs Neewer
The Elgato Stream Deck Creator Rig is renowned for its seamless integration with streaming software, offering robust build quality and sleek design. Its main competitor, the Neewer Creator Rig, often comes at half the price but may lack some of the smart features like programmable buttons and ultra-quiet fans. If your focus is on professional streaming with quick setup, Elgato’s rig justifies the higher cost, but if budget is a concern, Neewer provides a solid alternative. Expect to pay about $250 for Elgato and around $120 for Neewer. Make sure to compare current prices on [PriceCompare.com](https://www.pricecomparison.com).
Lighting Kits: Aputure Amaran vs Neewer or Godox
The Aputure Amaran AL-MX is praised for its high color accuracy and build quality, but more affordable options like the Neewer NW670 or Godox SL-60W still deliver impressive brightness and color fidelity at lower prices. The Amaran kit often costs around $200, providing excellent value for detailed color work, whereas Neewer and Godox alternatives range from $100–$150 but with slightly less advanced controls and durability. If you need professional color accuracy, Aputure makes a compelling case, but budget-conscious users can achieve satisfactory results with Neewer or Godox. Check for discounts at [PriceCheck.com](https://www.pricecomparison.com).
Camera Showdown: Sony A6400 vs Canon EOS M50 Mark II
The Sony A6400 boasts superior autofocus, 4K recording, and a broader lens selection, making it a favorite among videographers willing to invest around $900 body-only. The Canon EOS M50 Mark II offers decent 4K quality and user-friendly interfaces at approximately $600, making it a feasible option for newcomers. Enthusiasts seeking cinematic quality and quick focusing may prefer Sony, whereas beginners on a budget might opt for Canon’s more approachable system. For current pricing and reviews, visit [GearCompare.com](https://www.gearcompare.com/sony-a6400-vs-canon-m50).
Is It Worth the Upgrade?
Upgrading to higher-end gear can significantly impact your content quality and workflow efficiency. However, consider whether the added benefits justify the cost. For instance, switching from a budget microphone to a professional-grade one like the Shure SM7B can improve audio clarity noticeably. Similarly, upgrading your camera system might mean crisper visuals but requires a larger investment. Compare your current gear’s limitations and your content goals before making the leap, and consult reviews to see if the newer models truly offer advantages that meet your needs.
The Good, The Bad, and The Ugly
Pros: Extremely affordable and easy to deploy, absorbs excess light effectively, versatile for various setups, suitable for quick fixes, no specialized equipment needed.
Cons: Lack of precision compared to professional flags, fabric may flutter and shift, inconsistent light control, less durable than purpose-built modifiers, limited effectiveness in bright or complex lighting scenarios.
Who Should Try This Quick Hack?
Ideal for beginner content creators, small studios on a tight budget, or anyone needing a fast, temporary solution to harsh shadows. Perfect when you lack access to proper light-shaping tools or need an emergency fix during shoots.
Skip this if you require high-precision lighting control for professional productions or work in environments with highly unpredictable lighting conditions. Not recommended for setups demanding studio-grade consistency or durability.
Final Word: 7/10 — Grab That Old T-Shirt and Start Improving Your Lights Today
This DIY approach offers a surprisingly effective way to mitigate harsh shadows without breaking the bank. While it won’t replace professional gear, using a black T-shirt is a smart, quick solution for many creators. To explore more budget-friendly lighting hacks, check out this guide on studio cable management or consider investing in purpose-built gear as your needs evolve.