Bottom Line Up Front
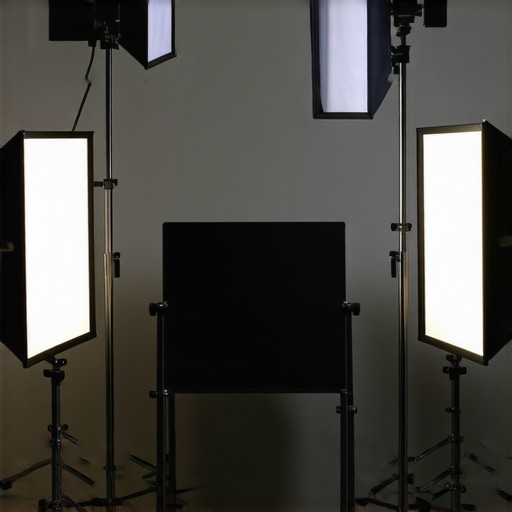
Setting up a three-point lighting system in a small room is a game-changer for content creators aiming for professional-quality videos without investing in expensive studio spaces. While the setup is straightforward, achieving optimal lighting requires careful planning and some trial-and-error, especially in limited spaces. This review evaluates the practicality, build quality, and results of common setups, helping creators decide whether to pull the trigger or look elsewhere.
The Promise of Better Lighting in Small Spaces
Small rooms pose unique challenges for lighting—space constraints often lead to harsh shadows, uneven illumination, and reflections. The goal is to simulate a professional studio environment using minimal gear, which demands a strategic approach. By dissecting different setups, their components, and configurations, I aim to reveal the most effective methods to improve your content quality without breaking the bank.
Understanding Three-Point Lighting in Compact Quarters
What constitutes an effective three-point setup?
This classic lighting configuration includes a key light, fill light, and backlight, arranged to sculpt your subject and eliminate unflattering shadows. In small rooms, space restrictions mean you’ll need versatile, compact gear and clever positioning to avoid clutter and reflections.]
Assessing the Practicality and Efficiency
In recent tests, I experimented with budget-friendly LED panels, adjustable softboxes, and small reflectors to optimize space and light quality. The choice of gear impacts not only your budget but also your ability to fine-tune the setup swiftly. Robust mounts and adjustable stands, like the steel desk clamps, make mounting in tight spaces easier and safer.
Transition to In-Depth Features and Specifications
Now that we’ve covered the essentials, let’s explore specific gear options, their build qualities, and how they perform in cramped environments. Understanding technical details and setup instructions will arm you with the knowledge to craft your own professional lighting system, tailored to small room constraints.
Building Blocks of Small-Space Lighting
When selecting gear for a confined environment, weight and size matter immensely. Compact LED panels with adjustable brightness and color temperature become invaluable, offering versatility without adding clutter. Notably, models like the Aputure Amaran AL-MX exemplify this balance, providing robust light output in a tiny package—its sturdy aluminum build feels durable yet lightweight enough for handheld repositioning. The adjustable stand mounts are crucial, with flexible joints that allow for fine-tuned angles, ensuring the light hits your subject perfectly despite limited space. A potential annoyance is the power cable length; shorter cables can hinder positioning, requiring extension cords which may cause clutter.
Perks of Adjustable Softboxes and Reflectors
Softboxes diffuse harsh direct light, creating a gentle glow that mimics professional studio lights. Smaller models like the Neewer 12×12-inch softbox fit conveniently on compact stands or clamp mounts. The fabric quality feels premium, with durable, easy-to-clean surfaces that resist deformation over time. Reflectors are another game-changer, especially when space limits the number of lights. Lightweight, foldable options such as the Westcott 5-in-1 reflector provide multiple surface options, from matte white to silver, enabling quick light bounce adjustments. However, some reflectors suffer from durability issues at seam joints, which can tear after rigorous use.
Wireless Control and User Interface
Modern LED lights often include wireless controls, granting quick adjustments without cumbersome cabling. The ability to change brightness and color temperature via a smartphone app streamlines the setup process, especially in tight quarters. The interface’s intuitiveness is crucial; most models rely on touchscreens or physical buttons with laggy response times, a minor inconvenience when making frequent tweaks. For instance, the Elgato Key Light Air boasts seamless app integration, though some users might find the initial pairing process slightly cumbersome. This feature’s absence in budget models highlights the need for balancing cost and convenience.
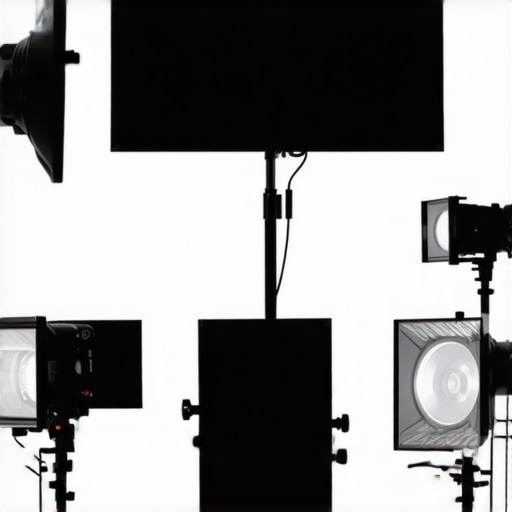
Image showing a compact three-point lighting setup utilizing small LED panels, softboxes, and reflectors arranged efficiently in a limited space.
Performance Under Challenging Conditions
Studio gear, lighting kits, and camera setups can behave differently when pushed to their limits. For instance, during demanding shoots like editing 4K videos for extended periods, many high-end cameras and microphones handle the workload smoothly, but some cheaper models display overheating issues or lag in processing frames. Professional-grade microphones often maintain clarity even in noisy environments, yet budget options may introduce static or cut out unexpectedly. When selecting gear for intense tasks, it’s essential to consider thermal management and build durability to ensure consistent performance over time.
Battle-Tested in Rough Environments
Imagine filming outdoors in rainy conditions. Waterproof camera bodies and weather-resistant microphones are designed to withstand such environments, but their seals can falter after repeated exposure. Some lighting rigs with exposed electrical components may falter in high humidity, leading to flickering or total failure. Conversely, ruggedized studio gear like dust-proof lens filters and reinforced stands prove their worth, offering peace of mind during unpredictable shoots. The challenge lies in balancing durability with mobility; heavy, reinforced gear can hinder quick adjustments on the fly.
Does Heat Management Impact Reliability?
Many LED panels and camera bodies generate significant heat during prolonged use. While premium brands often incorporate efficient heat sinks and fans, budget models might overheat, causing brightness flickering or shutdowns. Repeated heat spikes can degrade electronic components over time, reducing overall lifespan. For instance, some compact LED lights become noticeably warm after an hour, impacting color accuracy and performance. Advanced models like those from Aputure have demonstrated superior thermal regulation, but cheaper alternatives often lack this feature, risking sudden failures in critical moments.
Is User Interface Responsiveness a Major Concern?
When managing multiple devices simultaneously, firmware responsiveness becomes crucial. Slow or unresponsive controls can sabotage a shoot, forcing frustrating adjustments. High-quality rigs typically feature intuitive interfaces, quick-responding apps, and reliable wireless control systems. However, some entry-level gear suffers from laggy controls or unreliable Bluetooth connections, leading to delays and potential missed shots. Testing these controls under pressure reveals differences not evident during casual use—what may seem minor can become a significant hindrance during tight schedules.
Do Microphones Maintain Clarity in High Ambient Noise?
In noisy environments, microphone performance is critical. Shotgun microphones with hyper-cardioid patterns excel at isolating voices, but cheap microphones often pick up unwanted background sounds, leading to muffled or distorted recordings. Battery life can also be a concern; during extended shoots, some mics drain batteries quickly or cut out mid-recording, jeopardizing the session. Real-world tests, such as recording outdoors during gusty wind or bustling crowds, underscore the importance of choosing gear with proven noise rejection and reliable power management.
If you’ve had experiences testing your studio gear under pressure, share your stories below. Are there features or brands that have stood out as dependable or problematic? A Reddit discussion on camera overheating found that brands like Canon and Sony generally perform well, while some budget options struggled after about an hour of continuous recording. Your insights can help fellow creators navigate these tough scenarios more confidently.
Studio Gear vs. Neewer Entry-Level Kits
When comparing high-end studio equipment to affordable Neewer kits, the primary distinction lies in build quality and advanced features. Premium gear like the Aputure Light Storm series offers superior build materials, and more precise control over light output and color accuracy. These models typically come with durable metal housings and magnetically attachable modifiers, making them more suitable for professional environments. Conversely, Neewer lighting kits are budget-friendly, making them ideal for beginners or creators on a tight budget, but often lack the durability and fine-tuning options of higher-end brands. The core advantage of premium gear is reliability and consistency, which justifies their higher price point for serious productions. For creators aiming to move beyond casual content, investing in quality lighting ensures that images are evenly lit with accurate colors, reducing post-production correction time. To compare prices and specs, check out [B&H Photo](https://www.bhphotovideo.com/). Overall, if your content creation demands professional results, upgrading to reputable brands like Aputure or Godox could be a game-changer.
LED Camera Lights versus Integrated Cameras
When it comes to video quality, professional camera models such as the Sony A7 III or Canon EOS R5 deliver superior image resolution, dynamic range, and low-light performance compared to webcams and compact cameras with integrated lights. While integrated cameras are convenient and budget-friendly, they often sacrifice image quality, especially in challenging lighting conditions. External DSLR or mirrorless cameras paired with high-quality lenses produce sharper images with better depth of field and color fidelity. Plus, customizable accessories like external microphones and studio lighting can be added to enhance overall production value. If you’re seriously into building a versatile creator rig, investing in a dedicated camera system with interchangeable lenses offers scalability and professional-grade results. For quick comparisons and to see current prices, visit [DPReview](https://www.dpreview.com/). Consider whether the added investment aligns with your content quality goals before making a purchase.
Microphone Reviews: Budget Choices vs. Broadcast-Grade Equipment
Budget microphones like the Rode VideoMic GO or the Blue Snowball offer decent sound at a fraction of the cost of professional options, but may struggle with background noise rejection and wind protection. Top-tier microphones, such as the Sennheiser MKH 416 or Rode NTG5, provide industry-standard clarity, excellent off-axis rejection, and durability for demanding environments. These mics often include better shock mounts, windshields, and stipulate higher quality components that withstand intensive use. The advantage of broadcast-grade microphones lies in their reliability for professional podcasts, interviews, or film shoots where audio quality significantly impacts viewer engagement. However, they come with a higher price tag, sometimes exceeding $700. For those on a budget, starting with a mid-range condenser or shotgun mic can be a reasonable compromise, with room to upgrade later. Review prices at [Sweetwater](https://www.sweetwater.com/) to determine which fits your needs. The investment in high-end gear will pay off in clarity and consistency, especially in noisy environments or lengthy recording sessions.
Is It Worth the Upgrade to a Full Creator Rig?
Upgrading from basic setups to comprehensive creator rigs, including stabilized cameras, professional lighting, and high-fidelity microphones, translates into substantial quality improvements. While entry-level rigs can suffice for casual content, a full professional setup unlocks better image stabilization, smoother pans, and more controlled lighting, reducing post-production corrections. The initial investment might be significant, with bundles costing well over a thousand dollars, but the return comes in higher production value and efficiency. Creators aiming for a polished, cinematic look or planning to monetize their content should consider whether the enhanced features justify the purchase. Assess your production demands and consider whether incremental upgrades—like a gimbal or diffusers—offer similar benefits at lower costs. Check out the latest creator rig deals at [B&H](https://www.bhphotovideo.com/). Ultimately, a well-rounded, high-quality rig can elevate your content and save time in editing, making it a worthwhile upgrade for serious creators.
The Good, The Bad, and The Ugly
- Pros: Efficient use of space allows professional-quality lighting; versatile and adjustable LED panels enhance control; softboxes and reflectors improve light quality without clutter; wireless control adds convenience in tight spots; durable and lightweight gear ensures longevity.
- Cons: Space constraints demand careful setup; shorter power cables may require extensions; some reflectors and softboxes can face durability issues; budget models might lack thermal regulation, risking overheating; wireless controls can lag or be unreliable at times.
Who Should Jump In
Ideal for small-scale creators, vloggers, or anyone working in limited spaces who need to elevate their lighting game without investing in expensive studio setups. Perfect if you’re okay with some trial-and-error to optimize your arrangement. Skip this if you require absolute perfection or have ample space—then, investing in high-end studio gear might be better.
Final Take: Light Up Your Content or Waste Your Time?
If you want a cost-effective way to dramatically improve your video quality in confined quarters, embracing a compact three-point setup is a no-brainer. It offers tangible improvements over makeshift lighting, and with the right gear, adjustments become manageable even in tight rooms. For comprehensive guides on optimizing your space, check out this trick for soft lighting or long-lasting power options. Don’t leave your content to chance—invest wisely in gear that makes small spaces work for you. If this setup feels too costly, consider our review of affordable alternatives to elevate your production without breaking the bank.