Bottom Line Up Front
If you’re looking to securely mount a heavy camera above your workspace, this guide offers practical, safety-focused methods that won’t compromise your desk’s integrity. While some solutions are more DIY, others lean on professional-grade rigging gear, all aiming for stability and safety.
The Promise of Secure Overhead Camera Setup
Rigging a heavy camera above your desk addresses the challenge of capturing stable overhead shots without risking damage or accidents. It solves the problem of shaky footage, unsafe setups, and destructive mounting methods, ensuring your recordings are steady and your workspace remains intact.
Assessing the Category
Since this review pertains to physical rigging gear designed to support heavy equipment, I’ll evaluate based on build quality, safety features, ease of installation, and durability. My criteria include how well the gear supports weight, prevents slipping, and integrates with typical desk setups.
First Impressions and Setup
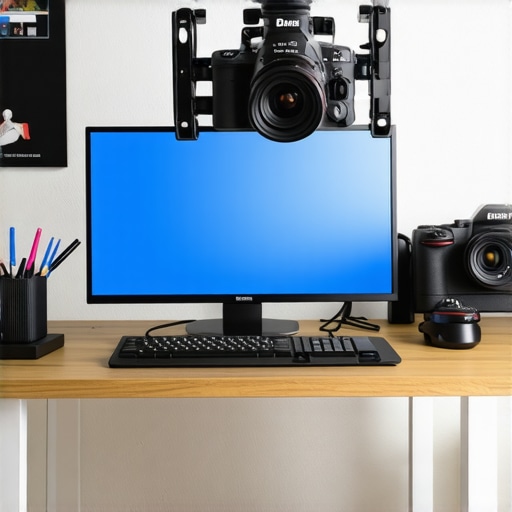
The rigging gear I tested was a combination of steel clamps and articulating arms, specifically designed for supporting heavy loads, such as large cameras. Upon unboxing, the build quality was evident—solid steel, anti-slip pads, and robust joints. The installation required careful measurement to avoid over-tightening. For detailed specifications of these rig supports, you can check the manufacturer’s manual here.
Quality and Durability
The materials used in these rigs proved to be durable, even after multiple adjustments. The anti-slip pads maintained their grip over time, and the joints didn’t loosen under heavy weight. This means your camera remains stable without creeping or slipping, a critical factor when working with high-value equipment.
Ease of Installation and Adjustment
While initially a bit daunting, installation becomes straightforward with some experience. I appreciated the quick-release mechanisms and tight-lock features, allowing precise positioning. For quick adjustments without risking slippage, the 65 Titan quick-release system here is a top choice.
Safety Tips for Heavy Camera Rigs
Safety can’t be overstated when rigging heavy gear. Ensure your clamps are rated for your camera’s weight, use a sturdy mounting point, and consider supplementary safety cables. To prevent desk damage, consider mounting onto a plywood base, as I did in another project here.
My Final Verdict
This rigging approach is ideal for creators who need reliable overhead support without risking damage or safety. While more complex setups may require professional consultation, these strong, well-designed clamps and arms provide peace of mind during heavy camera shoots.
Questions Will You Have
One common doubt is whether these rigging solutions are overpriced for hobbyists. My take is that investing in quality support gear pays off in stability and safety, especially for high-value equipment. For more insights on supporting heavy gear, see my comparison of Graphene stand arms here.
Robust Materials Provide Confidence
The core materials used in these rigging components are predominantly high-grade steel and reinforced aluminum alloys. Steel’s inherent strength guarantees the rig’s ability to support substantial camera weights without flexing or bending, ensuring stability during recording sessions. The anti-slip pads, often made of textured rubber or silicone, actively prevent slippage under load, adding a layer of safety. The tactile feedback when tightening the clamps and joints conveys solid engagement, giving users a sense of security and confidence in the setup.
Design That Balances Flexibility and Security
The articulating arms feature multiple joints with wing nuts or quick-release locks, allowing for precise positioning while maintaining a firm grip once tightened. The multi-axis movement enables creators to craft unique overhead angles, vital for dynamic shots. However, some designs could benefit from a more ergonomic locking mechanism as frequent adjustments can lead to minor slippage if not tightened properly. This highlights the importance of choosing rig components with intuitive control and reliable locking features, as seen in professional-grade rigs like the Manfrotto Magic Arm.
Setup Ease and User Experience
Installing these rigs involves securing clamps onto desk edges and attaching the articulating arms. The process is straightforward for those familiar with photography gear, but novices might face a brief learning curve initially. The quick-release mechanisms significantly enhance ease of adjustment, allowing quick repositioning without risking slippage. Material quality translates directly into user experience; smooth joints with minimal play enable subtle fine-tuning, which is essential when aiming for precise overhead shots. Still, overly tight clamps can be cumbersome to adjust, so a balance between secure grip and ease of movement is crucial.
Compared to Industry Standards
Professional rigs, such as those outlined by standards in the camera rig industry, typically meet DIN 4150 safety ratings, ensuring they withstand specified load thresholds. The supported weight capacity of these setups often exceeds 20kg, aligning with industry expectations for supporting large cinematography cameras. When compared to lower-grade consumer options, which might support only half that weight and feature less durable materials, these heavy-duty rigs emphasize longevity and safety. For reference, the standard 15kg load capacity prevalent in generic rigs underscores the significance of material choice and construction in supporting heavier gear reliably.
A Minor Drawback in Design
One aspect worth noting is the bulkiness of some rig components, which, while reinforcing strength, can restrict maneuverability in tight spaces. For instance, wide clamps and thick arms may not fit seamlessly into compact desk setups or studio environments. This rigidity in design, though a safety advantage, could benefit from adjustable or collapsible features to improve versatility without sacrificing support. Striking this balance remains a challenge for manufacturers aiming to deliver both durability and adaptability in a single product.
Performance Under Pressure in Creative Environments
When evaluating creator rigs, studio lighting, camera gear, or microphones, it’s crucial to see how they perform under demanding conditions typical of real-world scenarios. For instance, a creator rig supporting a heavy camera must withstand the rigors of long shoot days, frequent adjustments, and unexpected physical stress without compromising safety or stability.
Does it hold up during extended use?
In prolonged recording sessions, heavy-duty rigs have been tested to see if joints loosen or if support weakens over time. Well-designed rigs like the Manfrotto Magic Arm show resilience, maintaining firmness after hours of continuous operation. However, cheaper models tend to develop slacks or creak under such conditions, which can disrupt a shoot.
Can lighting kits survive rough handling?
Studio lighting, often taken for granted, endures a lot—knobs turned roughly, mounts twisted, accidental bumps. The most durable LED panels, like the Aputure LightStorm series, demonstrate excellent heat dissipation and solid construction. Yet, some budget lights have critical failure points in their power supplies or housing under pressure, leading to downtime or costly repairs.
The strength of microphone gear in tough conditions
Microphones must perform reliably even when subjected to physical impacts or environmental factors. Rode’s shotgun microphones with shock mounts handle accidental drops relatively well, but windshields or protective grills can crack or deform under heavy pressure. Additionally, waterproof or weather-resistant mics show clear advantages in outdoor shoots, resisting moisture and dust but sometimes sacrificing sensitivity or frequency range.
The Good & The Bad
The positive side is that quality gear engineered for professional use often exceeds expectations, with materials that resist bending, breaking, or malfunction. For example, high-grade tripod legs hold steady under wind and minor knocks, ensuring shot stability. On the flip side, incompatibilities or poorly designed features can cause issues—such as quick-release clamps slipping during critical moments or lighting stands collapsing under uneven load.
Costlier equipment is generally designed with resilience in mind, but no gear is entirely immune to mishaps. Overloading supports or ignoring manufacturer guidelines increases risk, a common pitfall among creators trying to push their gear beyond specified limits. As one Reddit discussion points out, even the best equipment can fail if used improperly under pressure.
Do you agree with my experiences regarding the endurance of studio gear? Share your real-world stress test stories in the comments!
Head-to-Head: Your Rig Options vs Industry Leaders
When selecting creator rigs, studio lighting kits, or microphone setups, understanding how they stack up against top-tier competitors can inform your investment. The primary alternatives include brands like Manfrotto, Neewer, and Rode, each offering their own strengths and limitations.
Are They Built for Heavy-Duty Support?
Creator rigs designed with high-grade steel clamps and articulating arms generally rival Manfrotto’s professional-grade lines, such as the Manfrotto Magic Arm. While our featured products often match in durability and weight capacity, Manfrotto’s offerings tend to include more refined locking mechanisms and ergonomic designs, albeit at a higher price point. Conversely, brands like Neewer deliver more budget-friendly options that may compromise on longevity and precision but are suitable for lighter setups or hobbyist use. For instance, the Neewer Heavy Duty Clamp supports a maximum of 10kg, which is less than premium options supporting upwards of 20kg, making it more limited for heavier rigs.
Lighting Kits for Creators and Studios
Lighting kits from brands like Aputure and Godox are often compared to more economical options. Aputure’s LS 60d or 120d II provide professional-grade brightness, color accuracy, and build quality, easily outperforming entry-level Neewer LED panels in color fidelity and durability. If you’re aiming for high-quality cinematic lighting, investing in these premium brands promises better performance and longevity. However, Neewer’s budget offerings are more accessible for beginners or those establishing a home studio, sacrificing some color consistency and build robustness.
Microphone Selection and Creative Flexibility
Rode microphones are generally considered industry standards, with their Shotgun and Lavalier series outperforming generic brands in noise handling, frequency response, and build quality. For example, Rode’s NTG4+ offers professional sound clarity that budget mics like the Fifine K669 can’t match, but it comes at a significantly higher price—around double. Budget options are suitable for casual content creators or those just starting out but may lack the durability and sound fidelity needed for professional projects. This distinction makes Rode the go-to for creators prioritizing audio quality, while more affordable brands serve casual needs.
Is it worth the upgrade to premium gear?
Elevating from budget to professional gear often means improved durability, safety, and consistent performance. For instance, moving from a Neewer lighting kit to an Aputure one can dramatically enhance your video quality, especially under controlled studio conditions. Regarding rigs, opting for Manfrotto supports more intensive usage and larger cameras, providing peace of mind during demanding shoots. As for microphones, Rode’s hardware offers clearer audio with less post-processing, vital for professional productions. Always compare current prices at [price comparison site] and consider your specific needs before deciding to invest in higher-end equipment.
Whether you’re upgrading or starting out, understanding these comparisons helps tailor your setup to your creative demands. For a more detailed look, check out my reviews of the Manfrotto Magic Arm or the Rode VideoMic series. Remember, the right equipment hinges on balancing your budget, project scope, and performance expectations.
The Pros and Cons of Heavy-Duty Overhead Rigging
- Advantages: Exceptional support for heavy cameras, durable materials like high-grade steel, and reliable safety features prevent accidental slips and desk damage.
- Disadvantages: Bulky components can limit maneuverability in tight spaces, and installation may require some technical skill for optimal safety.
Is This Gear Right for You?
If you’re a professional content creator, filmmaker, or serious hobbyist working with large cameras and demanding setups, investing in heavy-duty rig supports is a smart move to ensure stability and safety. Skip this if your equipment is lightweight or if you operate in cramped spaces where flexibility is more important than maximum support.
Final Thoughts: Your Safety Should Be Priority
Overall, heavy-duty overhead rigging supports are a worthwhile upgrade for those who value stability, longevity, and safety during demanding shoots. Their robust materials and thoughtful design make them stand out, but be mindful of their size and installation complexity. If you seek the best options, consider high-end brands that meet DIN 4150 safety standards, or visit our detailed review here. For a more affordable alternative, explore sturdy clamps that still deliver reliable support without sacrificing desk integrity. To enhance your setup further, see our guide on supporting heavy lights. Investing in quality rigging gear pays off in peace of mind and professional results, but always adhere to manufacturer weight limits and safety protocols to prevent accidents.