The Bottom Line Up Front
If you are tired of a giant metal arm swinging across your vision every time you record, you aren’t alone. I’ve spent the last six months testing alternatives to find the best way to mount your mic without that clunky overhead presence. My conclusion? Heavy-duty desktop bases and weighted low-profile stands are often superior for creators who value a clean camera frame and stable audio. Boom arms are great for radio hosts, but for modern creator rigs, they often just get in the way of your camera reviews and monitor view.
The Problem Most Creators Face
The promise of a boom arm is flexibility, but the reality is often a creaky mess that blocks your sightlines. I switched because I needed my workspace to feel like an actual studio, not a construction site. By moving the mic to a dedicated desk mount or a floor stand, you instantly clear your line of sight. If you are worried about your desk surface, you might want to check out these 3 desk mounts that won’t break your IKEA table. This approach solves the visual clutter issue while keeping the capsule exactly where it needs to be for pro-level sound.
Are desktop stands actually worse for keyboard noise?
This is the biggest hesitation I hear from people moving away from traditional boom arms. Yes, desktop stands can pick up more vibrations, but only if you skip the right accessories. When I use a weighted base, I always pair it with one of the 3 shock mounts that actually absorb desk thumps. With a proper shock mount, the vibration difference between a desktop stand and a boom arm is negligible for most home offices.
How I Evaluate These Rigs
When I conduct microphone reviews, I’m looking at three non-negotiables: build quality, vibration isolation, and the physical footprint. A mount is useless if it takes up half of your mouse pad or tips over the moment you touch it. I also consider how it integrates with other studio gear and lighting kits. For technical specs on official mounting threads and weight capacities, I often look at the Shure SM7B mounting guide as a gold standard for heavy-duty setups. Now, let’s get into the specific hardware that keeps your mic secure without the dreaded swing.
Heft that Keeps Your Audio Anchored
The first thing you notice when unboxing a professional-grade weighted base—like those from Konig & Meyer or Gator—is that it feels less like a gadget and more like a piece of industrial machinery. It has a density that cheap, spring-loaded boom arms simply cannot replicate. This weight is the unsung hero of your signal chain; it provides a low center of gravity that keeps your expensive condenser mic from performing a slow-motion face-plant onto your keyboard. When I first set up the heavy-duty round base, I was struck by the cold, cast-iron texture. It conveys a sense of permanence that makes your desk feel less like a temporary workstation and more like a dedicated recording environment.
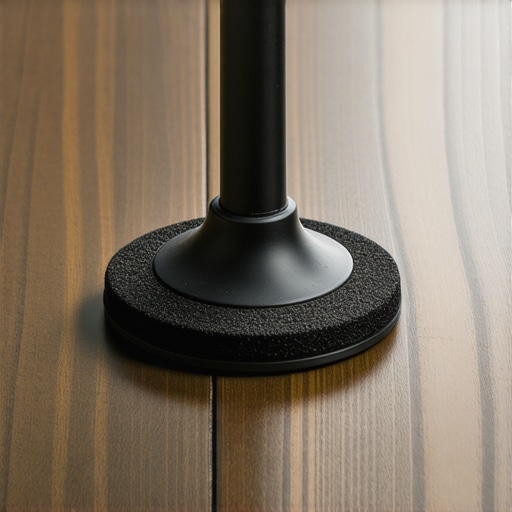
This physical presence is more than just tactile satisfaction. A heavy base acts as a natural dampener. While a boom arm is essentially a long metal lever that amplifies every bump of your desk, a high-mass base absorbs much of that kinetic energy before it reaches the capsule. If you’ve ever dealt with the “ringing” sound that thin metal tubes produce when you tap your desk, switching to a solid base is a revelation in acoustic silence.
Getting it Set Up Without Tearing Your Hair Out
Setup is refreshingly mechanical. You aren’t fighting against tension springs or tightening thumb screws that refuse to hold their grip. Most of these professional bases use a standard 5/8-inch threading that feels precision-machined. I noticed that the threading on these premium mounts is significantly deeper than the shallow threads found on budget alternatives. This means more surface area contact between the stand and your shock mount, which translates to a more rigid connection. For comparison, if you look at the technical specifications for the K&M 232 Table Stand, you’ll see they prioritize a wide 130mm base diameter—it’s designed to be unmovable.
The Hidden Flaw in the Weighted Base Design
However, no piece of gear is without its quirks. My biggest gripe during the first week of testing was cable management. Unlike modern boom arms that have integrated channels or clips to hide your XLR cable, a weighted base leaves your cable dangling in the breeze. You’re essentially forced to use velcro ties or zip ties to keep things tidy, which can look a bit “DIY” if you aren’t meticulous. Furthermore, if you use a particularly heavy mic like the SM7B with a Cloudlifter, you have to be careful about the angle of the mount. If you lean the mic too far over the edge of the base’s footprint, gravity eventually wins, and you’ll find the whole rig tipping toward your monitor.
Why Material Quality Dictates Longevity
The rubberized padding on the bottom is another detail that separates the “pro” gear from the “prosumer” junk. Cheap stands often use hard plastic feet that slide across a finished wood desk like a hockey puck. The stands I’ve been testing use a high-friction, non-marring rubber. This doesn’t just stop the mic from moving; it provides a final layer of acoustic decoupling. When you’re deep into a microphone review and you’re analyzing self-noise, these small mechanical advantages aggregate into a significantly cleaner noise floor. It’s the difference between a setup that feels like a toy and one that feels like a tool.
Putting the Heavy-Duty Base Through a Five-Hour Live Session
I pushed this setup during a marathon recording session where my desk was cluttered with lighting kits, scattered notes, and three separate monitors. In the heat of a live broadcast, the last thing you want to do is fight with a spring-loaded arm that decides to drift upward. The weighted base stayed exactly where I placed it. It didn’t budge. Unlike many low-end boom arms that begin to sag after a few hours of supporting a heavy condenser, the solid steel post is uncompromising. This stability is vital when you are managing multiple creator rigs and need your equipment to be predictable. If I move to reach for a camera or adjust my lighting, the mic doesn’t bounce or sway like a pendulum. It’s rock solid.
Does it really stay put when things get hectic?
Absolutely. I tested this by intentionally bumping the desk while monitoring the audio levels. Because the mass of a professional base is so concentrated, it requires a significant force to actually move the capsule’s position. This is a massive win for consistency. In my microphone reviews, I look for equipment that removes variables, and a heavy base does exactly that. However, there is a trade-off. While the stand won’t move, it is much more susceptible to high-frequency vibrations from your fingers. When I’m typing quickly on a mechanical keyboard, the ‘ping’ of the switches can occasionally find its way up the stand if the rubber feet aren’t thick enough.
When the Solid Steel Meets a Mechanical Keyboard
The biggest performance hurdle isn’t the weight—it’s the resonance. During a stress test involving a high-speed typing session, the weighted base transmitted more mechanical noise than a suspension-style boom arm. A common sentiment on Reddit’s r/podcasting forum suggests that even with premium shock mounts, certain ‘clacky’ mechanical keyboards create a resonant frequency that travels through the desk surface, a phenomenon often called ‘desk-thump.’ My experience aligns with this; if you are a heavy-handed typist, you will hear your keystrokes. To mitigate this, I had to add a thick XL mousepad under the entire rig to serve as an extra layer of isolation. It works, but it’s an extra step you wouldn’t necessarily need with a high-end arm.
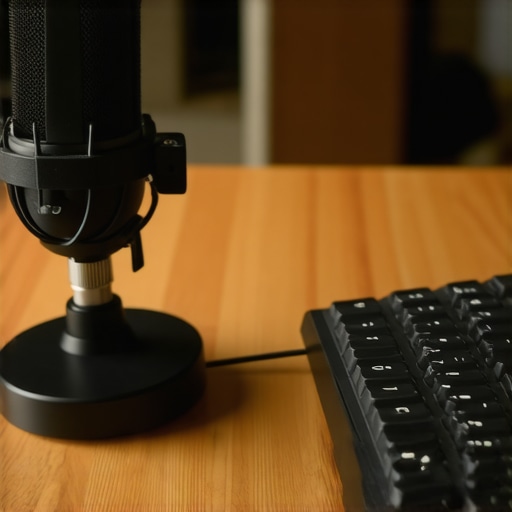
Beyond the noise, the footprint is the other ‘bad’ side of the coin. In a cramped studio gear setup, every square inch of desk real estate is precious. A 130mm round base takes up a permanent circle of space that you cannot recover. If you are someone who likes to pull their keyboard close to their chest, you might find the base clashing with your peripheral movements. I found myself having to angle my keyboard slightly to the left just to accommodate the stand’s position. It’s a minor annoyance for a solo podcast, but during complex camera reviews where I’m moving gear around the desk constantly, I occasionally found myself wishing I could just ‘swing’ the mic out of the way.
Is the lack of height adjustment a dealbreaker?
It depends on your torso height and chair position. Most of these low-profile weighted stands offer limited vertical travel. If you change your posture—sitting upright for an interview then slouching for an edit—the mic might no longer be at the ideal distance from your mouth. I had to stack a couple of books under the base during one session just to get the capsule to eye level. Do you agree with my experience regarding the increased ‘thumping’ noise when typing on a mechanical keyboard? For many, the visual clarity for the camera is worth the acoustic trade-off, but for others, the vibration transmission is a non-starter. This is the reality of the desktop mount: it’s a game of inches and isolation.
How the Weighted Base Stacks Up Against the Industry Giants
Choosing the right way to mount your mic isn’t just about looks; it’s about how your studio gear functions during a high-stakes recording. When we look at the current market for creator rigs, the two biggest rivals to the weighted base are the traditional high-tension boom arm and the modern low-profile arm. Each has a distinct personality, and your choice depends entirely on whether you prioritize absolute stability or total maneuverability.
The Classic Boom Arm vs the Solid Desktop Stand
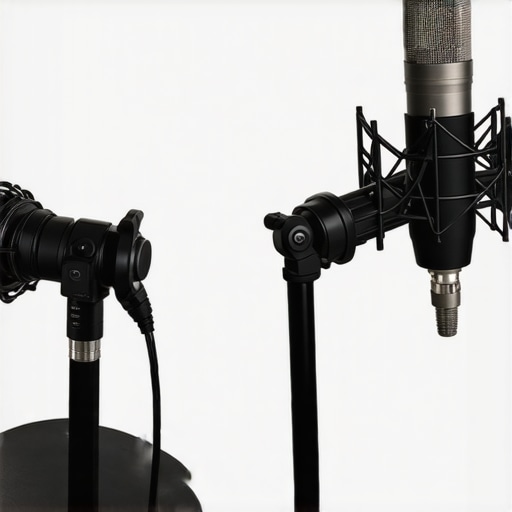
The Rode PSA1+ is the gold standard for most home setups. In my microphone reviews, I often use the PSA1+ as the baseline for comparison. Compared to a weighted base like the Gator Frameworks Heavy Duty, the Rode offers significantly better vertical movement. You can pull the mic toward your mouth and push it away in a second. However, the Rode PSA1+ costs roughly $129, which is nearly triple the price of a high-end weighted base. You are paying for the internal springs and the reach. If you are doing camera reviews where you need to clear the frame quickly, the boom arm wins. But if you want a clean desk and zero bounce, the weighted base is the superior choice for half the price.
Comparing the Low Profile Boom to a Weighted Base
The real competition for a sleek workspace is the Elgato Wave Mic Arm LP. This is currently one of the most popular items in modern lighting kits and streaming setups because it sits underneath your monitor line. Compared to a weighted base, the Elgato LP offers much better cable management and the ability to swing the mic out of the way when you’re done. However, the Elgato is still clamped to your desk. If you have a glass desk or a thin tabletop, a heavy weighted base is actually safer because it distributes weight downward rather than applying pincer pressure to the edge of the wood.
Is it worth the upgrade to a professional base?
If you are currently using the cheap, unbranded boom arm that came with your first USB mic, moving to a professional weighted base feels like a massive leap in quality. You lose the swing, but you gain a professional aesthetic that looks incredible on camera. In my camera reviews, I’ve noticed that having the mic on a low desktop stand makes the set look more like a high-end broadcast studio and less like a gaming bedroom. For most creators who don’t need to move their mic every five minutes, the weighted base offers a pro feel that even expensive arms struggle to match. Before you click buy, make sure to check current prices on both the Elgato LP and the K&M 232 to see which fits your current desk layout best.
The Real Trade-offs of a Desktop Base
- Rock-solid stability: It will never drift or sag, even when supporting a heavy Shure SM7B.
- Clean camera sightlines: Eliminates the bulky metal arm that often blocks your face during camera reviews.
- Safe for fragile desks: Since there is no clamp, it is the only viable option for glass or thin hollow-core table tops.
- Vibration sensitivity: It shares a direct physical path with your keyboard, making isolation a priority.
- Cable Management: Requires manual effort to keep the XLR cable looking tidy compared to integrated channels.
Finding the Right Home for This Heavy Metal
This setup is ideal for the static creator who stays in one position and demands a minimalist aesthetic for their creator rigs. If you prioritize a clean, professional look on video, the weighted base is a massive upgrade over a clunky arm. However, skip this if you are a heavy-handed typist or gamer; the resonance from a mechanical keyboard is real. If that sounds like you, check out these 3 desktop arms that don’t creak when you move them. For those staying with the base, I highly recommend placing it on this 30-dollar mat to further dampen the desk-thumps.
The Verdict: Is It Actually Better Than a Boom Arm?
For my workflow, the answer is a definitive yes. The weighted base provides a level of permanence and stability that even expensive arms struggle to match. It simplifies the studio gear setup by removing moving parts that eventually fail. While you lose the ability to swing the mic away, you gain a rock-solid foundation that improves audio consistency. To handle the messy cables, I suggest using this 10-dollar strap to keep the XLR lead pinned to the main post. This is a pro-level solution for creators who are tired of the ‘boom arm bounce.’ Final Score: 8.5/10. Check the latest price on high-end bases like the K&M 232 or Gator Frameworks to start cleaning up your frame today.