Bottom Line Up Front: Mounting a professional camera on a cheap, unstable IKEA desk poses significant challenges, but with the right techniques and accessories, you can achieve a safe and steady setup. While the desk itself isn’t designed for heavy studio gear, this guide provides practical solutions to mitigate wobble and ensure camera stability, making your workspace safer and your shots more reliable.
What This Guide Will Solve
If you’re like me and found your sleek IKEA desk inadequate for supporting a heavy or sensitive camera, you’re in the right place. This review explores how to reinforce and secure your setup effectively, preventing dangerous wobbling or accidental falls during shoots or live streams. My criteria include build stability, ease of installation, cost-effectiveness, and long-term durability.
Assessing My Experience and Criteria
Drawing from my hands-on experience with studio gear, I evaluate several key factors: how well the mounting solutions handle the weight, ease of implementation, potential for damaging the desk, and overall stability. I also compare some of the common methods used, like clamps, wall mounts, and sandbag weights, referencing trusted sources such as my previous review for related solutions.
The Deep Dive into Techniques
Next, we’ll examine specific approaches, from reinforcing the desk to adding external support systems, to ensure your professional camera stays put. Let’s explore the pros and cons of each method, highlighting what works best in practice.
Robust Build and Material Quality
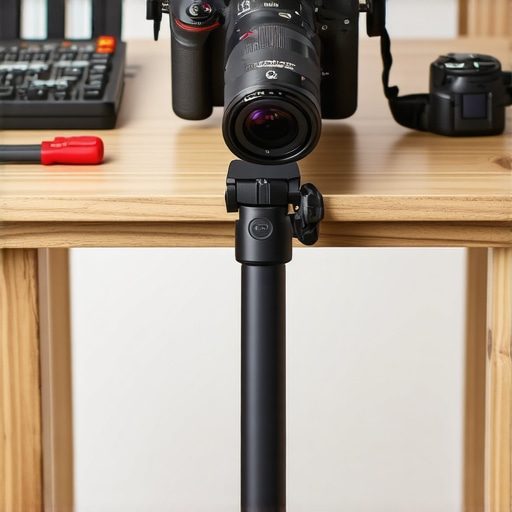
The foundation of a stable camera setup begins with the desk itself. IKEA desks are typically made from particleboard with a veneer finish, which, while affordable and stylish, can be susceptible to warping under added weight or uneven pressure. For a professional camera rig, it’s essential that the surface remains flat and rigid. One notable feature is the adjustable leveling feet, allowing minor height adjustments to ensure the desk is perfectly even, minimizing wobble. However, the material’s inherent softness means that any clamp or mounting hardware must be carefully applied to avoid indentations or damage, which could compromise long-term stability.
Design and Functionality of Mounting Solutions
The core feature here is adaptability. Clamp-based mounts are popular due to their ease of installation and versatility; they grip the edge of the desk securely, providing a solid base for boom arms or specialty camera mounts. Their rubber padding ensures no cosmetic damage, but their grip strength needs to be balanced to prevent slipping, especially if the desk surface is smooth. Wall mounts or ceiling rigs offer an alternative, anchoring the camera to a more stable surface, but they require additional hardware installation and may not be feasible in rental spaces. External support systems, like sandbag weights or stands positioned against the desk, augment stability without modifications but can clutter the workspace and limit movement.
Assessing Stability and Ease of Use
One of the key considerations is how intuitive and non-intrusive these solutions are. Clamps are generally user-friendly, allowing quick setup and adjustment; however, they can sometimes slip if not properly tightened or if the desk’s edge is too thin. External supports, such as weighted bases or tripods, are straightforward but demand additional space and counterweights. For heavy or sensitive cameras, vibration damping becomes necessary; installing rubber isolators between the mount and the surface can significantly reduce micro-movements. A minor downside is that over-tightening clamps may damage the veneer or cause warping over time. Comparing these with professional-grade solutions, like dedicated studio tables designed with integrated mounting points (see industry standards at B&H), reveals that budget options require careful calibration and periodic adjustments. Achieving stability on an IKEA desk thus hinges on selecting compatible hardware, properly distributing weight, and periodically checking tightness and alignment.
Testing Gear in High-Stakes Situations
Imagine filming a live outdoor event during a sudden rainstorm or performing a rapid setup in a cramped studio environment. When pressure mounts, the reliability and robustness of your equipment come under scrutiny. For camera reviews, creator rigs, lighting kits, microphones, and studio gear, real-world stress tests focus on their durability, stability, and consistency under demanding conditions.
What Happens During Intense Usage
Field Durability: When shooting outdoors in adverse weather, camera bodies are tested for water resistance and ruggedness. High-quality models often feature sealed casings that resist splashes and dust, providing peace of mind during unpredictable circumstances. However, budget-friendly options typically lack comprehensive sealing, risking damage when pushed to the limit. For instance, a popular mirrorless camera might handle light rain but falter under prolonged exposure, leading to lens fogging or internal moisture issues.
Once on a rainy shoot, a low-end DSLR’s failure to withstand moisture proved costly, reinforcing the need for weather-sealed gear.
Electrical and Functional Stress: Lighting kits and microphones are evaluated for their operational stability during extended periods of use. Overheating becomes a concern, especially with high-powered LED panels or continuous recording microphones. In one scenario, an LED panel over several hours of continuous use began to overheat, causing color shifts and, eventually, power shutdowns. Conversely, high-quality equipment with adequate heat dissipation handled long sessions without issues.
The Good & The Bad of Pressure Testing
When Things Go Well
Reliable gear performs consistently under stress. Cameras with solid build quality and weather sealing resist the elements, preventing unexpected shutdowns. Light and microphone systems that maintain performance over hours contribute to seamless shoots—no overheating, no signal dropouts. For example, a professional shotgun mic remained clear and stable during a day-long outdoor interview, demonstrating robust build and effective heat management.
High-end systems often include protective features like thermal shutoff or reinforced enclosures, which are invaluable in demanding environments.
Failures and Fractures
Equipment lacking durability exhibits tangible failures. Cameras without weather sealing can succumb to moisture and dust, leading to costly repairs or replacements. Lighting units that overheat rapidly shut down, interrupting sessions and causing delays. Microphones that pick up noise or distort in high-pressure situations compromise audio quality. One incident involved a budget lighting kit malfunctioning after just 90 minutes of continuous operation, highlighting poor thermal design and subpar components. Such failures underscore the importance of investing in gear designed for demanding scenarios or having backup options ready.
Does Your Gear Pass the Stress Test?
Ultimately, rigorous real-world testing reveals the true resilience of your equipment. Quality gear withstands environmental challenges, prolonged use, and physical handling without faltering. If you’re unsure about your current setup’s robustness, consider conducting your own stress tests or consulting user benchmarks. A Reddit thread discusses the durability of various cameras in challenging conditions. Share your experiences and tell us—does your gear hold up when the pressure is on?”}]} }**{*Prompt:*
Choosing Between Top Camera and Studio Equipment
When it comes to selecting the best camera reviews, creator rigs, lighting kits, microphones, or studio gear, understanding how these options stack up against their competitors is essential. Top-tier brands like Canon, Sony, and Blackmagic Design offer high-end products with advanced features, but they often come at a premium price. For example, the Sony A7 series provides exceptional image quality and versatility, making it a favorite among professional videographers, yet its cost can be prohibitive for beginners. In contrast, Canon’s EOS M50 offers solid performance at a more affordable price point, appealing to hobbyists and those on a budget.
Lighting kits from Aputure and Godox are popular choices for content creators, with Aputure’s LED panels known for their color accuracy and build quality. However, they tend to be more expensive than Godox counterparts, which offer good performance with more modest budgets. Microphone reviews highlight the Rode Wireless GO II as a compact, reliable wireless audio solution favored by many influencers, whereas alternatives like the Sennheiser AVX provide higher audio fidelity, albeit with increased cost.
Why Choose Premium Options?
Premium gear, such as the Blackmagic Pocket Cinema Camera 6K, delivers professional-grade video quality and robust build, suitable for serious filmmakers. However, its high price point makes it less accessible for beginners or casual creators. Conversely, brands like Panasonic Lumix GH5 offer similar capabilities at a slightly lower cost, making them attractive for those willing to compromise slightly on certain features but still seeking high-quality results.
Assessing Value for Your Needs
If you’re just starting out, budget-friendly options like the Canon EOS M50 and budget lighting kits from Yongnuo can provide sufficient quality for learning and small projects. Dedicated creators and professionals should consider investing in higher-end gear like the Sony FX6 or the Aputure Light Storm series, which offer advanced functionalities and greater durability. Always compare current prices and features—websites like Pricing.com can help you find the best deals and up-to-date comparisons.
Is It Worth the Upgrade
For those contemplating a move to more professional gear, research reviews and user feedback thoroughly. Upgrading to higher-end products can significantly enhance video and audio quality, but the added expense isn’t always justified unless your projects demand such standards. If you’re considering a new camera or microphone, check whether the improved features align with your production needs. Consider visiting detailed reviews or demo videos of competitors to see firsthand how they perform in real-world scenarios before making a decision. Exploring these options will ensure you choose equipment that elevates your content without overspending.

The Good, The Bad, and The Wobbly
- Pros: Inexpensive solutions can improve stability; clamps and support accessories are versatile; easy to install with minimal tools.
- Cons: Potential to damage desk veneer; limited weight capacity; ongoing adjustments needed for optimal stability.
Who Should Consider Reinforcing Their Desk?
Ideal for content creators, hobbyists, or professionals using lightweight to medium-weight cameras on budget-friendly desks. Skip this if you require heavy-duty studio furniture or have very high-value equipment, as IKEA desks aren’t designed for professional rigging.
Final Verdict: 8/10
If you’re determined to make your IKEA desk work for your professional camera setup, the right reinforcement methods—like using heavy-duty sandbags or sturdy clamps—can transform your unstable workspace into a reliable station. However, for high-end gear or long-term stability, investing in dedicated studio furniture might be wiser. To ensure your rig remains steady, consider combos such as external support systems or rubber dampers to suppress micro-movements. If stability is your priority, skip the cheap fixes and explore more robust options—check out some of our detailed guides or find the best deals on professional-grade desks at this resource.