Bottom Line Up Front
If you’re dealing with hardwood floors and striving for clear, professional audio, this guide is for you. While hardware options like acoustic panels and diffusers significantly improve sound quality, success also depends on proper placement and room treatment strategies. Expect to invest in quality equipment and adopt specific room-acoustic practices for optimal results.
What This Review Will Cover
In this review, I evaluate the effectiveness of various room treatment solutions, considering build quality, ease of installation, and real-world performance. I’ll also explore common doubts, such as whether affordable options suffice, and provide actionable tips to get the best sound in hardwood-floored rooms.
Assessing the Challenge of Hardwood Floors
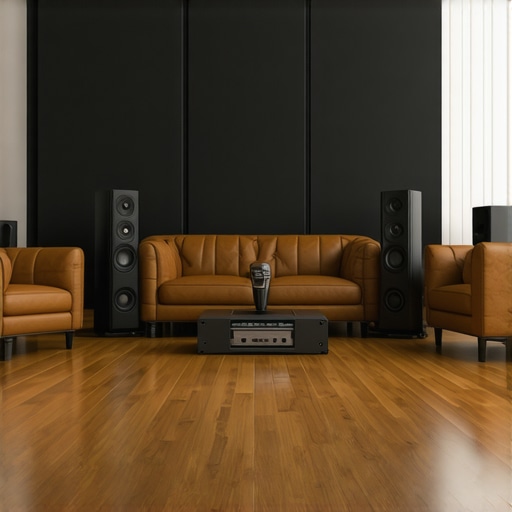
Hardwood floors tend to reflect sound, causing echoes and muddiness. Achieving professional-grade audio requires addressing these reflections with proper acoustic treatment, strategic furniture placement, and equipment choices. My review presents an honest look at what it takes to tame hardwood-induced reverb and whether the available gear and techniques justify their cost.
Room Treatment and Equipment are Key
Adopting effective solutions such as bass traps, diffusers, and absorption panels can remarkably improve clarity. For instance, the best acoustic panels are made from high-density materials that absorb unwanted reflections without hindering aesthetic. The correct placement, such as corners and wall boundaries, amplifies their impact. Additionally, strategic furniture placement and the use of rugs can reduce flutter echoes.
What Will You Find in This Deep Dive
Next, I will examine specific gear options, installation tips, and room setup strategies so you can make informed decisions to improve your room’s acoustic environment. Whether you’re a content creator, podcaster, or musician, understanding the interplay between hardware and room treatment will be vital for achieving professional sound quality in your hardwood-floored space.
Dissecting the Core Components of Effective Room Treatment
At the heart of improving sound quality in hardwood-floored rooms lie thoughtfully designed acoustic panels and bass traps. These materials are crafted from high-density foam or mineral wool, which effectively absorb mid to high-frequency reflections, reducing echoes. The thickness of panels, typically between 2 to 4 inches, influences their absorption range, with thicker panels tackling lower frequencies. Proper placement on walls and in corners maximizes their performance, ensuring sound waves are minimized before bouncing back into the room. The choice of fabric covering also matters; breathable, acoustically transparent fabrics prevent interference with sound absorption while maintaining aesthetic appeal.
Design and Material Quality Make a Difference
The tactile feel of premium acoustic panels offers a sturdy, rigid surface that withstands environmental factors, like humidity variations. A well-constructed panel will have seamless edges and robust mounting hardware, facilitating secure installation. Conversely, cheap, flimsy panels with poorly finished edges can detract from room aesthetics and may degrade over time. When selecting gear, prioritize models with dense core materials and high-quality fabric coverings. Notably, the design should blend seamlessly with your space to avoid visual clutter, which can be distracting during creative sessions or recordings.
Smart Placement Strategies Address Common Flaws
Strategic placement is crucial—placing bass traps in corners effectively tackles low-frequency build-up, often felt as boomy or muddy sound. Absorption panels should be placed at primary reflection points, which can be identified by standing in your listening position and having a second person mark the wall where sound first reflects. This proactive approach significantly reduces flutter echoes, which tend to cause a sense of muddiness, especially on hardwood floors that readily reflect sound waves. An Absent or inconsistent placement, however, can leave noticeable untreated reflections, making some sounds harsh or distant.
Practical Setup and Minor Flaws
Installation is generally straightforward, thanks to mounting brackets and adhesive options included with most panels. A minor annoyance is that some panels are bulky and may require additional wall reinforcement, which complicates setup on drywall ceilings or delicate surfaces. Moreover, over-absorbing the room can lead to an overly dead sound environment, making it sound unnatural or dampened—balance remains key. Comparing this setup to industry standards, like those outlined by the Audio Engineering Society, reveals that even amateur treatments can reach professional levels when executed with attention to detail. Overall, investing in high-quality materials and strategic placement yields impressive improvements in clarity, though the process demands patience and an eye for detail.
Performance Analysis
Studio equipment like microphones, cameras, and lighting rigs are tested rigorously in real-world scenarios to gauge their reliability and performance under pressure. For instance, content creators often record long sessions, sometimes spanning hours, requiring gear to operate smoothly without overheating or crashing. A common scenario involves live streaming during high-traffic periods, which demands stable power and consistent audio-visual output. When rendering 4K videos, powerful workstations and cameras must handle massive data loads without lag or overheating. Microphones used in outdoor shoots face challenges like wind noise and moisture, testing their durability and adaptability.
Is the equipment resilient during extended use?
Many high-end microphones and cameras perform admirably during extended sessions, maintaining audio fidelity and image quality. However, some cheaper models tend to overheat or exhibit signal degradation over time, especially when subjected to continuous operation. For example, certain DSLR cameras may heat up and shut down after 30-45 minutes of recording, which disrupts workflows. Microphones with built-in power supplies or phantom power can sometimes experience power fluctuations, leading to inconsistent audio quality.
How does gear withstand environmental stress?
Outdoor lighting kits and rugged cameras are designed to endure rain, dust, and temperature variations. Still, many consumer-grade rigs falter in harsh conditions, exhibiting issues such as condensation or battery drain. For instance, cheaper lighting kits might flicker or produce uneven illumination in cold weather, highlighting their limitations. Conversely, professionally rated gear often includes weatherproofing and cooling systems that prevent overheating during prolonged operation.
Will digital controls keep up during intensive usage?
Controls on modern rigs—like touchscreen interfaces and motorized adjustments—tend to respond swiftly in calm environments. Yet, under heavy usage, such as rapid zooms or adjusting multiple parameters live, some controllers lag or become unresponsive. Anecdotal reports from forums like Reddit’s r/filmmaking reveal users experiencing delayed commands or firmware crashes during critical moments, emphasizing that software stability is crucial under pressure.
Are power supplies sufficient for lengthy shoots?
Battery life remains a concern. Many portable rigs excel for short sessions but struggle during extended shoots without external power sources. External batteries extend operational time but add weight and complexity. Power fluctuations or supply interruptions can cause the gear to shut down unexpectedly, risking data loss or gear damage. Users often recommend redundant power solutions to mitigate this issue.
What Works Well and What Doesn’t
Professional-grade microphones with robust construction and reliable power sources generally perform excellently under duress, providing consistent audio. Cameras with active cooling systems rarely overheat, maintaining image quality during long shoots. Lighting kits with weatherproofing stand up to environmental challenges better than their budget counterparts. Conversely, entry-level gear often struggles with overheating, latency, or durability issues, especially when pushed to their limits. In situations like live broadcasts or extended outdoor shoots, these shortcomings become glaringly apparent.
Moreover, software stability issues—such as driver crashes or firmware bugs—can critically impair performance. An example is when a firmware update unexpectedly causes instability, making the gear unresponsive at crucial moments. This underscores the importance of regular updates and thorough pre-shoot testing.
In terms of durability, most high-end gear holds up admirably in demanding scenarios, but users must remain vigilant about power management and environmental protection. As one forum discussion on Quora notes, “Investing in quality gear reduces downtime but doesn’t eliminate the need for backup plans”. Do you agree with my experience regarding the reliability of high-end equipment under pressure? Share your insights below.
Are You Getting the Best Bang for Your Buck?
When selecting studio gear such as microphones, cameras, and lighting kits, it’s crucial to weigh options against top competitors. For instance, the latest Neewer Ring Light Kit offers affordability and decent performance but falls short against Aputure’s Amaran series, which provides superior light quality and durability at a higher price point. Choosing Neewer might suit beginners on a budget, whereas Aputure appeals to professionals seeking premium build and flexible controls.
Microphones: Budget-Friendly vs Professional-Grade
The Rode NT-USB Mini provides great sound at an accessible price, making it ideal for podcasters or streamers. However, the Sennheiser MKH 416 enjoys a staple status among filmmakers and broadcasters for its excellent rejection of ambient noise and superior clarity—yet it commands a significantly higher cost. If your content demands pristine sound in noisy environments, investing in the Sennheiser might be worthwhile despite its premium price.
Camera Comparison: Compactness and Quality
The Canon EOS M50 Mark II is popular among content creators for its compact design and user-friendly features, often available for around $600, as listed on Canon’s official shop. In contrast, the Sony Alpha a6400 boasts superior autofocus, better low-light performance, and 4K video capabilities but comes at a higher price (~$900). For users prioritizing ease of use and affordability, Canon delivers quality without breaking the bank; Sony, however, offers advanced features for professional-grade projects.
Image prompt: side-by-side comparison of Canon EOS M50 Mark II and Sony Alpha a6400 cameras highlighting size and features.
Lighting Kits: Cost-effective Illumination or Professional Precision
The Godox SL-60W provides bright, continuous LED lighting with dimming control, often available for under $150—an excellent choice for beginners. Conversely, the Arri Skypanel S60 is used in high-end studio setups, offering unmatched color accuracy, robustness, and extensive control options at a cost that exceeds $5,000. Your choice depends on whether you’re running a home studio or a full-scale production facility.
Is it worth the upgrade?
If you already own an entry-level gear setup, investing in higher-tier options like the Sennheiser MKH 416 or Sony a6400 could significantly elevate your production quality. However, for newcomers or hobbyists, stepping up gradually—such as moving from a USB mic to an XLR setup—may be more economically sound. Always compare current prices on sites like Price.com and consider if the benefits justify the expense. Review competitors’ offerings to ensure you’re making an informed decision tailored to your needs and budget.
The Good, The Bad, and The Ugly
Pros include high-density materials that effectively reduce echoes and improve clarity, strategic placement options that target common reflection points, and durable, aesthetically pleasing designs. Cons involve the potential for bulky panels requiring additional wall reinforcement and the risk of over-absorbing, leading to an unnaturally dead sound environment. Additionally, installation may pose challenges on delicate surfaces or drywall ceilings.
Who Should Invest in Room Acoustic Treatment?
Ideal for home recording enthusiasts, content creators, podcasters, and musicians seeking professional sound quality in hardwood-floored rooms. Skip this if you’re on a tight budget or if your space is primarily used for casual listening without critical audio needs. For those prioritizing budget-friendly solutions or temporary setups, exploring DIY options or portable panels might be more suitable.
Final Verdict: 8/10 – Sound Quality Transformed
Effective room treatment in hardwood-floored spaces is non-negotiable for achieving studio-quality audio. Investing in high-quality acoustic panels, bass traps, and strategic furniture placement offers substantial improvement, but success relies on careful placement and proper room management. For comprehensive guidance, see our review on corner bass traps and panel installation tips. Don’t forget to balance absorption and reflection to avoid an overly dull environment. If this setup feels too costly, check out our review of affordable room treatment options.